
User Manual
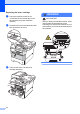
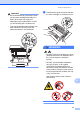
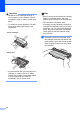
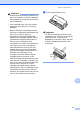
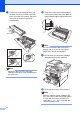
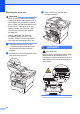

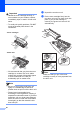
Table Of Contents
- Basic User’s Guide MFC-8950DW
- User's Guides and where do I find them?
- Table of Contents
- 1 General information
- 2 Loading paper
- 3 Loading documents
- 4 Sending a fax
- 5 Receiving a fax
- 6 Using PC-FAX
- 7 Telephone and external devices
- Telephone line services
- Telephone Service for Australia
- Telephone Service for New Zealand
- Telephone Service for Some Countries
- Connecting an external TAD
- External and extension telephones
- 8 Dialling and storing numbers
- 9 Making copies
- 10 Printing data from a USB Flash memory drive or digital camera supporting mass storage
- 11 How to print from a computer
- 12 How to scan to a computer
- A Routine maintenance
- B Troubleshooting
- C Menu and features
- D Specifications
- Index

78
Replacing the drum unit A
Important
• While removing the drum unit, handle it
carefully because it may contain toner. If
toner scatters on your hands or clothes,
wipe or wash it off with cold water at once.
• Every time you replace the drum unit,
clean the inside of the machine. (See
Cleaning and Checking the machine
uu page 82.)
• Wait to unpack the new drum unit
immediately before you put it in the
machine. Exposure to direct sunlight or
room light may damage the drum unit.
a Leave the machine turned on for
10 minutes for the internal fan to cool
the extremely hot parts inside the
machine.
b Press the front cover release button and
then open the front cover.
c Take out the drum unit and toner
cartridge assembly.
WARNING
HOT SURFACE
After you have just used the machine, some
internal parts of the machine will be
extremely hot. Wait for the machine to cool
down before you touch the internal parts of
the machine.