Basic User’s Guide MFC-9140CDN MFC-9330CDW MFC-9340CDW Not all models are available in all countries.
If you need to contact customer service Complete the following information for future reference: Model Number: MFC-9140CDN / MFC-9330CDW / MFC-9340CDW (Circle your model number) Serial Number: 1 Date of Purchase: Place of Purchase: 1 The serial number is on the back of the unit. Retain this User’s Guide with your sales receipt as a permanent record of your purchase, in the event of theft, fire or warranty service. Register your product on-line at http://www.brother.
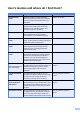
User’s Guides and where do I find them? Which Guide? What’s in it? Where is it? Product Safety Guide Read this Guide first. Read the Safety Instructions before you set up your machine. See this Guide for trademarks and legal limitations. Printed / In the Box Quick Setup Guide Follow the instructions for setting up your machine and installing the drivers and software for the operating system and connection type you are using.
Which Guide? AirPrint Guide 1 ii What’s in it? This Guide provides information for using AirPrint to print from OS X v10.7.x, 10.8.x and your iPhone, iPod touch, iPad, or other iOS device to your Brother machine without installing a printer driver. Visit us at http://solutions.brother.com/.
Table of Contents (Basic User’s Guide) 1 General information 1 Using the documentation ....................................................................................... 1 Symbols and conventions used in the documentation .................................... 1 Accessing Brother Utilities (Windows® 8).............................................................. 2 Accessing the Advanced User’s Guide, Software User’s Guide and Network User’s Guide.......................................................
4 Sending a fax 36 How to send a fax ................................................................................................36 Stop faxing.....................................................................................................37 Faxing Letter size documents from the scanner glass ..................................38 Cancelling a fax in process............................................................................38 Transmission Verification Report...............................
8 Dialling and storing numbers 55 How to dial........................................................................................................... 55 Manual dialling............................................................................................... 55 Dialing from the Address Book ......................................................................55 Fax redial.......................................................................................................55 Storing numbers ....
A Routine maintenance 70 Replacing the consumable items .........................................................................70 Replacing the toner cartridges.......................................................................74 Replacing the drum units ...............................................................................81 Replacing the belt unit ...................................................................................88 Replacing the waste toner box ..........................
D Specifications 207 General.............................................................................................................. 207 Document Size .................................................................................................. 209 Print media......................................................................................................... 210 Fax.....................................................................................................................
Table of Contents (Advanced User's Guide) You can view the Advanced User's Guide on the CD-ROM. The Advanced User's Guide explains the following features and operations. 1 General Setup 7 Memory storage Automatic Daylight Saving Time Ecology features 2 Making copies Copy settings A Routine maintenance Touchscreen Checking the machine Security features Replacing periodic maintenance parts Packing and shipping the machine Secure Function Lock 2.
1 General information Using the documentation The following symbols and conventions are used throughout the documentation. WARNING WARNING indicates a potentially hazardous situation which, if not avoided, could result in death or serious injuries. Bold style identifies the dial pad numbers of the Touchpanel or on the computer screen. Italics Italicized style emphasizes an important point or refers you to a related topic.
Chapter 1 Accessing Brother Utilities (Windows® 8) If you are using a tablet running Windows® 8, you can make your selections either by tapping the screen or by clicking with your mouse. After the printer driver is installed, appears on both the Start screen and the desktop. a Tap or click Brother Utilities either on the Start screen or the desktop. b Select your machine. c Choose the function you want to use.
General information Accessing the Advanced User’s Guide, Software User’s Guide and Network User’s Guide a NOTE If the Brother screen does not appear, go to Computer (My Computer). (For 1 This Basic User's Guide does not contain all the information about the machine such as how to use the advanced features for Fax, Copy, Printer, Scanner, PC-Fax and Network.
Chapter 1 Viewing Documentation (Macintosh) a Turn on your Macintosh. Insert the CD-ROM into your CD-ROM drive. Double-click the BROTHER icon. The following window will appear. 1 How to find Scanning instructions There are several ways you can scan documents. You can find the instructions as follows: Software User's Guide Scanning ControlCenter Network Scanning Nuance™ PaperPort™ 12SE How-to-Guides (Windows® users) b c Double-click the User's Guides icon. d e Click User's Guides.
General information How to find Network setup instructions Your machine can be connected to a wireless (MFC-9330CDW and MFC-9340CDW only) or wired network. Basic setup instructions: (see Quick Setup Guide.) How to access the User’s Guides for Advanced Features 1 1 You can view and download these Guides from the Brother Solutions Center at: Connection to a wireless access point or router supports Wi-Fi Protected Setup or AOSS™: (see Quick Setup Guide.
Chapter 1 Accessing Brother Support (Windows®) You can find all the contacts you will need, such as web support (Brother Solutions Center) on the CD-ROM. 1 Accessing Brother Support (Macintosh) You can find all the contacts you will need, such as web support (Brother Solutions Center) on the CD-ROM. Click Brother Support on the Top Menu. The Brother Support screen appears. Double-click the Brother Support icon. Choose your model if needed. The Brother Support screen appears.
General information 1 7
Chapter 1 Control panel overview 1 The MFC-9140CDN, MFC-9330CDW and MFC-9340CDW have a 3.7 in. (93.4 mm) Touchscreen LCD and Touchpanel 1. 1 This is a Touchscreen LCD with an electrostatic Touchpanel that only shows the LEDs that can be used. 1 NOTE The illustrations are based on MFC-9340CDW 1 3.7 in. (93.4 mm) Touchscreen LCD (Liquid Crystal Display) This is a Touchscreen LCD. You can access the menus and options by pressing them when they are displayed on this screen.
General information 1 2 3 4 2 Touchpanel: 3 The LEDs on the Touchpanel only light up when they are available for use. Press Press and hold down to turn off the machine. The Touchscreen LCD will show Shutting Down and will stay on for a few seconds before going off. Home Press to return to the Home screen. The factory setting shows the date and time, but you can change the Home screen’s default setting (see Setting the Ready screen on page 13.) to turn on the machine.
Chapter 1 Touchscreen LCD 1 You can select three types of screens for the Home screen. When the Home screen is displayed, you can change the displayed screen by swiping left or right, or pressing d or c. The following screens show the machines status when the machine is idle. 2 3 1 4 Home screen The Home screen shows the date and time and provides access to Fax, Copy, Scan, Wi-Fi setup, Toner levels and the Setup screen. When the Home screen is displayed the machine is in Ready mode.
General information NOTE 3 Swiping is a type of user operation on the Touchscreen that is performed by brushing your finger across the screen to display the next page or item. (Toner) See the remaining toner life. 1 Press to access the Toner menu. NOTE The indication of remaining toner life will vary depending on the types of documents printed and customer’s usage. 4 (Settings) Press to access the main settings (for more information, see Settings screen on page 12).
Chapter 1 10 New Fax Settings screen When Fax Preview is set to On, you can see how many new faxes you received into the memory. 10 1 The Touchscreen shows the machines settings when you press . You can check and access all the machine’s settings from the following screen.
General information 3 Network Setting the Ready screen 1 Press to set up a network connection. (MFC-9330CDW and MFC-9340CDW) A four level indicator on the screen shows the current wireless signal strength if you are using a wireless connection. 4 Date & Time See the date and time. Press to access the Date & Time menu. 5 Fax Preview See the Fax Preview status. Press to access the Fax Preview setting. Set the Ready screen to either Home, More, Shortcuts 1, Shortcuts 2 or Shortcuts 3.
Chapter 1 Basic Operations 1 g Press Backlight. h Press Med. Press your finger on the Touchscreen to operate it. To display and access all the screen menus or options, swipe left, right, up, down, or press d c or a b to scroll through them. IMPORTANT DO NOT press the Touchscreen with a sharp object, such as a pen or stylus. It may damage the machine. The following steps show how to change a setting in the machine. In this example, the Touchscreen Backlight setting is changed from Light to Med.
General information Shortcut Settings g 1 You can add the fax, copy, scan and Web Connect settings you use most frequently by setting them as your Shortcuts. Later you can recall and apply these settings quickly and easily. You can add up to 18 Shortcuts. Adding Copy Shortcuts 1 h When you have finished changing the settings, press Save as Shortcut. i Read and confirm the displayed list of settings you selected, and then press OK.
Chapter 1 e Enter the fax or telephone number using the dial pad on the Touchpanel, the Address Book or the Call History on the Touchscreen. When you have finished, go to step f. NOTE • You can enter up to 20 digits for a fax number. • If the Shortcut is to be used for broadcasting, press Options and select Broadcasting in step g before entering the fax or telephone number in step e. • You can enter up to 20 fax numbers if the Shortcut is for broadcasting.
General information a If the displayed screen is either Home or More, swipe left or right, or press d or c to display a Shortcut screen. b Press where you have not added a Shortcut. c d Press Scan. e Do one of the following: f Do one of the following: To enter an E-mail address manually, press Manual. Enter the E-mail address using the keyboard on the Touchscreen. (To help you enter letters, see Entering text on page 206.) Press OK.
Chapter 1 k Review the settings you have selected: a If the displayed screen is either Home or More, swipe left or right, or press d or c to display a Shortcut screen. b Press where you have not added a Shortcut. c d Press Web. e Swipe left or right, or press d or c to display the available services, and then press your desired service. f Press your account. If the account needs a PIN code, enter the PIN for the account using the keyboard on the Touchscreen. Press OK.
General information Changing Shortcuts 1 Editing Shortcut Names You can change the settings in a Shortcut. You can edit a Shortcut name. NOTE a You cannot change a Web Connect Shortcut. If you want to change the Shortcut, you must delete it, and then add a new Shortcut. (For more information, see Deleting Shortcuts on page 19 and Adding Web Connect Shortcuts on page 18.) NOTE You can also press , All Settings and Shortcut Settings. b Press Edit Shortcut Name.
Chapter 1 Volume settings Ring volume 1 1 You can choose from a range of ring volume levels. a Press b c Press All Settings. d e Press General Setup. f g h Press Volume. i Press Press Beep. i Press Swipe up or down, or press a or b to display Volume. a Press b c Press All Settings. d e Press General Setup. f g h Press Volume. i Press Press Ring. Press Off, Low, Med or High. . a Press b c Press All Settings. d e Press General Setup. f Press Volume. .
2 Loading paper Loading paper and print media 2 b 2 The machine can feed paper from the paper tray or manual feed slot. While pressing the green paper-guide release levers (1), slide the paper guides to fit the paper you are loading in the tray. Make sure the guides are firmly in the slots. NOTE If your application software supports paper size selection on the print menu, you can select it through the software.
Chapter 2 d Load paper in the tray and make sure: f The paper is below the maximum paper mark ( ) (1), as overfilling the paper tray will cause paper jams. The side to be printed on is face down. The paper guides touch the sides of the paper so it will feed correctly. 1 1 e 22 Put the paper tray firmly back in the machine. Make sure the tray is completely inserted into the machine.
Loading paper Loading paper in the manual feed slot b Open the manual feed slot cover. 2 You can load envelopes and special print media one-at-a-time into this slot. Use the manual feed slot to print or copy on labels, envelopes, thicker paper or glossy paper (for the recommended paper to use, see Acceptable paper and other print media on page 29). 2 NOTE The machine turns on the Manual Feed mode when you put paper in the manual feed slot.
Chapter 2 d Use both hands to push one sheet of paper firmly into the manual feed slot until the top edge of the paper presses against the paper feed rollers. Continue pressing the paper against the rollers for about two seconds, or until the machine grabs the paper and pulls it in further. • To easily remove a small printout from the output tray use both hands to lift up the scanner cover as shown in the illustration. • You can still use the machine while the scanner cover is up.
Loading paper Printing on thick paper, labels, envelopes and glossy paper from the manual feed slot c Open the manual feed slot cover. 2 When the back cover (face-up output tray) is pulled down, the machine has a straight paper path from the manual feed slot through to the back of the machine. Use this paper feed and output method for printing on thick paper, labels, envelopes or glossy paper. a 2 Open the back cover (face-up output tray).
Chapter 2 e Use both hands to push one sheet of paper or one envelope firmly into the manual feed slot until the top edge of the paper presses against the paper feed rollers. Continue pressing the paper against the rollers for about two seconds, or until the machine grabs the paper and pulls it in further. • When Label is selected in the printer driver, the machine will feed the paper from the manual feed slot, even if Manual is not selected as the paper source.
Loading paper Unscannable and unprintable areas 2 The figures in the table show maximum unscannable and unprintable areas. These areas may vary depending on the paper size or settings in the application you are using. 2 Usage 1 Document Size Top (1) Left (2) Bottom (3) Right (4) Letter 3 mm 4 mm A4 3 mm (ADF) 1 mm (Scanner Glass) 3 mm Legal 3 mm 4 mm Copy* Letter 4 mm 4 mm *a A4 4 mm 3 mm Legal 4 mm 4 mm Letter 3 mm 3 mm A4 3 mm 3 mm Legal (ADF) 3 mm 3 mm Letter 4.
Chapter 2 Paper settings Paper Size 2 2 Paper Type To get the best print quality set the machine for the type of paper you are using. You can use the following sizes of paper for printing faxes: A4, Letter, Legal or Folio. a Press When you change the size of paper in the tray, you must also change the setting for paper size at the same time so your machine can fit the document or an incoming fax on the page. b (MFC-9330CDW and MFC-9340CDW) Press Tray Setting. c d Press Paper Type.
Loading paper Acceptable paper and other print media Type and size of paper 2 Print quality may vary according to the type of paper you are using. 2 The machine feeds paper from the installed paper tray or the manual feed slot. The names for the paper trays in the printer driver and this Guide are as follows: You can use the following types of print media: plain paper, thin paper, thick paper, thicker paper, bond paper, recycled paper, labels, envelopes or glossy paper (see Print media on page 210).
Chapter 2 Paper capacity of the paper trays Paper Tray (Tray 1) 2 Paper size Paper types No. of sheets A4, Letter, Legal, B5 (JIS), Executive, A5, Plain paper, Thin paper, Recycled paper up to 250 (80 g/m2) A5 L, A6, Folio 1 Manual Feed Slot Width: 76.2 to 215.9 mm Plain paper, Thin paper, Thick paper, Thicker paper, Bond paper, Recycled paper, Envelopes, Labels, Glossy paper Length: 116.0 to 355.6 mm 1 1 sheet 1 Envelope Folio size is 215.9 mm × 330.2 mm.
Loading paper Handling and using special paper The machine is designed to work well with most types of xerographic and bond paper. However, some paper variables may have an effect on print quality or handling reliability. Always test samples of paper before purchasing to ensure desirable performance. Store paper in its original packaging and keep it sealed. Keep the paper flat and away from moisture, direct sunlight and heat.
Chapter 2 Envelopes 2 The machine is designed to work well with most envelopes. However, some envelopes may have feed and print quality problems because of the way they have been made. Envelopes should have edges with straight, well-creased folds. Envelopes should lie flat and not be of baggy or flimsy construction. Use only quality envelopes from a supplier who understands that you will be using the envelopes in a laser machine.
Loading paper Labels The machine will print on most types of labels designed for use with a laser machine. Labels should have an adhesive that is acrylic-based since this material is more stable at the high temperatures in the fuser unit. Adhesives should not come in contact with any part of the machine, because the label stock may stick to the drum unit or rollers and cause jams and print quality problems. No adhesive should be exposed between the labels.
3 Loading documents How to load documents NOTE 3 You can send a fax, make copies, and scan from the ADF (Automatic Document Feeder) and the scanner glass. Using the automatic document feeder (ADF) 3 • To scan documents that are not appropriate for the ADF, see Using the scanner glass on page 35. • It is easier to use the ADF if you are loading a multiple page document. • Make sure documents with correction fluid or written with ink are completely dry.
Loading documents d b Adjust the paper guides (1) to fit the width of your document. Using the document guidelines on the left and top, place the document face down in the upper left corner of the scanner glass. 1 3 NOTE To scan non-standard documents, see Using the scanner glass on page 35. Using the scanner glass 3 You can use the scanner glass to fax, copy or scan pages of a book, one page at a time. Document Sizes Supported Length: Up to 300.0 mm Width: Up to 215.9 mm Weight: Up to 2.
4 Sending a fax How to send a fax 4 c 4 The following steps show you how to send a fax. To send multiple pages use the ADF. a Do one of the following to load your document: Place the document face up in the ADF (see Using the automatic document feeder (ADF) on page 34). Load your document face down on the scanner glass (see Using the scanner glass on page 35). b Do one of the following: You can change the following fax sending options. Press Options.
Sending a fax Stop faxing NOTE You can send 2-sided documents from the ADF. e To stop faxing, press 4 . Enter the fax number. Using the dial pad Using the Address Book Address Book 4 Using call history Call History (For more information, see How to dial on page 55.) f Press Fax Start. Faxing from the ADF The machine starts scanning the document. Faxing from the scanner glass If Real Time TX is On, the machine will send the document without asking if there are additional pages to scan.
Chapter 4 Faxing Letter size documents from the scanner glass 4 When faxing Letter size documents, you must set the scan glass size to Letter; otherwise, a portion of your faxes will be missing. a You can use the Transmission Verification Report as proof that you sent a fax. This report lists the receiving party’s name or fax number, the time and date of transmission, duration of transmission, number of pages sent, and whether or not the transmission was successful.
Sending a fax NOTE • If you choose On+Image or Off+Image, the image will not appear on the Transmission Verification Report if Real Time Transmission is set to On. (see Advanced User's Guide, Real Time Transmission). • If the transmission is successful, OK will appear next to RESULT on the Transmission Verification Report. If the transmission is not successful, ERROR will appear next to RESULT.
5 Receiving a fax 5 Receive modes 5 You must choose a receive mode depending on the external devices and telephone services you have on your line. Choosing the receive mode 5 By default, your machine will automatically receive any faxes that are sent to it. The diagrams below will help you choose the correct mode. (For more detailed information about the receive modes, see Using receive modes on page 42.
Receiving a fax i Press Fax, Fax/Tel, External TAD or Manual. j Press .
Chapter 5 Using receive modes 5 5 Manual mode turns off all automatic answering functions. Some receive modes answer automatically (Fax and Fax/Tel). You may want to change the Ring Delay before using these modes (see Ring Delay on page 43). Fax Only Manual 5 Fax mode will automatically answer every call as a fax. To receive a fax in Manual mode lift the handset of the external telephone. When you hear fax tones (short repeating beeps), press Fax Start, and then press Receive to receive a fax.
Receiving a fax Receive Mode settings Ring Delay The Ring Delay setting sets the number of times the machine rings before it answers in Fax and Fax/Tel modes. If you have external or extension telephones on the same line as the machine, choose the maximum number of rings (see Fax Detect on page 44 and Operation from external or extension telephones on page 53). a Press b c Press All Settings. d e Press Fax. f g h i j . Swipe up or down, or press a or b to display Fax.
Chapter 5 Fax Detect If Fax Detect is On: 5 5 The machine can receive a fax automatically, even if you answer the call. When you see Receiving on the Touchscreen or hear a click on the phone line through the handset you are using, just replace the handset. Your machine will do the rest. If Fax Detect is Off: If you are at the machine and answer a fax call first by lifting the external handset, then press Fax Start, and then press Receive to receive the Fax.
Receiving a fax Fax Preview (Black and White only) Using Fax Preview 5 How to preview a received fax 5 When you receive a fax, you will see a pop-up message on the Touchscreen. (For example: New Fax(es):01 [View]) a You can view received faxes on the Touchscreen by pressing then • Although printed faxes show the received date and time when Fax Receive Stamp is turned on, the Fax Preview screen will not show the received date and time. (Received Faxes).
Chapter 5 Press the Touchscreen or Touchpanel to perform the following operations. How to print all faxes in the list Description Enlarge the fax. Reduce the fax. or Scroll vertically. or Scroll horizontally. a Press b c d Press Received Faxes. 5 (Fax). Press Print/Delete. Do one of the following: Press Print All(New Faxes) to print all faxes you have not yet viewed. Rotate the fax clockwise. Delete the fax. Press Print All(Old Faxes) to print all faxes you have viewed.
Receiving a fax Turning off Fax Preview a Press b Press c d e Press Off. 5 . (Fax Preview). Press Yes to confirm. If there are faxes stored in the memory, do one of the following: 5 If you do not want to print the stored faxes, press Continue. Press Yes to confirm. Your faxes will be deleted. To print all the stored faxes, press Print All Faxes Before Delete. If you do not want to turn off Fax Preview, press Cancel. f Press .
6 Using PC-FAX How to use PC-FAX PC-Fax Receive (For Windows® only) If you turn on the PC-Fax Receive feature your MFC will store received faxes in memory and send them to your computer automatically. You can then use your computer to view and store these faxes. Even if you turn off your computer (at night or on the weekend, for example), your MFC will receive and store your faxes in its memory. The number of received faxes that are stored in the memory will appear on the Touchscreen.
Using PC-FAX NOTE • Before you can set up PC-Fax Receive you must install the MFL-Pro Suite software on your computer. Make sure your computer is connected and turned on (see Software User's Guide). • If your machine has an error and is unable to print faxes from memory, you can use this setting to transfer your faxes to a computer (see Transferring your faxes or Fax Journal report on page 124). • PC-Fax Receive is not supported in Mac OS.
7 Telephone and external devices Telephone line services Setting the telephone line type i 7 Press b c Press All Settings. d e Press Initial setup. f g h Swipe up or down, or press a or b to display Phone Line Set. Press Phone Line Set. Press PBX, ISDN (or Normal). Do one of the following: If you chose ISDN or Normal, go to step l. If you chose PBX, go to step i. 50 NOTE 7 • If you choose Always, you can access an outside line without pressing R.
Telephone and external devices Connecting an external TAD Connections 7 The external TAD must be connected as shown in the illustration below. You can connect an external Telephone Answering Device (TAD) to the same line as your machine. When the TAD answers a call, your machine will “listen” for the CNG (fax calling) tones sent by a sending fax machine. If it hears them it will take over the call and receive the fax.
Chapter 7 Recording an outgoing message (OGM) a b c 7 Record 5 seconds of silence at the beginning of your message. This allows your machine time to listen for fax tones. External and extension telephones NOTE You must turn the Remote Codes setting to on to use the Remote Activation Code l51 and Remote Deactivation Code #51 (see Using Remote Codes on page 53). Limit your speaking to 20 seconds. End your 20-second message by giving your Remote Activation code for people sending manual faxes.
Telephone and external devices Operation from external or extension telephones 7 If you answer a fax call on an extension telephone, or an external telephone that is correctly connected to the machine into the correct socket on the machine, you can make your machine take the call by using the Remote Activation code. When you press the Remote Activation code l51 the machine starts to receive the fax.
Chapter 7 Turning on the Remote Codes You must turn the Remote Codes setting to On to use the Remote Activation Code and Remote Deactivation Code. a Press b c Press All Settings. d e f g . Swipe up or down, or press a or b to display Fax. Press Fax. Swipe up or down, or press a or b to display Setup Receive. Press Setup Receive. Swipe up or down, or press a or b to display Remote Codes. 7 Changing the Remote Codes The preset Remote Activation Code is l51.
8 Dialling and storing numbers How to dial 8 8 Dialing from the Address Book 8 You can dial in any of the following ways. Manual dialling a b a Load your document. b Press c d Press Address Book. 8 Do one of the following: When Fax Preview is set to Off, press Press , and then enter the first letter of the name and press OK. (Fax) and Sending Faxes. Press all digits of the fax number. Do one of the following: Swipe up or down, or press a or b to display the number you want. (Fax).
Chapter 8 Storing numbers 8 NOTE If you downloaded Internet Fax: You can set up your machine to do the following types of easy dialling: Address Book and Groups for broadcasting faxes. When you dial an Address Book number, the Touchscreen shows the number. If you want to store an E-mail address to use with Internet Fax or Scan to E-mail server, press address (see Entering text on page 206), and press OK.
Dialling and storing numbers Changing Address Book names or numbers To change the fax or telephone number, press Address. Enter the new fax or telephone number (up to 20 digits) using the keyboard on the Touchscreen. 8 You can change or delete an Address Book name or number that has already been stored. Press OK. If the stored number has a scheduled job, such as a delayed fax or a fax forwarding number, it will be dimmed on the Touchscreen.
9 Making copies How to copy 9 9 Stop copying 9 The following steps show the basic copy operation. To stop copying, press a Copy preset settings Do one of the following to load your document: Place the document face up in the ADF (see Using the automatic document feeder (ADF) on page 34). Load your document face down on the scanner glass (see Using the scanner glass on page 35). b Press the Copy button on the Touchscreen. .
Making copies h Swipe up or down, or press a or b to display the available options, and then press your new option. Repeat steps g and h for each setting you want. If you have finished changing the settings, press OK. NOTE Save the settings as a Shortcut by pressing Save as Shortcut. i Press Colour Start or Mono Start. Copy Options 9 You can change the following copy settings. Press Copy and then press Options. Swipe up or down, or press a or b to scroll through the copy settings.
10 Printing data from a USB Flash memory drive or digital camera supporting mass storage (For MFC-9330CDW and MFC-9340CDW) With the Direct Print feature, you do not need a computer to print data. You can print by just plugging your USB Flash memory drive into the machine’s USB direct interface. You can also connect and print directly from a camera set to USB mass storage mode. a From the menu bar of an application, click File, then Print.
Printing data from a USB Flash memory drive or digital camera supporting mass storage (For MFC-9330CDW and MFC-9340CDW) Printing data directly from the USB Flash memory drive or digital camera supporting mass storage a Connect your USB Flash memory drive or digital camera to the USB direct interface (1) on the front of the machine. The Touchscreen will automatically show the USB memory menu to confirm the intended use of the USB devices. 10 NOTE • Make sure your digital camera is turned on.
Chapter 10 b Press Direct Print. g To change another setting, repeat step e. NOTE If your machine has been set to Secure Function Lock On, you may not be able to access Direct Print (see Advanced User's Guide: Switching Users). c Swipe up or down, or press a or b to choose the folder name and file name you want. If you have selected the folder name, swipe up or down, or press a or b to choose the file name you want.
Printing data from a USB Flash memory drive or digital camera supporting mass storage (For MFC-9330CDW and MFC-9340CDW) Changing the default settings for direct print 10 You can change the default settings for Direct Print. a Connect your USB Flash memory drive or digital camera to the USB direct interface on the front of the machine. b c d Press Direct Print. e Press the new option you want. Repeat steps d and e for each setting you want to change. f Press OK. g Press Press DefaultSettings.
11 How to print from a computer Printing a document 11 The machine can receive data from your computer and print it. To print from a computer, you must install the printer driver. (For more information about printer driver settings, see Software User's Guide) a Install the Brother printer driver from the CD-ROM (see Quick Setup Guide). b From your application, choose the Print command.
12 How to scan to a computer Before scanning 12 12 To use the machine as a scanner, install a scanner driver. If the machine is on a network, configure it with a TCP/IP address. Install the scanner drivers from the CD-ROM (see Quick Setup Guide: Install MFL-Pro Suite). Configure the machine with a TCP/IP address if network scanning does not work (see Software User's Guide).
Chapter 12 Scanning a document as a PDF file using ControlCenter4 (Windows®) 12 (For Macintosh users, see Software User's Guide.) NOTE The screens on your computer may vary depending on your model. ControlCenter4 is a software utility that lets you quickly and easily access the applications you use most often. Using ControlCenter4 eliminates the need to manually launch specific applications. You can use ControlCenter4 on your computer. a b Load your document (see How to load documents on page 34).
How to scan to a computer d e Make sure the machine you want to use is selected from the Model drop-down list. f Press Scan. The machine starts the scanning process. The folder where the scanned data is saved will open automatically. Click File.
Chapter 12 How to scan a document as a PDF file using the Touchscreen a b Load your document (see How to load documents on page 34). c Swipe left or right to display to File. Press Scan. will be displayed in the centre of the Touchscreen highlighted in blue. d Press OK. When the machine is connected to a network, press the computer name. Do one of the following: If you want to use the default settings, go to step i. If you want to change the default settings, go to step e. e f Press Options.
How to scan to a computer NOTE The following scan modes are available. • to USB (MFC-9330CDW and MFC-9340CDW) • to Network (Windows®) • to FTP • to E-mail Server • to E-mail • to Image • to OCR • to File • WS Scan 1 (Web Services Scan) 1 Windows® users only (Windows Vista® SP2 or later, Windows® 7 and Windows® 8) (See Software User's Guide.
A Routine maintenance Replacing the consumable items A You must replace the consumable items when the machine indicates that the life of the consumable is over. You can replace the following consumable items by yourself: Using non-Brother supplies may affect the print quality, hardware performance, and machine reliability. NOTE The drum unit and toner cartridge are two separate consumables. Make sure both are installed as an assembly.
Routine maintenance The messages in the table appear on the Touchscreen in Ready mode. These messages provide advanced warnings to replace the consumable items before they reach end of life. To avoid any inconvenience, you may want to buy spare consumable items before the machine stops printing. Touchscreen messages Consumable item to prepare Approximate life How to replace Model name Toner Low Toner cartridge See page 74. TN-261BK 5 Prepare New BK = Black Toner Cartridge.
You must clean the machine regularly and replace the consumable items when the messages in the table are displayed on the Touchscreen. Touchscreen messages Consumable item to replace Approximate life How to replace Model name Replace Toner Toner cartridge See page 74. TN-261BK 5 The Touchscreen shows the toner cartridge colour that you must replace.
Routine maintenance NOTE • Discard used consumable items according to local regulations, keeping it separate from domestic waste. If you have questions, call your local waste disposal office. Be sure to reseal the consumable items tightly so that the material inside does not spill. • We recommend placing used consumable items on a piece of paper to prevent accidentally spilling or scattering the material inside.
Replacing the toner cartridges Model Name: TN-261BK 1, TN-261C 1, TN-261M 1, TN-261Y 1, TN-265C 2, TN-265M 2, TN-265Y 2 The Standard toner cartridge can print approximately 2,500 pages 3 (Black) or approximately 1,400 pages 3 (Cyan, Magenta, Yellow). The High Yield toner cartridge can print approximately 2,200 pages 3 (Cyan, Magenta, Yellow). Actual page count will vary depending on your average type of document. When a toner cartridge is running low, the Touchscreen shows Toner Low.
Routine maintenance Replacing the toner cartridges a b Make sure the machine is turned on. c Remove the toner cartridge and drum unit assembly for the colour shown on the Touchscreen. A WARNING HOT SURFACE Open the top cover until it locks in the open position. After you have just used the machine, some internal parts of the machine will be extremely hot. Wait for the machine to cool down before you touch the internal parts.
IMPORTANT • We recommend that you place the toner cartridge and drum unit assembly on a clean, flat surface with disposable paper underneath it in case you accidentally spill or scatter toner. • To prevent damage to the machine from static electricity, DO NOT touch the electrodes shown in the illustration. 76 d Push down the green lock lever and take the toner cartridge out of the drum unit.
Routine maintenance WARNING • DO NOT put a toner cartridge or a toner cartridge and drum unit assembly into a fire. It could explode, resulting in injuries. • DO NOT use flammable substances, any type of spray, or an organic solvent/liquid containing alcohol or ammonia to clean the inside or outside of the product. Doing so could cause a fire or electrical shock. Instead, use only a dry, lint-free cloth. IMPORTANT • Handle the toner cartridge carefully.
NOTE • Be sure to seal up the used toner cartridge tightly in a bag so that toner powder does not spill out of the cartridge. e Unpack the new toner cartridge. Hold the cartridge level with both hands and gently shake it from side to side several times to spread the toner evenly inside the cartridge. • Discard used consumable items according to local regulations, keeping it separate from domestic waste. If you have questions, call your local waste disposal office.
Routine maintenance f Pull off the protective cover. g Put the new toner cartridge firmly into the drum unit until you hear it lock into place. If you put it in correctly, the green lock lever on the drum unit will lift automatically. IMPORTANT Put the new toner cartridge in the drum unit immediately after you remove its protective cover. To prevent any degradation to the print quality, DO NOT touch the shaded parts shown in the illustrations.
h Clean the corona wire inside the drum unit by gently sliding the green tab from left to right and right to left several times. j Slide each toner cartridge and drum unit assembly into the machine. Make sure you match the toner cartridge colour to the same colour label on the machine. 1 BK C M NOTE Y Be sure to return the tab to the Home position (a) (1). The arrow on the tab must be aligned with the arrow on the drum unit. If it is not, printed pages may have a vertical stripe.
Routine maintenance k Close the top cover of the machine. NOTE After replacing a toner cartridge, DO NOT turn off the machine or open the top cover until the Touchscreen clears the Please wait. message and returns to Ready mode. Replacing the drum units A Model Name: DR-261CL 4 pc. Drum Set or single drum units DR-261CL-BK, DR-261CL-CMY A new drum unit can print approximately 15,000 A4 or Letter size single-sided pages.
Drum ! A The corona wires are dirty. Clean the corona wires in the four drum units (see Cleaning the corona wires on page 101). We cannot guarantee the print quality. Replace the drum unit with a new one. We recommend a Brother Original drum unit be installed at this time. If you cleaned the corona wires and the Drum ! error is still displayed on the Touchscreen, then the drum unit is at the end of its life. Replace the drum units with a new set.
Routine maintenance Replacing the drum units A IMPORTANT c Remove the toner cartridge and drum unit assembly for the colour shown on the Touchscreen. • While removing the drum unit, handle it carefully because it may contain toner. If toner scatters on your hands or clothes, wipe or wash it off with cold water at once. • Every time you replace the drum unit, clean the inside of the machine (see Cleaning and Checking the machine on page 97).
IMPORTANT • We recommend that you place the toner cartridge and drum unit assembly on a clean, flat surface with disposable paper underneath it in case you accidentally spill or scatter toner. d Push down the green lock lever and take the toner cartridge out of the drum unit. • To prevent damage to the machine from static electricity, DO NOT touch the electrodes shown in the illustration. WARNING • DO NOT put a toner cartridge or a toner cartridge and drum unit assembly into a fire.
Routine maintenance IMPORTANT • Handle the toner cartridge carefully. If toner scatters on your hands or clothes, immediately wipe or wash it off with cold water. • To avoid print quality problems, DO NOT touch the shaded parts shown in the illustrations. NOTE • Be sure to seal up the used drum unit tightly in a bag so that toner powder does not spill out of the drum unit. • Discard used consumable items according to local regulations, keeping it separate from domestic waste.
g Put the toner cartridge firmly into the new drum unit until you hear it lock into place. If you put the cartridge in correctly, the green lock lever will lift automatically. h Clean the corona wire inside the drum unit by gently sliding the green tab from left to right and right to left several times. 1 NOTE NOTE Make sure you put the toner cartridge in correctly or it may separate from the drum unit. Be sure to return the tab to the Home position (a) (1).
Routine maintenance j Slide each toner cartridge and drum unit assembly into the machine. Make sure you match the toner cartridge colour to the same colour label on the machine. k l Close the top cover of the machine. When you replace the drum unit with a new one, you must reset the drum counter. Instructions of how to do this can be found in the box your new drum unit came in.
Replacing the belt unit A c Remove all of the toner cartridge and drum unit assemblies. Model name: BU-220CL A new belt unit can print approximately 50,000 A4 or Letter size single-sided pages. Replace Belt A When the Replace Belt message appears on the Touchscreen, you must replace the belt unit. When you replace the belt unit with a new one, you must reset the belt unit counter. Instructions of how to do this can be found in the box your new belt unit came in.
Routine maintenance IMPORTANT • We recommend that you place the toner cartridge and drum unit assemblies on a clean, flat surface with disposable paper underneath them in case you accidentally spill or scatter toner. d Hold the green handle of the belt unit and lift the belt unit up, and then pull it out. • To prevent damage to the machine from static electricity, DO NOT touch the electrodes shown in the illustration.
e Unpack the new belt unit and put the new belt unit in the machine. f Slide each toner cartridge and drum unit assembly into the machine, making sure you match the toner cartridge colours to the same colour labels on the machine.
Routine maintenance g h Close the top cover of the machine. When you replace the belt unit with a new one, you must reset the belt unit counter. Instructions of how to do this can be found in the box your new belt unit came in. Replacing the waste toner box A Model name: WT-220CL The life of a waste toner box is approximately 50,000 A4 or Letter size single-sided pages. WT Box End Soon A If the Touchscreen shows WT Box End Soon, it means the waste toner box is near the end of its life.
c Remove all of the toner cartridge and drum unit assemblies. IMPORTANT • We recommend that you place the toner cartridge and drum unit assemblies on a clean, flat surface with disposable paper underneath them in case you accidentally spill or scatter toner. • To prevent damage to the machine from static electricity, DO NOT touch the electrodes shown in the illustration. WARNING HOT SURFACE After you have just used the machine, some internal parts of the machine will be extremely hot.
Routine maintenance d Hold the green handle of the belt unit and lift the belt unit up, and then pull it out. e Remove the orange packing material and discard it. IMPORTANT To avoid print quality problems, DO NOT touch the shaded parts shown in the illustrations. A NOTE This step is only necessary when you are replacing the waste toner box for the first time, and is not required for the replacement waste toner box.
f Hold the green handle of the waste toner box and remove the waste toner box from the machine. WARNING • DO NOT put the waste toner box into a fire. It could explode, resulting in injuries. • DO NOT use flammable substances, any type of spray, or an organic solvent/liquid containing alcohol or ammonia to clean the inside or outside of the product. Doing so could cause a fire or electrical shock. Instead, use only a dry, lint-free cloth. (See Product Safety Guide: General precautions.
Routine maintenance g Unpack the new waste toner box and place it in the machine. h Put the belt unit back in the machine.
i Slide each toner cartridge and drum unit assembly into the machine, making sure you match the toner cartridge colours to the same colour labels on the machine. BK C M Y BK = Black, C = Cyan, M = Magenta, Y= Yellow j 96 Close the top cover of the machine.
Routine maintenance Cleaning and Checking the machine Clean the outside and inside of the machine regularly with a dry, lint-free cloth. When you replace the toner cartridge or the drum unit, make sure that you clean the inside of the machine. If printed pages are stained with toner, clean the inside of the machine with a dry, lint-free cloth. IMPORTANT A • Use neutral detergents. Cleaning with volatile liquids such as thinner or benzine will damage the surface of the machine.
Cleaning the outside of the machine b Wipe the outside of the machine with a dry, lint-free cloth to remove dust. c Pull the paper tray completely out of the machine. d If paper is loaded in the paper tray, remove it. e Remove anything that is stuck inside the paper tray. A IMPORTANT DO NOT use any type of liquid cleaners (including ethanol). Cleaning the Touchscreen a Press and hold down machine off. b Clean the Touchscreen with a dry, soft lint-free cloth.
Routine maintenance f Wipe the inside and the outside of the paper tray with a dry, lint-free cloth to remove dust. Cleaning the LED heads A If there is a problem with the print quality, such as light or faded colours or white streaks or bands down the page, clean the LED heads as follows: IMPORTANT DO NOT touch the windows of the LED heads with your fingers. g Re-load the paper and put the paper tray firmly back in the machine. h Turn on the machine. a Press and hold down machine off.
c Wipe the windows of all four LED heads (1) with a dry, lint-free cloth. Be careful not to touch the windows of the LED heads (1) with your fingers. Cleaning the scanner glass a Press and hold down machine off. b (MFC-9340CDW) Unfold the ADF document support (1) and then open the ADF cover (2). Clean the white bar (3) and the scanner glass strip (4) underneath it with a soft lint-free cloth slightly moistened with water. Close the ADF cover (2) and fold the ADF document support (1).
Routine maintenance d In the ADF unit, clean the white bar (1) and the scanner glass strip (2) underneath it with a soft lint-free cloth slightly moistened with water. 1 Cleaning the corona wires A If you have print quality problems or the Touchscreen shows Drum !, clean the corona wires as follows: a Open the top cover until it locks in the open position. b Remove the toner cartridge and drum unit assembly.
WARNING HOT SURFACE After you have just used the machine, some internal parts of the machine will be extremely hot. Wait for the machine to cool down before you touch the internal parts. 102 IMPORTANT • We recommend that you place the toner cartridge and drum unit assembly on a clean, flat surface with disposable paper underneath it in case you accidentally spill or scatter toner. • To prevent damage to the machine from static electricity, DO NOT touch the electrodes shown in the illustration.
Routine maintenance c Clean the corona wire inside the drum unit by gently sliding the green tab from left to right and right to left several times. d Slide the toner cartridge and drum unit assembly into the machine. Make sure that you match the toner cartridge colour to the same colour label on the machine. 1 BK C M NOTE Y Be sure to return the tab to the Home position (a) (1). The arrow on the tab must be aligned with the arrow on the drum unit.
e Repeat steps b - d to clean the three remaining corona wires. NOTE When cleaning the corona wires, you do not have to remove the toner cartridge from the drum unit. f Close the top cover of the machine. Cleaning the drum unit If your printout has dots at 94 mm intervals, follow the steps below to solve the problem. a Make sure that the machine is in the Ready mode. b Press c d Press All Settings. e f Press Print Reports. g h Press Drum Dot Print. i The machine will print the Drum Dot .
Routine maintenance k Open the top cover until it locks in the open position. WARNING HOT SURFACE After you have just used the machine, some internal parts of the machine will be extremely hot. Wait for the machine to cool down before you touch the internal parts. l The colour of printed dots is the colour of the drum you should clean. Remove the toner cartridge and drum unit assembly of the colour causing the problem.
IMPORTANT • We recommend that you place the toner cartridge and drum unit assembly on a clean, flat surface with disposable paper underneath it in case you accidentally spill or scatter toner. • To prevent damage to the machine from static electricity, DO NOT touch the electrodes shown in the illustration. 106 m Push down the green lock lever and take the toner cartridge out of the drum unit.
Routine maintenance IMPORTANT n • Handle the toner cartridge carefully. If toner scatters on your hands or clothes, immediately wipe or wash it off with cold water. Turn the drum unit as shown in the illustration. Make sure that the drum unit gear (1) is on the left side. • To avoid print quality problems, DO NOT touch the shaded parts shown in the illustrations. 1 o Read the following information from the Drum Dot Check Sheet.
p Use the numbered markers next to the drum roller to find the mark. For example, a dot in column 2 on the Drum Dot Check Sheet would mean that there is a mark in the "2" region of the drum. q Turn the edge of the drum unit toward you by hand while looking at the surface of the suspected area. NOTE DO NOT touch the drum’s surface. To avoid print quality problems, hold the edges of the drum unit.
Routine maintenance t Put the toner cartridge firmly into the new drum unit until you hear it lock into place. If you put the cartridge in correctly, the green lock lever will lift automatically. u Slide the toner cartridge and drum unit assembly into the machine. Make sure that you match the toner cartridge colour to the same colour label on the machine. BK C M Y NOTE Make sure you put the toner cartridge in correctly or it may separate from the drum unit.
v w Close the top cover of the machine. Turn on the machine and try a test print. Cleaning the paper pick-up rollers Cleaning the paper pick-up roller periodically may prevent paper jams by ensuring the correct feeding of the paper. If you have paper feed problems, clean the pick-up rollers as follows: 110 a Press and hold down machine off. b Pull the paper tray completely out of the machine. c If paper is loaded in the paper tray, remove it.
Routine maintenance d Tightly wring out a lint-free cloth soaked in lukewarm water, and then wipe the separator pad (1) on the paper tray to remove dust. 1 e Wipe the two pick-up rollers (1) inside the machine to remove dust. 1 f g Put the paper tray back in the machine. h Turn on the machine. Calibration A The output density for each colour may vary depending on the machine’s environment, such as temperature and humidity. Calibration helps you to improve the colour density.
NOTE • If an error message is displayed, press OK and try again. (For more information, see Error and maintenance messages on page 116.) • If you are using the Windows® printer driver, the driver will get the calibration data automatically if both Use Calibration Data and Get Device Data Automatically are selected. The default settings are on (see Software User's Guide). • If you are using the Macintosh printer driver, you must perform the calibration using the Status Monitor.
Routine maintenance Frequency (Colour Correction) A You can set how often the colour correction (Colour Calibration and Auto Registration) occurs. The default setting is Normal. The colour correction process consumes some amount of the toner. a Press b c Press All Settings. d e Press Printer. f g Press Frequency. h Press . Swipe up or down, or press a or b to display Printer. Swipe up or down, or press a or b to display Frequency. Press Normal, Low or Off. .
B Troubleshooting B If you think there is a problem with your machine, check each of the items below first and follow the troubleshooting tips. You can correct most problems by yourself. If you need additional help, the Brother Solutions Center offers the latest FAQs and troubleshooting tips. Visit us at http://solutions.brother.com/. Identifying your problem B First, check the following: The machine’s power cord is connected correctly and the machine’s power is on.
Troubleshooting Scanning problems: Scanning difficulties on page 143 Software and Network problems: Software difficulties on page 143 Network difficulties on page 144 B 115
Error and maintenance messages B As with any sophisticated office product, errors may occur and consumable items may have to be replaced. If this happens, your machine identifies the error or required routine maintenance and shows the appropriate message. The most common error and maintenance messages are shown in the table. You can clear most errors and perform routine maintenance by yourself.
Troubleshooting Error Message Cause Comm.Error Poor telephone line quality Try sending the fax again or try connecting the caused a communication error. machine to another telephone line. If the problem continues, contact the telephone company and ask them to check your telephone line. Connection Failed You tried to poll a fax machine that is not in Polled Waiting mode. Cooling Down Wait for a while Cover is Open. Action Check the other fax machine’s polling setup.
Error Message Cause Action Drum ! The corona wires on the drum units must be cleaned. Clean the corona wires on the drum units (see Cleaning the corona wires on page 101). The drum unit or the toner cartridge and drum unit assembly is not installed correctly. Put the toner cartridge into the drum unit that is indicated on the Touchscreen. Then reinstall the toner cartridge and drum unit assembly into the machine. Drum Stop It is time to replace the drum unit.
Troubleshooting Error Message Cause Action No Permission Printing colour documents is restricted by Secure Function Lock 2.0. The print job will be cancelled. Contact your administrator to check your Secure Function Lock Settings. No Paper The machine is out of paper in the paper tray, or paper is not correctly loaded in the paper tray. Do one of the following: Refill paper in the paper tray. Make sure the paper guides are set to the correct size. Remove the paper and load it again.
Error Message Cause Action Out of Memory The machine’s memory is full. Fax sending or copy operation in progress Do one of the following: Press Send Now, Partial Print or Quit to send or copy the scanned pages. Press and wait until the other operations in progress finish, and then try again. Clear the faxes from the memory. Print the faxes that are stored in the memory to restore the memory to 100%.
Troubleshooting Error Message Cause Action Registration failed. Registration failed. Press OK and try again. Press and hold down to turn off the machine. Wait a few seconds, then turn it on again. Perform the auto colour registration using the Touchscreen (see Auto Registration on page 112). Put in a new belt unit (see Replacing the belt unit on page 88). If the problem continues, contact Brother customer service.
Error Message Cause Scan Unable XX The machine has a mechanical problem. Action Press and hold down to turn the machine off, and then turn it on again (see Transferring your faxes or Fax Journal report on page 124). If the problem continues, contact Brother customer service for support. Short paper The length of the paper in the tray is too short for the machine to deliver it to the Face down output tray.
Troubleshooting Error Message Cause Action Unusable Device A defective USB device or a high power consumption USB device has been connected to the USB direct interface. Unplug the device from the USB direct Unusable Device A USB device or USB Flash memory drive that is not supported/is encrypted has been connected to the USB direct interface.
Transferring your faxes or Fax Journal report If the Touchscreen shows: Print Unable XX Scan Unable XX Transferring faxes to another fax machine B If you have not set up your Station ID, you cannot enter fax transfer mode (see Quick Setup Guide: Enter personal information (Station ID)). a Press to interrupt the error temporarily.
Troubleshooting Transferring faxes to your computer You can transfer the faxes from your machine’s memory to your computer. a Press to interrupt the error temporarily. b Make sure you have installed MFL-Pro Suite and then turn on PC-Fax Receiving on the computer. Follow the instructions for the operating system you are using. (Windows® XP, Windows Vista® and Windows® 7) From the (Start) menu, select All Programs > Brother > MFC-XXXX > PC-FAX Receiving > Receive. (XXXX is your model name.
Document Jams Document is jammed in the top of the ADF unit a Remove any paper from the ADF that is not jammed. b c Open the ADF cover. B Document is jammed under the document cover a Remove any paper from the ADF that is not jammed. b c Lift the document cover. B Pull the jammed document out to the left. If the document rips or tears, be sure you remove all small paper scraps to prevent future jams. d Close the ADF cover. e Press 126 Pull the jammed document out to the right. .
Troubleshooting Removing small documents jammed in the ADF a b B Document is jammed at the output tray B Lift the document cover. a Remove any paper from the ADF that is not jammed. Insert a piece of stiff paper, such as cardstock, into the ADF to push any small paper scraps through. b Pull the jammed document out to the right. c Press c Close the document cover. d Press . .
Paper Jams If the Touchscreen shows Jam Tray, follow these steps: Always remove the remaining paper from the paper tray and straighten the stack when you are adding new paper. This helps prevent multiple sheets of paper from feeding through the machine at one time and prevents paper jams. Paper is jammed in the manual feed slot Paper is jammed in the paper tray B B a Pull the paper tray completely out of the machine. b Use both hands to slowly pull out the jammed paper.
Troubleshooting c d Make sure the paper is below the maximum paper mark ( ) in the paper tray. While pressing the green paper-guide release lever, slide the paper guides to fit the paper size. Make sure the guides are firmly in the slots. Paper is jammed at the output paper tray B When the paper is jammed at the output paper tray, follow the these steps: a Use both hands to open the scanner. Put the paper tray firmly back in the machine.
c Push the scanner down with both hands to close it. Paper is jammed at the back of the machine If the Touchscreen shows Jam Rear, follow these steps: a Leave the machine turned on for 10 minutes for the internal fan to cool the extremely hot parts inside the machine. b Open the back cover. WARNING HOT SURFACE After you have just used the machine, some internal parts of the machine will be extremely hot. Wait for the machine to cool down before you touch the internal parts.
Troubleshooting c Pull the green tabs at the left and right sides down to release the fuser cover (1). e 1 d Use both hands to gently pull the jammed paper out of the fuser unit. Close the fuser cover (1). Make sure the green tabs at the left and right sides lock into place. 1 f Close the back cover until it locks in the closed position.
Paper is jammed inside the machine If the Touchscreen shows Jam Inside, follow these steps: a Leave the machine turned on for 10 minutes for the internal fan to cool the extremely hot parts inside the machine. b Open the top cover until it locks in the open position. c Remove all of the toner cartridge and drum unit assemblies. 132 WARNING B HOT SURFACE After you have just used the machine, some internal parts of the machine will be extremely hot.
Troubleshooting IMPORTANT d Pull out the jammed paper slowly. • We recommend that you place the toner cartridge and drum unit assemblies on a clean, flat surface with disposable paper underneath them in case you accidentally spill or scatter toner. • To prevent damage to the machine from static electricity, DO NOT touch the electrodes shown in the illustration.
e Slide each toner cartridge and drum unit assembly into the machine, making sure you match the toner cartridge colours to the same colour labels on the machine. BK C M Y BK = Black, C = Cyan, M = Magenta, Y= Yellow 134 f Close the top cover of the machine. NOTE If you turn off the machine during Jam Inside is on the Touchscreen, the machine will print incomplete data from your computer when it is turned on. Before you turn on the machine, delete the job from your computer’s print spooler.
Troubleshooting Paper is jammed underneath the paper tray d If paper is not caught inside the machine, check underneath the paper tray. e If the paper is not caught in the paper tray, open the back cover. B If the Touchscreen shows Jam 2-sided, follow these steps: a Leave the machine turned on for 10 minutes for the internal fan to cool the extremely hot parts inside the machine. b Pull the paper tray completely out of the machine.
WARNING HOT SURFACE After you have just used the machine, some internal parts of the machine will be extremely hot. Wait for the machine to cool down before you touch the internal parts. f Use both hands to gently pull the jammed paper out of the back of the machine. g Close the back cover until it locks in the closed position. h Put the paper tray firmly back in the machine.
Troubleshooting If you are having difficulty with your machine B IMPORTANT • For technical help, you must call the country where you bought the machine. Calls must be made from within that country. • If you think there is a problem with your machine, check the chart below and follow the troubleshooting tips. You can correct most problems by yourself. • If you need additional help, the Brother Solutions Center offers the latest FAQs and troubleshooting tips. Visit us at http://solutions.brother.com/.
Printing difficulties (continued) Difficulties Suggestions The machine prints unexpectedly or it prints garbage. Press to cancel print jobs. Check the settings in your application to make sure they are set up to work with your machine. The machine prints the first couple of pages correctly, then some pages have missing text. Check the settings in your application to make sure they are set up to work with your machine.
Troubleshooting Printing received faxes Difficulties Condensed print Horizontal streaks Suggestions Usually this is caused by a poor telephone connection. Make a copy; if your copy looks good, you probably had a bad connection, with static or interference on the telephone line. Ask the other party to send the fax again. Top and bottom sentences are cut off Missing lines Vertical black lines when receiving The corona wires for printing may be dirty.
Receiving Faxes Difficulties Suggestions Cannot receive a fax. Check all line cord connections. Make sure the telephone line cord is directly plugged into the telephone wall socket and the LINE socket of the machine. If you subscribe to DSL or VoIP services, contact your service provider for connection instructions. Make sure the machine is in the correct Receive Mode.
Troubleshooting Receiving Faxes (continued) Difficulties Suggestions Cannot receive a fax. If you are using a telephone answering machine (External TAD mode) on the same line as the Brother machine, make sure your answering machine is set up correctly (see Connecting an external TAD on page 51). (continued) 1 Connect the external TAD as shown in the illustration, see page 51. 2 Set your answering machine to answer in one or two rings. 3 Record the outgoing message on your answering machine.
Sending faxes (continued) Difficulties Suggestions Transmission Verification Report says RESULT:ERROR. There is probably temporary noise or static on the line. Try sending the fax again. If you are sending a PC-Fax message and get RESULT:ERROR on the Transmission Verification Report, your machine may be out of memory.
Troubleshooting Copying difficulties (continued) Difficulties Suggestions Vertical black line appears in copies. Black vertical lines on copies are typically caused by dirt or correction fluid on the scanner glass, or the corona wires are dirty. Clean the glass strip and scanner glass and also the white bar and white plastic above them (see Cleaning the scanner glass on page 100 and Cleaning the corona wires on page 101). Copies are blank.
Network difficulties Difficulties Suggestions Cannot print and scan over a network after completing the software installation. When the Cannot print to the networked printer. screen appears, follow the onscreen instructions. The network scanning feature does not work. (Windows® and Macintosh) If the problem is not solved, see Network User's Guide:Troubleshooting. The network scanning feature may not work due to the firewall settings. Change or disable the firewall settings.
Troubleshooting Other difficulties Difficulties Suggestions The machine will not turn on. Adverse conditions on the power connection (such as lightning or a power surge) may have triggered the machine’s internal safety mechanisms. Press and hold down to turn off the machine and unplug the power cord. Wait for ten minutes, then plug in the power cord and press to turn on the machine. If the problem is not solved and you are using a power breaker, disconnect it to make sure it is not the problem.
Setting Dial Tone detection When you send a fax automatically, by default your machine will wait for a fixed amount of time before it starts to dial the number. By changing the Dial Tone setting to Detection you can make your machine dial as soon as it detects a dial tone. This setting can save a small amount of time when sending a fax to many different numbers. If you change the setting and start having problems with dialling you should change back to the default No Detection setting.
Troubleshooting Improving the print quality If you have a print quality problem, print a test page first ( B , All Settings, Printer, Print Options, Test Print). If the printout looks good, the problem is probably not the machine. Check the interface cable connections and try printing a different document. If the printout or test page printed from the machine has a quality problem, check the following steps first.
Examples of poor print quality ABCDEFGHIJKLMNOPQRSTUVWXYZ. 0123456789. abcdefghijklmnopqrstuvwxyz. ABCDEFGHIJKLMNOPQRSTUVWXYZ. 0123456789. abcdefghijklmnopqrstuvwxyz. ABCDEFGHIJKLMNOPQRSTUVWXYZ. 0123456789. abcdefghijklmnopqrstuvwxyz. ABCDEFGHIJKLMNOPQRSTUVWXYZ. 0123456789. abcdefghijklmnopqrstuvwxyz. Recommendation Perform the calibration using the Touchscreen or the printer driver (see Calibration on page 111).
Troubleshooting Examples of poor print quality Recommendation Wipe the scanner glass strip with a dry lint free soft cloth (see Cleaning the scanner glass on page 100). ABCDEFGHIJKLMNOPQRSTUVWXYZ. 0123456789. abcdefghijklmnopqrstuvwxyz. ABCDEFGHIJKLMNOPQRSTUVWXYZ. 0123456789. abcdefghijklmnopqrstuvwxyz. ABCDEFGHIJKLMNOPQRSTUVWXYZ. 0123456789. abcdefghijklmnopqrstuvwxyz. ABCDEFGHIJKLMNOPQRSTUVWXYZ. 0123456789. abcdefghijklmnopqrstuvwxyz. ABCDEFGHIJKLMNOPQRSTUVWXYZ. 0123456789.
Examples of poor print quality ABCDEFGHIJKLMNOPQRSTUVWXYZ. 0123456789. abcdefghijklmnopqrstuvwxyz. ABCDEFGHIJKLMNOPQRSTUVWXYZ. 0123456789. abcdefghijklmnopqrstuvwxyz. ABCDEFGHIJKLMNOPQRSTUVWXYZ. 0123456789. abcdefghijklmnopqrstuvwxyz. ABCDEFGHIJKLMNOPQRSTUVWXYZ. 0123456789. abcdefghijklmnopqrstuvwxyz. Recommendation Make sure the media type setting in the driver matches the type of paper you are using (see Acceptable paper and other print media on page 29). Check the machine’s environment.
Troubleshooting Examples of poor print quality ABCDEFGHIJKLMNOPQRSTUVWXYZ. 0123456789. abcdefghijklmnopqrstuvwxyz. ABCDEFGHIJKLMNOPQRSTUVWXYZ. 0123456789. abcdefghijklmnopqrstuvwxyz. ABCDEFGHIJKLMNOPQRSTUVWXYZ. 0123456789. abcdefghijklmnopqrstuvwxyz. ABCDEFGHIJKLMNOPQRSTUVWXYZ. 0123456789. abcdefghijklmnopqrstuvwxyz. Recommendation Check the machine’s environment. Conditions such as high humidity and high temperatures may cause this print quality problem.
Examples of poor print quality Recommendation Make sure the machine is on a solid level surface. ABCDEFGHIJKLMNOPQRSTUVWXYZ. 0123456789. abcdefghijklmnopqrstuvwxyz. ABCDEFGHIJKLMNOPQRSTUVWXYZ. 0123456789. abcdefghijklmnopqrstuvwxyz. ABCDEFGHIJKLMNOPQRSTUVWXYZ. 0123456789. abcdefghijklmnopqrstuvwxyz. ABCDEFGHIJKLMNOPQRSTUVWXYZ. 0123456789. abcdefghijklmnopqrstuvwxyz. ABCDEFGHIJKLMNOPQRSTUVWXYZ. 0123456789. abcdefghijklmnopqrstuvwxyz. ABCDEFGHIJKLMNOPQRSTUVWXYZ. 0123456789. abcdefghijklmnopqrstuvwxyz.
Troubleshooting Examples of poor print quality Recommendation Make sure the back cover is closed correctly. ABCDEFGHIJKLMNOPQRSTUVWXYZ. 0123456789. abcdefghijklmnopqrstuvwxyz. ABCDEFGHIJKLMNOPQRSTUVWXYZ. 0123456789. abcdefghijklmnopqrstuvwxyz. ABCDEFGHIJKLMNOPQRSTUVWXYZ. 0123456789. abcdefghijklmnopqrstuvwxyz. ABCDEFGHIJKLMNOPQRSTUVWXYZ. 0123456789. abcdefghijklmnopqrstuvwxyz. Make sure the two grey levers inside the back cover are in the up position (1). Pull up the two grey levers until they stop.
Examples of poor print quality ABCDEFGHIJKLMNOPQRSTUVWXYZ. 0123456789. abcdefghijklmnopqrstuvwxyz. ABCDEFGHIJKLMNOPQRSTUVWXYZ. 0123456789. abcdefghijklmnopqrstuvwxyz. ABCDEFGHIJKLMNOPQRSTUVWXYZ. 0123456789. abcdefghijklmnopqrstuvwxyz. ABCDEFGHIJKLMNOPQRSTUVWXYZ. 0123456789. abcdefghijklmnopqrstuvwxyz. ABCDEFGHIJKLMNOPQRSTUVWXYZ. 0123456789. abcdefghijklmnopqrstuvwxyz. ABCDEFGHIJKLMNOPQRSTUVWXYZ. 0123456789. abcdefghijklmnopqrstuvwxyz. ABCDEFGHIJKLMNOPQRSTUVWXYZ. 0123456789. abcdefghijklmnopqrstuvwxyz.
Troubleshooting Examples of poor print quality ABCDEFGHIJKLMNOPQRSTUVWXYZ. 0123456789. abcdefghijklmnopqrstuvwxyz. ABCDEFGHIJKLMNOPQRSTUVWXYZ. 0123456789. abcdefghijklmnopqrstuvwxyz. ABCDEFGHIJKLMNOPQRSTUVWXYZ. 0123456789. abcdefghijklmnopqrstuvwxyz. ABCDEFGHIJKLMNOPQRSTUVWXYZ. 0123456789. abcdefghijklmnopqrstuvwxyz. Recommendation Make sure the two grey levers inside the back cover are in the up position (1). Pull up the two grey levers until they stop.
EFGHIJKLMN ABCDEFG Examples of poor print quality Envelope Creases 156 Recommendation Make sure the envelope levers inside the back cover are pulled down to the envelope position when you print envelopes (see Loading paper in the manual feed slot on page 23). NOTE When you have finished printing, open the back cover and reset the two grey levers back to their original positions (1). Pull up the two grey levers until they stop.
Troubleshooting Machine Information Checking the Serial Number You can see the machine’s Serial Number on the Touchscreen. a Press b c Press All Settings. d e f g . Swipe up or down, or press a or b to display Machine Info.. Press Machine Info.. Press Serial No.. The Touchscreen will display the machines Serial Number. Press B B Checking the Firmware Version B You can see the machine’s firmware version on the Touchscreen. a Press b c Press All Settings. d e f Press Machine Info..
Reset functions B The following reset functions are available: 1 Network You can reset the internal print server back to its default factory settings such as the password and IP address information. How to reset the machine a Press b c Press All Settings. d e Press Initial Setup. f g Press Reset.
C Settings and features tables Using the Settings Tables C C Your machine’s Touchscreen LCD is easy to set up and operate. All you have to do is press the settings and options you want as they are displayed on the screen. We created step-by-step Settings Tables and Features Tables so you can see at-a-glance all the available choices for each setting and feature. You can use these tables to quickly set up your preferred settings in the machine.
Settings Tables C The Settings tables will help you understand the menu selections and options that are found in the machine’s programs. The factory settings are shown in Bold with an asterisk. (Settings) Level 1 C Level 2 Level 3 Options Descriptions See Page Date — — See . Time — — Add the date and time on the Touchscreen and in headings of faxes you send. Auto Daylight — On Change to Daylight Saving Time automatically. See . Set the time zone for your country. See .
Settings and features tables See Page Level 1 Level 2 Level 3 Options Descriptions Tray Setting Paper Size — A4* Set the size of paper in the paper tray. 28 Set the type of paper in the paper tray. 28 Set the size of paper in the paper tray. 28 Select your default settings.
All settings Level 1 Level 2 General Setup Paper Type C Level 3 Level 4 Options Descriptions — — Thin Set the type of paper in the paper tray. 28 Set the size of paper in the paper tray. 28 Adjust the ring volume. 20 Adjust the beeper volume. 20 Adjust the speaker volume.
Settings and features tables Level 1 Level 2 General Setup Button Settings (continued) Level 3 Level 4 Options Descriptions Home Button Settings — Home* Set the screen that is displayed when you More Shortcuts 1 See Page 13 press Home ( ) on the Touchpanel. Shortcuts 2 Shortcuts 3 Ecology Toner Save — On Off* Sleep Time — Range varies depending on the model. Increase the page yield of the toner cartridge. See . Conserve power.
Level 1 Level 2 Level 3 Level 4 Fax Setup Receive Receive Mode — Options Descriptions Fax* Choose the receive mode that best suits your needs. 40 Set the number of rings before the machine answers in Fax or Fax/Tel mode. 43 Set the length of the fast double-ring time in Fax/Tel mode. 43 View faxes you receive on the Touchscreen. 45 Receive fax messages automatically when you answer a call and hear fax tones.
Settings and features tables Level 1 Level 2 Level 3 Level 4 Fax Setup Receive Memory Receive — (continued) (continued) Options Descriptions See Page Off* Set the machine to forward fax messages, to store incoming faxes in the memory (so you can retrieve them while you are away from your machine), or to send faxes to your computer.
Level 1 Level 2 Level 3 Level 4 Options Descriptions Fax Report Setting XMIT Report — On Choose the initial setup for the Transmission Verification Report. (continued) On+Image Off* See Page 38 Off+Image Journal Period Journal Period Off Every 50 Faxes* Set the interval for automatic printing of the Fax Journal. Every 6 Hours If you select other Every 12 Hours than Off or Every 50 Faxes, you can Every 24 Hours set the time for the Every 2 Days option.
Settings and features tables Level 1 Level 2 Level 3 Level 4 Printer Emulation — — Options Descriptions See Page Auto* Choose the emulation mode. See HP LaserJet . BR-Script 3 Print Options Internal Font HP LaserJet — BR-Script 3 2-sided Configuration — — Print a list of the machine’s printer settings. Test Print — — Print a test page. — — Off* Enable or disable 2-sided printing and choose long edge or short edge.
Level 1 Level 2 Level 3 Level 4 Level 5 Network Wired LAN TCP/IP BOOT Method — Options Descriptions Auto* Choose the BOOT method that best suits your needs. Static RARP BOOTP DHCP (IP Boot Tries) 3* [0-32767] Specifies the number of attempts the machine will try to obtain an IP address when the BOOT Method is set to any setting except Static. — [000-255]. [000-255]. [000-255]. [000-255] Enter the IP address. Subnet Mask — [000-255]. [000-255]. [000-255].
Settings and features tables Level 1 Level 2 Level 3 Level 4 Level 5 Options Descriptions Network Wired LAN TCP/IP DNS Server — Primary (continued) (continued) (continued) Specifies the IP address of the primary or secondary DNS server. [000-255]. [000-255]. [000-255]. [000-255] Secondary [000-255]. [000-255]. [000-255]. [000-255] APIPA — On* Off IPv6 — On Off* Ethernet — — Auto* 100B-FD Automatically allocate the IP address from the link-local address range.
Level 1 Level 2 Level 3 Level 4 Level 5 Options Descriptions Network Wired LAN Wired Enable — — On* (continued) (continued) (MFC-9330CDW and MFC-9340CDW) Enable or Disable the Wired LAN manually. WLAN TCP/IP Off BOOT Method — (MFC-9330CDW and MFC-9340CDW) Auto* Static Choose the BOOT method that best suits your needs. RARP BOOTP DHCP (IP Boot Tries) — IP Address — [000-255]. [000-255]. [000-255]. [000-255] Enter the IP address. Subnet Mask — [000-255]. [000-255]. [000-255].
Settings and features tables Level 1 Level 2 Level 3 Level 4 Level 5 Network WLAN TCP/IP WINS Server — (continued) (MFC-9330CDW and MFC-9340CDW) (continued) Options Descriptions Primary Specifies the IP address of the primary or secondary WINS server. [000-255]. [000-255]. [000-255]. [000-255] (continued) Secondary [000-255]. [000-255]. [000-255]. [000-255] DNS Server — Primary [000-255]. [000-255]. [000-255]. [000-255] Specifies the IP address of the primary or secondary DNS server.
Level 1 Level 2 Level 3 Level 4 Level 5 Options Descriptions Network WLAN WPS w/ PIN Code — — — (continued) (MFC-9330CDW and MFC-9340CDW) You can easily configure your wireless network settings using WPS with a PIN code. — Active(11b) You can see the current wireless network status. (continued) WLAN Status Status Active(11g) Active(11n) Wired LAN Active WLAN Off AOSS Active Connection Failed Signal — Strong Medium Weak You can see the current wireless network signal strength.
Settings and features tables Level 1 Level 2 Level 3 Level 4 Level 5 Options Descriptions Network Wi-Fi Direct PIN Code — — — You can easily configure your Wi-Fi Direct™ network settings using WPS with a PIN code. Manual — — — You can manually configure your Wi-Fi Direct™ network settings. Group Owner — — On Set your machine as the Group Owner.
Level 1 Level 2 Level 3 Network Wi-Fi Direct I/F Enable Level 4 Level 5 Options Descriptions — — On Enable or Disable the Wi-Fi Direct™ connection. Off* (continued) (MFC-9330CDW and MFC-9340CDW) (continued) E-mail/IFAX Mail Address — — — Setup Server SMTP SMTP Server Name (Up to 64 characters) (Available after IFAX is downloaded) Enter the mail address (Up to 60 characters). Enter the SMTP server address. IP Address [000-255]. [000-255]. [000-255].
Settings and features tables Level 1 Level 2 Level 3 Level 4 Level 5 Options Network E-mail/IFAX Setup Server POP3 Mailbox Name — (continued) (Available after IFAX is downloaded) (continued) (continued) Enter the mail box name (Up 60 characters). Mailbox Password — Enter the password to log in to the POP3 server (Up 32 characters). POP3 SSL/TLS None* You can send or receive an E-mail via an E-mail server that requires secure SSL/TLS communication.
Level 1 Level 2 Level 3 Level 4 Level 5 Options Descriptions Network E-mail/IFAX Setup Mail TX Size Limit — On (continued) (Available after IFAX is downloaded) (continued) Limit the size of E-mail documents. Notification — On Off* Off* (continued) Setup Relay Relay Broadcast — On Off* Web Connect Settings — — Register the Domain name. Relay Report — On Print the Relay Broadcast Report.
Settings and features tables Level 1 Level 2 Print Reports XMIT Verify Level 3 Level 4 Options Descriptions See Page View on LCD — — — Display and print a Transmission Verification Report for your last transmission. See Print Report — Address Book — — — List names and numbers stored in the Address Book. Fax Journal — — — List information about your last 200 incoming and outgoing faxes. (TX means Transmit. RX means Receive.) User Settings — — — List your settings.
Level 1 Level 2 Machine Info. Serial No. Firmware Version Page Counter Level 2 Level 2 Options Descriptions — — — Check the serial number of your machine. 157 Main Version — — 157 Sub1 Version — — Check the firmware version of your machine. Sub2 Version — — Total — Colour Fax/List — Colour Copy — Colour Black and White Black and White Check the number of total colour or black & white pages the machine has printed during its life.
Settings and features tables Level 1 Level 2 Initial Setup Date & Time Level 3 Level 4 Options Descriptions See Page Date — — See . Time — — Put the date and time on the Touchscreen and in the headings of faxes you send. Auto Daylight — On Change to Daylight Saving Time automatically. See . See . Off* Station ID Time Zone — UTCXXX:XX Set the time zone for your country. — — Fax Set up your name and fax number to appear on each page you fax.
Features Tables C Fax (When Fax Preview is Off) C Fax Level 1 Level 2 Level 3 Options Descriptions Redial (Pause) — — — Redial the last number called. When you are entering a fax or telephone number on the Touchpanel, Redial changes to Pause on the Touchscreen. Press Pause when you need a delay while dialing numbers, such as access codes and credit card numbers. You can also store a pause when you set up addresses.
Settings and features tables Level 1 Level 2 Level 3 Options Descriptions Address Book — Apply — Start sending a fax using the address book. Outgoing Call Edit Add to Address Book Choose a number from the Outgoing Call history and then send a fax to it, add it to Address Book, or delete it. (continued) Call History Delete Apply — Fax Start — — — Send a fax. Options Fax Resolution — Standard* Set the resolution for outgoing faxes. Fine See Page — See . — See . S.
Level 1 Level 2 Level 3 Options Coverpage Setup Coverpage Setup (continued) Options Descriptions See Page On Automatically send a cover page you programmed. See Off* . Coverpage Note 1.Comment Off 2.Please Call 3.Urgent 4.Confidential 5. 6. Polling RX Total Pages — — Standard Secure Set up your machine to poll another fax machine.
Settings and features tables Fax (When Fax Preview is On) C Fax Level 1 Level 2 Sending Faxes See Fax (When Fax Preview is Off) on page 180. Level 3 Options Received Faxes Print/Delete Descriptions Print All(New Faxes) — Print the new received faxes. Print All(Old Faxes) — Print the old received faxes. Delete All(New Faxes) — Delete the new received faxes. Delete All(Old Faxes) — Delete the old received faxes. Address Book See Fax (When Fax Preview is Off) on page 180.
Copy C Copy Level 1 Level 2 Level 3 Options 1 Options 2 Descriptions Mono Start — — — — Lets you make a monochrome copy. Colour Start — — — — Lets you make a colour copy. — — — — Choose the desired settings from the preset items. Quality — Auto* — Choose the Copy resolution for your type of document.
Settings and features tables Level 1 Level 2 Level 3 Options 1 Options 2 Descriptions See Page Options Enlarge/Reduce — 100%* — — See Enlarge 200% Choose an enlargement ratio for the next copy. (continued) 141% A5A4 . 104% EXELTR Reduce 97% LTRA4 94% A4LTR Choose a reduction ratio for the next copy. 91% Full Page 85% LTREXE 83% LGLA4 78% LGLLTR 70% A4A5 50% Custom(25-400%) Density — — You can choose the enlargement or reduction ratio for the next copy.
Level 1 Level 2 Level 3 Options Colour Adjust Red Options 1 Options 2 Descriptions See Page — Adjust the red colour for copies. See — Adjust the green colour for copies. — Adjust the blue colour for copies. — Enable or disable 2-sided copying and choose long edge or short edge.
Settings and features tables Level 1 Level 2 Level 3 Options 1 Options 2 Descriptions See Page Options — — 2-sided Copy Page Layout LongEdge LongEdge* See (MFC-9340CDW) LongEdge ShortEdge Choose a page layout option when you make 2-sided N in 1 copies from a 2-sided document. (continued) . ShortEdge LongEdge ShortEdge ShortEdge Advanced Settings — Off* — Remove Background Colour Low Change the amount of background colour that is removed.
Scan C Scan Level 1 Level 2 Level 3 Level 4 to OCR (PC Select) Options See Options (to OCR) on page 190. Save as Shortcut — — Add the current settings as a shortcut. — Start scanning. to File to Image (PC Select) (PC Select) Options Descriptions Start — Options See Options (to File, to Image and to E-mail) on page 191. Save as Shortcut — — Add the current settings as a shortcut. — Start scanning. Start — Options See Options (to File, to Image and to E-mail) on page 191.
Settings and features tables Level 1 Level 2 Level 3 Level 4 to FTP (Profile name) Options See Options (to FTP and to Network) on page 196. Save as Shortcut — — Add the current settings as a shortcut. Start — — Start scanning. Options See Options (to FTP and to Network) on page 196. Save as Shortcut — — Add the current settings as a shortcut. to Network WS Scan (Appears when you install a Web Services Scan, which is displayed in your computer’s Network explorer.
Options (to OCR) C Level 1 Level 2 Options Descriptions See Page Options 2-sided Scan Off* See (MFC-9340CDW) 2-sided Scan: Long Edge Choose the 2-sided scan mode. 2-sided Scan: Short Edge Set with Touch Panel Off(Set with Computer)* On Scan Type Colour Grey To change settings using the Touchscreen, choose On. Choose the scan type for your document. Black and White* Resolution 100 dpi 200 dpi* Choose the scan resolution for your document.
Settings and features tables Options (to File, to Image and to E-mail) C Level 1 Level 2 Options Descriptions See Page Options 2-sided Scan Off* See (MFC-9340CDW) 2-sided Scan: Long Edge Choose the 2-sided scan mode. . 2-sided Scan: Short Edge Set with Touch Panel Off(Set with Computer)* On Scan Type Colour* Grey To change settings using the Touchscreen, choose On. Choose the scan type for your document.
Options (to USB) C Level 1 Level 2 Options Descriptions See Page Options 2-sided Scan Off* See (MFC-9340CDW) 2-sided Scan: Long Edge Choose the 2-sided scan mode. Scan Type Colour* 2-sided Scan: Short Edge Grey Choose the scan type for your document.
Settings and features tables Level 1 Level 2 Options Descriptions See Page Options File Type (When you select Colour or Grey in Scan Type) Choose the file format for your document. See (continued) . PDF* JPEG PDF/A Secure PDF Signed PDF XPS (When you select Black and White in Scan Type) PDF* PDF/A Secure PDF Signed PDF TIFF Glass Scan Size A4* Letter To scan a Letter sized document, you must change the Glass Scan Size setting. File Name — Enter a file name for the scanned data.
Options (to E-mail Server) C Level 1 Level 2 Options Descriptions See Page Options 2-sided Scan Off* See (MFC-9340CDW) 2-sided Scan: Long Edge Choose the 2-sided scan mode. 2-sided Scan: Short Edge Scan Type Colour* Grey Choose the scan type for your document.
Settings and features tables Level 1 Level 2 Options Descriptions See Page Options File Type (When you select Colour or Grey in Scan Type) Choose the file format for your document. See (continued) . PDF* JPEG PDF/A Secure PDF Signed PDF XPS (When you select Black and White in Scan Type) PDF* PDF/A Secure PDF Signed PDF TIFF Glass Scan Size A4* Letter File Size Small Medium* To scan a Letter sized document, you must change the Glass Scan Size setting.
Options (to FTP and to Network) C Level 1 Level 2 Options Descriptions See Page Options 2-sided Scan Off* See (MFC-9340CDW) 2-sided Scan: Long Edge Choose the 2-sided scan mode. 2-sided Scan: Short Edge Scan Type Colour* Grey Choose the scan type for your document.
Settings and features tables Level 1 Level 2 Options Descriptions See Page Options File Type (When you select Colour or Grey in Scan Type) Choose the scan resolution and file format for your document. See (continued) PDF* .
Direct Print (MFC-9330CDW and MFC-9340CDW) C Level 1 Level 2 Level 3 Level 4 Options Descriptions Direct Print (Select File) Print Settings Paper Type Thin Set the print media type when printing directly from the USB flash memory drive. 61 Set the paper size when printing directly from the USB flash memory drive. 61 Set the page layout when printing multiple pages directly from the USB Flash memory drive. 61 Set the page orientation when printing directly from the USB Flash memory drive.
Settings and features tables Level 1 Level 2 Level 3 Level 4 Options Descriptions Direct Print (Select File) Print Settings Collate On* Enable or disable page collation when printing directly from the USB Flash memory drive. 61 Set the print quality option when printing directly from the USB Flash memory drive. 61 Set the USB direct print setting whether to print comments Document&Stamps (Markup) or stamps in the PDF file along with the text. 61 (continued) (No.
Level 1 Level 2 Level 3 Level 4 Options Descriptions DefaultSettings Orientation — — Portrait* Set the default page orientation when printing directly from the USB Flash memory drive. 63 Enable or disable the default page collation when printing directly from the USB Flash memory drive. 63 Set the default print quality option when printing directly from the USB Flash memory drive.
Settings and features tables Toner Level 1 C Level 2 Level 3 Options Descriptions See Page Toner Life — — View the approximate remaining toner life for each colour. See Test Print — — Print the Test Print page. Calibration Calibrate Yes Adjust the colour density or return the colour calibration to the factory settings. 111 Adjust the print position of each colour automatically. 112 No Reset Yes . No Auto Regist.
Web (More screen) C Level 1 Level 2 Level 3 Options Descriptions Page Web Picasa Web Albums™ — — See Google Drive™ — — Connect the Brother machine to an Internet service. Flickr® — — Facebook — — Evernote — — Dropbox — — Visit the Brother Solutions Center to download the Web Connect Guide at http://solutions.brother.com/. The factory settings are shown in Bold with an asterisk. 202 .
Settings and features tables Shortcut C Level 1 Level 2 Level 3 Level 4 Options Descriptions Add Shortcut Copy Receipt — — Choose the desired settings from the preset items. 15 Normal See Options on page 184. 2in1(ID) — Standard Set the resolution for outgoing faxes. 15 Choose the 2-sided fax scan mode. 15 Change the lightness or darkness of faxes you send. 15 Send the same fax message to more than one fax number. 15 Send a fax without using the memory.
Level 1 Level 2 Level 3 Level 4 Options Add Shortcut Fax Coverpage Setup Coverpage Setup On (continued) (Options) Off Coverpage Note (continued) Descriptions Page Automatically send a cover page you programmed. 15 If you are having difficulty sending faxes overseas, set this to On. 15 Adjust the scan area of the scanner glass to the size of the document. 15 1.Comment Off 2.Please Call 3.Urgent 4.Confidential 5. 6.
Settings and features tables Level 1 Level 2 Level 3 Level 4 Options Descriptions Add Shortcut Scan to E-mail Server — Address 16 (continued) (continued) Scan a black & white or a colour document into your E-mail Server. 2-sided Scan (MFC-9340CDW) Page Scan Type Resolution File Type Glass Scan Size File Size Web to Network — Profile Name Send scanned data to a CIFS server on your local network or on the Internet. 16 to FTP — Profile Name Send scanned data via FTP.
Entering text C When you need to enter text into the machine the keyboard will appear on the Touchscreen. Press to cycle among letters, numbers and special characters. Press to cycle between upper and lower case letters. Inserting spaces To enter a space, press Space or c. Making corrections If you entered an incorrect character and want to change it, use the arrow buttons to move the cursor under the incorrect character. Press , and then enter the correct character.
D Specifications D General D Model MFC-9140CDN Printer Type LED Print Method Electrophotographic LED Printer Memory Capacity 192 MB LCD (liquid crystal display) 3.7 in. (93.4 mm) TFT Colour Touchscreen LCD 1 and Touchpanel Power Source Power Consumption (Average) MFC-9330CDW MFC-9340CDW 256 MB 220 - 240 V AC 50/60 Hz 2 Peak Approx. 1200 W Printing Approx. 375 W at 25 °C Copying Approx. 380 W at 25 °C Ready Approx. 70 W at 25 °C Sleep Approx. 7.5 W Deep Sleep Approx. 1.
Model Noise Level MFC-9140CDN Sound Pressure MFC-9330CDW Printing LPAm = 53.0 dB (A) Ready LPAm = 33 dB (A) Sound Power Printing LWAd = 6.39 B (A) (Colour) Printing LWAd = 6.42 B (A) (Monochrome) Ready LWAd = 4.44 B (A) Temperature Operating 10 to 32.
Specifications Document Size Model Document Size (1-sided) Document Size (2-sided) D MFC-9140CDN MFC-9330CDW MFC-9340CDW ADF Width 147.3 to 215.9 mm ADF Length 147.3 to 355.6 mm Scanner Glass Width Max. 215.9 mm Scanner Glass Length Max. 300.0 mm ADF Width — 147.3 to 215.9 mm ADF Length — 147.3 to 355.
Print media D Model Paper Input MFC-9140CDN Paper Tray MFC-9330CDW MFC-9340CDW Paper Type Plain Paper, Thin Paper, Recycled Paper Paper Size A4, Letter, B5 (JIS), A5, A5 (Long Edge), A6, Executive, Legal, Folio Paper Weight 60 to 105 g/m2 Manual Feed Slot Maximum Paper Capacity Up to 250 sheets of 80 g/m2 Plain Paper Paper Type Plain Paper, Thin Paper, Thick Paper, Thicker Paper, Recycled Paper, Bond Paper, Label, Envelope, Env.Thin, Env.Thick, Glossy Paper Paper Size Width: 76.2 to 215.
Specifications Fax D Model MFC-9140CDN Compatibility ITU-T Super Group 3 Coding System MH/MR/MMR/JBIG Modem Speed 33,600 bps (with Automatic Fallback) 2-sided Print Receiving Yes Automatic 2-sided Sending — Scanning Width Max. 208 mm Printing Width Max. 208 mm Greyscale 8 bit/256 levels Resolution Horizontal 8 dot/mm Vertical Standard: MFC-9330CDW MFC-9340CDW Yes (from ADF) 3.85 line/mm Fine: 7.7 line/mm Photo: 7.7 line/mm Superfine: 15.
Copy D Model MFC-9140CDN Copy Width Max. 210 mm Automatic 2-sided Copy — Multiple Copies Stacks or Sorts up to 99 pages Reduce/Enlarge 25% to 400% (in increments of 1%) Up to 600 × 600 dpi Resolution First Copy Out Time 1 1 Monochrome Less than 19 seconds at 23 °C / 230 V Colour Less than 22 seconds at 23 °C / 230 V From Ready mode and standard tray.
Specifications Scanner D Model MFC-9140CDN MFC-9330CDW MFC-9340CDW Colour / Mono Yes / Yes TWAIN Compliant Yes (Windows® XP/ Windows Vista® / Windows® 7 / Windows® 8 Mac OS X v10.6.8 / 10.7.x / 10.8.x 1) WIA Compliant Yes (Windows® XP / Windows Vista ® / Windows® 7 / Windows® 8) ICA Compliant Colour Depth Yes (Mac OS X v10.6.8 / 10.7.x / 10.8.
Printer D Model MFC-9140CDN Automatic 2-sided Print Yes Emulations PCL6, BR-Script3 (PostScript® 3™) Resolution 600 dpi × 600 dpi, 2400 dpi (600 dpi × 2400 dpi) quality Print Speed (2-sided) Monochrome MFC-9330CDW Up to 7 sides/minute (Up to 3.5 sheets/minute) (A4 size) 1 Colour Up to 7 sides/minute (Up to 3.
Specifications Interfaces D Model MFC-9140CDN USB Hi-Speed USB 2.0 1 2 MFC-9330CDW D MFC-9340CDW It is recommended you use a USB 2.0 cable (Type A/B) that is no more than 2.0 metres long. 10BASE-T / 100BASE-TX Ethernet 3 Use a straight-through Category 5 (or greater) twisted-pair cable. Wireless LAN 3 — IEEE 802.11b/g/n (Infrastructure mode/Ad-hoc mode) IEEE 802.11g/n (Wi-Fi Direct™) 1 Your machine has a Hi-Speed USB 2.0 interface.
Network D NOTE For more information about the Network specifications, see Network User's Guide. Model MFC-9140CDN MFC-9330CDW MFC-9340CDW LAN You can connect your machine to a network for Network Printing, Network Scanning, PC-Fax Send, PC-Fax Receive (Windows® only) and Remote Setup 1. Also included is Brother BRAdmin Light 2 3 Network Management software.
Specifications Direct Print feature D Model MFC-9140CDN MFC-9330CDW MFC-9340CDW Compatibility — PDF version 1.7 1, JPEG, Exif + JPEG, PRN (created by Brother printer driver), TIFF (scanned by all Brother MFC or DCP models), XPS version 1.0 2 Interface — USB direct interface 1 PDF data including a JBIG2 image file, a JPEG2000 image file or a transparency file is not supported. 2 Not available to countries subject to applicable export regulations.
Computer requirements D Hard Disk Space to install PC Interface Computer Platform & Operating System Version USB 2 10/100Base-TX Wireless (Ethernet) 802.11b/g/n Windows® XP Home 1 4 Professional 1 4 XP Professional x64 Edition 14 Windows 310 MB 500 MB 500 MB 650 MB 1.
Specifications Consumable items Model MFC-9140CDN Toner Inbox Cartridge D D MFC-9330CDW MFC-9340CDW Model Name Black Approx. 1,000 pages A4 or Letter page 1 — Cyan Approx. 1,000 pages A4 or Letter page 1 — Black Approx. 2,500 pages A4 or Letter page 1 TN-261BK Cyan Approx. 1,400 pages A4 or Letter page 1 TN-261C Magenta Yellow Standard High Yield Magenta TN-261M Yellow TN-261Y Black Cyan — Approx.
E Index A D Address Book changing ...............................................57 setting up ..............................................56 using .....................................................55 ADF (automatic document feeder) using .....................................................34 Answering machine (TAD) connecting .............................................51 Apple Macintosh See Software User's Guide. Automatic fax receive .............................................42 fax redial .
F M Fax codes changing ...............................................54 remote activation code ..........................53 remote deactivation code ......................53 Fax Detect ................................................44 Fax, stand-alone receiving fax detect ...........................................44 from extension telephone ..................53 ring delay, setting ...............................43 telephone line interference ..............146 sending ...................................
P R Paper .......................................................29 how to load ............................................21 in manual feed slot .............................23 in paper tray .......................................21 recommended ................................ 29, 30 size ................................................. 28, 29 tray capacity ..........................................30 type ................................................ 28, 29 Pause ...................................
T W TAD (telephone answering device), external ....................................................42 connecting ............................................51 recording OGM .....................................52 Tel/R ........................................................53 Telephone line connections ...........................................51 difficulties ............................................139 interference .........................................146 multi-line (PBX) ......................
Visit us on the World Wide Web http://www.brother.com/ These machines are approved for use in the country of purchase only. Local Brother companies or their dealers will only support machines purchased in their own countries. www.brotherearth.