
User Manual
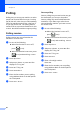
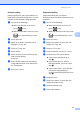
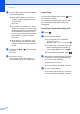


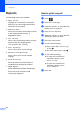
Table Of Contents
- Advanced User’s Guide MFC-9140CDN/MFC-9330CDW/MFC-9340CDW
- User’s Guides and where do I find them?
- Table of Contents
- 1 General Setup
- 2 Security features
- 3 Sending a fax
- Additional sending options
- Additional sending operations
- Sending a fax manually
- Dual access
- Broadcasting
- Real Time Transmission
- Overseas Mode
- Delayed Fax
- Delayed batch transmission
- Checking and cancelling waiting jobs
- Setting your changes as the new default
- Restoring all fax settings to the factory settings
- Saving fax options as a Shortcut
- Electronic cover page
- Destination Display
- Polling
- 4 Receiving a fax
- 5 Dialling and storing numbers
- 6 Printing reports
- 7 Making copies
- Copy settings
- Stop copying
- Improving copy quality
- Enlarging or reducing copies
- 2-sided Copying
- Adjusting Density and Contrast
- Sorting copies
- Making N in 1 copies (page layout)
- 2 in 1 ID Copy
- Adjusting the Colour Saturation
- Making 2-sided N in 1 copies (MFC-9340CDW)
- Removing Background Colour
- Saving copy options as a Shortcut
- Saving paper
- Copy settings
- A Routine maintenance
- B Glossary
- Index

Chapter 6
44
Reports 6
The following reports are available:
1 XMIT Verify
Displays the Transmission Verification
Report for your last outgoing 200 faxes
and prints the last report.
2 Address Book
Prints a list of names and numbers stored
in the Address Book memory, in
alphabetical order.
3 Fax Journal
Prints a list of information about your last
200 incoming and outgoing faxes.
(TX: transmit.) (RX: receive.)
4 User Settings
Prints a list of your current settings.
5 Network Configuration
Prints a list of your current network
settings.
6 Drum Dot Print
Prints the Drum Dot Check Sheet to
troubleshoot a dotted print problem.
7 WLAN Report
(MFC-9330CDW and MFC-9340CDW)
Prints the result of wireless LAN
connectivity diagnosis.
How to print a report 6
a Press .
b Press All Settings.
c Swipe up or down, or press a or b to
display Print Reports.
d Press Print Reports.
e Swipe up or down, or press a or b to
display the report you want.
f Press the report name.
g Do one of the following:
If you chose XMIT Verify, go
to step h.
For other reports, go to step i.
h Do one of the following:
To view the Transmission
Verification Report, press
View on LCD.
To print the Transmission
Verification Report, press
Print Report.
i Press OK.