
User Manual
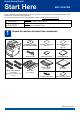

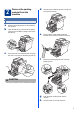
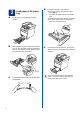
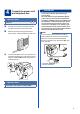
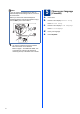
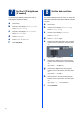
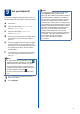
Table Of Contents
- Quick Setup Guide MFC-9970CDW
- Start Here
- 1 Unpack the machine and check the components
- 2 Remove the packing material from the machine
- 3 Load paper in the paper tray
- 4 Connect the power cord and telephone line
- 5 Choose your language (if needed)
- 6 Choose the correct Receive Mode
- 7 Set the LCD brightness (if needed)
- 8 Set the date and time
- 9 Set your Station ID
- 10 Fax Transmission Report
- 11 Set tone or pulse dialing mode (Canada only)
- 12 Set the telephone line compatibility
- 13 Dial Prefix
- 14 Automatic Daylight Savings Time
- 15 Set the Time Zone
- 16 Send in the Product Registration and Test Sheet (USA only)
- 17 Choose your connection type
- For USB Interface Users (Windows® 2000 Professional/XP/XP Professional x64 Edition/Windows Vista®/Windows® 7)
- For USB Interface Users (Mac OS X 10.4.11 - 10.6.x)
- For Wired Network Interface Users (Windows® 2000 Professional/XP/XP Professional x64 Edition/Windows Vista®/Windows® 7)
- For Wired Network Interface Users (Mac OS X 10.4.11 - 10.6.x)
- For Wireless Network Interface Users
- 18 Before you begin
- 19 Confirm your network environment (Infrastructure Mode)
- Connecting the Brother machine to the wireless network
- Troubleshooting
- Entering Text for Wireless Settings
- Install the Drivers & Software (Windows® 2000 Professional/XP/XP Professional x64 Edition/Windows Vista®/Windows® 7)
- Install the Drivers & Software (Mac OS X 10.4.11 - 10.6.x)
- For Network Users
- Other Information
- Options and Consumables
- brother USA/CAN
- Start Here

10
10
Fax Transmission Report
Your Brother machine is equipped with a
Transmission Verification Report that can be used as
confirmation that you sent a fax. This report lists the
name or fax number of the receiving party, the date,
time, and duration of the transmission, the number of
pages transmitted, and whether or not the
transmission was successful. If you want to use the
Fax Transmission Report feature see Printing reports
in the Advanced User's Guide.
11
Set tone or pulse dialing
mode (Canada only)
Your machine comes set for Tone dialing service. If
you have Pulse dialing service (rotary), you need to
change the dialing mode.
a Press MENU.
b Press a or b to display Initial Setup.
Press Initial Setup.
c Press a or b to display Tone/Pulse.
Press Tone/Pulse.
d Press Pulse (or Tone).
e Press Stop/Exit.
12
Set the telephone line
compatibility
If you are connecting the machine to a VoIP service
(over the Internet) you need to change the
compatibility setting.
a Press MENU.
b Press a or b to display Fax.
Press Fax.
c Press a or b to display Miscellaneous.
Press Miscellaneous.
d Press Compatibility.
e Press Basic(for VoIP).
f Press Stop/Exit.
Note
If you are using an analog telephone line you can
skip this step.