ADVANCED USER’S GUIDE MFC-9970CDW Version 0 USA/CAN
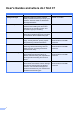
User's Guides and where do I find it? i Which manual? What's in it? Where is it? Safety and Legal Read this Guide first. Please read the Safety Instructions before you set up your machine. See this Guide for trademarks and legal limitations. Printed / In the Box Quick Setup Guide Follow the instructions for setting up your machine and installing the drivers and software for the operating system and connection type you are using.
Table of Contents 1 General Setup 1 Memory storage..................................................................................................... 1 Volume settings ..................................................................................................... 1 Ring volume..................................................................................................... 1 Beeper volume ................................................................................................
Additional sending operations..............................................................................19 Sending a fax manually .................................................................................19 Sending a fax at the end of a conversation ...................................................19 Dual access (black & white only) ...................................................................20 Broadcasting (black & white only) .............................................................
6 Printing reports 49 Fax reports........................................................................................................... 49 Transmission verification report..................................................................... 49 Fax Journal.................................................................................................... 49 Reports ................................................................................................................
v C Glossary D Index 97 101
1 General Setup Memory storage Your menu settings are stored permanently, and in the event of a power failure will not be lost. Temporary settings (for example, Contrast, Overseas Mode) will be lost. Also, during a power failure the machine will retain the date and time and programed fax timer jobs (for example, Delayed Fax) for approximately 60 hours. Other fax jobs in the machine memory will not be lost.
Chapter 1 Beeper volume When the beeper is on, the machine will beep when you press a key, make a mistake, or after you send or receive a fax. You can choose a range of volume levels, from High to Off. a b c d e f 2 1 Speaker volume You can choose a range of speaker volume levels, from High to Off. a b Press MENU. c Press a or b to display Volume. Press Volume. d e f Press Speaker. Press MENU. Press a or b to display General Setup. Press General Setup. Press a or b to display Volume.
General Setup Automatic daylight savings time Ecology features 1 1 Toner Save 1 You can set the machine to change automatically for Daylight Savings Time. It will set itself forward one hour in the Spring, and back one hour in the Fall. You can save toner using this feature. When you set Toner Save to On, print appears lighter. The default setting is Off. a b a b Press MENU. Press MENU. Press a or b to display Initial Setup. Press Initial Setup. Press a or b to display General Setup.
Chapter 1 Sleep mode 1 The Sleep Mode Setting can reduce power consumption. When the machine is in Sleep Mode (Power Save mode) it acts as though it were turned off. Receiving data or starting an operation wakes up the machine from Sleep mode to Ready mode. The timer will restart if any operation is carried out on the machine, such as receiving a fax or computer data or making a copy. The default setting is 3 minutes. When the machine goes into Sleep mode, the LCD back light turns off. a b Press MENU.
General Setup LCD screen Setting the backlight brightness 1 1 You can adjust the brightness of the LCD backlight. If you are having difficulty reading the LCD, try changing the brightness setting. a b Setting up the prefix number Press a or b to display General Setup. Press General Setup. a b Press MENU. c Press a or b to display Dial Prefix. Press Dial Prefix. d Do one of the following: Press a or b to display LCD Settings. Press LCD Settings. d e f Press Backlight.
Chapter 1 Changing the prefix number a b c Press MENU. Press a or b to display Initial Setup. Press Initial Setup. Press a or b to display Dial Prefix. Press Dial Prefix. d Press On (or Off). You can turn off the prefix number by pressing Off. The prefix number will remain off until you press On. e f Press Dial Prefix. Repeat until the prefix number is correct, and then press OK. To exit without making a change, press OK. Note • You can use the numbers and symbols 0 to 9, #, and l.
2 Security features Secure Function Lock 2.0 Secure Function Lock lets you restrict Public access to the following machine functions: Fax Tx Fax Rx Copy Scan USB Direct PC Print Color Print This feature also prevents users from changing the Default settings of the machine by limiting access to the MENU settings. 2 2 Note • Secure Function Lock can be set manually at the control panel or by using Web Based Management. We recommend using Web Based Management to configure this feature.
Chapter 2 Setting and changing the Administrator Password Changing the password a b Press MENU. c Press a or b to display Security. Press Security. d e f Press Function Lock. g Enter a four-digit number for the new password by pressing the buttons on the Touchscreen. Press OK. Press a or b to display General Setup. Press General Setup. h Re-enter the password when the LCD shows Verify. Press OK. c Press a or b to display Security. Press Security. i Press Stop/Exit.
Security features Setting up and changing the Public user mode Public user mode restricts the functions that are available for Public users. Public users do not need to enter a password to access the features made available through this setting. You can set up one Public user. a b Press MENU. Press a or b to display General Setup. Press General Setup. c Press a or b to display Security. Press Security. d e f Press Function Lock.
Chapter 2 j To set up a restricted user, press Enable or Disable for each operation, as follows: Press Fax Tx. Then press Enable or Disable. After you have set Fax Tx, repeat these steps for Fax Rx, Copy, Scan, Direct Print, Print and Color Print. k Repeat steps g to j for entering each additional user and password. l Press Stop/Exit. Note a b Press MENU. Press a or b to display General Setup. Press General Setup.
Security features Turning Secure Function Lock on/off Turning Secure Function Lock off 2 a Press User: Public or User: xxxxx (where xxxxx is the user’s name). b c Press Lock OniOff. d Press Stop/Exit. Turning Secure Function Lock on a b c Press MENU. Press a or b to display General Setup. Press General Setup. Press a or b to display Security. Press Security. d e f Press Function Lock. g Press Stop/Exit. Press Lock OffiOn.
Chapter 2 Switching Users This setting allows you to switch between registered restricted users or Public mode when Secure Function Lock is turned on. 2 Changing to the Public Mode a Press User: xxxxx. (where xxxxx is the user’s name.) b Press Go to Public. Changing to the restricted user Mode a Press User: Public or User: xxxxx (where xxxxx is the user’s name). Press Change User. b c d Press a or b to display your user name. e Press Stop/Exit. Press your user name.
Security features Setting Lock Setting Lock lets you set a password to stop other people from accidentally changing your machine settings. Make a careful note of your password. If you forget it, you will have to reset the passwords stored in the machine. Please call your administrator or Brother Customer Service. While Setting Lock is On, you cannot access MENU and Address Book Functions. Also, machine settings cannot be changed through the Remote Setup utility while Setting Lock is On.
Chapter 2 Changing your Setting Lock password a b Press MENU. Press a or b to display General Setup. Press General Setup. c Press a or b to display Security. Press Security. d e f Press Setting Lock. Press Set Password. Enter the registered four-digit password by pressing the buttons on the Touchscreen. Press OK. g Enter a four-digit number for the new password by pressing the buttons on the Touchscreen. Press OK. h Re-enter the password when the LCD shows Verify. Press OK.
Security features Restricting dialing 2 a b This feature is to prevent users from sending a fax or call to a wrong number by mistake. You can set the machine to restrict dialing by using the dial pad, One Touch and Speed Dial. If you choose Off, the machine does not restrict the dialing method. If you choose Enter # twice, the machine will prompt you to re-enter the number, and then if you re-enter the same number correctly, the machine will start dialing.
Chapter 2 LDAP server restriction a b Press MENU. c Press a or b to display Dial Restrict. Press Dial Restrict. d e f Press LDAP server. Press a or b to display Fax. Press Fax. Press Off, Enter # twice or On. Press Stop/Exit. Note • The Enter # twice setting will not work if you use an external phone or press Hook before entering the number. You will not be asked to re-enter the number. • You can not restrict dialing when you use Redial/Pause.
3 Sending a fax Additional sending options Sending faxes using multiple settings Before you send a fax, you can change any combination of these settings: duplex fax, contrast, resolution, overseas mode, delayed fax timer, polling transmission, real time transmission, broadcast, glass scan size or cover page settings. a 3 3 3 You need to choose the duplex scanning format before you send a 2-sided fax. The format you choose will depend on the layout of your 2-sided document.
Chapter 3 Volume 3 You can adjust the speaker volume temporarily. a b Press The quality of a fax can be improved by changing the Fax Resolution. Resolution can be changed for the next fax. (FAX). Press d or c to display Volume. Press Volume. c Press to decrease or to increase the speaker volume level. d Press OK. Contrast 3 For most documents the default setting of Auto will give the best results. Auto automatically chooses the suitable contrast for your document.
Sending a fax Additional sending operations Sending a fax at the end of a conversation Sending a fax manually 3 Manual transmission 3 Manual transmission lets you hear the dialing, ringing and fax-receiving tones while sending a fax. a b c d e Make sure you are in Fax mode Load your document. Press Hook and listen for a dial tone. Or pick up the handset of the external telephone and listen for a dial tone. Dial the fax number you want to call. 3 3 .
Chapter 3 Dual access (black & white only) 3 Broadcasting (black & white only) You can dial a number, and start scanning the fax into memory—even when the machine is sending from memory, receiving faxes or printing PC data. The LCD will show the new job number. Broadcasting lets you send the same fax message to more than one fax number. You can include Groups, One Touch, Speed Dial numbers and up to 50 manually dialed numbers in the same broadcast.
Sending a fax How to broadcast a fax 3 Note To help you choose numbers easily, press Address Book and then press (Search). Canceling a Broadcast in progress 3 While broadcasting you can cancel the fax currently being sent or the whole broadcast job. a b PressStop/Exit. Do one of the following: a b c Press Press d or c to display Broadcasting. Press Broadcasting. To cancel the current job, press the button that displays the number being dialed. Go to step d.
Chapter 3 Real Time Transmission 3 When you are sending a fax, the machine will scan the documents into the memory before sending it. Then, as soon as the telephone line is free, the machine will start dialing and sending. Sometimes, you may want to send an important document immediately, without waiting for memory transmission. You can turn on Real Time TX.
Sending a fax Delayed batch transmission (black & white only) Before sending the delayed faxes, your machine will help you economize by sorting all the faxes in the memory by destination and scheduled time. All delayed faxes that are scheduled to be sent at the same time to the same fax number will be sent as one fax to save transmission time. a b Press MENU. c Press a or b to display Setup Send. Press Setup Send. d e f Press Batch TX. Press a or b to display Fax. Press Fax.
Chapter 3 Setting your changes as the new default You can save the fax settings for Fax Resolution, Contrast, Real Time TX, Glass ScanSize and Coverpage Setup you use most often by setting them as the default. These settings will stay until you change them again. a b Press Press d or c to choose the setting you want to change, and then press the new option. Repeat this step for each setting you want to change. After changing the last setting, press d or c to display Set New Default.
Sending a fax Electronic cover page (black & white only) This feature will not work unless you have already programmed your Station ID. (See the Quick Setup Guide.) You can automatically send a cover page with every fax. Your cover page includes your Station ID, a comment, and the name (or number) stored in the One Touch or Speed Dial memory. By choosing Next Fax:On you can also display the number of pages on the cover page. You can choose one of the following preset comments. 1.Comment Off 2.
Chapter 3 Send a cover page for all faxes You can set the machine to send a cover page whenever you send a fax. a b c d e 26 Press (FAX). Press d or c to display Coverpage Setup. Press Coverpage Setup. Press On (or Off). Press a or b to choose a comment. Enter two digits to show the number of pages you are sending. Press OK. For example, enter 0, 2 for 2 pages or 0, 0 to leave the number of pages blank. If you make a mistake, press Clear to back up and re-enter the number of pages.
Sending a fax Polling overview 3 Polling lets you set up your machine so other people can receive faxes from you, but they pay for the call. It also lets you call somebody else’s fax machine and receive a fax from it, so you pay for the call. The polling feature needs to be set up on both machines for this to work. Not all fax machines support polling.
4 Receiving a fax Remote Fax Options (black & white only) Fax Forwarding 4 Remote Fax Options are NOT available for color faxes. Remote Fax Options let you receive faxes while you are away from the machine. You can use only one Remote Fax Option at a time. Receiving faxes into memory when the paper tray is empty As soon as the paper tray becomes empty during fax reception, the LCD shows No Paper and begins receiving faxes into the machine’s memory. Put some paper in the paper tray.
Receiving a fax Note • You can enter an E-mail address by pressing on the Touchscreen. Paging 4 • You can display your stored numbers and E-mail addresses in alphabetical order by pressing on the Touchscreen. When Paging is chosen, the machine dials the cell phone or pager number you programmed. This activates your cell phone or pager so you will know that you have a fax message in the machine’s memory. • You cannot enter a forwarding number using a One Touch key on the control panel.
Chapter 4 h Press Stop/Exit. Fax Storage Note The Fax Storage feature lets you store your received faxes in the machine’s memory. You can retrieve stored fax messages from a fax machine at another location using the remote retrieval commands. (See Retrieving fax messages on page 34.) Your machine will automatically print a copy of the stored fax. • If you have set Paging, a backup copy will automatically be printed at the machine. • You cannot change a Paging or PIN number remotely.
Receiving a fax PC-Fax Receive 4 If you turn on the PC-Fax Receive feature your machine will store received faxes in memory and send them to your PC automatically. You can then use your PC to view and store these faxes. Even if you have turned off your PC (at night or on the weekend, for example), your machine will receive and store your faxes in its memory. The number of received faxes that are stored in the memory will appear on the LCD.
Chapter 4 Changing Remote Fax Options If received faxes are left in your machine’s memory when you change to another Remote Fax Option, the LCD will ask you one of the following questions: Erase All fax? IMPORTANT 4 If you choose Backup Print On, the machine will also print received faxes at your machine so you will have a copy. This is a safety feature in case there is a power failure before the fax is forwarded or a problem at the receiving machine.
Receiving a fax Remote retrieval 4 The remote retrieval feature lets you retrieve your stored fax messages when you are not at the machine. You can call your machine from any touch tone telephone or fax machine, then use the Remote Access Code to retrieve your messages. Setting a Remote Access Code 4 Using your Remote Access Code a Dial your fax number from a telephone or another fax machine using touch tone.
Chapter 4 Retrieving fax messages a Dial your fax number from a telephone or another fax machine using touch tone. b When your machine answers, immediately enter your Remote Access Code (3 digits followed by l). If you hear one long beep, you have messages. c When you hear two short beeps, use the dial pad to press 9 6 2. d Wait for a long beep, and then use the dial pad to enter the number of the remote fax machine where you want your fax messages sent, followed by ## (up to 20 digits).
Receiving a fax Remote fax commands 4 Follow the commands below to access features when you are away from the machine. When you call the machine and enter your Remote Access Code (3 digits followed by l), the system will give two short beeps and you must enter a remote command. Remote commands 95 Change the fax forwarding, paging or fax storage settings 1 OFF You can choose Off after you have retrieved or erased all your messages. 2 Fax Forwarding One long beep means the change is accepted.
Chapter 4 Additional receiving operations Printing a reduced incoming fax If you choose On, the machine automatically reduces each page of an incoming fax to fit on one page of A4, Letter, Legal or Folio size paper. The machine calculates the reduction ratio by using the page size of the fax and your Paper Size setting (MENU, General Setup, Tray Setting, Tray Use:Fax). See Paper Size and Type in Chapter 2 of the Basic User's Guide. a b c Press MENU. Press a or b to display Fax. Press Fax.
Receiving a fax Setting the Fax Receive Stamp (black & white only) 4 Receiving a fax at the end of a conversation You can set the machine to print the received date and time in the top center of each received fax page. At the end of a conversation you can ask the other party to send you a fax before you both hang up. a b Press MENU. a Ask the other party to place the document in their machine and to press the Start or Send key. c Press a or b to display Setup Receive. Press Setup Receive.
Chapter 4 Setting the Print Density You can adjust the Print Density setting to make your printed pages darker or lighter. a b Press MENU. c Press a or b to display Setup Receive. Press Setup Receive. Press a or b to display Fax. Press Fax. d Press a or b to display Print Density. Press Print Density. e Press c to make the print darker. Or, press d to make the print lighter. f 38 Press Stop/Exit.
Receiving a fax Polling overview e Press Manual and enter a number by pressing the buttons on the Touchscreen. Polling lets you set up your machine so other people can receive faxes from you, but they pay for the call. It also lets you call somebody else’s fax machine and receive a fax from it, so you pay for the call. The polling feature needs to be set up on both machines for this to work. Not all fax machines support polling. Polling receive Press c d Press OK. Press Address Book.
Chapter 4 c When the LCD asks if you want to cancel the entire sequential polling job, do one of the following: Press Yes to confirm. To exit without canceling, press No or Stop/Exit. d Do one of the following: To cancel the current job, press Yes. To exit without canceling, press No or Stop/Exit.
5 Dialing and storing numbers Telephone line services Tone or Pulse (Canada only) Special line considerations Pick up the handset of the external telephone or press Hook. b Press # on the machine’s control panel. Any digits dialed after this will send tone signals. When you hang up, the machine will return to the Pulse dialing service.
Chapter 5 d The third way is the easiest: Buy a triplex adapter. You can plug a triplex adapter into an RJ14 outlet. It separates the wires into two separate RJ11 jacks (Line 1, Line 2) and a third RJ14 jack (Lines 1 and 2). If your machine is on Line 1, plug the machine into L1 of the triplex adapter. If your machine is on Line 2, plug it into L2 of the triplex adapter. Plug one end of the second telephone line cord for your TAD into the L2 jack of the two-line TAD. Plug the other end into the EXT.
Dialing and storing numbers Additional dialing operations Dialing access codes and credit card numbers 5 5 Sometimes you may want to choose from several long distance carriers when you send a fax. Rates may vary depending on the time and destination. To take advantage of low rates, you can store the access codes of long distance carriers and credit card numbers as One Touch and Speed Dial numbers.
Chapter 5 Additional ways to store numbers Setting up Groups for Broadcasting f Enter the Group number by pressing the buttons on the Touchscreen. Use the chart for Entering text in Appendix C of the Basic User's Guide to help you enter numbers. Press OK. g To select the telecommunication medium and the file type, press d or c to display Fax/IFAX, E-Mail Color PDF, E-Mail Color JPEG, E-Mail Color XPS, E-Mail Gray PDF, E-Mail Gray JPEG, E-Mail Gray XPS, E-Mail B&W PDF or E-Mail B&W TIFF.
Dialing and storing numbers i To choose the fax/scan resolution for the Group number, go to the appropriate next step as shown in the following table. n Select the PDF type from PDF, PDF/A, Secure PDF or Signed PDF that will be used to send E-mail.
Chapter 5 Options for Setting Up Groups 5 The following chart shows the selections for setting up Group numbers. When you store numbers, the LCD instructs you to choose from the options shown in the following steps.
Dialing and storing numbers Changing Group numbers You can change a Group number that has already been stored. If the Group has a fax forwarding number, it will be dimmed on the LCD. You cannot select the number to make changes. Changing a Group name a b c d e f Press Address Book. Press More. Note 5 • How to change the stored name or number: If you want to change a character, press d or c to position the cursor under the character you want to change, and then press . Re-enter the character.
Chapter 5 Deleting Group numbers You can delete a Group number that has already been stored. If a Group has a scheduled job or fax forwarding number, it will be dimmed on the LCD. You cannot select the number to delete it. a b c d e Press Address Book. Press More. Press Delete. Press a or b to display the Group you want to delete. Press the check box of the Group you want to delete to check it. Press OK. Do one of the following: To Delete the Group, press Yes.
6 Printing reports Fax reports e 6, 12, 24 hours, 2 or 7 days The machine will print the report at the chosen time and then erase all jobs from its memory. If the machine's memory becomes full with 200 jobs before the time you chose has passed, the machine will print the Journal early and then erase all jobs from the memory. If you want an extra report before it is due to print, you can print it without erasing the jobs from the memory.
Chapter 6 Reports The following reports are available: 1 Transmission Displays the Transmission Verification Report for your last outgoing 200 faxes and prints the last report. 2 Help List Prints a list of commonly used functions to help you program your machine. 3 Tel Index List 6 How to print a report a b Press MENU. c Press a or b to display the report you want to print. Press the report you want to print. d (Tel Index List only) Press Numerical Order or Alphabetical Order.
7 Making copies Copy settings 7 7 Auto These settings are temporary, and the machine returns to its default settings one minute after copying, unless you have set the Mode Timer to 30 seconds or less. (See Mode Timer on page 6.) Auto is the recommended mode for ordinary printouts. Suitable for documents that contain both text and photographs. Text To change a setting, press (COPY) and then press d or c to scroll through the copy settings. When the setting you want is displayed, press the button.
Chapter 7 Enlarging or reducing the image copied To enlarge or reduce the next copy follow the instructions below: a b c d Press (COPY). Load your document. Enter the number of copies you want. Press d or c to display Enlarge/Reduce. Press Enlarge/Reduce. e Press 100%, Enlarge, Reduce or Custom(25-400%). f Do one of the following: If you chose Enlarge or Reduce, press the enlargement or reduction ratio button you want.
Making copies If you want to use the automatic duplex copy feature, load your document in the ADF. If you get an Out of Memory message while you are making duplex copies, try installing extra memory. (See Installing extra memory on page 95.) You must choose a 2-sided copy layout from the following options before you can start duplex copying. The layout of your document determines which 2-sided copy layout you should choose.
Chapter 7 d Press d or c to display Duplex Copy. Press Duplex Copy. e Press 2sidei2side, 1sidei2side 2sidei1side 1sidei2side 2sidei1side Off. f Press Load your document. Press d or c to display Tray Use. Press Tray Use. Press MP>T1, M>T1>T2 1, T1>MP, T1>T2>M 1, Tray#1 Only, Tray#2 Only 1 or MP Only. T2 and Tray#2 Only appears only if the optional lower tray is installed. If you do not want to change additional settings, press Black Start or Color Start.
Making copies Sorting copies using the ADF You can sort multiple copies. Pages will be stacked in the order 1 2 3, 1 2 3, 1 2 3, and so on. a b c d Press e f Press Sort. (COPY). Load your document in the ADF. 7 Making N in 1 copies (page layout) You can reduce the amount of paper used when copying by using the N in 1 copy feature. This allows you to copy two or four pages onto one page. If you want to copy both sides of an ID card onto one page, see 2 in 1 ID Copy on page 57.
Chapter 7 h i If you are copying from the scanner glass: Place the next page on the scanner glass. Press Black Start or Color Start. Repeat steps g and h for each page of the layout. Insert your document face down in the direction shown below: 2 in 1 (P) After all the pages have been scanned, press No in step g to finish.
Making copies 2 in 1 ID Copy You can copy both sides of your identification card onto one page, keeping the original card size. Note You can copy an identification card to the extent permitted under applicable laws. See Legal limitations for copying in the Safety and Legal Booklet. a b Press 7 h Press Black Start or Color Start. The machine scans the other side of the card and prints the page. Note When 2 in 1 ID Copy is chosen, the machine sets the quality to Photo and the contrast to +2. (COPY).
Chapter 7 Adjusting Color (Saturation) 7 You can change the default setting for color saturation. a b c d Press e f Press Red, Green or Blue. (COPY). Load your document. Enter the number of copies you want. Press d or c to display Color Adjust. Press Color Adjust. Press d to decrease or c to increase the color saturation. Press OK. g Repeat steps e and f if you want to adjust the next color. Press . h If you do not want to change additional settings, press Black Start or Color Start.
Making copies Setting your favorites 7 a b Press c d Press Rename. Press Store. e Press the location where you want to store your setting for Favorite:1, Favorite:2 or Favorite:3. Enter the new name (up to 12 characters). f Press OK. a b Press c Press d or c to display Favorite Settings. Press Favorite Settings. f 7 After you stored your favorite setting, you can rename it. You can store the copy settings that you use most often by setting them as a favorite.
A Routine maintenance Cleaning and checking the machine Clean the outside and inside of the machine regularly with a dry, lint-free cloth. When you replace the toner cartridge or the drum unit, make sure that you clean the inside of the machine. If printed pages are stained with toner, clean the inside of the machine with a dry, lint-free cloth.
Routine maintenance c Wipe the outside of the machine with a dry, lint-free soft cloth to remove dust. Cleaning the scanner A a Turn off the machine’s power switch. Unplug the telephone line cord first, disconnect all cables, and then unplug the power cord from the AC power outlet. b Unfold the ADF document support (1) and then open the ADF cover (2). Clean the white bar (3) and the scanner glass strip (4) underneath it with a soft lint-free cloth moistened with water.
d In the ADF unit, clean the white bar (1) and the glass strip (2) underneath it with a soft lint-free cloth moistened with water. Cleaning the laser scanner windows a Turn off the machine’s power switch. Unplug the telephone line cord first, disconnect all cables, and then unplug the power cord from the AC power outlet. b Press the front cover release button and then open the front cover.
Routine maintenance c Hold the green handle of the drum unit. Pull the drum unit out until it stops. d Turn the green lock lever (1) at the left of the machine counterclockwise to the release position. Holding the green handles of the drum unit, lift the front of the drum unit and remove it from the machine.
IMPORTANT e Wipe the four scanner windows (1) with a dry, lint-free cloth. • We recommend that you place the drum unit and/or the toner cartridge on a clean, flat surface with a sheet of disposable paper or cloth underneath it in case you accidentally spill or scatter toner. • To prevent damage to the machine from static electricity, DO NOT touch the electrodes shown in the illustration. 1 f • Hold the green handles of the drum unit when you carry it. DO NOT hold the sides of the drum unit.
Routine maintenance g Match the guide ends (2) of the drum unit to the c marks (1) on both sides of the machine, then gently slide the drum unit into the machine until it stops at the green lock lever. i Push the drum unit in until it stops. 1 2 A h Turn the green lock lever (1) clockwise to the lock position. j k Close the front cover of the machine. Plug the machine’s power cord back into the AC power outlet first, connect all cables, and then plug in the telephone line cord.
Cleaning the corona wires If you have print quality problems, clean the four corona wires as follows: a 66 Press the front cover release button and then open the front cover. A b Hold the green handle of the drum unit. Pull the drum unit out until it stops.
Routine maintenance c Hold the handle of the toner cartridge and slightly push it toward the machine to unlock it. Then pull it out of the drum unit. Repeat this for all the toner cartridges. d Push to release the latches of the corona wire cover (1), and then open the cover.
e Clean the corona wires inside the drum unit by gently sliding the green tabs from left to right and right to left several times. 1 Note • Be sure to return the tab to the home position (a) (1). If you do not, printed pages may have a vertical stripe. • We recommend that you clean the corona wire for each color. If you want to clean only the corona wire of the color that caused the print quality problem, see the illustration below to identify the position of each of the corona wires.
Routine maintenance f Close the corona wire cover. h Hold the handle of the toner cartridge and slide the toner cartridge into the drum unit, then slightly pull it toward you until you hear it click into place. Make sure that you match the toner cartridge color to the same color label on the drum unit. Repeat this for all the toner cartridges. A C g Repeat steps d to f to clean each of three remaining corona wires.
i Push the drum unit in until it stops. Cleaning the drum unit If your printout has colored dots or other repeating marks at 3.7 in. (94 mm) intervals, the drum may have foreign material, such as glue from a label stuck on the drum surface. Follow the steps below to solve the problem. j 70 Close the front cover of the machine. a Make sure that the machine is in the Ready mode. b c Press MENU. d Press a or b to display Drum Dot Print. Press Drum Dot Print. e The machine will display Press Start.
Routine maintenance g Press the front cover release button and then open the front cover. h Hold the green handle of the drum unit. Pull the drum unit out until it stops.
i Turn the green lock lever (1) at the left of the machine counterclockwise to the release position. Holding the green handles of the drum unit, lift the front of the drum unit and remove it from the machine. 1 IMPORTANT • We recommend that you place the drum unit on a clean, flat surface with a sheet of disposable paper or cloth underneath it in case you accidentally spill or scatter toner. • To prevent damage to the machine from static electricity, DO NOT touch the electrodes shown in the illustration.
Routine maintenance j Hold the handle of the toner cartridge and slightly push it to unlock it. Then pull it out of the drum unit. Repeat this for all the toner cartridges. • To prevent damage to the machine from static electricity, DO NOT touch the electrodes shown in the illustration. IMPORTANT • We recommend that you place the toner cartridges on a clean, flat surface with a sheet of disposable paper or cloth underneath it in case you accidentally spill or scatter toner.
k Turn the drum unit over by holding the green handles. Make sure that the drum unit gears (1) are on the left hand side. 1 l Read following information from the drum dot check sheet. Dot color: The color of printed dots is the color of the drum you should clean. Dot location: The sheet has eight numbered columns. The number of the column with the printed dots in it is used to find the dot position on the drum.
Routine maintenance n Turn the drum unit gear toward you by hand while looking at the surface of the suspected area. o When you have found the mark on the drum that matches the drum dot check sheet, wipe the surface of the drum gently with a cotton swab until the mark on the surface comes off. IMPORTANT • The drum is photosensitive so DO NOT touch it with your fingers. • DO NOT clean the surface of the photosensitive drum with a sharp object.
q Hold the handle of the toner cartridge and slide the toner cartridge into the drum unit, then slightly pull it toward you until you hear it click into place. Make sure that you match the toner cartridge color to the same color label on the drum unit. Repeat this for all the toner cartridges. r Make sure the green lock lever (1) is in the release position as shown in the illustration.
Routine maintenance t Turn the green lock lever (1) clockwise to the lock position. w Plug the machine’s power cord back into the AC power outlet first, connect all cables, and then plug in the telephone line cord. Turn on the machine’s power switch. 1 u Push the drum unit in until it stops. A v Close the front cover of the machine.
Cleaning the paper pick-up rollers c A If you have paper feed problems, clean the pick-up rollers as follows: a Turn off the machine’s power switch. Unplug the power cord from the AC power outlet. b Pull the paper tray completely out of the machine. Tightly wring out a lint-free cloth soaked in lukewarm water, and then wipe the separator pad (1) of the paper tray with it to remove dust. 1 d Wipe the two pick-up rollers (1) inside of the machine to remove dust.
Routine maintenance Calibration The output density for each color may vary depending on the environment the machine is in, such as temperature and humidity. Calibration helps you to improve the color density. a b Press MENU. Press a or b to display Printer. Press Printer. c Press a or b to display Calibration. Press Calibration. d e Press Calibrate. f g The machine will display Completed. The machine will display Calibrate?. Press Yes to confirm. Press Stop/Exit.
Auto Registration Registration A A If solid areas of color or images have cyan, magenta or yellow fringes, you can use the auto-registration feature to correct the problem. a b Press a or b to display Printer. Press Printer. Press a or b to display Auto Regist.. Press Auto Regist.. d The machine will display Registration?. Press Yes. 80 If color still appears incorrectly after autoregistration, you will need to perform manual registration. a b Press MENU.
Routine maintenance Frequency (Color Correction) You can set how often the color correction (Color Calibration and Auto Registration) occurs. The default setting is Normal. The color correction process consumes some amount of the toner. a b Press MENU. Press a or b to display Printer. Press Printer. c Press a or b to display Frequency. Press Frequency. d e Press Normal, Low or Off.
Checking the remaining life of parts You can see the machine’s parts life on the LCD. a b Press MENU. c d Press Parts life. e Press a or b to display Machine Info.. Press Machine Info.. Press a or b to see the approximate remaining parts life of the Drum, Belt unit, Fuser, Laser, PF Kit MP, PF Kit 1 and PF Kit 2. Press Stop/Exit. Note The life check will be accurate only if you have reset the part counter when you installed a new part.
Routine maintenance Packing and shipping the machine Note • If for any reason you must ship your machine, carefully repack the machine in the original packaging to avoid any damage during transit. The machine should be adequately insured with the carrier. A WARNING This machine is heavy and weighs approximately 62.8 lb (28.5 kg). To prevent possible injuries at least two people should lift the machine. Be careful not to pinch your fingers when you put the machine down.
a Turn off the machine’s power switch. Unplug the telephone line cord first, disconnect all cables, and then unplug the power cord from the AC power outlet. b Press the front cover release button and then open the front cover. 84 c Hold the green handle of the drum unit. Pull the drum unit out until it stops.
Routine maintenance d Turn the green lock lever (1) at the left of the machine counterclockwise to the release position. Holding the green handles of the drum unit, lift the front of the drum unit and remove it from the machine. 1 IMPORTANT • Hold the green handles of the drum unit when you carry it. DO NOT hold the sides of the drum unit. • We recommend that you place the drum unit on a clean, flat surface with a piece of disposable paper underneath it in case you accidentally spill or scatter toner.
e Hold the green handle of the belt unit with both hands and lift the belt unit up, then pull it out. f Remove the two pieces of orange packing material and discard them. Note This step is only necessary when you are replacing the waste toner box for the first time, and is not required for the replacement waste toner box. The orange packing pieces are installed at the factory to protect your machine during shipment from the factory.
Routine maintenance g Remove the waste toner box from the machine using the green handle, and then put it in a plastic bag and seal the bag completely. h Put the belt unit back into the machine. Make sure the belt unit is level and fits firmly into place. IMPORTANT A Handle the waste toner box carefully. If toner scatters on your hands or clothes, immediately wipe or wash it off with cold water.
i Install orange packing materials to the drum unit as follows: To secure the toner cartridges, install the matching orange packing strips (1) (marked L and R) to the drum unit on the left and right sides, as shown in the illustration. Attach the orange packing strip (2) to the left side of the drum unit, as shown in the illustration. Slide the small orange packing material (3) onto the metal shaft on the right side of the drum unit, as shown in the illustration.
Routine maintenance j Put a piece of paper (Letter or A4) on the belt unit to prevent damage to the belt unit. l Match the guide ends (2) of the drum unit to the c marks (1) on both sides of the machine, then gently slide the drum unit into the machine until it stops at the green lock lever. 1 2 k Make sure the green lock lever (1) is in the release position as shown in the illustration. A m Turn the green lock lever (1) clockwise to the lock position.
n Push the drum unit in until it stops. p Put the Styrofoam piece (2) into the lower carton (1). Then put the waste toner box in the Styrofoam piece. FRONT 2 1 q o Wrap the machine with a plastic bag. Put the machine on the Styrofoam piece (1). Close the front cover of the machine.
Routine maintenance r Put the Styrofoam piece (2) into the back side of Styrofoam piece (1) as shown in the illustration. s 2 Place the upper carton (1) over the machine and the lower carton (2). Align the joint holes of the upper carton with the joint holes of the lower carton. Secure the upper carton to the lower carton using the four plastic joints (3) as shown in the illustration.
t Put the two Styrofoam pieces (1) into the carton matching the right of the machine to the "RIGHT" mark on one of the Styrofoam pieces, and the left of the machine to the "LEFT" mark on the other Styrofoam piece. Put the AC power cord and printed materials in the original carton as shown in the illustration. LEFT RIGHT 1 1 Note If you are returning your machine to Brother as part of the Exchange Service, pack only the machine.
B Options B Options B This machine has the following optional accessories. You can increase the capabilities of the machine with these items.
Optional paper tray (LT-300CL) An optional lower tray can be installed, and it can hold up to 500 sheets of 20 lb (80 g/m2) paper. When an optional tray is installed, the machine can hold up to 800 sheets of plain paper. Memory board B B MFC-9970CDW has 256 MB of standard memory. The machine has one slot for optional memory expansion. You can increase the memory up to maximum of 512 MB by installing one SO-DIMM (Small Outline Dual In-line Memory Module).
Options Installing extra memory a Turn off the machine’s power switch. Unplug the telephone line cord. b Disconnect the interface cable from the machine, and then unplug the power cord from the AC power outlet. B e Hold the SO-DIMM by the edges and align the notches in the SO-DIMM with the protrusions in the slot. Insert the SO-DIMM diagonally (1), then tilt it toward the interface board until it clicks into place (2).
h Plug in the telephone line cord. Turn on the machine’s power switch. Note To make sure that you have installed the SO-DIMM properly, you can print the user settings page that shows the current memory size. (See How to print a report on page 50.
C Glossary C This is a comprehensive list of features and terms that appear in Brother manuals. Availability of these features depends on the model you purchased. ADF (automatic document feeder) The document can be placed in the ADF and scanned one page at a time automatically. Auto Reduction Reduces the size of incoming faxes. Automatic fax transmission Sending a fax without picking up the handset of the external telephone or pressing Hook.
Easy Receive Enables your machine to respond to CNG tones if you interrupt a fax call by answering it. ECM (Error Correction Mode) Detects errors during fax transmission and resends the pages of the fax that had an error. Extension telephone A telephone on the fax number that is plugged into a separate telephone wall jack. External telephone A telephone that is plugged into the EXT jack of your machine.
Glossary One Touch Keys on the machine’s control panel where you can store numbers for easy dialing. You can store a second number on each key if you press 21-40 and the One Touch key together. Out of Paper Reception Receives faxes into the machine’s memory when the machine is out of paper. Overseas Mode Makes temporary changes to the fax tones to accommodate noise and static on overseas telephone lines. Paging This feature enables your machine to call your pager when a fax is received into its memory.
Temporary settings You can choose certain options for each fax transmission and copy without changing the default settings. Tone A form of dialing on the telephone line used for Touch Tone telephones. Transmission The process of sending faxes over the telephone lines from your machine to the receiving fax machine. Transmission Verification Report A report for each transmission, that shows its date, time and number. User Settings List A printed report that shows the current settings of the machine.
D Index A D Apple Macintosh See Software User’s Guide. Daylight Savings Time ............................... 3 Deep Sleep mode ...................................... 4 Delayed batch transmission .................... 23 Dialing access codes and credit card numbers ............................................... 43 dial prefix ................................................ 5 groups (broadcasting) .......................... 20 restricting dialing ..................................
canceling from memory ......................23 contrast ..............................................18 delayed batch .....................................23 delayed fax .........................................22 from memory (dual access) ...............20 manual ...............................................19 overseas ............................................22 polled transmit ....................................27 real time transmission ........................22 resolution ........................
R T Redial/Pause key .............................. 43, 99 Reducing copies ...................................................52 incoming faxes ......................................36 Remote retrieval .......................................33 access code ..........................................33 commands ............................................35 getting your faxes .................................34 Remote setup See Software User’s Guide. Reports .............................................
Brother International Corporation 100 Somerset Corporate Boulevard P.O. Box 6911 Bridgewater, NJ 08807-0911 USA Brother International Corporation (Canada) Ltd. 1 rue Hôtel de Ville, Dollard-des-Ormeaux, QC, Canada H9B 3H6 Visit us on the World Wide Web http://www.brother.com/ This machine is approved for use in the country of purchase only. Local Brother companies or their dealers will only support machines purchased in their own countries.