
Software User's Guide
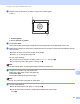
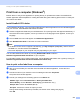
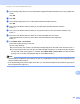
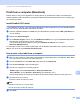
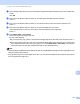
Table Of Contents
- SOFTWARE USER’S GUIDE
- Applicable models
- Definitions of notes
- Compilation and publication notice
- IMPORTANT NOTE
- Table of Contents
- Windows®
- 1 Printing
- Using the Brother printer driver
- Features
- Choosing the right type of paper
- Simultaneous printing, scanning and faxing
- Clearing data from the memory
- Status Monitor
- Printer driver settings
- Accessing the printer driver settings
- Basic tab
- Advanced tab
- Print Profiles tab
- Support
- Trial Photo Print (Not available for MFC-J280W/J425W/J430W/J435W/J5910DW)
- Using FaceFilter Studio for photo printing by REALLUSION
- Using Homepage Print 2 by Corpus (Not available for MFC-J5910DW)
- 2 Scanning
- Scanning a document using the TWAIN driver
- Scanning a document using the WIA driver
- Scanning a document using the WIA driver (Windows® Photo Gallery and Windows® Fax and Scan users)
- Using ScanSoft™ PaperPort™12SE with OCR by NUANCE™
- Using BookScan Enhancer and Whiteboard Enhancer by REALLUSION
- 3 ControlCenter4
- 4 Remote Setup (For MFC-J625DW/J825DW/J835DW/J5910DW)
- 5 Brother PC-FAX Software (MFC models only)
- 6 PhotoCapture Center™ (For MFC-J625DW/J825DW/J835DW/J5910DW)
- 7 Firewall settings (For Network users)
- 1 Printing
- Apple Macintosh
- 8 Printing and Faxing
- 9 Scanning
- 10 ControlCenter2
- 11 Remote Setup & PhotoCapture Center™ (For MFC-J625DW/J825DW/J835DW/J5910DW)
- Using the Scan key
- 12 USB cable scanning
- 13 Network Scanning
- Before using Network Scanning
- Using the Scan key on your network
- Using Web Services for scanning on your network (Windows Vista® SP2 or later and Windows® 7)
- Printing on a Disc
- Index
- brother USA

Printing on a Disc (MFC-J825DW/J835DW only)
233
14
Do one of the following:
If you want to do a test print on paper, press TestPrint and go to k.
If you want to print the disc, press OK and go to m.
Note
If the Disc Guide opens, close the guide before performing a test print.
k If a disc is in the Disc Tray, remove the disc.
Make sure Letter paper is set in the paper tray.
Press Color Start.
The machine starts printing the test image.
Note
You can only use Letter size paper for a test print.
l Do one of the following:
If the test print result is OK, press OK and go to m.
If the test print result is not OK, readjust the printable area of the image.
Go to j.
m Enter the number of copies you want either by pressing the number box directly, or pressing + or -, and
then do one of the following:
If you want to change the print settings, press PrintSetting and go to n.
If you do not want to change any settings, go to p.
n Choose your printable disc type.
If you chose Printable Disc, go to o.
If you chose Glossy Disc, go to p.
o Press Normal or Slow Drying.
Use Slow Drying if the print is smudged.
p Press Print Disc.
q Load a printable disc on the tray. (See How to load a printable disc uu page 226.)
Press OK.
r Press Color Start.
The machine starts printing on the disc.
Do one of the following:
If you are printing only one disc, the finished message appears on the LCD of the machine. Press OK.
If you are printing more than one disc, replace the disc with a new one and press OK.
Press Color Start.
The machine starts printing on the next disc.
(Repeat this step for each additional disc.)
Note
If the printed image runs off the edges of the disc, you may need to adjust the print position. (See Adjust
the print position uu page 231.)