
User Manual
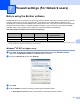
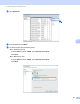
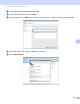
Table Of Contents
- Software User’s Guide
- Applicable models
- Definitions of notes
- Compilation and publication notice
- IMPORTANT NOTE
- Table of Contents
- Windows®
- 1 Printing
- Using the Brother printer driver
- Features
- Choosing the right type of paper
- Simultaneous printing, scanning and faxing
- Clearing data from the memory
- Status Monitor
- Printer driver settings
- Accessing the printer driver settings
- Basic tab
- Advanced tab
- Print Profiles tab
- Maintenance tab
- Support
- Using FaceFilter Studio for photo printing by REALLUSION
- 2 Scanning
- Scanning a document using the TWAIN driver
- Scanning a document using the WIA driver
- Scanning a document using the WIA driver (Windows® Photo Gallery and Windows® Fax and Scan users)
- Using Nuance™ PaperPort™ 12SE
- Using BookScan Enhancer and Whiteboard Enhancer by REALLUSION
- 3 ControlCenter4
- 4 Remote Setup (For MFC models)
- 5 Brother PC-FAX Software (For MFC models)
- 6 PhotoCapture Center™
- 7 Firewall settings (For Network users)
- 1 Printing
- Apple Macintosh
- 8 Printing and Faxing
- 9 Scanning
- 10 ControlCenter2
- 11 Remote Setup & PhotoCapture Center™
- Using the Scan button
- 12 USB cable scanning
- 13 Network Scanning
- Before using Network Scanning
- Using the Scan button on your network
- Using Web Services for scanning on your network (Windows Vista® SP2 or later and Windows® 7)
- Index
- brother UK

114
6
6
IMPORTANT
DO NOT start your computer with a memory card or USB Flash memory drive installed in the media drive
of the machine. You could lose your data or damage the media.
NOTE
• The PhotoCapture Center™ will read only the media that was put in first.
• While the machine is printing from the PhotoCapture Center™, your computer cannot access the
PhotoCapture Center™ for any other operation.
Using PhotoCapture Center™ 6
a Open the media slot cover.
b Put a memory card or USB Flash memory drive into your machine.
c In Windows
®
Explorer, double-click the Removable Disk icon
1
. The files and folders on the memory
card or USB Flash memory drive will appear on your screen.
You can edit a file and save it to another drive on your computer.
1
If you are using Windows
®
XP/Windows Vista
®
/ Windows
®
7 and you create a name for the volume label of the memory card or USB Flash
memory drive, this name appears instead of Removable Disk.
When you take out a memory card or USB Flash memory drive, do the following to prevent damage
to the memory card or USB Flash memory drive: 6
a In Windows
®
Explorer, right-click the removable disk icon and choose Eject.
b Wait until the LCD message disappears before taking out the media.
IMPORTANT
DO NOT remove the memory card or USB Flash memory drive while the LCD is displaying a message.
Otherwise, the card, USB Flash memory drive or data stored on the card could be damaged.
If you remove the memory card or USB Flash memory drive while the LCD is displaying the message, you
must restart your computer once before inserting the same memory card or USB Flash memory drive into
the machine. If you do not restart your computer, the data on your media could be destroyed.
PhotoCapture Center™ 6