
User Manual
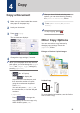


Table Of Contents
- Reference Guide MFC-J5845DW/MFC-J5945DW

• [Outgoing Call] (Select a
number from the Outgoing Call
history.)
Press [Call History] >
[Outgoing Call].
Select the number you want, and
then press [Apply].
• [Caller ID History] (Select a
number from the Caller ID history.)
(Not available for Taiwan and some
countries)
Press [Call History] > [Caller
ID History].
Select the number you want, and
then press [Apply].
• [Address Book] (Select a number
from the Address Book.)
Press [Address Book].
Do one of the following:
- Select the number you want, and
then press [Apply].
- Press
, and then enter the first
letter of the name and press
[OK]. Press the name you want to
dial. If the name has two numbers,
press the number you want. Press
[Apply].
For more detailed information on how
to store address book numbers, see
the Online User's Guide.
(available only for some countries)
If the LDAP search is available, the result
will be shown on the touchscreen with
.
4
To change the additional settings, press
[Options].
When finished, press [OK].
5
Press [Fax Start].
6
Do one of the following:
• If you are using the ADF, the machine
starts scanning and sending the
document.
• If you are using the scanner glass
and selected [Mono] in the
[Colour Setting], the machine
starts scanning the first page.
Go to the next step.
• If you are using the scanner glass
and selected [Colour] in the
[Colour Setting], the
touchscreen asks if you want to send
a colour fax.
Press [Yes (Colour fax)] to
confirm. The machine starts dialling
and sending the document.
7
When the touchscreen displays [Next
Page?], do one of the following:
• Press [No] when finished scanning
pages. The machine starts sending
the document.
• Press [Yes] to scan another page.
Place the next page on the scanner
glass, and then press [OK]. The
machine starts scanning the page.
Repeat this step for each additional
page.
6
Fax
15