
User Manual


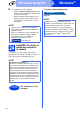
Table Of Contents
- Quick Setup Guide MFC-J6925DW
- Start Here
- 1 Unpack the machine and check the components
- 2 Connect the power cord and telephone line
- 3 Install the ink cartridges
- 4 Load plain Letter/A4 paper
- 5 Check the print quality
- 6 Set the date and time
- 7 Set the paper settings
- 8 Review Touchscreen display
- 9 Choose your language (if needed)
- 10 Choose the correct Receive Mode
- 11 Set your Station ID
- 12 Transmission Verification Report
- 13 Set Tone or Pulse dialing mode (Canada only)
- 14 Set the telephone line compatibility (VoIP)
- 15 Automatic Daylight Saving Time
- 16 Set the Time Zone
- 17 Choose your connection type
- For Windows® USB interface users (Windows® XP Home/XP Professional/Windows Vista®/Windows® 7/Windows® 8)
- For Macintosh USB interface users (Mac OS X v10.6.8, 10.7.x, 10.8.x)
- For Windows® wired network interface users (Windows® XP Home/XP Professional/Windows Vista®/Windows® 7/Windows® 8)
- For Macintosh wired network interface users (Mac OS X v10.6.8, 10.7.x, 10.8.x)
- For wireless network interface users
- 18 Before you begin
- 19 Choose your wireless setup method
- 20 Setup using the CD-ROM (Windows® and Macintosh)
- 20 Manual setup from the control panel using the Setup Wizard (Windows®, Macintosh and mobile devices)
- 20 One-push setup using WPS or AOSS™ (Windows®, Macintosh and mobile devices)
- Troubleshooting
- Install the drivers and software (Windows® XP Home/XP Professional/Windows Vista®/Windows® 7/Windows® 8)
- Install the drivers and software (Mac OS X v10.6.8, 10.7.x, 10.8.x)
- Install Optional Applications Windows®
- For Network Users
- Other Information
- Consumables
- brother USA-ENG
- Start Here

35
For Wireless Network Users
Wireless Network
20
One-push setup using
WPS or AOSS™
(Windows
®
,
Macintosh and mobile devices)
a Confirm your wireless access point/router has
the WPS or AOSS™ symbol as shown below.
b Place the Brother machine within range of your
WPS or AOSS™ access point/router. The
range may differ depending on your
environment. Refer to the instructions provided
with your access point/router.
c Press .
Press WPS/AOSS.
When Switch Network interface to
wireless? is displayed, press Yes to accept.
This will start the wireless setup wizard.
To cancel, press No.
d When the Touchscreen instructs you to start
WPS or AOSS™, press the WPS or AOSS™
button on your wireless access point/router (for
more information, see the instructions provided
with your wireless access point/router), and
then press OK on your machine.
This feature will automatically detect which
mode (WPS or AOSS™) your wireless access
point/router uses to configure your machine.
Press OK.
Wireless setup is now complete.
The Wi-Fi LED on the control panel
lights up, indicating that the machine’s
Network I/F is set to WLAN.
For mobile device users:
• Connect your mobile device to a wireless access
point/router using a Wi-Fi connection.
• Download and install Brother iPrint&Scan
(Android™/iOS/Windows
®
Phone) from your
mobile device’s application download site. You can
also use AirPrint (iOS) with this machine.
• To download the User’s Guide for the application
you are using (Brother iPrint&Scan/AirPrint), visit
the Brother Solutions Center and click Manuals on
your model’s page.
Now go to
http://solutions.brother.com/
To install MFL-Pro Suite, continue to
step 21.
For Windows
®
users:
Now go to
Page 38
For Macintosh users:
Now go to
Page 41
NOTE
If your wireless access point/router supports WPS
and you want to configure your machine using the
PIN (Personal Identification Number) Method,
see Configure Your Wireless Network Using the
PIN Method of Wi-Fi Protected Setup™ (WPS) in
the Software and Network User’s Guide.
NOTE
If the connection failed, check the error code on
the printed report and refer to Troubleshooting
on page 36.