
User Manual
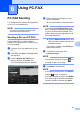

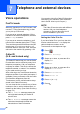


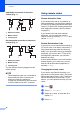
Table Of Contents
- Basic User’s Guide MFC-J6925DW
- User's Guides and where do I find them?
- Table of Contents
- 1 General information
- Using the documentation
- Accessing Brother Utilities (Windows® 8)
- Accessing the Advanced User’s Guide and Software and Network User’s Guide
- How to access Guides for Advanced Features
- Accessing Brother Support (Windows®)
- Accessing Brother Support (Macintosh)
- Control panel overview
- Shortcut Settings
- Volume Settings
- Touchscreen LCD
- 2 Loading paper
- 3 Loading documents
- 4 Sending a fax
- 5 Receiving a fax
- 6 Using PC-FAX
- 7 Telephone and external devices
- 8 Dialling and storing numbers
- 9 Making copies
- 10 Printing photos from a memory card or USB Flash drive
- 11 How to print from a computer
- 12 How to scan to a computer
- 13 How to print and scan with NFC (Near Field Communication)
- A Routine maintenance
- B Troubleshooting
- C Settings and feature tables
- D Specifications
- Index
- brother UK

Telephone and external devices
65
7
Telephone services 7
Your machine supports the Caller ID
subscriber telephone service that some
telephone companies offer.
Features like Voice Mail, Call Waiting, Call
Waiting/Caller ID, answering services, alarm
systems or other custom features on one
telephone line may create problems with the
operation of your machine.
NOTE
Caller ID is available for U.K. and Ireland
only.
Setting the Telephone Line
Type 7
If you are connecting the machine to a line
that features PBX or ISDN to send and
receive faxes, it is also necessary to change
the Telephone Line Type accordingly by
completing the following steps.
a Press .
b Press All Settings.
c Swipe up or down, or press a or b to
display Initial Setup.
d Press Initial Setup.
e Swipe up or down, or press a or b to
display Phone Line Set.
f Press Phone Line Set.
g Press Normal, PBX or ISDN.
h Do one of the following:
If you choose PBX, go to step i.
If you choose ISDN or Normal, go to
step l.
i Press On or Always.
NOTE
If you choose On, the machine dials a
prefix number before the fax number you
dial only when R is pressed.
If you choose Always, the machine
always automatically dials a prefix number
before the fax number.
j Press Dial Prefix.
k Enter the prefix number using the
keyboard on the Touchscreen.
Press OK.
NOTE
You can use the numbers 0 to 9, #, l and !.
You cannot use ! with any other numbers
or characters.
l Press .