
User Manual


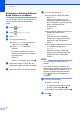


Table Of Contents
- Basic User’s Guide MFC-J6925DW
- User's Guides and where do I find them?
- Table of Contents
- 1 General information
- Using the documentation
- Accessing Brother Utilities (Windows® 8)
- Accessing the Advanced User’s Guide and Software and Network User’s Guide
- How to access Guides for Advanced Features
- Accessing Brother Support (Windows®)
- Accessing Brother Support (Macintosh)
- Control panel overview
- Shortcut Settings
- Volume Settings
- Touchscreen LCD
- 2 Loading paper
- 3 Loading documents
- 4 Sending a fax
- 5 Receiving a fax
- 6 Using PC-FAX
- 7 Telephone and external devices
- 8 Dialling and storing numbers
- 9 Making copies
- 10 Printing photos from a memory card or USB Flash drive
- 11 How to print from a computer
- 12 How to scan to a computer
- 13 How to print and scan with NFC (Near Field Communication)
- A Routine maintenance
- B Troubleshooting
- C Settings and feature tables
- D Specifications
- Index
- brother UK

Chapter 8
74
Caller ID history 8
This feature requires the Caller ID subscriber
service offered by many local telephone
companies. (See Caller ID (U.K. and Ireland
only) on page 64.)
The numbers, or names if available, from the
last 30 faxes and telephone calls you
received will be stored in the Caller ID history.
You can view the list or choose one of these
numbers to fax to, add to Address Book, or
delete from the history. When the thirty-first
call comes into the machine, it replaces
information about the first call.
NOTE
If you are not a Caller ID subscriber, you
can still view call dates from the Caller ID
history, and delete entries from the list.
a Press (Fax).
b Press (Call History).
c Press Caller ID history.
d Press the number or the name you want.
e Do one of the following:
To send a fax, press Apply.
Press Fax Start.
If you want to store the number,
press Edit and then press
Add to Address Book.
(See Advanced User’s Guide:
Storing Address Book numbers from
the Caller ID history.)
If you want to delete the number from
the Caller ID history list, press Edit
and then press Delete.
Press Yes to confirm.
Press .
NOTE
You can print the Caller ID list.
(See Advanced User’s Guide: How to
print a report.)