
User Manual
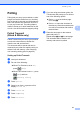
Table Of Contents
- Advanced User’s Guide MFC-J6920DW MFC-J6925DW
- User's Guides and where do I find them?
- Table of Contents
- 1 General setup
- 2 Security features
- 3 Sending a fax
- Additional sending options
- Additional sending operations
- Sending a 2-sided fax from the ADF (Automatic Document Feeder)
- Sending a fax manually
- Sending a fax at the end of a conversation
- Dual Access (Black & White only)
- Broadcasting (Black & White only)
- Real Time Transmission
- Overseas Mode
- Delayed Faxing (Black & White only)
- Delayed Batch Transmission (Black & White only)
- Checking and canceling waiting jobs
- Polling
- 4 Receiving a fax
- 5 Dialing and storing numbers
- 6 Printing reports
- 7 Making copies
- Copy options
- Stop copying
- Improving copy quality
- Enlarging or reducing copies
- Making N in 1 copies or a poster (Page Layout)
- 2 in 1 ID Copy (Page Layout)
- Sorting copies using the ADF
- Adjusting Density
- Ink Save Mode
- Thin Paper Copy
- Auto Deskew
- Book Copy
- Watermark Copy
- Remove Background Color
- 2-sided copying
- Saving copy options as a Shortcut
- Ledger Copy Shortcuts
- Copy options
- 8 PhotoCapture Center™: Printing photos from a memory card or USB Flash drive
- 9 Printing photos from a camera
- A Routine maintenance
- B Glossary
- Index
- brother USA/CAN

Sending a fax
19
3
Overseas Mode 3
If you are having difficulty sending a fax
overseas due to possible interference on the
telephone line, we recommend that you turn
on Overseas Mode. After you send a fax
using this feature, the feature will turn itself
off.
a Load your document.
b Do one of the following:
When Fax Preview is set to Off,
press (Fax).
When Fax Preview is set to On, press
(Fax) and then
(Sending Faxes).
c Press Options.
d Swipe up or down, or press a or b to
display Overseas Mode.
e Press Overseas Mode.
f Press On (or Off).
g Press OK.
h Enter the fax number.
i Press Fax Start.
Delayed Faxing
(Black & White only) 3
You can store up to 50 faxes in the memory
to be sent within 24 hours. These faxes will
be sent at the time of day you enter in step i.
a Load your document.
b Do one of the following:
When Fax Preview is set to Off,
press (Fax).
When Fax Preview is set to On, press
(Fax) and then
(Sending Faxes).
c Press Options.
d Swipe up or down, or press a or b to
display Delayed Fax.
e Press Delayed Fax.
f Press Delayed Fax.
g Press On (or Off).
h Press Set Time.
i To enter the time you want the fax to be
sent, do one of the following:
If you have set 12h Clock as the
format in the Clock Type setting,
enter the time (in 12-hour format)
using the keyboard on the
Touchscreen, and then press AM or
PM.
Press OK.
If you have set 24h Clock in the
Clock Type setting, enter the time
(in 24-hour format) using the
keyboard on the Touchscreen.
Press OK.
(For example, enter 19:45 for
7:45 PM.)