
User Manual
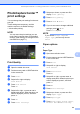
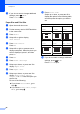
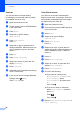


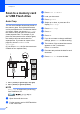
Table Of Contents
- Advanced User’s Guide MFC-J6920DW MFC-J6925DW
- User's Guides and where do I find them?
- Table of Contents
- 1 General setup
- 2 Security features
- 3 Sending a fax
- Additional sending options
- Additional sending operations
- Sending a 2-sided fax from the ADF (Automatic Document Feeder)
- Sending a fax manually
- Sending a fax at the end of a conversation
- Dual Access (Black & White only)
- Broadcasting (Black & White only)
- Real Time Transmission
- Overseas Mode
- Delayed Faxing (Black & White only)
- Delayed Batch Transmission (Black & White only)
- Checking and canceling waiting jobs
- Polling
- 4 Receiving a fax
- 5 Dialing and storing numbers
- 6 Printing reports
- 7 Making copies
- Copy options
- Stop copying
- Improving copy quality
- Enlarging or reducing copies
- Making N in 1 copies or a poster (Page Layout)
- 2 in 1 ID Copy (Page Layout)
- Sorting copies using the ADF
- Adjusting Density
- Ink Save Mode
- Thin Paper Copy
- Auto Deskew
- Book Copy
- Watermark Copy
- Remove Background Color
- 2-sided copying
- Saving copy options as a Shortcut
- Ledger Copy Shortcuts
- Copy options
- 8 PhotoCapture Center™: Printing photos from a memory card or USB Flash drive
- 9 Printing photos from a camera
- A Routine maintenance
- B Glossary
- Index
- brother USA/CAN

PhotoCapture Center™: Printing photos from a memory card or USB Flash drive
65
8
PhotoCapture Center™
print settings
8
You can change the print settings for the next
print job.
These settings are temporary, and the
machine returns to its default settings
1 minute after printing.
NOTE
You can save the print settings you use
most often by setting them as the default
settings. (See Setting your changes as the
new default on page 71.)
Print Quality 8
a Open the media slot cover.
b Put the memory card or USB Flash drive
in the correct slot.
c Press Photo.
d Swipe left or right to display
View Photos.
e Press View Photos.
Press OK.
f Swipe left or right, or press d or c to
display each photo. When the photo you
want is displayed, press it, and then
press OK.
g Press OK.
h Press Print Settings.
i Swipe up or down, or press a or b to
display Print Quality.
j Press Print Quality.
k Press Normal or Photo.
l If you do not want to change additional
settings, press or OK.
Press Start to print.
NOTE
If you choose Inkjet Paper in
Paper Type, you can only choose
Photo.
Paper options 8
Paper Type 8
a Open the media slot cover.
b Put the memory card or USB Flash drive
in the correct slot.
c Press Photo.
d Swipe left or right to display
View Photos.
e Press View Photos.
Press OK.
f Swipe left or right, or press d or c to
display each photo. When the photo you
want is displayed, press it, and then
press OK.
g Press OK.
h Press Print Settings.
i Swipe up or down, or press a or b to
display Paper Type.
j Press Paper Type.
k Press Plain Paper, Inkjet Paper,
Brother BP71 or Other Glossy.