Reference Guide Brief explanations for routine operations DCP-L5500DN DCP-L6600DW MFC-L5700DN MFC-L5750DW MFC-L6800DW MFC-L6900DW Brother recommends keeping this guide next to your Brother machine for quick reference. Online User's Guide This Reference Guide contains basic instructions and information for your Brother machine. For more advanced instructions and information, see the Online User's Guide at solutions.brother.
User's Guides and Where to Find Them Which Guide? What's in It? Where Is It? Product Safety Guide Read this Guide first. Please read the Safety Instructions before you set up your machine. See this Guide for trademarks and legal limitations. Printed / In the box Quick Setup Guide Follow the instructions for setting up your machine, and installing the drivers and software for the operating system and connection type you are using.
The Online User's Guide Helps You Get the Most Out of Your Machine We hope that you find this guide helpful. To learn more about your machine's features, please take a look at our Online User's Guide. It offers: Quicker Navigation! Search box Navigation index in a separate panel Comprehensive! Every topic in one guide Simplified Layout! Provides step-by-step instructions Feature summary at the top of the page 1 2 3 4 1. Search Box 2. Navigation 3. Summary 4.
Questions or Problems? Take a Look at our FAQs, Solutions, and Videos Online. Go to your model's FAQs & Troubleshooting page on the Brother Solutions Center at support.brother.com. • Provides several ways to search! • Displays related questions for more information • Receives regular updates based on customer feedback Since the Brother Solutions Center is updated regularly, this screen is subject to change without notice. Important Note • This documentation is for both MFC and DCP models.
1 General Information Control Panel Overview 1 2 3 4 5 1. Near Field Communication (NFC) Reader (available only for certain models) You can use card authentication by touching the IC card to the NFC Reader on the control panel. If your Android™ device supports the NFC feature, you can print from your device or scan documents to your device in the same way. 2. Touchscreen Liquid Crystal Display (LCD) Access menus and options by pressing them on the Touchscreen. 3.
4. Power On/Off • Turn the machine on by pressing . • Turn the machine off by pressing and holding down . The LCD displays [Shutting Down] for a few seconds before going off. If you have an external telephone or TAD connected, it is always available. 1 5. (WiFi) When the WiFi light is on, your Brother machine is connected to a wireless access point. When the WiFi light blinks, the wireless connection is down, or your machine is in the process of connecting to a wireless access point.
Touchscreen LCD Overview You can select from two types of screens to set the Home screen: Function screens and Shortcuts screen. When a Function screen is displayed, swipe left or right or press d or c to display the other Function screens. The Home screen displays the machine’s status when the machine is idle. This screen is also called the Ready Mode screen. When displayed, this screen indicates that your machine is ready for the next command.
• 5. Date & Time [Web] [Apps] [Shortcuts] Press to access the [Shortcuts] screen. (Function screens) 7. Press to access the Function screens. Press to connect the Brother machine to the Brother Apps service. For more information, see the Web Connect Guide. Go to your model's Manuals page on the Brother Solutions Center at support.brother.com to download the guide. • 6. General Information • Displays the date and time set on the machine.
How to Navigate the Touchscreen LCD 4 Swipe up or down or press a or b to display the [LCD Settings] option, and then press [LCD Settings]. 5 Press [Backlight]. 6 Press [Med]. 7 Press Press your finger on the LCD to operate it. To display and access all the options, swipe left, right, up, down or press d c or a b on the LCD to scroll through them. The following steps explain how to change a machine setting. In this example, the LCD Backlight setting is changed from [Light] to [Med].
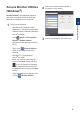
Access Brother Utilities (Windows®) 2 Select your machine (where XXXX is the name of your model). 3 Choose the operation you want to use. Brother Utilities is an application launcher that offers convenient access to all Brother applications installed on your computer. 1 Do one of the following: General Information 1 • (Windows® XP, Windows Vista®, Windows® 7, Windows Server® 2003, Windows Server® 2008 and Windows Server® 2008 R2) Click (Start) > All Programs > Brother > Brother Utilities.
2 Load Paper Load Paper in the Paper Tray Load Paper in the Multipurpose Tray (MP Tray) Use the paper tray when printing on the following media: Use the MP tray when printing on the following media: Plain paper Plain paper Thin paper Thin paper Recycled paper Recycled paper Letterhead Bond paper Coloured paper Letterhead Thick paper 1 Coloured paper Thick paper 1 Labels 1 • Adjust the guides Envelopes 1 • Fan the paper • Fan the paper 1 1 Open the back cover (face up output tray) befo
3 Print Print from Your Computer Print a Document (Macintosh) For printing instructions, see the Online User's Guide: Print from Your Computer (Macintosh). Print More Than One Page on a Single Sheet of Paper (N in 1) (Windows®) 3 Print a Document (Windows®) Print 1 Select the print command in your application. 2 Select Brother XXX-XXXX (where XXXX is the name of your model). 3 Click Print. 1 Select the print command in your application. 4 Complete your print operation.
4 Copy Copy a Document 3 Press [Copy]. The LCD displays: 1 Make sure you have loaded the correct size paper in the paper tray. 2 Do one of the following: • Place the document face up in the ADF. (If you are copying multiple pages, we recommend using the ADF.) 4 Change the copy settings, if needed. (Number of copies) • Enter the number of copies in one of the following ways: • Press or on the LCD. • Press the numbers on the control panel. • Place the document face down on the scanner glass.
• Current setting indications Press the following icons to change these settings for the next copy only. • [Enlarge/Reduce] • [2-sided Copy] • [Density] • 5 [Tray Use] Press [Start]. To stop copying, press .
5 Scan Scan a Document Scan from Your Computer There are several ways you can use your computer to scan photos and documents on your Brother machine. Use the software applications provided by Brother, or use your favourite scanning application. 2 Press 3 Swipe left or right or press d or c to display the Scan mode icon. The icon is highlighted and moves to the middle of the LCD.
7 Select the scan settings you want to change: • [2-sided Scan] • [Scan Settings] • [Scan Type] • [Resolution] • [File Type] • [Document Size] • [Brightness] • [Contrast] • [ADF Auto Deskew] • [Skip Blank Page] • [Remove Background Colour] (available only for the [Colour] and [Grey] options.) 9 Press [Start]. Scan Make the changes you want, and then press [OK]. 5 8 The machine scans the document. NOTE Use the Scan button on the machine to make temporary changes to the scan settings.
6 Fax Before Faxing Set Telephone Line Compatibility for Interference and VoIP Systems line, you may prefer to use this option only when needed. 3 Press . Related Models: MFC-L5700DN/MFC-L5750DW/MFC-L6800DW/ MFC-L6900DW Problems sending and receiving faxes due to possible interference on the telephone line may be solved by reducing the modem speed to minimise errors in fax transmission.
Choose the Correct Receive Mode Related Models: MFC-L5700DN/MFC-L5750DW/MFC-L6800DW/MFC-L6900DW You must choose a Receive Mode depending on the external devices and telephone services you have on your line. By default, your machine will automatically receive any faxes that are sent to it. The diagram below will help you select the correct mode.
Fax Using Your Machine Send a Fax Related Models: MFC-L5700DN/MFC-L5750DW/MFC-L6800DW/ MFC-L6900DW 1 Do one of the following: • Place the document face up in the ADF. (If you are faxing multiple pages, we recommend using the ADF.) • Using the Address Book Press [Address Book], and then do one of the following: • Swipe up or down or press a or b to display the number you want, and then press it. • Press • Place the document face down on the scanner glass. , and then enter the name and press [OK].
4 Press [Fax Start]. The machine scans and sends the document. If you placed the document on the scanner glass, follow the instructions in the table. Option Description Yes To scan the next page, press the Yes option, and then place the next page on the scanner glass. Press OK to scan the page. No After you have scanned the last page, press the No option. The machine sends the document. To stop faxing, press .
A Troubleshooting Use this section to resolve problems you may encounter when using your Brother machine. Identify the Problem Even if there seems to be a problem with your machine, you can correct most problems yourself. First, check the following: • The machine's power cord is connected correctly and the machine's power is on. • All of the machine's orange protective parts have been removed.
Find the Error Find the Solution Using the LCD 1. Follow the messages on the LCD. 2. See the instructions in the following table. 3. If you cannot resolve the error, see the Online User's Guide: Error and Maintenance Messages or see: FAQs & Troubleshooting on the Brother Solutions Center at support.brother.com.
Error Message Cause Action Drum ! The corona wire on the drum unit must be cleaned. Clean the corona wire on the drum unit. See the Online User's Guide: Clean the Corona Wire. If the problem continues, replace the drum unit with a new one. The drum unit or the toner cartridge and drum unit assembly is not installed correctly. Remove the drum unit, remove the toner cartridge from the drum unit, and put the toner cartridge back into the drum unit. Reinstall the drum unit in the machine.
Error Message Cause Action No Paper Fed T1 The machine failed to feed paper from the indicated paper tray. Pull out the paper tray indicated on the LCD and remove all jammed paper. No Paper Fed T2 No Paper Fed T3 No Paper MP The MP tray is out of Do one of the following: paper, or paper is not • Refill paper in the MP tray. Make sure loaded correctly in the MP the paper guides are set to the tray. correct size. • If paper is in the tray, remove it and load it again.
Error Message Cause Action Supplies It is time to replace the drum unit. Replace the drum unit with a new one. Replace Drum The drum unit counter Reset the drum unit counter. was not reset when a new See the instructions included with the drum was installed. new drum unit.
Document and Paper Jams An error message indicates where the paper is stuck in your machine. Error messages: 1. Document Jam 2. Jam Rear 3. Jam 2-sided 4. Jam Tray 5.
B Appendix How to Enter Text on Your Brother Machine • When you must enter text on your Brother machine, a keyboard appears on the LCD. • The characters that are available may differ depending on your country. • The keyboard layout may differ depending on the operation you perform. • Press • Press to cycle between letters, numbers and special characters. to cycle between lowercase and uppercase letters. • To move the cursor to the left or right, press d or c.
Information for Compliance with Commission Regulation 801/2013 Power consumption DCP-L5500DN MFC-L5700DN MFC-L5750DW DCP-L6600DW/ MFC-L6800DW/ MFC-L6900DW Approximately 1.9 W Approximately 2.0 W Approximately 3.5 W Approximately 3.7 W Networked Standby 1 1 All network ports activated and connected How to enable/disable Wireless LAN To turn the wireless network connection on or off, press [Settings] > [Network] > [WLAN] > [WLAN Enable] > [On] or [Off].
Supplies When the time comes to replace supplies, such as the toner or drum, an error message will appear on your machine's control panel or in the Status Monitor. For more information about the supplies for your machine, visit http://www.brother.com/original/index.html or contact your local Brother dealer. The toner cartridge and drum unit are two separate parts.
Visit us on the World Wide Web www.brother.