
User Manual
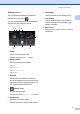
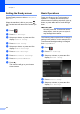
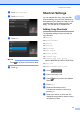

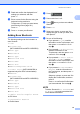

Table Of Contents
- Basic User’s Guide MFC-L8600CDW/MFC-L8850CDW/MFC-L9550CDW
- User’s Guides and where do I find them?
- Table of Contents
- 1 General information
- Using the documentation
- Accessing Brother Utilities (Windows®)
- Accessing the Advanced User's Guide, and Software and Network User's Guide
- How to access the User’s Guides for Advanced Features
- Accessing Brother Support (Windows®)
- Accessing Brother Support (Macintosh)
- Control panel overview
- Shortcut Settings
- Set the date and time
- Enter personal information (Station ID)
- Volume settings
- 2 Loading paper
- Loading paper and print media
- Paper settings
- Acceptable paper and other print media
- 3 Loading documents
- 4 Sending a fax
- 5 Receiving a fax
- 6 Using PC-FAX
- 7 Telephone and external devices
- 8 Dialling and storing numbers
- 9 Making copies
- 10 Printing from a USB flash drive or digital camera supporting mass storage
- 11 How to print from a computer
- 12 How to scan to a computer
- A Routine maintenance
- B Troubleshooting
- C Settings and features tables
- D Specifications
- Index

General information
19
1
Deleting Shortcuts 1
You can delete a Shortcut.
a Press .
b Press a tab from 1 to 8 to display the
Shortcut you want.
c Press .
NOTE
You can also press , All Settings
and Shortcut Settings.
d Press the Shortcut.
e Press Delete to delete the Shortcut
that you chose in step d.
f Press Yes to confirm.
Recalling Shortcuts 1
The Shortcut settings are displayed on the
Shortcut screen. To recall a Shortcut, simply
press the Shortcut name.
Set the date and time 1
The Touchscreen displays the date and time.
You can also add the current date and time to
each fax you send by setting your Station ID
(see Enter personal information (Station ID)
on page 20).
a Press .
b Press .
c Press Date.
d Enter the last two digits of the year using
the numbers on the Touchscreen, and
then press OK.
(e.g., Enter 1, 4 for 2014.)
e Enter the two digits for the month using
the numbers on the Touchscreen, and
then press OK.
f Enter the two digits for the day using the
numbers on the Touchscreen, and then
press OK.
g Press Time.
h Enter the time in 24-hour format using
the numbers on the Touchscreen, and
then press OK.
i Press .