
Manual

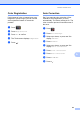
Table Of Contents
- Advanced User’s Guide MFC-L8600CDW/MFC-L8850CDW/MFC-L9550CDW
- User’s Guides and where do I find them?
- Table of Contents
- 1 General Setup
- 2 Security features
- Secure Function Lock 3.0
- Active Directory Authentication
- IPSec
- Setting Lock
- Restricting dialing
- 3 Sending a fax
- Additional sending options
- Additional sending operations
- Sending a fax manually
- Sending a fax at the end of a conversation
- Dual access
- Broadcasting
- Real Time Transmission
- Overseas Mode
- Delayed Fax
- Delayed batch transmission
- Checking and canceling waiting jobs
- Setting your changes as the new default
- Restoring all fax settings to the factory settings
- Saving fax options as a Shortcut
- Electronic cover page
- Destination Display
- 4 Receiving a fax
- 5 Dialing and storing numbers
- 6 Printing reports
- 7 Making copies
- Copy settings
- Stop copying
- Improving copy quality
- Enlarging or reducing copies
- 2-sided Copying
- Tray selection
- Adjusting Density and Contrast
- Sorting copies
- Making N in 1 copies (page layout)
- 2 in 1 ID Copy
- Adjusting the Color Saturation
- Making 2-sided N in 1 copies (MFC-L8850CDW and MFC-L9550CDW)
- Removing Background Color
- Saving copy options as a Shortcut
- Saving paper
- Copy settings
- A Routine maintenance
- Cleaning and checking the machine
- Cleaning the outside of the machine
- Cleaning the scanner
- Cleaning the laser scanner windows
- Cleaning the corona wires
- Cleaning the drum unit
- Cleaning the paper pick-up rollers
- Calibration
- Color Registration
- Auto Correction
- Printing the Test Print
- Checking the Page Counters
- Checking the remaining life of toner cartridges
- Checking the remaining life of parts
- Replacing periodic maintenance parts
- Packing and shipping the machine
- Cleaning and checking the machine
- B Options
- C Glossary
- Index

82
Calibration A
The output density for each color may vary
depending on the machine’s environment,
such as temperature and humidity.
Calibration helps you to improve the color
density.
a Press .
b Press Calibration.
c Press Calibrate.
d Press Yes to confirm.
e The Touchscreen displays Completed.
f Press .
You can reset the calibration parameters
back to those set at the factory.
a Press .
b Press Calibration.
c Press Reset.
d Press Yes to confirm.
e The Touchscreen displays Completed.
f Press .
NOTE
• If an error message appears, press OK
and try again.
(For more information, see
Basic User's Guide.)
• If you are using the Windows
®
printer
driver, the driver will get the calibration
data automatically if both Use Calibration
Data and Get Device Data
Automatically are selected. The factory
settings are on (see
Software and Network User's Guide).
• If you are using the Macintosh printer
driver, you must perform the calibration
using the Status Monitor. Turn on the
Status Monitor, and then select Color
Calibration from the Control menu
(see Software and Network User's Guide).