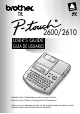
2600/2610 USER’S GUIDE GUÍA DE USUARIO • Read this User’s Guide before you start using your P-touch. • Keep this User’s Guide in a handy place for future reference. • Antes de usar su equipo por primera vez, lea cuidadosamente esta guía de usuario. • Guarde esta guía de usuario para futuras referencias.
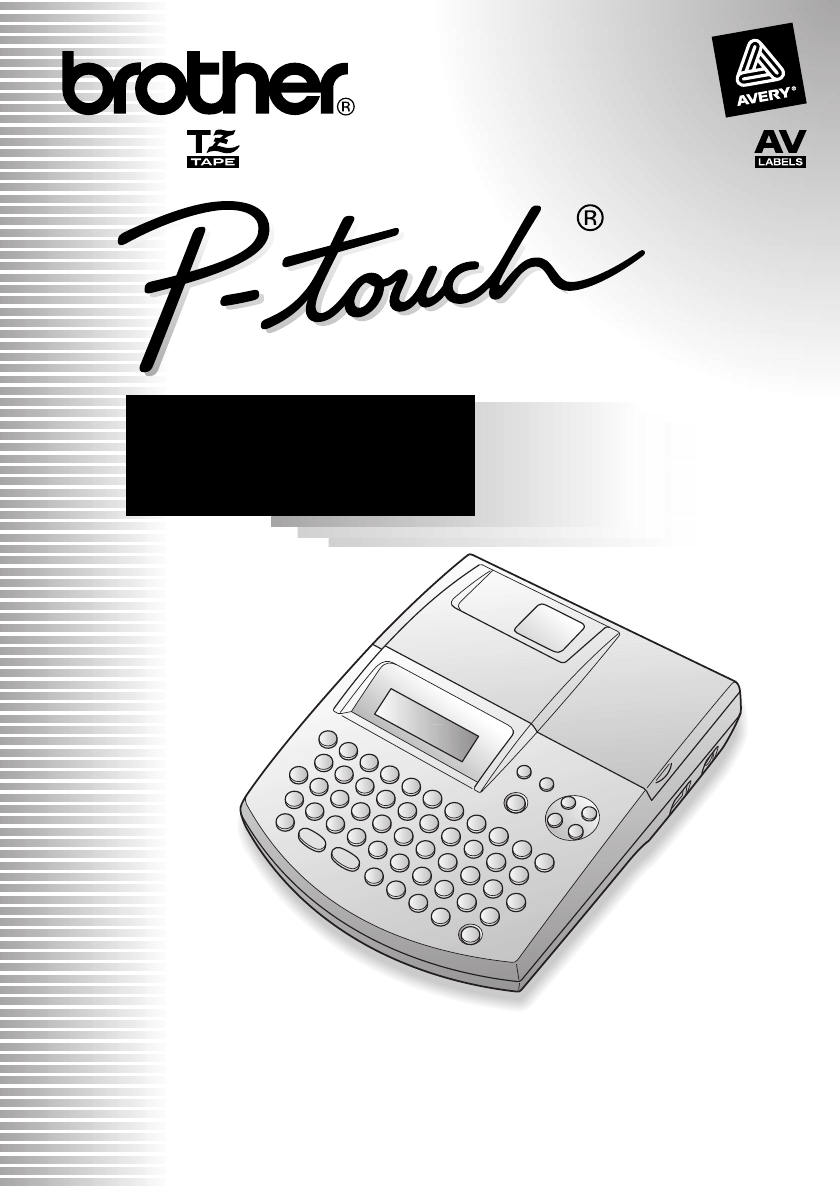
INTRODUCTION Thank you for purchasing the P-touch 2600/2610! Your new P-touch will allow you to create labels and stamps for any need. Its versatility enables you to design custom labels by choosing from a variety of frame designs and from many character sizes and styles. TZ tapes in five different widths (1/4″ (6 mm), 3/8″ (9 mm), 1/2″ (12 mm), 3/4″ (18 mm) and 1″ (24 mm)) and a variety of colors allow you to print personalized labels, useful for color-coded labelling.
CONTENTS Brother® 90 Days/One Year Limited Warranty and Replacement Service (For USA Only) .................................................................................................. iii Important Information ......................................................................................... v Getting Started GENERAL DESCRIPTION .................................................................................... 1 GENERAL PRECAUTIONS.............................................................
STAMP FUNCTION........................................................................................... 71 LOCAL FORMAT FUNCTION ........................................................................... 74 FONT FUNCTION ............................................................................................ 75 SIZE & WIDTH FUNCTIONS............................................................................. 76 STYLE FUNCTION ..........................................................................
Brother® 90 Days/One Year Limited Warranty and Replacement Service (For USA Only) Who is covered: • This limited warranty (“warranty”) is given only to the original end-use/retail purchaser (referred to in this warranty as “Original Purchaser”) of the accompanying product, consumables and accessories (collectively referred to in this warranty as “this Product”).
Brother® 90 Days/One Year Limited Warranty and Replacement Service (For USA Only) 91st day to 1 year: If the problem reported concerning your Machine is covered by this warranty and if you first reported the problem after 90 days, but before 1 year from the date of original purchase, Brother will furnish, free of charge (excluding labor charges), replacement part(s) for those part(s) of the Machine determined by Brother or its Authorized Service Center to be defective.
Important Information Should you have questions, or need information about your Brother Product, we have a variety of support options for you to choose from: USA-Customer Service: Customer Service 877-478-6824 (voice) Customer Service 901-379-1210 (fax) Automated Faxback 800-521-2846 World Wide Web www.brother.com Supplies / Accessories www.brothermall.com or 888-879-3232 BROTHER INTERNATIONAL CORPORATION 100 SOMERSET CORPORATE BLVD.
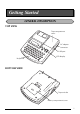
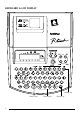
Getting Started GENERAL DESCRIPTION TOP VIEW Tape compartment cover AC adapter connector USB port Keyboard LCD display BOTTOM VIEW Tape exit slot Battery compartment cover 1
KEYBOARD & LCD DISPLAY Delete key Return key 2 Cursor keys Power key
GENERAL PRECAUTIONS ● ● To avoid injuries, do not touch the cutter’s edge. Use only Brother TZ tapes or Brother/Avery AV labels with this machine to avoid damage. Do not use tapes that do not have the or mark. Brother/Avery cannot be held responsible for trouble or damage by the use of unauthorized supplies. Do not pull on the tape being fed from the P-touch. This may damage the tape cassette. Do not use the machine in dusty places, and keep it out of both direct sunlight and rain.
2 3 4 If batteries are already installed, remove them. Insert eight new AA alkaline batteries, making sure that their poles point in the correct direction. Attach the battery compartment cover. ☞ Be sure to insert the new batteries within five minutes of removing the old ones, otherwise the text shown in the display and any text files stored in the memory will be lost (unless the machine is plugged into an AC outlet with the AC adapter).
DC IN 9.5V TAPE CASSETTE TZ tape cassettes are available for this machine in a wide variety of types, colors and sizes, enabling you to make distinctive color-coded labels and stylized stamps. AV label cassettes are also available for expanded addressing and filing capabilities. This machine has been designed to allow you to change cassettes quickly and easily. To change the tape cassette: Lift open the tape compartment cover. The installed cassette is also released.
CONNECTING THE P-TOUCH TO A COMPUTER This machine is equipped with a USB port, allowing you to connect the P-touch to your IBM PC-compatible or Macintosh computer, and print labels and stamps created using the P-touch Editor software. ☞ The P-touch Editor software and the printer driver must be installed before the P-touch is connected to the computer or turned on.
INSTALLING THE SOFTWARE AND PRINTER DRIVER In order to provide even more illustration and layout features to the label-making possibilities available with your P-touch 2600/2610, two applications are available on the enclosed CDROM: P-touch Editor 3.2 and P-touch Quick Editor. With either application, the printer driver must also be installed in order to print labels from the P-touch 2600/2610.
1 2 Insert the enclosed CD-ROM into the computer’s CD-ROM drive. A dialog box automatically appears, allowing you to select what to install. ☞ If the dialog box does not automatically appear, double-click “My Computer” on the desktop, and then double-click the CD-ROM drive containing the CD-ROM. (For Windows® XP, click “My Computer” in the Start menu, and then double-click the CD-ROM drive containing the CD-ROM.) Next, double-click “Setup.exe” to display the dialog box.
3 Carefully read the contents of the Welcome dialog box, and then click the Next button to continue. The User Information dialog box appears. 4 Type the necessary information into the appropriate boxes (If the information has already been registered in Windows®, it will automatically appear.), and then click the Next button. A dialog box appears, asking for confirmation of the entered information. 5 Click the Yes button to register the entered information.
7 •For a Custom installation Selecting “Custom”, then clicking the Next button displays a dialog box that allows you to select which options to install. Only the options with a check mark beside them will be installed. In addition to the basic options listed for a Typical installation, the User’s Guide can also be installed. 1) Select which options to install. Editor: P-touch Editor 3.2 software Clip Art: Illustrations for the P-touch Editor 3.
☞ If the printer driver is already installed, click the No button. A dialog box appears explaining that installation is finished. Select “Yes, I want to restart my computer now.”, click the Finish button to restart the computer, and then remove the CD-ROM from the CD-ROM drive. INSTALLING THE P-TOUCH QUICK EDITOR SOFTWARE The P-touch Quick Editor software provides quick access to the more simple label-designing features for easy text input and instant printing of labels.
☞ 3 To install just the printer driver, click the lower button (Driver). The first Driver Setup dialog box appears, informing you that the PT-2600/2610 printer driver will be installed. Continue with the procedure in INSTALLING THE PRINTER DRIVER on page 13. To install the P-touch Editor 3.2 software, click the upper button (P-touch Editor). Continue with the procedure in INSTALLING THE P-TOUCH EDITOR 3.2 SOFTWARE on page 7.
6 7 Click the Next button to begin installation. ☞ To change the location where P-touch Quick Editor will be installed, click the Browse button, and then select the installation folder in the Choose Folder dialog box that appears. Then, click the OK button. After P-touch Quick Editor is installed, a dialog box appears, allowing you to select where shortcuts to P-touch Quick Editor will be added. Select the desired locations for the shortcuts, and then click the Next button.
With Windows® 98, 98 SE, Me or 2000: 1 In the dialog box that appears, informing you that the PT-2600/2610 printer driver will be installed, click the Next button. A dialog box appears, instructing you to connect the P-touch 2600/2610 to the computer. 2 Connect the P-touch 2600/2610 to the computer using the enclosed USB interface cable as described on page 6, and then turn on the P-touch 2600/2610. A dialog box appears, indicating that the printer driver has been installed. 3 Click the Finish button.
2 Connect the P-touch 2600/2610 to the computer using the enclosed USB interface cable as described on page 6, and then turn on the P-touch 2600/2610. The first Found New Hardware Wizard dialog box appears. 3 Select “Install the software automatically (Recommended)”, and then click the Next button. A dialog box appears, warning that the software has not passed Windows Logo testing. 4 Click the Continue Anyway button to continue with the installation.
6 7 Click the Finish button. A dialog box appears, indicating that the installation is finished. Select “Yes, I want to restart my computer now.” (or “Yes, restart immediately” if the printer driver was installed separately), click the Finish button to restart the computer, and then remove the CD-ROM from the computer. REPLACING OR ADDING THE PRINTER DRIVER 1 2 3 4 16 Turn off the P-touch 2600/2610, and then disconnect it from the computer. Insert the enclosed CD-ROM into the computer’s CD-ROM drive.
☞ If “Replace with new Brother PT-2600/2610” is selected, the previously installed printer driver is deleted, and replaced with a new one. Select this option when upgrading the printer driver, or when running Windows 2000 or XP and changing to a P-touch 2600/2610 with a different serial number. If “Add Brother PT-2600/2610” is selected, a new printer driver is added. With a USB connection on Windows® 98 or Me, only a port is added without adding it as a new printer.
6 Connect the P-touch 2600/2610 to the computer using the enclosed USB interface cable as described on page 6, and then turn on the P-touch 2600/2610. The first Found New Hardware Wizard dialog box appears. 7 Select “Install the software automatically (Recommended)”, and then click the Next button. A dialog box appears, warning that the software has not passed Windows Logo testing. 8 Click the Continue Anyway button to continue with the installation.
On a Macintosh Computer The Mac version of the software is for a Macintosh with an English operating system. If the software is installed on a Macintosh with an operating system in a different language, the software may not run properly. BEFORE INSTALLATION Check that your system configuration meets the following requirements. Computer: Macintosh with a Power PC processor Operating system: Mac OS 8.6 or later or OS X 10.
5 Double-click the P-touch Editor 3.2 folder to open it. 6 Double-click the P-touch Editor 3.2 Installer icon in the folder that appears. The installer starts up. 7 Select the installation method. •For a basic installation Clicking the Install button immediately starts installing the all options. ☞ About 20 MB of available hard-disk space is needed to begin installation. In order to install all options, about 100 MB of available hard-disk space is needed.
9 When the dialog box appears, asking if you wish to restart the computer, click the Restart button to restart the computer. With Mac OS X 10.1 or later: 1 2 3 With the P-touch 2600/2610 and the Macintosh turned off, connect the P-touch to the computer using the enclosed USB interface cable as described on page 6. Be sure to leave the P-touch turned off. Turn on the Macintosh. Insert the enclosed CD-ROM into the computer’s CD-ROM drive. 4 Double-click the Mac OS X folder to open it.
Click the Next button. The Choose Product Components dialog box appears. 8 Select the installation method. •For a typical installation Click the Next button to immediately start installing all options. ☞ About 20 MB of available hard-disk space is needed to begin installation. In order to install all options, about 100 MB of available hard-disk space is needed.
9 Select the desired location for the alias, and then click the Next button. A dialog box appears, allowing you to check the installation. 0 Check that the installation will be performed as desired, and then click the Install button. After P-touch Editor is installed, a dialog box appears, indicating that the installation is finished. Click the Done button, and then restart the computer.
4 Double-click the Mac OS 9 folder to open it. 5 Double-click the P-touch Quick Editor Installer icon in the folder that appears. The installer starts up. 6 Select the installation method. •For a basic installation Clicking the Install button immediately starts installing the most basic options. ☞ About 20 MB of available hard-disk space is needed to begin installation. If enough hard-disk space is available, click the Install button.
With Mac OS X 10.1 or later: 1 2 3 With the P-touch 2600/2610 and the Macintosh turned off, connect the P-touch to the computer using the enclosed USB interface cable as described on page 6. Be sure to leave the P-touch turned off. Turn on the Macintosh. Insert the enclosed CD-ROM into the computer’s CD-ROM drive. 4 Double-click the Mac OS X folder to open it. 5 Double-click the P-touch Quick Editor folder to open it. 6 Double-click the Quick Editor Installer icon in the folder that appears.
7 Click the Next button. The Choose Alias Folder dialog box appears, allowing you to select where an alias to P-touch Quick Editor will be added. 8 Select the desired location for the alias, and then click the Next button. A dialog box appears, allowing you to check the installation. 9 Check that the installation will be performed as desired, and then click the Install button. After P-touch Quick Editor is installed, a dialog box appears, indicating that the installation is finished.
3 Insert the enclosed CD-ROM into the computer’s CD-ROM drive. 4 Double-click the Mac OS X folder to open it. 5 Double-click the Driver Installer icon in the folder that appears. The installer starts up, and then the Introduction dialog box appears. 6 Click the Next button. A dialog box appears, allowing you to check the installation.
7 8 Check that the installation will be performed as desired, and then click the Install button. After P-touch Quick Editor is installed, a dialog box appears, indicating that the installation is finished. Click the Done button, and then restart the computer. SELECTING THE PT-2600/2610 AS THE PRINTER With a Mac OS before OS X: 1 2 3 4 Turn on the P-touch 2600/2610. Pull down the Apple menu and select “Chooser” to display the Chooser window. In the list on the left, click the PT-2600/ 2610 icon.
5 6 7 Click the Add Printer button. A list of detected USB printers appears. Select “PT-2600/2610” from the USB list, and then click the Add button. The PT2600 appears in the Printer List. Quit Print Center. READING THE USER’S GUIDE The P-touch Editor User’s Guide can be viewed either by inserting the CD-ROM into the drive each time you wish to refer to it or by installing it onto your computer so that it is quickly available at any time.
USING P-TOUCH EDITOR 3.2 P-touch Editor 3.2 makes it easy for anyone to design and print more complex labels for almost any need imaginable. STARTING UP P-TOUCH EDITOR 3.2 On an IBM PC-compatible computer: • With the Start button: 1 Click the Start button in the taskbar to display the Start menu. 2 Select “Programs”. 3 Select “P-touch Editor 3.2”. 4 Click “P-touch Editor 3.2”. • With Windows Explorer: 1 Start up Windows Explorer. 2 Select the drive and directory where P-touch Editor is installed.
On a Macintosh computer: ● Double-click the P-touch Editor 3.2 icon in the P-touch Editor 3.2 folder installed on the computer. When P-touch Editor is started, the following window is displayed. Print Layout area Title bar Rulers area Menu bar Draw toolbar Print toolbar Database toolbar Property dock Object dock Status bar ☞ To view the help for P-touch Editor 3.2, double-click “Main.htm” in the Help folder within the P-touch Editor 3.2 folder installed on the computer.
Click an icon to display its Properties. • Page Properties Click this button to hide the Properties. When the P-touch 2600/2610 is selected as the printer ENTERING TEXT ☞ 1 2 3 4 32 Although the screens shown in the following explanations are for Windows® 98, 98 SE and Me, the operations for Windows® 2000 and XP and Macintosh are the same unless specifically mentioned. Click (Text button) on the draw toolbar. Text can be typed in, and the pointer changes from (selection pointer) to (I-beam pointer).
5 To create a new line of text, press the keyboard’s Enter key. ☞ With P-touch Editor 3.2, text is always typed in using the insert mode. The overwrite mode cannot be used to type in text. ☞ To change the font and text size, click the appropriate icon in the property dock, and then select the desired settings from the Properties that appear. ☞ For details, refer to READING THE USER’S GUIDE on page 29. NOTES ON USAGE Barcodes Keep the following points in mind when using P-touch Editor 3.
STARTING UP P-TOUCH QUICK EDITOR On an IBM PC-compatible computer: • If a shortcut was added to the StartUp menu: ● P-touch Quick Editor automatically starts when the computer is started up. • If a shortcut was added to the desktop: ● Double-click the P-touch Quick Editor icon on the desktop. • If a shortcut was added to the Quick Launch toolbar: ● Double-click the P-touch Quick Editor icon in the Quick Launch toolbar.
SPECIFYING A LABEL SIZE Before entering text, the label size must be set. A selection of preset layout sizes is available for a variety of needs. ☞ Although the screens shown in the following explanations are for Windows® 98, 98 SE and Me, the operations for Windows® 2000 and XP and Macintosh are the same unless specifically mentioned. 1 Click the arrow beside the Properties button to display a drop-down menu. 2 Click [Tape Settings] to display various label format settings.
IMPORTING TEXT Text that has already been typed in another application can easily be imported into the label. 1 Select the desired text in the other application. 2 Import the text into the label layout either by pressing the designated shortcut keys (Windows only) or by dragging it from the other application. ☞ (Windows only) To specify the shortcut keys used to import text, right-click in the label view (or text box), and then click [Options] in the menu that appears.
VIEWING THE TEXT Layouts that are too long to fit in the screen can be scrolled by clicking the Arrange button to view the left, the center, then the right side of the layout with each click of the button. ☞ If the label view (or text box) has been moved away from the tool bar, it will be docked before scrolling. PRINTING Before printing labels, certain print options can be selected. 1 Click the arrow beside the Print button to display a drop-down menu. 2 Click [Print Options].
UNINSTALLING THE SOFTWARE & PRINTER DRIVER On an IBM PC-Compatible Computer UNINSTALLING THE SOFTWARE Uninstall the P-touch Editor 3.2 or the P-touch Quick Editor software from a PC as described below. 1 Start up Windows® 98, 98 SE, Me, 2000 or XP. 2 Click the Start button in the taskbar, select “Settings”, and then click “Control Panel”. With Windows® XP, click the Start button in the taskbar, and then click “Control Panel”.
3 Click the lower button (Driver). A Driver Setup dialog box appears, allowing you to select whether to replace, add or delete the PT-2600/2610 printer driver. 4 Select “Delete Brother PT-2600/2610.”, and then click the Next button. A dialog box appears, asking for confirmation to delete all PT-2600/2610 printer drivers. 5 Click the Yes button. A dialog box appears, indicating that the printer drivers have been deleted. Click the Finish button.
5 Drag the following to the Trash icon. •P-touch Editor 3.2 Prefs icon (for the P-touch Editor 3.2 software) •P-touch Quick Editor Prefs icon (for the P-touch Quick Editor software) •PT-2600/2610 Prefs icon (for the printer driver) With Mac OS X 10.1 or later: To uninstall the P-touch Editor 3.2 software: 1 Double-click the Applications folder on the Macintosh HD to open it. 2 Double-click the P-touch Editor 3.2 folder to open it. 3 Double-click the Uninstall P-touch folder.
ATTACHING LABELS LAMINATED TAPE The enclosed stick enables you to easily remove the backing from labels printed on laminated tapes. 1 Hold the tape in your left hand, with the printed surface facing up, and hold the stick in your right hand. 2 Pass the tape halfway through the long narrow hole in the stick. 3 Turn the stick three-quarters of a turn towards you and pull the stick away from you as shown below. 4 Peel off the label backing.
PRINT HEAD & ROLLERS Occasionally, specks of dust or dirt become attached to the machine’s print head and rollers. This is particularly likely when you are using the unit outdoors or in a very dusty environment. If a section of the print head is covered with dust, a black horizontal streak may appear through the label text. Therefore, as with a tape recorder, the machine’s head may need to be cleaned from time to time.
For Your Information pe -Ta TZ l be -La AV POWER KEY The Power key ( o ) is located in the lower-right corner of the keyboard. If batteries have been installed or the machine has been plugged in using the optional AC adapter, the previous session’s information is displayed when the machine is turned on. This feature allows you to stop work on a label, turn off the machine, and return to it later without having to re-enter the text.
RIGHT CURSOR KEY To move the cursor one character to the right: Press w once. ● ☞ If this key is pressed when the cursor is at the end of a line followed by another line, the cursor moves to the beginning of the next line. To move the cursor several characters to the right: Hold down w until the cursor moves to the desired position. ● To move the cursor to the end of the current line: Hold down c and press w. ● To move the cursor to the beginning of the next text block: Hold down s and press w.
CODE KEY To use a function printed above a key: ● Hold down c and press the key immediately below the desired function. EXAMPLE To start the Symbol function: 1: D A N G E R _ ● Hold down c and press a once. Ü ALT KEY To type in characters printed in color on the right-hand side of the keys: ● Hold down a and press the key of the desired character written in color. The Alt indicator on the left side of the display comes on while a is held down. EXAMPLE To type in “–”: ● Hold down a and press / once.
SHIFT KEY To type in an uppercase letter or a symbol printed in the top left-hand corner of a key: Hold down s and press the key of the desired letter or symbol. ● EXAMPLE To type in “%”: 1: 5 _ ● Hold down s and press 5. 1: 5 % _ The Caps mode is similar to holding down s. It allows you to type capital letters continuously. To type in many capital letters: 1 Hold down c and press s. The Caps indicator on the left side of the display comes on.
pe l SPACE KEY be -Ta -La AV TZ The Space key ( r ) lets you add blank spaces between characters in your text. It is different from the right cursor key ( w ), which just moves the cursor without adding blank spaces. To add a space: Press r. ● EXAMPLE To add a space: 1: J . _ ● Press r. 1: J . pe -Ta TZ l be -La AV _ RETURN KEY As on a typewriter or word processor, this machine’s Return key ( _ ) is used to end a line of text and start another one.
TZ-Tape Tape widths Maximum number of lines that can be printed 1/4" (6 mm) 2 3/8" (9 mm) 2 1/2" (12 mm) 3 3/4" (18 mm) 5 1" (24 mm) 7 Stamp 3/4" (18 mm) 3 Stamp 1" (24 mm) 5 AV-Label Label sizes Maximum number of lines that can be printed AV2067 Address labels: 3/4" × 2 5/8" (20 mm × 67 mm) 7 AV1957 Return address labels: 3/4" × 2 1/4" (19 mm × 57 mm) 7 AV1789 File folder labels: 5/8" × 3 1/2" (17 mm × 89 mm) 6 The return key can also be used to select an item from a list (e.g.
pe -Ta TZ l NEW BLOCK KEY be -La AV In order for one section of the text to have a different number of lines than the rest of the text or in order to apply a different format to a section of the text (Refer to LOCAL FORMAT FUNCTION on page 74.), a new block must be created using the New Block function. ☞ A single label can only contain a maximum of five blocks. If the cursor is located in the fifth block when c is held down and _ is pressed, the error message “5 BLOCK LIMIT!” appears.
pe -Ta TZ l be -La AV TAB FUNCTION This function allows you to separate sections of a line of text by adding tabs. This enables you to create perfectly aligned columns without having to type in several spaces. All tabs have the same length and are measured from either the beginning of the line or the previous tab, if there is more than one. The tab length can be set between 0.0” and 11.8” (0.0 and 30.0 cm). ☞ The text cannot contain more than 50 tabs.
The label shown below will be printed. Margin Tab (1.2" (3.0 cm)) Tab (1.2" (3.0 cm)) Margin EXAMPLE To set the tab length to 1”: 1 Hold down c and press W once. TAB LENGTH 2.0inch 2 Press h until 1.0 is displayed. TAB LENGTH 1.Oinch 3 Press _. To add a tab: ● Hold down c and press Q once. 1: a r t NO.
pe -Ta TZ l DELETE KEY be -La AV The Delete (backspace) key ( * ) allows you to remove characters to the left of the cursor’s current position. It differs from the left cursor key ( f ), which only moves the cursor without deleting any characters. The delete key can also be used to quit most functions and return to the previous display without changing the text.
Hold down c and press P once. 2 ☞ Each time Pis pressed while c is held down, one line of text is deleted. EXAMPLE To delete “012-345-6789”: 1: G a r d e n 2: 3 4 5 – 6 7 8 9 _ ● Hold down c and press P once.
EXAMPLE To clear the text and formats: 1: G a r d e n 2: 3 4 5 – 6 7 8 9 _ 1 Hold down c and press *. TXT&FORMAT TEXT ONLY 2 Press e until TXT&FORMAT is flashing. TXT&FORMAT TEXT ONLY 3 Press _. 1: _ To delete just the text: 1 Hold down c and press *. 2 Press e or h until TEXT ONLY is selected (flashing). To return to the text without erasing anything, press *. ☞ 3 Press _.
EXAMPLE 1 Hold down c and press *. TXT&FORMAT TEXT ONLY 2 Press h until TEXT ONLY is flashing. TXT&FORMAT TEXT ONLY 3 Press _. 1: _ e p -Ta TZ l be -La AV ACCENT FUNCTION The Accent function can also be used to add accented characters to your text. Many of these characters can also be typed in using the Symbol function. The accented characters are grouped according to the capital or small letter that they are combined with.
To type in an accented character: 1 2 Hold down c and press A. The message “ACCENT a – u / A – U?” appears on the display. Press the key of the letter in the desired accented character. ☞ 3 To type a capital letter, hold down s (or hold down c and press s to turn on Caps mode) before pressing the letter key. Press f or w until the desired accented character appears enlarged within the frame in the middle of the display. 4 Press _. The accented character is added to the text.
EXAMPLE 3 Press w until É appears in the frame. É 4 Press _. 1: R E S U M E _ pe -Ta TZ l SYMBOL FUNCTION be -La AV In addition to the letters, symbols and numerals on the key tops, there are 67 additional marks available with the Symbol function.
To type in a symbol: 1 Hold down c and press a. A row of symbols appears in the display. 2 Press e or h to display different rows of symbols and press f or w until the desired symbol appears enlarged within the frame in the middle of the display. 3 Press _. The symbol is added to the text. To type in a series of symbols, hold down c before pressing _. Then, con- ☞ tinue adding symbols by selecting them as explained in step 2, and holding down c while pressing _.
pe -Ta TZ l be -La AV AUTO FORMAT FUNCTION The Auto Format function keys make creating labels quick and easy. After simply selecting one of the various pre-formatted layouts and typing text into each of its fields, the overall style of the label can easily be changed by selecting one of the seven available style formats, and then the label is ready to be printed.
7 Press e or h to select the desired character style. ☞ 8 The default setting (ORIGINAL) can be selected by pressing r. Press _. “MENU” appears in the display. Six additional character styles are available. ☞ The text and selected text style of an auto format layout can be stored in the memory to be recalled and used at a later time. To print a label using the selected layout: 9 Press e or h until the PRINT command is displayed.
2 Press e or h until layout 35 (FILE SHORT) is displayed. 35:1/2×2.9 FILE SHORT 3 Press _. 1TITLE? _ 4 Type in “August Sales Report”, and then press _. MENU PRINT To change the character style of the label: 5 Press e or h until CHNGE STL? is displayed. MENU CHNGE STL? 6 Press _. CHAR.STYL ORIGINAL 7 Press e or h until ELEGANT is displayed. CHAR.STYL ELEGANT 8 Press _.
To print the label: 9 Make sure that PRINT is displayed, and then press _. COPIES 1/ 1 To create an address label using a layout for AV labels: 1 Press i. 1:ADDRES1 2 Press e or h until layout 4 (ADDRES4) is displayed. 4:ADDRES4 3 Press _. 1NAME? 4 Type in “Mr. R. Becker”, and then press _. 2ADDRESS1? 5 Type in “29 South Main St.”, and then press _.
6 Type in “Los Angeles, CA 88888”, and then press _. MENU PRINT To change the character style of the label: 7 Press e or h until CHNGE STL? is displayed. MENU CHNGE STL? 8 Press _. CHAR.STYL ORIGINAL 9 Press e or h until FORMAL is displayed. CHAR.STYL FORMAL 0 Press _. MENU PRINT To print the label: A Make sure that PRINT is displayed, and then press _.
Auto format layouts for TZ tape No. Layout name 1 VCR VHS-1 2 VCR VHS-2 3 VCR 8mm-1 4 VCR 8mm-2 5 VCR VHSC-1 6 VCR VHSC-2 7 AUDIO-1 8 AUDIO-2 9 10 AUDIO-3 11 12 DAT-1 13 DAT-2 14 MINI DISK1 15 MINI DISK2 16 NAME PLATE 17 64 Tape width × label length Layout fields 11 SYMBOL? 3/4" × 5.5" 22 TITLE? (18 mm × 140 mm) 33 SUBTITLE? 1" × 3.0" 11 TITLE? (24 mm × 77 mm) 22 SUBTITLE? 11 SYMBOL? 3/8" × 2.9" 22 TITLE? (9 mm × 73 mm) 33 SUBTITLE? 11 SYMBOL? 1/2" × 3.
No. Layout name 18 ADDRESS 19 20 EQUIPMENT 21 22 SLIDE 23 PRICE 24 25 SALE PRICE 26 27 ORGANIZ. L 28 ORGANIZ. S 29 FILE LONG 30 31 FILE LONGV 32 33 34 FILE SHORT 35 36 37 3.5" FLOPPY 38 Tape width × label length 1" × 2.0" (24 mm × 52 mm) 3/4" × 2.0" (18 mm × 52 mm) 1" × 3.1" (24 mm × 79 mm) 3/4" × 3.1" (18 mm × 79 mm) 1/2" × 1.7" (12 mm × 42 mm) 1" × 2.2" (24 mm × 57 mm) 3/4" × 2.2" (18 mm × 57 mm) 1" × 3.6" (24 mm × 92 mm) 3/4" × 3.6" (18 mm × 92 mm) 1" × 3.2" (24 mm × 82 mm) 1" × 2.
No. Layout name 39 miniDV1 40 miniDV2 41 42 43 44 45 46 47 48 FREE FORM 1 FREE FORM 1 FREE FORM 1 FREE FORM 1 FREE FORM 2 FREE FORM 2 FREE FORM 2 FREE FORM 2 Tape width × label length 3/8" × 1.7" (9 mm × 43 mm) Layout fields 11 TITLE? 22 SUBTITLE? 11 TITLE? 1/2" × 2.1" 22 SUBTITLE? (12 mm × 55 mm) 23 DURATION? 1" (24 mm) 3/4" (18 mm) 1/2" (12 mm) 3/8" (9 mm) 11 1 LINE? 1" (24 mm) 3/4" (18 mm) 1/2" (12 mm) 3/8" (9 mm) 33 DATE? 44 REC.MODE? 34 REC.
Layout samples for TZ tape 1 VCR VHS-1 2 VCR VHS-2 3 VCR 8mm-1 4 VCR 8mm-2 5 VCR VHSC-1 6 VCR VHSC-2 7 AUDIO-1 8 AUDIO-2 9 AUDIO-2 10 AUDIO-3 11 AUDIO-3 12 DAT-1 13 DAT-2 14 MINI DISK1 15 MINI DISK2 16 NAME PLATE 17 NAME PLATE 18 ADDRESS 19 ADDRESS 67
20 EQUIPMENT 22 SLIDE 21 EQUIPMENT 23 PRICE 24 PRICE 25 SALE PRICE 26 SALE PRICE 27 ORGANIZ. L 28 ORGANIZ.
37 3.5”FLOPPY 38 3.
7 ADDRES7 1 RETURN1 2 RETURN2 3 RETURN3 4 RETURN4 1 FILING1 2 FILING2 3 FILING3 4 FILING4 Character styles for TZ tape and AV labels CHAR.
CHAR.STYLE setting Font setting Style setting CUTE FONT 4 OUTLINE FORMAL FONT 2 ITALIC ELEGANT FONT 3 NORMAL NATURAL FONT 6 NORMAL pe -Ta TZ l be -La AV Sample STAMP FUNCTION The Stamp function allows you to quickly and easily create your own stamp stencil films for customized stamps. After inserting a stamp film cassette, select this function to automatically center the text and adjust the tape length and margins to a perfect format for the pre-inked stamp film holders.
EXAMPLE To cut a stamp: 1 Enter the text and insert a stamp film cassette in the tape compartment. 2 Hold down c and press U. STAMP FORMAT? 3 Press _. 1: J S m i t h 2: 1 2 3 4 M a i n 4 Press p to engrave the stamp stencil film, and then automatically cut it off. COPIES 1/ 1 To affix a stamp: 5 Remove the stamp frame from around the stamp film holder ink pad, one side at a time, and then remove the protective seal covering the ink pad and the backing paper from the stamp stencil film.
7 Hold the end of the stamp stencil film in place with your thumb, and then pass the tape through the guides while pulling it tight. Guides 8 Fold the other end of the stamp stencil film over the other side of the stamp film holder and hold it in place with your finger. Fold over 9 Fit the stamp frame over the stamp stencil film and push it into place. 0 Insert the stamp film holder straight into its cap. ☞ Be sure that the stamp is correctly covered in order to prevent ink spills.
pe -Ta TZ l be -La AV LOCAL FORMAT FUNCTION The Local format function allows you to emphasize a block of the text by printing it with a font, size, width, style, underline or frame setting that is different from the rest of the text. In order to apply local formatting, the text must be divided into blocks. (For more details, refer to NEW BLOCK KEY on page 49.) To use the Local format function: 1 ☞ 2 3 Press f, w, e or h to position the cursor in the block that will be given a different format.
4 Continue pressing m until the I+SHAD style setting is displayed. STYLE I+SHAD 5 Press _. pe -Ta TZ l be -La AV FONT FUNCTION With the Font function, you can choose one of eight fonts for your text. The following font settings are available: (HELSINKI) (BRUSSELS) (US) (FLORIDA) (BELGIUM) (SAN DIEGO) (LOS ANGELES) (ISTANBUL) The default font setting is FONT 1. To change the font setting: 1 Press k once to display the current font setting.
2 Continue pressing k until FONT 2 is displayed. FONT 2 A 3 Press _. pe -Ta TZ l be -La AV SIZE & WIDTH FUNCTIONS The character size can be adjusted using both the Size and Width functions. Since the character size that can be used depends on the width of the tape, the following table shows the character sizes that can be used with each tape width.
TZ-Tape ☞ With the AUTO setting selected and a 1″ (24 mm)-, 3/4″ (18 mm)- or 1/2″ (12 mm)-wide TZ tape cassette installed, text consisting of just one line of only uppercase letters (and no accented characters) will be printed with a character size slightly larger than the maximum character size possible for that tape width (i.e., 62 points for 1″ (24 mm)-wide tape, 48 points for 3/4″ (18 mm) wide tape and 29 points for 1/2″ (12 mm) wide tape).
EXAMPLE To select the 24 point size setting: 1 Press l once. SIZE AUTO 2 Continue pressing l until 24 is displayed. SIZE 24 3 Press _. To change the width setting: 1 Press n once to display the current width setting. 2 Continue pressing n until the desired width setting is displayed. ☞ 3 The Width indicator comes on when a setting other than MEDIUM is selected. Press _ to apply the selected width setting to the text. EXAMPLE To select the WIDE width setting: 1 Press n once.
pe l be -Ta -La AV TZ STYLE FUNCTION You can choose from eleven different character styles to apply to your text (including vertical printing). ☞ Characters printed using the smaller sizes may be difficult to read if certain style settings (e.g., I+SHAD) are selected.
REFERENCE REFERENCE Font Setting Style Setting NORMAL BOLD OUTLINE SOLID SHADOW ITALIC FONT 1 FONT 2 FONT 3 FONT 4 FONT 5 FONT 6 FONT 7 FONT 8 Font Setting FONT 1 FONT 2 FONT 3 FONT 4 FONT 5 FONT 6 80 Style Setting I+BOLD I+OUTL I+SOLID I+SHAD VERT
Style Setting Font Setting I+BOLD I+OUTL I+SOLID I+SHAD VERT FONT 7 FONT 8 pe l be -Ta -La AV TZ UNDERLINE FUNCTION You can emphasize your text by underlining it or striking it out. The default underline setting is OFF. When the Underline function is set to any setting other than OFF, the Udl/Frm indicator on the right side of the display comes on.
2 While still holding down c, continue pressing 5 until ON1 is displayed. UNDL ON1 3 Release c. pe l be -Ta -La AV TZ FRAME FUNCTION With the Frame function, you can choose from various frames and highlights to design a more decorative or emphasized label. The default setting is OFF; however, 18 other settings are also available. Refer to Reference at the end of this section for samples of the available settings.
2 While still holding down c, continue pressing 6 until the candy frame is displayed. 3 Release c.
pe -Ta TZ l be -La AV TAPE MARGIN FUNCTION The Tape margin function allows you to adjust the size of the margins on the left and right sides of your text. The default tape margin setting is FULL; however, three other settings are also available. FULL (1" (24 mm) margins) NONE (1/6" (4 mm) margins) NARROW (5/16" (8 mm) margins) HALF (1/2" (12 mm) margins) ☞ When a setting other than FULL is selected, extra tape is fed out before printing starts.
2 While still holding down c, continue pressing E until HALF is displayed. MARGIN HALF 3 Release c. e p -Ta TZ l be -La AV HORIZONTAL ALIGNMENT FUNCTION You can choose to align the text in one of three ways. In addition, if the Length function was used to set the length of the label, the text will align within the label according to the selected horizontal alignment setting. The default setting is LEFT; however, two other settings are also available.
EXAMPLE To select the RIGHT horizontal alignment setting: 1 While holding down c, press R once, and keep c held down. ALIGN LEFT 2 While still holding down c, continue pressing R until RIGHT is displayed. ALIGN RIGHT 3 Release c. e p -Ta TZ l be -La AV MIRROR PRINTING FUNCTION This function prints your label so that the text can be read from the adhesive side of the tape.
EXAMPLE To select the ON mirror printing setting: 1 While holding down c, press p once, and keep c held down. MIRROR OFF ABC MIRROR ON CBA 2 While still holding down c, continue pressing p until ON is displayed. 3 Release c. e p -Ta TZ l be -La AV LENGTH FUNCTION Although the length of the printed label automatically adjusts to fit the length of the entered text, there may be times when you will want to make a label with a specific length.
Press _. 5 EXAMPLE To select a label length of 5”: 1 While holding down c, press T once, and keep c held down. LENGTH 5.3inch LENGTH OFF 2 While still holding down c, continue pressing T until ON is displayed. LENGTH ON 3 Release c. LENGTH 4.0inch 4 Press e until 5.0 inch is displayed. LENGTH 5.0inch 5 Press _. e p -Ta TZ l be -La AV BARCODE FUNCTION The Barcode function, which enables barcodes to be printed as a part of label, is one of this machine’s most advanced features.
Four different parameters enable you to create custom barcodes. PARAMETER SETTINGS PROTOCOL CODE 39, I-2/5, EAN13, EAN8, UPC-A, UPC-E, CODE128 WIDTH (barcode width) LARGE, SMALL UNDER#S (characters printed below barcode) ON, OFF CH.DIG. (check digit) OFF, ON The default settings are CODE 39 PROTOCOL, LARGE WIDTH, UNDER#S set to ON, and CH.DIG. set to OFF.
SYMBOL SPECIAL CHARACTER 1 + 2 $ The following special characters can only be entered when using protocol CODE 128.
To add the barcode to your text: B Press _. EXAMPLE To add a barcode to the label: 1 Hold down c and press Y once. CODE _ 39 2 Press e. PROTOCOL CODE 39 3 Press f or w until the CH.DIG. parameter is displayed. CH.DIG. OFF 4 Press e or h until ON is displayed. CH.DIG. ON 5 Press _. CODE _ 39 6 Press 1, 2, 3, then 4. CODE 39 1234A _ 7 Press _.
pe -Ta TZ l be -La AV TZ CUT FUNCTION The TZ Cut function allows you to set whether or not the machine will automatically cut each TZ label after it is printed. Turn on the TZ Cut function before starting to print in order to cut the labels automatically after printing them. TZ-Tape ☞ After printing a label on TZ tape with the TZ Cut function set to OFF, hold down c and press r once to feed the tape, then cut it.
pe l PRINT KEY be -Ta -La AV TZ After you have entered your text and chosen the desired format settings, you are ready to print. TZ-Tape ☞ If the TZ Cut function is set to ON, TZ labels will automatically be cut after they are printed. AV-Label ☞ AV labels are always cut off after they are printed.
To feed and cut off 1” (24 mm) of TZ tape: Hold down c and press r once. 1” (24 mm) of tape is fed out and cut off. ● e p -Ta TZ l be -La AV NUMBERING FUNCTION This function can be used to print many copies of the same text while increasing certain characters (letters, numbers or barcode data) after each label is printed. This type of automatic incrementation is very useful when printing serial number labels, production control labels or other labels requiring ascending codes.
6 Press e or h until the desired number of copies is displayed, or use the number keys to type in the number. 7 Press p (or _). TZ-Tape The set number of labels is printed. The number of the copy being printed is displayed. ☞ If the TZ Cut function is set to ON, each TZ label is automatically cut off after it is printed. This completes the procedure for TZ tapes; disregard steps 8 and 9. AV-Label CUT MENU appears in the display. Continue with step 8 to finish printing.
5 Press p (or _ ). If TZ tape is being printed on: COPIES 1/ 3 COPIES 2/ 3 COPIES 3/ 3 If AV labels are being printed on: In the following example, CUT MENU is set to EACH LABEL. CUT MENU EACH LABEL 6 Press p (or _ ). COPIES 1/ 3 COPIES 2/ 3 COPIES 3/ 3 ☞ 96 If CUT MENU was set to AFTER LAST, the string of three labels would not be cut off until after the last one is printed.
pe -Ta TZ l be -La AV REPEAT PRINTING FUNCTION This function allows you to print up to 99 copies of the same text. To use the Repeat printing function: 1 Hold down c and press I. The message “COPIES” appears in the display with the default setting 1, which may be changed as necessary. ☞ To cancel the Repeat printing function at any time, hold down c and press I (or press just * ). 2 Press e or h until the desired number of copies is displayed, or use the number keys to type in the number.
EXAMPLE To print three copies of a label: 1 Hold down c and press I. COPIES 1 2 Press 3. COPIES 3 3 Press p (or _ ). If TZ tape is being printed on: COPIES 1/ 3 COPIES 2/ 3 COPIES 3/ 3 If AV labels are being printed on: In the following example, CUT MENU is set to EACH LABEL.
4 Press p (or _ ). COPIES 1/ 3 COPIES 2/ 3 COPIES 3/ 3 ☞ pe -Ta TZ l be -La AV If CUT MENU was set to AFTER LAST, the string of three labels would not be cut off until after the last one is printed. MEMORY FUNCTIONS You can use the memory to store your most frequently used text files, TZ tape layouts or AV label layouts. The text remains in the memory, along with its formatting, even after all characters are removed from the display using the Clear function (holding down c and pressing * ).
☞ To quit the Store function without storing the text, hold down c and press 7 (or press just * ). TZ tape and AV label layouts of the Auto Format function can be stored after the text for each field has been typed in. To store the layout with a specific character style, select the style of the text before storing the layout. 2 Press e or h to select the file number where you wish to store the text. 3 Press _.
RECALLING TEXT To recall a stored text file: 1 Hold down c and press 8. The message “RECALL” appears on the display with the file number and beginning of the most recently stored or recalled text. ☞ To quit the Recall function without recalling text, hold down c and press 8 (or press just * ). An auto format layout that has been stored in the memory can be recalled when you are asked to select a layout in the Auto Format function.
DELETING A FILE To delete a stored text file: 1 Hold down c and press 9. The message “CLEAR” appears on the display with the file number and beginning of the most recently stored or recalled text. ☞ To cancel the Memory delete function without deleting the text file, hold down c and press 9 (or press just * ). 2 Press e or h to select the file number containing the text that you wish to delete. The text stored under the selected file number is shown.
PRINTING MEMORY TEXT Text files and auto format layout files stored in the memory can easily be printed without recalling each file one by one. To print stored text files: 1 Hold down c and press 0. “PRINT” appears on the display with the file number and beginning of the most recently stored or recalled text. ☞ To quit the Memory print function without printing text, hold down c and press 0 (or press just *). 2 Press e or h to display the file containing the text that you wish to print.
9 Press _. 0 Press e or h to select the desired character style. ☞ The default setting (NO CHANGE) can be selected by pressing r. A Press _. “MENU” appears in the display. To print more stored files: B Press e or h until the PRINT MORE command is displayed. C Press _. The name of the layout appears in the top line of the display and the file number and beginning of the text appears in the bottom line. D Press e or h to display the file containing the text that you wish to print.
4 Press r. PRINT 2:R. BECK 5 Press _. COPIES 1/ 2 COPIES 2/ 2 To print AV label layouts stored under file numbers 0 and 3: 1 Press i. 4:ADDRES4 2 Hold down c and press 0. PRINT 3 ADDRESS 4 0:R. Beck Since this is one of the files that we wish to print, press r. ADDRESS 4 0:R. Beck 4 Press e or h until file number 3 is displayed. ADDRESS 1 3:B.
5 Press r. ADDRESS 1 3:B. Reyn 6 Press _. MENU PRINT 7 Press _.
TROUBLESHOOTING Problem Remedy 1. The display stays blank after you have turned on the machine. • Check that the AC adapter is connected correctly. • If you are using alkaline batteries, check that they are correctly inserted. • If the batteries are low, replace them with new ones. 2. The machine does not print or the printed characters are blurred. • Check that the tape cassette has been inserted properly. • If the tape cassette is empty, replace it with a new one.
ERROR MESSAGE LIST Error Message Cause Remedy 1 BARCODE PER BLOCK! This message appears if a barcode has already been added to the block when you try to use the Barcode function. Limit the number of barcodes in a block to one. 4 DIGIT MIN.! This message appears when less than the minimum four digits are entered as barcode data. Enter a minimum of four digits 5 BLOCK LIMIT! This message appears if five text Limit the number of text blocks to five.
Error Message CAN’T HERE! Cause Remedy This message appears if the cursor is at the end of the text when you hold Move the cursor below a number before holding down down c and press O. c and pressing O. CASSETTE CHANGED! This message appears if the tape cassette is changed while the P-touch is receiving data from the computer. Cancel the print job, install the correct tape cassette, and then try printing again. CHANGE ADAPTOR! This message appears if a high-voltage adapter is being used.
Error Message Cause Remedy INTERFACE ERROR! This message appears if the wrong port is selected. Windows Under “Print to the following port” in the printer Properties dialog box, select “PTUSB:” for the USB connection. ☞ If two or more of the same P-touch models are connected through their USB ports, instead of “PTUSB:”, select “PTUSB (PT2600/2610-XXXXXXXXX):” (where XXXXXXXXX is the serial number). The serial number is written above the barcode on the silver label attached to the bottom of the P-touch.
Error Message Cause Remedy NO FILES! This message appears if you try to recall or delete a text file from the memory when none are stored. Store a text file first. NO TAPE! This message appears if you try to print a label or feed the tape when no tape cassette is installed. Install a tape cassette and try again. REPLACE BATTERIES! This message appears if the installed alkaline batteries are about to run out. Replace the batteries or use the AC adapter.
Error Message Cause Remedy SET ADDRES TAPE! This message appears if an AV2067 Address label cassette is not installed when an AV2067 Address label layout of the Auto Format function is selected. Install an AV2067 Address label cassette. SET RETURN TAPE! This message appears if an AV1957 Return address label cassette is not installed when an AV1957 Return address label layout of the Auto Format function is selected. Install an AV1957 Return address label cassette.
SPECIFICATIONS HARDWARE Input Device: Keyboard - 57 keys LCD: 10 characters × 2 lines 20 indicators (including Alt and Caps) Print Tape: Pressure-sensitive, Adhesive-based 26’ 2” (8 m) long TZ tape is available in the following five widths. 1/4” (6 mm) 3/8” (9 mm) 1/2” (12 mm) 3/4” (18 mm) 1” (24 mm) AV labels are available in the following three types.
SOFTWARE Buffer Size: Maximum 272 characters Maximum seven lines Maximum five blocks Memory Size: Approx. 4,000 characters Character Size: For TZ tapes: Seven sizes (6, 9, 12, 18, 24, 36 and 48 points) + 62 point (one line of only capital letters on 1” (24 mm) wide tape) For AV labels: Seven sizes (6, 9, 12, 18, 24, 36 and 48 points) + 62 point (one line of only capital letters on AV2067 address labels) All are available in narrow, medium and wide widths. Availability depends on tape width.
ACCESSORIES (For USA Only) ● Supplies The following supplies and accessories are available for your P-touch and can be purchased from an authorized Brother dealer or directly from Brother should your dealer not stock them. Use only Brother TZ tapes or Brother /Avery AV labels with this machine. Brother/Avery cannot be held responsible for trouble caused by the use of unauthorized supplies. Do not use tapes that do not have the or mark. TZ Laminated Tape Cassettes (26.
Stock No. Description Qty/ Package Price** TZ-WB41 TZ-WT41 TZ-WS41 TZ-S141 TZ-S241 Black characters on Bugs Bunny adhesive Black characters on Taz adhesive Black characters on Tweety & Sylvester adhesive Industrial (strong adhesive) black characters on clear adhesive Industrial (strong adhesive) black characters on white adhesive 1 1 1 1 1 $23.99 $23.99 $23.99 $21.99 $21.99 1 1 1 1 1 1 1 1 $16.99 $17.99 $17.99 $20.99 $20.99 $17.99 $18.99 $18.99 1 1 1 1 1 1 $14.99 $16.99 $18.99 $16.99 $17.99 $17.
Stamp Kit Stock No. SK-LB SK-MB SH-LB SH-MB Description Stamp-Making Kit Containing Stamp Stencil Film Cassette and 1” Black Pre-Inked Stamp Holder Stamp-Making Kit Containing Stamp Stencil Film Cassette and 3/4” Black Pre-Inked Stamp Holder Additional 1” Black Pre-Inked Stamp Holder Additional 3/4” Black Pre-Inked Stamp Holder Qty/ Package Price** 1 $39.99 1 $37.99 1 1 $27.99 $24.99 Qty/ Package Price** 1 1 1 $20.99 $24.99 $29.99 Qty/ Package Price** 1 $11.99 1 $11.99 1 $11.
INDEX A E AC adapter............................................... 4 Accented characters............................... 55 Adding spaces ................................................ 47 tabs .................................................... 50 Aligning ................................................. 85 Alt key ................................................... 45 Automatic formatting ............................. 59 Automatic tape-cutting........................... 92 Avery Paper Labels.........
P U Power .................................................... 43 Preset formatting .................................... 59 Print head .............................................. 42 Printing .................................................. 93 Printing stored files............................... 103 P-touch Editor installing .............................................. 7 starting up .......................................... 30 Underlining............................................
PT-2600/2610 CONTACT INFORMATION (For USA Only) Service Center Locations If you need a local service center, please call 1-800-284-HELP (4357) to locate the authorized service center closest to you. Note: Be sure to call the Service Center before your visit. Service centers do not provide operational assistance. See “Operational Assistance”.
P-TOUCH ACCESSORY ORDER FORM (For USA Only) Dear Customer: This order form is provided for your convenience should your retailer not stock the item(s) needed. To order by mail, send this completed form along with proper payment to the address below OR credit card holders: call toll-free 1-888-879-3232, fax completed order form to 1-800-947-1445, or visit our web site at http://www.brothermall.com. Please refer to the Accessories listing in your User’s Guide for stock no. and price.