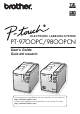
ELECTRONIC LABELING SYSTEM PT - 97OOPC/98OOPCN User’s Guide Guía del usuario STA TUS STA TUS If you encounter any problems with your product, visit our Web site: http://solutions.brother.com/ Si tiene algún problema con su producto, visite nuestro sitio web: http://solutions.brother.
Introduction Thank you for purchasing the PT-9700PC/PT-9800PCN. The PT-9700PC/PT-9800PCN (hereafter, referred to as “printer”) is a label printer that enables you to easily print custom labels after it is connected to a computer. This manual contains various precautions and basic procedures for using this printer. Read this manual carefully before starting and keep the manual in a handy place for future reference.
Compilation and Publication Notice Under the supervision of Brother Industries Ltd., this manual has been compiled and published, covering the latest product’s descriptions and specifications. The contents of this manual and the specifications of this product are subject to change without notice. If new versions of the PT-9700PC/9800PCN software become available, this manual may not reflect the updated features. Therefore, you may find that the software and the contents in this manual are different.
Brother® Two Year Limited Warranty (USA Only) Who is covered: • This limited warranty (“warranty”) is given only to the original end-user/retail purchaser (referred to in this warranty as “Original Purchaser”) of the accompanying Product, consumables and accessories (collectively referred to in this warranty as “this Product”).
Limitations: Brother is not responsible for damage to or loss of any equipment, media, programs or data related to the use of this Product. Except for the repair or replacement as described above, Brother shall not be liable for any direct, indirect, incidental or consequential damages or specific relief. Because some states do not allow the exclusion or limitation of consequential or incidental damages, the above limitation may not apply to you.
Important Information Should you have questions, or need information about your Brother Product, we have a variety of support options for you to choose from: Customer Service 1-800-255-0415 Customer Service 1-303-460-1628 (fax) World Wide Web www.brothermobilesolutions.com Supplies / Accessories 1-800-543-6144 Brother Mobile Solutions, Inc., 100 Technology Drive, #250A, Broomfield, CO 80021 Please record your model and serial number and your date and location of Purchase below for your records.
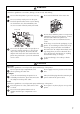
Safety precautions To prevent injury and damage, important notes are explained using various symbols. The symbols and their meanings are as follows: WARNING Tells you what to do to avoid the risk of injury. CAUTION Tells you about procedures you must follow to avoid minor personal injury or damage to the printer. The symbols used in this manual are as follows: Action NOT allowed. DO NOT disassemble the product. DO NOT splash the product with or immerse the product in water.
WARNING Printer Follow these guidelines to avoid fire, damage, electric shock, and choking. Do not allow the printer to get wet in any way. Do not touch the blade of the cutter unit. Do not touch any metal parts near the print head. The print head becomes very hot during use and remains very hot immediately after use. Do not touch it directly with your hands. Print head Do not disassemble the printer.
General Precautions ● The printer may malfunction if left near a television, radio, etc. Do not install the printer near any printer that will cause electromagnetic interference. ● Do not use the printer in any way or for any purpose not described in this manual. Doing so may result in accidents or damage to the printer. ● Do not put any foreign objects into the label outlet, AC adapter jack, USB port, serial port or LAN port (PT-9800PCN only), etc. ● Do not touch the print head with your fingers.
Table of contents Unpacking the printer .....................................................................................................10 General description .........................................................................................................11 LED display ....................................................................................................................................12 Getting ready to use your printer ..........................................................
Unpacking the printer Open the box and confirm that the following items are included. If any item is missing or damaged, please contact the retail outlet where the printer was purchased. ■ PT-9700PC/PT-9800PCN ■ USB cable Printer (PT-9700PC) STATUS ■ Tape cassette Printer (PT-9800PCN) ■ User’s Guide STATUS ■ AC adapter Connect to the power supply cord. ■ Power supply cord Connect to an electrical outlet (AC 120 V).
General description ■ PT-9700PC 1 3 STATUS 2 4 5 6 7 10 8 DC IN 24V 9 Front view Rear view ■ PT-9800PCN 1 3 STATUS 2 11 12 4 5 6 7 10 8 DC IN 24V 13 9 Front view Rear view 1. Tape compartment cover 8. AC adapter jack 2. Label outlet 9. Serial (RS-232C) port 3. Cover release button 10.USB port 4. STATUS lamp 5. Power button (including lamp) 11.LED lamp on USB Direct Interface (PT-9800PCN only) 6. Feed/Cut button 12.USB Direct Interface (PT-9800PCN only) 7. Main power switch 13.
LED display The condition of the printer can be determined by LED display on printer or USB Direct Interface (PT9800PCN only). ■ LED display on printer Lamp condition Power button (green) STATUS lamp (red) Lit Not lit Flashing Not lit Condition Remedy Printer standby condition — Receiving data — During the printer receiving data Flashing Lit 1) No tape cassette 1) Install the tape cassette and close the tape compartment cover. 2) Tape compartment cover is open. 2) Close the cover.
Lamp condition Power button (green) Condition STATUS lamp (red) Cutter error Lit Flashing fast Lit Flashing very fast Not lit Lit Roller holder error Remedy Confirm that the tape is not jammed in the printer. If necessary, turn the printer off and on. If the STATUS lamp continues to flash, contact the reseller where the printer was purchased or call Brother customer service. Print head overheat error Turn the printer off and on. EEPROM error Turn the printer off and on.
Getting ready to use your printer Before creating labels with the printer, the following preparations are necessary. Note ● The connection procedures are different depending on the operating system running on the computer. They will also vary depending on whether a USB connection, serial connection or network connection (PT-9800 PCN only) is used. For details on connecting the printer to your specific computer, refer to “Connecting to a computer” (→ P.16).
Connecting the printer Connect the printer to the power source and a computer. Turning on the printer Connecting to the power source Connect the included power supply cord 1 to the AC adapter. 4 Turn on the main power switch on the back of the printer, and then press the power button on the front of the printer. Turning off the printer Hold down the power button on the front of the printer until the printer is turned off, and then turn off the main power switch on the back of the printer.
Connecting to a computer Connect the printer to a computer using the interface cables. The interface cables used to connect to a USB port, serial (RS-232C) port and LAN (10/100BASE-TX Wired Ethernet) port are different. Basic Setup Operation Systems PT-9800PCN PT-9700PC USB port Windows® XP/ Windows Vista®/ Windows® 7 Mac 10.6 OS® { { – X 10.3.9- Windows® XP/ Windows Vista®/ Windows® 7/ Windows Server® 2003/Windows Server® 2008/ 2008 R2 Mac OS® X 10.3.910.
Using the interface cables Serial (RS-232C) cables and network (Ethernet) cables are not standard accessories. Use the appropriate cable for your type of interface. Note ● For USB interface, the included USB interface cable should be used to ensure compliance with the limits for EMC. ● For serial and network interfaces, a shielded interface cable should be used to ensure compliance with the limits for EMC. ● Changes or modifications not expressly approved by Brother Industries, Ltd.
Installing the tape cassette This section lists the types of tape that may be used with the printer and explains the procedures to install the tape cassettes. Install the tape cassette. 3 Make sure that the end of the tape feeds Authorized tape under the tape guides. The types of tape that may be used with the printer are listed below.
Installing the software for PT-9700PC The procedure for installing the software varies depending on the OS of the computer. Install procedure is subject to change without notice. For Microsoft® Windows® users, see “When using Microsoft® Windows®” (→ P.19). For Macintosh® users, see “When using Mac OS®” (→ P.20). Note ● If you will be using the models "PT-9700PC", it is necessary to install the following versions of P-touch Editor or b-PAC SDK to avoid printing difficulties: [P-touch Editor] version 5.0.
Select the desired model, and then click 5 [OK]. Follow the on-screen instructions of the driver installation. • If you choose “No, do not display the page”, you will continue the installation. Note ● To download the optional tools later, you can find them on this Web site: http://solutions.brother.com/ [Select your region/country] - [Choose your product] - [Downloads] Click [Finish]. 0 The software installation is now complete. Restart your computer if you are instructed to do so.
Double click “Brother PT-9700PC 2 Driver.pkg” in “Mac OS X” folder. After restarting the computer, connect 6 your printer to the computer by using the USB cable, and then turn on the printer. The Driver Installer starts up. Follow the on-screen instructions. USB port USB cable DC IN After the installation is completed and 3 the screen shown below is displayed, click [Close]. The installation of printer driver is completed. Next, install the P-touch Editor 5.0.
Installing the software for PT-9800PCN The procedure for installing the software varies depending on the OS of the computer. Install procedure is subject to change without notice. For Microsoft® Windows® users, see “When using Microsoft® Windows®” (→ P.22). For Macintosh® users, see “When using Mac OS®” (→ P.26). Note ● If you will be using the models "PT-9800PCN", it is necessary to install the following versions of P-touch Editor or b-PAC SDK to avoid printing difficulties: [P-touch Editor] version 5.0.
Put a check mark in the box next to the ■ For USB interface cable users click [Next]. 6 this screen appears, confirm the printer 4 Add-in programs you want to install, and Note ● Make sure that all Microsoft® Office applications are closed. Follow the on-screen instructions. When power is on. Connect the USB interface cable to your computer, and then connect it to the printer. Then, choose your connection method 5 and click [Next].
■ For network interface cable users Choose Search the network for devices 6 and choose from a list of discovered devices (Recommended). Or enter your printer’s IP address or its node name. Click [Next]. You can find your printer’s IP address and the node name by printing out the Printer Settings Page. For details, refer to “Printing the printer settings” (→ P.43). ■ For shared network printer users Choose your printer’s queue, and then 6 click [OK]. Follow the on-screen instructions.
■ Installing the BRAdmin Light configuration utility The BRAdmin Light is a utility for initial setup of Brother network connected devices. It can also search for Brother products on your network, view the status and configure basic network settings, such as IP address. For more information on BRAdmin Light, visit us at http://solutions.brother.com/ If the Windows Firewall is enabled on your computer, the message “Do you wish to add this application to the list of exceptions?” appears.
Choose STATIC for the Boot Method. 3 Enter the IP Address, Subnet Mask and When using Mac OS® Gateway, and then click [OK]. This section explains how to install P-touch Editor 5.0 and printer driver. Note ● Until P-touch Editor 5.0 installation is The address information will be saved to 4 the printer. completed, do not connect the printer to Macintosh®. Make sure the USB cable is not connected until you are instructed to connect it.
After the installation is completed and 3 the screen shown below is displayed, After restarting the computer, connect 6 your printer to the computer by using the click [Close]. The installation of printer driver is completed. Next, install the P-touch Editor 5.0. USB/LAN cable, and then turn on the printer. USB port USB cable AC adapter jack AC adapter LAN port Note ● If you are connecting the printer to Double click “P-touch Editor 5.0 4 Installer.mpkg”. The P-touch Editor 5.
8 Choose your connection method. Local Printer with USB cable See “For USB interface cable users” (→ P.28). Network Shared Printer (Simple network configuration) Check that LAN cable and the printer are connected. See “For network interface cable users (Simple network configuration)” (→ P.29). Network Shared Printer (Manual network configuration) Check that LAN cable and the printer are connected. See “For network interface cable users (Manual network configuration)” (→ P.30).
■ For network interface cable users (Simple network configuration) 9 Click [Add]. For Mac OS® X 10.3.9 0 Make the selection shown below. Mac OS® X 10.5.x-10.6 When the screen returns to “Printer List” b / “Print & Fax” screen, check that “Brother PT-9800PCN” is added, and close the “Printer List” / “Print & Fax” screen. Now you can use the printer. Choose “Brother PT-9800PCN” from the a list and click [Add] again to add the printer to the “Printer Setup Utility”/ ”Print & Fax”.
■ For network interface cable users (Manual network configuration) For Mac OS® X 10.3.9 9 Click [Add] and choose IP Printing at the top of the screen. Enter the IP address of the printer into the Printer Address box. Choose “PT9800PCN” from the list and click [Add] again to add the printer to the “Printer Setup Utility”. For Mac OS® X 10.4.x - 10.6 Click [Add] and choose IP Printer / IP at the top of the screen. Enter the IP address of the printer into the Address box.
■ Setting your IP Address, Subnet Mask and Gateway using BRAdmin Light Choose “STATIC” for the “BOOT 3 Method”. Enter the IP Address, Subnet Mask and Gateway, and then click [OK]. Click “Library”-“Printers”-“Brother”-“P1 touch Utilities”-“BRAdmin Light.jar”. BRAdmin Light will search for new devices automatically. Note ● If you have a DHCP/BOOTP/RARP server in your network, you don’t have to do the following operation, as the print server will automatically obtain its IP address.
Uninstalling the software This section describes how to uninstall the software and printer driver. In the following steps, you will see PT-XXXX. Read “XXXX” as your printer name. For Microsoft® Windows® users, see “When using Microsoft® Windows®” (→ P.32). For Macintosh® users, see “When using Mac OS®” (→ P.33). When using Microsoft® Windows® ■ Uninstalling P-touch Editor For Windows® XP 1 From “Control Panel”, go to “Add or 1 Turn off the printer.
For Windows® 7 Choose [Fax] or [Microsoft XPS Document Writer] in the [Devices and Printers] window, and then click [Print server properties], which appeared in the menu bar. For Windows® XP 5 Click the “Drivers” tab and choose “Brother PT-XXXX”. Then, click [Remove]. Go to step 7. For Windows Vista® Click the “Drivers” tab and choose “Brother PT-XXXX”. Then, click [Remove...]. For Windows® 7 Click the [Drivers] tab, and then click [Change Driver Settings].
Advanced function After the printer has been connected to the computer, labels can be created and printed. This section describes how to create labels using a barcode reader and various useful print settings. ■ Printing labels at high speed or a high resolution See “Printing at a higher speed or at a higher resolution” (→ P.34) ■ Printing a large number of labels distributed to multiple printers See “Distributed printing” (→ P.
Select the “Advanced” tab, select the 3 “Distributed printing” check box, and Distributed printing then click [Settings]. When printing a large number of labels, printing can be distributed among multiple printers. Since printing is performed at the same time, the total printing time can be reduced. Note ● Printing can be distributed to printers connected via a USB connection or network connection (PT-9800PCN only).
Specify the tape width to be used for 5 printing. A.If only one printer has been selected In the dialog box from step 4, select the printer whose setting is to be specified, and then either double-click it or rightclick it and click “Settings”. From the “Set Width” drop-down list, select the tape width. Note ● Information to be displayed in the dialog box from step 4 can be entered in the “Notes” text box. B.
■ Preparation BTP (Barcode Template Print) function With a barcode reader connected to the printer, labels and barcodes can easily be printed by scanning barcodes. Connect a barcode reader to the printer. Barcode reader connection interfaces Barcode reader RS-232 USB direct interface PT-9700PC - PT-9800PCN STATUS Preset template printing (→ P.38) If a frequently used label layout is stored in the printer, identical labels can be printed simply by scanning barcodes. Barcode printing (→ P.
■ Preset template printing If a frequently used label layout is stored in the printer, identical labels can be printed simply by scanning barcodes. Bill Anderson Refer to “List of barcodes for specifying settings” (→ P.51). From the “Basic settings” barcodes, scan 4 the barcode for the parameter whose setting is to be specified. Mr.
■ Barcode printing A barcode scanned with the barcode reader can be printed with the protocol and size from a previously created template. From the “Basic settings” barcodes, scan 4 the barcode for the parameter whose setting is to be specified. Note ● Settings can be specified for multiple Note ● For details on the barcodes that can be scanned for the various settings, refer to “List of barcodes for specifying settings” (→ P.51).
Scan the barcode whose data is to be 6 used. (CODE128/9-digit) 7 Scan the “Begin printing” barcode. The barcode is printed with the protocol 8 and size specified in the template. ■ Database-assisted label printing First, a database field must be connected to an object in the label layout. Then, when a key barcode is scanned with the barcode reader, the barcode data can be printed replacing data from the connected database file in the object of the specified template.
Scan the “P-touch template command” 4 barcode. Scan the key barcode whose data is to be 7 used in the database file. Refer to “List of barcodes for specifying settings” (→ P.51). From the “Basic settings” barcodes, scan 5 the barcode for the parameter whose setting is to be specified. Note ● Settings can be specified for multiple parameters. ● If no settings have been specified, a label will be printed by P-touch Template Settings.
Using P-touch Editor Lite LAN (PT-9800PCN and Windows® only) P-touch Editor Lite LAN is a basic version of a label-editing tool. By copying P-touch Editor Lite LAN, installed from the enclosed CD-ROM, into a shared folder on the server, P-touch Editor Lite LAN on the server can be accessed by other network users to create labels, and print from PT9800PCN connected to the network. Note ● In order for P-touch Editor Lite LAN to be used, the IP address of this printer must be correctly specified.
Note Printing the printer settings ● P-touch Editor Lite LAN is ideal for ● ● ● ● creating simple labels. To create labels with more complex designs, use P-touch Editor 5.0. When using the P-touch Editor Lite LAN for the first time, “Add shortcut” dialog box appears. Select the desired location from “Start menu”, “Desktop” or “Quick Launch bar”, then put a check mark in the box, and click [OK]. You can access to the P-touch Editor Lite LAN from the shortcut next time.
Serial interface settings (Windows® only) Use the following steps to change or confirm the port and the baud rate settings on the 6 Select the desired baud rate. computer and the printer. The following procedure is shown based on Windows Vista®. Setting the computer baud rate On the taskbar, click the “Start” button, 1 and then click “Control Panel”.
Maintenance Your printer should be cleaned on a regular basis to maintain its performance. Note ● Always disconnect the AC adapter prior to cleaning the printer. ■ Cleaning the exterior of the printer Head roller Wipe any dust and marks from the main unit using a soft, dry cloth. Use a slightly dampened cloth with water on difficult to remove marks. Note ● Do not use paint thinner, benzene, alcohol or any other organic solvent. These may deform the case or damage the appearance of your printer.
Troubleshooting For printer troubleshooting, refer to the following list of possible problems. Q&A Problem Solution The printer does not print. A printing error is received. Check that the interface cable is connected correctly, the tape cassette is installed correctly, and the tape compartment cover is closed. While printing, striped tape appears. The tape cassette is empty. Refer to “Installing the tape cassette” (→ P.18) and install a new tape cassette.
Problem Solution • - The baud rate cannot be set using the Change Baud Rate Wizard or the Brother printer utilities. Error 99: the computer cannot detect the printer. Make sure that the printer is turned on. Make sure that the interface cable is connected correctly. Make sure that the COM port where the printer is connected is the same COM port selected in the Change Baud Rate Wizard. (Many computers have more than one COM port and COM2 may have been selected in error in the Change Baud Rate Wizard.
Problem Solution I do not understand how to install the second printer that I have purchased. • With a USB connection When the printer is connected to the computer using a USB cable, the driver for the second printer is automatically installed through Plug and Play. • With a Peer-to-Peer connection (PT-9800PCN only) - If one is already installed After the second printer is connected to the LAN, the installer starts up and the printer driver is installed.
Product specifications ■ Printer specifications Item Display Printing Specification Power lamp (green), STATUS lamp (red), USB Direct Interface lamp (green/red) (PT-9800PCN only) Printing method Heat transfer laminated printing/thermal printing Print head 360 dpi/384 dot Print resolution For TZ tape cassettes: 360 × 360 dpi For HG tape cassettes: 360 x 180 dpi, 360 x 360 dpi or 360 x 720 dpi Printing speed For TZ tape cassettes: Up to 0.78"/sec (20 mm/sec) For HG tape cassettes: Up to 3.
Appendix General procedure for the BTP (Barcode Template Print) function The general procedure for using the BTP (Barcode Template Print) function is described below. For details on specifying the various settings, refer to “BTP (Barcode Template Print) function” (→ P.37). 1 Use P-touch Editor 5.0 to create a template, and then transfer it to the printer. 2 Connect the barcode reader to the printer. 3 Scan the “P-touch template command” barcode.
List of barcodes for specifying settings These are the barcodes for specifying settings used with the “BTP (Barcode Template Print) function” (→ P.37). Note ● When using the barcodes in this list, set “Trigger for P-touch Template Printing” and “Command Prefix Character” to default in P-touch Template Settings.
■ For entering numbers*2 •1 •2 •3 •4 •5 •6 •7 •8 •9 •0 • 00 ■ Preset template number 52 • Preset template 1 • Preset template 2 • Preset template 3 • Preset template 4
• Preset template 5 • Preset template 6 • Preset template 7 • Preset template 8 • Preset template 9 • Preset template 10 ■ Select template ■ Delimiter ■ Begin printing *1 This is the default setting. *2 These are used when specifying the number of copies printed and when selecting a template number. Scan barcodes to specify a three-digit number, such as [00][7] or [0][1][5]. The setting is automatically applied when three digits have been specified.
Index A Maintenance ................................................ 45 AC adapter............................................. 10, 15 AC adapter jack ........................................... 11 N B Barcode printing .......................................... 39 Baud rate ..................................................... 44 Network cable ............................................. 17 O Operating environment ................................ 49 C P CD-ROM .....................................
Contact Information (For USA Only) Operational Assistance For technical and operational assistance you may call Brother Customer Service at: Voice 1-800-255-0415 or Fax 1-303-460-1628 Assistance on the Internet For product information and downloading the latest drivers: http://solutions.brother.com/ For purchasing accessories and certain Brother products: http://www.brothermobilesolutions.
Guía del usuario
Introducción Gracias por adquirir la unidad PT-9700PC/PT-9800PCN. La PT-9700PC/PT-9800PCN (de aquí en adelante, “la impresora”) es una impresora de etiquetas que permite imprimir fácilmente etiquetas personalizadas cuando se conecta a una computadora. Este manual contiene diversos procedimientos básicos y precauciones para utilizar esta impresora. Léalo detenidamente antes de comenzar a utilizar la unidad y guárdelo en un lugar seguro para futuras consultas.
Aviso de redacción y publicación Este manual se ha redactado y publicado bajo la supervisión de Brother Industries Ltd. e incluye las últimas descripciones y especificaciones del producto. El contenido de este manual y las especificaciones de este producto están sujetos a cambios sin previo aviso. Si quedaran disponibles nuevas versiones del software de la PT-9700PC/9800PCN, este manual puede no reflejar las funciones actualizadas.
Garantía Limitada de Dos Años de Brother® (solamente para EE. UU.) Quién está cubierto: • Esta garantía limitada (“la garantía”) se concede exclusivamente al usuario final/comprador original (denominado en esta garantía “Comprador Original”) del Producto, consumibles y accesorios suministrados (denominados colectivamente en esta garantía “este Producto”).
Qué hará Brother: Si el problema comunicado relativo al Producto y/ o Consumibles y Accesorios suministrados está cubierto por esta garantía y si ha comunicado el problema dentro del período de garantía aplicable, Brother reparará o reemplazará el Producto y los Consumibles y Accesorios suministrados sin coste alguno para usted en cuanto a piezas o mano de obra. La decisión entre reparar o sustituir el Producto y/o los Consumibles y Accesorios suministrados será tomada por Brother a su exclusiva discreción.
Información importante En caso de que le surja alguna pregunta o necesite información sobre el Producto de Brother, tenemos varias opciones de asistencia entre las que podrá elegir: Servicio de atención al cliente 1-800-255-0415 Servicio de atención al cliente 1-303-460-1628 (fax) World Wide Web www.brothermobilesolutions.com Suministros / Accesorios 1-800-543-6144 Brother Mobile Solutions, Inc.
Precauciones de seguridad Para evitar lesiones personales y daños en el equipo, se facilita información importante utilizando diversos símbolos. Los símbolos y su significado son los siguientes: ADVERTENCIA Indica lo que debe hacer para evitar el riesgo de sufrir lesiones personales. PRECAUCIÓN Indica procedimientos que deberá seguir para prevenir lesiones personales leves o daños en la impresora. Los símbolos empleados en este manual son los siguientes: Acción NO permitida. NO desmonte el producto.
ADVERTENCIA Impresora Siga estas indicaciones para evitar fuego, daños, descargas eléctricas o asfixia. No deje que la impresora se moje de forma alguna. No toque la cuchilla del cortador. No toque las piezas metálicas situadas cerca del cabezal de impresión. El cabezal de impresión se calienta en exceso durante su uso y permanece muy caliente inmediatamente después. No lo toque directamente con las manos. Cabezal de impresión No desmonte la impresora.
Precauciones generales ● La impresora puede funcionar incorrectamente si se deja cerca de una televisión, radio, etc. No instale la impresora cerca de cualquier aparato que cause interferencia electromagnética. ● No utilice la impresora de forma alguna o para cualquier fin que no se describa en este manual. Si lo hiciera, podrían producirse accidentes o daños en la impresora.
Tabla de contenido Tabla de contenido ..........................................................................................................10 Desembalaje de la impresora ..........................................................................................11 Descripción general ........................................................................................................12 Lámparas LED ........................................................................................................
Desembalaje de la impresora Abra la caja y confirme que contiene los siguientes artículos. Si alguno de estos artículos falta o está dañado, comuníquese con la tienda o establecimiento donde compró la impresora. ■ PT-9700PC/PT-9800PCN ■ Cable USB Impresora (PT-9700PC) STATUS ■ Casete de cinta Impresora (PT-9800PCN) ■ Guía del usuario STATUS ■ Adaptador de CA Se conecta al cable de alimentación. ■ Cable de alimentación Se conecta a un enchufe (CA 120 V).
Descripción general ■ PT-9700PC 1 3 STATUS 2 7 4 5 6 10 8 DC IN 24V 9 Vista frontal Vista posterior ■ PT-9800PCN 1 3 STATUS 2 11 12 4 5 6 7 10 8 DC IN 24V 13 9 Vista frontal Vista posterior 1. Cubierta del compartimiento de la cinta 8. Tomacorriente para el adaptador de CA 2. Salida de etiquetas 9. Puerto en serie (RS-232C) 3. Botón de apertura de la cubierta 10.Puerto USB 4. Lámpara de STATUS (ESTADO) 5. Botón de encendido (con lámpara) 11.
Lámparas LED Puede determinarse cuál es el estado de la impresora por las lámparas LED en la impresora o la interfaz directa USB (solamente PT-9800PCN).
Estado de la lámpara Botón de encendido (verde) Lámpara de STATUS (ESTADO) (rojo) Estado Error en el cortador Encendido Parpadeando a intervalos rápidos Encendido Parpadeando a intervalos muy rápidos No encendido Encendida Error en el soporte del rodillo Solución Compruebe que la cinta no está atascada en la impresora. Si es necesario, apague la impresora y vuelva a encenderla.
Preparativos para utilizar la impresora Antes de crear etiquetas con la impresora, es necesario seguir los siguientes pasos. Nota ● Los procedimientos de conexión varían dependiendo del sistema operativo instalado en la computadora, y también varían de acuerdo al tipo de conexión, ya sea conexión USB, en serie o de red (solamente PT-9800PCN). Para obtener más información sobre la conexión de la impresora a su computadora, consulte “Conexión a una computadora” (→ P.17).
Conexión de la impresora Conecte la impresora a la fuente de alimentación y a una computadora. Encendido de la impresora Conexión a la fuente de alimentación Conecte el cable de alimentación 1 incluido al adaptador de CA. 4 Ponga el interruptor de alimentación principal, situado en la parte trasera de la impresora, en la posición de encendido y, a continuación, presione el botón de encendido en la parte frontal de la impresora.
Conexión a una computadora Conecte la impresora a una computadora mediante los cables de interfaz. Los cables de interfaz que se utilizan para la conexión a un puerto USB, puerto en serie (RS-232C) y puerto LAN (Ethernet cableada 10/100BASE-TX) son diferentes. Configuración básica Sistemas operativos PT-9800PCN PT-9700PC Puerto USB Windows® XP/ Windows Vista®/ Windows® 7 Puerto LAN Puerto en serie (solamente ESC/ P y P-touch Template) { { – Mac OS® X 10.3.910.
Utilización de los cables de interfaz Los cables en serie (RS-232C) y de red (Ethernet) no son accesorios estándar. Utilice el cable adecuado para el tipo de interfaz. Nota ● Para la interfaz USB, debe utilizarse el cable de interfaz USB incluido para garantizar el cumplimiento de los límites de CEM. ● Para las interfaces en serie y de red, debe utilizarse un cable de interfaz apantallado para garantizar el cumplimiento de los límites de CEM.
Instalación del casete de cinta En esta sección se indican los tipos de cintas que se pueden utilizar con esta impresora y se explica el procedimiento para instalar los casetes de cinta. Instale el casete de cinta. 3 Asegúrese de que el extremo de la cinta Cinta autorizada A continuación se enumeran los tipos de cintas que se pueden utilizar con la impresora. avanza por debajo de las guías de la cinta.
Instalación del software para la impresora PT-9700PC El procedimiento para instalar el software varía según el sistema operativo instalado en la computadora. El procedimiento de instalación está sujeto a cambios sin previo aviso. Si usa Microsoft® Windows®, consulte “Si se utiliza Microsoft® Windows®” (→ P.20). Si usa Macintosh®, consulte “Si se utiliza Mac OS®” (→ P.21).
Seleccione el modelo deseado y, después, 5 haga clic en [Aceptar]. Siga las instrucciones en pantalla para instalar el controlador de impresora. Nota ● Si desea descargar las herramientas opcionales más tarde, puede encontrarlas en este sitio web: http://solutions.brother.com/ [Seleccione su zona/país]-[Elija su producto]-[Descargas] Haga clic en [Finalizar]. 0 La instalación del software se ha completado. Reinicie la computadora si así se le indica. Inicie el software.
Haga doble clic en “Brother PT-9700PC 2 Driver.pkg”, en la carpeta “Mac OS X”. El instalador del controlador se iniciará. Siga las instrucciones que se muestran en pantalla. Una vez finalizada la instalación y que se 5 muestre el mensaje “Haga clic en Reiniciar para acabar de instalar el software.”, haga clic en [Reiniciar]. La computadora Macintosh® se reiniciará. La instalación del software se ha completado.
En Mac OS® X 10.3.9 - 10.4.x 8 Haga clic en [Añadir] y seleccione USB en la parte superior de la pantalla. Seleccione “PT-9700PC” en la lista y vuelva a hacer clic en [Añadir] para añadir la impresora a la “Lista de impresoras”. En Mac OS® X 10.5.x - 10.6 Seleccione “Brother PT-9700PC” en la lista y haga clic en [Añadir] / para añadir la impresora a la “Lista de impresoras” / “Impresión y Fax”.
Instalación del software para la impresora PT-9800PCN El procedimiento para instalar el software varía según el sistema operativo instalado en la computadora. El procedimiento de instalación está sujeto a cambios sin previo aviso. Si usa Microsoft® Windows®, consulte “Si se utiliza Microsoft® Windows®” (→ P.24). Si usa Macintosh®, consulte “Si se utiliza Mac OS®” (→ P.28).
Lea el contrato de licencia y haga clic en 3 [Sí] si acepta los términos y condiciones. Siga las instrucciones que se muestran en pantalla. Active la casilla de verificación 4 correspondiente a los programas de complemento que desee instalar y haga clic en [Siguiente]. ■ Para los usuarios de un cable de interfaz USB Siga las instrucciones que se muestran en 6 pantalla. Cuando aparezca esta pantalla, compruebe que la impresora está encendida.
Haga clic en [Finalizar]. 9 La instalación del software se ha completado. Reinicie la computadora si así se le indica. Inicie el software. 0 Haga clic en “Iniciar” - “Todos los programas (Programas)” - “Brother P-touch” - “P-touch Editor 5.0” para iniciar P-touch Editor 5.0. ■ Para los usuarios de un cable de interfaz de red Haga clic en [Finalizar]. 0 La instalación del software se ha completado. Reinicie la computadora si así se le indica. Inicie el software.
Haga clic en [Finalizar]. 9 La instalación del software se ha completado. Reinicie la computadora si así se le indica. Haga clic en [BRAdmin Light] y siga las 2 instrucciones que se muestran en pantalla. Inicie el software. 0 Haga clic en “Iniciar” - “Todos los programas (Programas)” - “Brother P-touch” - “P-touch Editor 5.0” para iniciar P-touch Editor 5.0.
Haga doble clic en el dispositivo sin 2 configurar. La contraseña predeterminada es “access”. Si se utiliza Mac OS® En esta sección se explica cómo instalar P-touch Editor 5.0 y el controlador de impresora. Nota ● No conecte la impresora a la Seleccione el Método de arranque 3 STATIC. Introduzca la dirección IP, la máscara de subred y la puerta de acceso y, a continuación, haga clic en [Aceptar]. computadora Macintosh® hasta que haya finalizado la instalación de P-touch Editor 5.0.
Una vez finalizada la instalación y que se 3 muestre la pantalla siguiente, haga clic en [Cerrar]. La instalación del controlador de impresora se ha completado. A continuación, instale P-touch Editor 5.0. Después de reiniciar la computadora, 6 conecte la impresora a la computadora mediante el cable USB/LAN y, a continuación, encienda la impresora.
8 Seleccione el método de conexión. Impresora local con cable USB Consulte “Para los usuarios de un cable de interfaz USB” (→ P.30). Impresora compartida de red (Configuración de red simple) Compruebe que el cable LAN y la impresora están conectados. Consulte “Para los usuarios de un cable de interfaz de red (Configuración de red simple)” (→ P.31). Impresora compartida de red (Configuración de red manual) Compruebe que el cable LAN y la impresora están conectados.
■ Para los usuarios de un cable de interfaz de red (Configuración de red simple) 9 Haga clic en [Añadir]. En Mac OS® X 10.3.9 0 Realice la selección que se muestra a continuación. Mac OS® X 10.5.x-10.6 Cuando vuelva a la pantalla “Lista de b impresoras” / “Impresión y Fax”, compruebe que se ha añadido “Brother PT-9800PCN” y, a continuación, cierre esta pantalla. Ahora ya puede utilizar la impresora.
■ Para los usuarios de un cable de interfaz de red (Configuración de red manual) ® En Mac OS X 10.3.9 9 Haga clic en [Añadir] y seleccione Impresión IP en la parte superior de la pantalla. Introduzca la dirección IP de la impresora en el cuadro Dirección de la impresora. Seleccione “PT-9800PCN” en la lista y vuelva a hacer clic en [Añadir] para añadir la impresora a la “Utilidad Configuración Impresoras”. En Mac OS® X 10.4.x - 10.
■ Configuración de la dirección IP, la máscara de subred y la puerta de acceso con BRAdmin Light Seleccione el método de arranque 3 STATIC. Introduzca la dirección IP, la máscara de subred y la puerta de acceso y, a continuación, haga clic en [Aceptar]. Haga clic en “Biblioteca”-“Impresoras”- 1 “Brother”-“P-touch Utilities”-“BRAdmin Light.jar”. BRAdmin Light buscará nuevos dispositivos automáticamente.
Desinstalación del software En esta sección se explica cómo desinstalar el software y el controlador de impresora. En los pasos siguientes verá el término PT-XXXX, donde “XXXX” es el nombre de su impresora. Si usa Microsoft® Windows®, consulte “Si se utiliza Microsoft® Windows®” (→ P.34). Si usa Macintosh®, consulte “Si se utiliza Mac OS®” (→ P.35). Si se utiliza Microsoft® Windows® ■ Desinstalación de P-touch Editor En Windows® XP 1 En “Panel de control”, vaya a “Agregar o quitar programas”.
Si aparece el cuadro de diálogo de confirmación de la autorización, haga clic en [Continuar]. Si aparece el cuadro de diálogo “Control de cuentas de usuario”, escriba la contraseña y haga clic en [Aceptar]. Aparecerá la ventana “Propiedades de Servidor de impresión”. En Windows® 7 Seleccione [Fax] o [Escritor de documentos XPS de Microsoft] en la ventana [Dispositivos e impresoras], y luego haga clic en [Propiedades del servidor de impresión], que aparece en la barra del menú.
■ Desinstalación del controlador de impresora 1 Apague la impresora. En Mac OS® X 10.3.9 - 10.4.x 2 Haga doble clic en la unidad donde está instalado Mac OS® X y haga doble clic en “Aplicaciones” - “Utilidades” - “Utilidad Configuración Impresoras”. Aparecerá la ventana “Lista de impresoras”. En Mac OS® X 10.5.x - 10.6 Haga clic en “Apple menú” “Preferencias del Sistema”, por este orden, y haga clic en “Impresoras y Faxes”. 3 En Mac OS® X 10.3.9 - 10.4.x Seleccione “PT-XXXX” y haga clic en .
Función avanzada Una vez conectada la impresora a la computadora, es posible crear e imprimir etiquetas. En esta sección se explica cómo crear etiquetas utilizando un lector de códigos de barras y diversos ajustes de impresión útiles. ■ Impresión de etiquetas a alta velocidad o con alta resolución Consulte “Impresión a mayor velocidad o con mayor resolución” (→ P.37) ■ Impresión de un gran número de etiquetas distribuidas entre varias impresoras Consulte “Impresión distribuida” (→ P.
Seleccione la ficha “Avanzado”, active la 3 casilla de verificación “Impresión Impresión distribuida distribuida” y, a continuación, haga clic en [Ajustes]. Si se va a imprimir un gran número de etiquetas, es posible distribuir la impresión entre varias impresoras. Dado que la impresión es simultánea, el tiempo total de impresión puede disminuir. Nota ● La impresión se puede distribuir entre impresoras conectadas mediante una conexión USB o de red (solamente PT-9800PCN).
Especifique el ancho de cinta que se va a 5 utilizar para imprimir. A. Si solamente se ha seleccionado una impresora En el cuadro de diálogo del paso 4, seleccione la impresora cuyo ajuste se va a especificar y, a continuación, haga doble clic en ella o haga clic con el botón derecho del ratón en ella y haga clic en “Ajustes”. En la lista desplegable “Ajustar ancho”, seleccione el ancho de cinta. Haga clic en [OK] para cerrar la ventana 6 de ajuste del ancho de cinta.
Función BTP (Impresión de plantillas de códigos de barras) Con un lector de códigos de barras conectado a la impresora, es posible imprimir fácilmente etiquetas y códigos de barras escaneando estos últimos. STATUS Impresión de plantillas predefinidas (→ P.41) Si se ha almacenado un diseño de etiqueta de uso frecuente en la impresora, es posible imprimir etiquetas idénticas con solamente escanear los códigos de barras. Impresión de códigos de barras (→ P.
■ Impresión de plantillas predefinidas Si se ha almacenado un diseño de etiqueta de uso frecuente en la impresora, es posible imprimir etiquetas idénticas con solamente escanear los códigos de barras. Bill Anderson Mr. Bill Anderson Escanee el código de barras “Comando 3 de plantilla P-touch” (P-touch template command). Consulte “Lista de códigos de barras para especificar ajustes” (→ P.56).
■ Impresión de códigos de barras Se puede imprimir un código de barras escaneado con el lector de códigos de barras con el protocolo y el tamaño de una plantilla creada anteriormente. el número de “Asignacion de clave” se especifica automáticamente.
Escanee el código de barras “Seleccionar 5 plantilla” (Select template) y, a continuación, escanee los códigos de barras de “Para introducir números” (For entering numbers) para especificar el número de “Asignacion de clave” (tres dígitos) para la plantilla de código de barras. Nota ● El ajuste se aplica automáticamente si se han especificado tres dígitos.
Con Transfer Manager, transfiera el 2 diseño de etiqueta desde P-touch Editor 5.0 a la impresora. El archivo de la base de datos también se transfiere. Cuando los datos se transfieren a 3 “Configuraciones” en Transfer Manager, el número de “Asignacion de clave” se especifica automáticamente. Escanee el código de barras “Comando 4 de plantilla P-touch” (P-touch template command). Consulte “Lista de códigos de barras para especificar ajustes” (→ P.56).
Utilización de P-touch Editor Lite LAN (solamente PT-9800PCN y Windows®) P-touch Editor Lite LAN es una versión básica de una herramienta de edición de etiquetas. Al copiar P-touch Editor Lite LAN, instalado desde el CD-ROM suministrado, en una carpeta compartida en el servidor, otros usuarios de la red pueden tener acceso a P-touch Editor Lite LAN en el servidor para crear etiquetas e imprimir con la impresora PT-9800PCN conectada a la red.
Nota ● P-touch Editor Lite LAN es ideal para ● ● ● ● crear etiquetas sencillas. Si desea crear etiquetas con diseños más complejos, utilice P-touch Editor 5.0. Cuando utilice P-touch Editor Lite LAN por primera vez, aparecerá el cuadro de diálogo “Añadir acceso directo”. Seleccione la ubicación deseada entre “Menú Inicio”, “Escritorio” o “Barra de Inicio rápido” y, a continuación, active la casilla y haga clic en [OK]. Podrá tener acceso a P-touch Editor Lite LAN desde el acceso directo la próxima vez.
Ajuste de la interfaz en serie (solamente Windows®) Siga los pasos que se indican a continuación para cambiar o confirmar los ajustes del puerto Haga clic en la ficha “Configuración del 5 dispositivo”, en “Utility...” y, a continuación, haga clic en la opción [Propiedades...] que aparece junto a Utility. y la velocidad en baudios de la computadora y de la impresora. El procedimiento siguiente se basa en Windows Vista®.
Mantenimiento La impresora ha de limpiarse con frecuencia para mantener su rendimiento. Nota ● Desconecte siempre el adaptador de CA antes de limpiar la impresora. ■ Limpieza del exterior de la impresora Quite el polvo y las marcas de la unidad principal con un paño suave y seco. Utilice un paño ligeramente humedecido con agua en aquellas marcas que sean difíciles de quitar. Cabezal de impresión Bastoncillo de algodón Nota ● No utilice diluyente, benceno, alcohol o cualquier otro disolvente orgánico.
■ Limpieza del cortador de cinta Aproximadamente una vez al año limpie las cuchillas del cortador con un bastoncillo de algodón humedecido con alcohol isopropílico. El adhesivo de la cinta puede acumularse en la cuchilla del cortador tras el uso continuado dejando fuera el borde de la cuchilla, lo que puede hacer que la cinta se atasque en el cortador. PRECAUCIÓN No toque la cuchilla del cortador con los dedos.
Solución de problemas Para solucionar los problemas de la impresora, consulte la lista siguiente de posibles problemas. PyR Problema Solución La impresora no imprime. Se recibe un error de impresión. Compruebe que el cable de interfaz está conectado correctamente, que el casete de cinta está instalado de la forma adecuada y que la cubierta del compartimiento de la cinta está cerrada. La cinta aparece rayada durante la impresión. El casete de cinta está vacío.
Problema Solución Aparece un error de transmisión de datos en la computadora. • Puede que se haya seleccionado el puerto incorrecto. En Windows®, seleccione el puerto correcto en la lista “Imprimir en el siguiente puerto” del cuadro de diálogo de propiedades de la impresora. Para una conexión USB, seleccione “USB00n”.
Problema Solución • Se ha producido un error durante la instalación. • No se puede realizar la instalación con el CD-ROM. Visite http://www.brother-usa.com/faqs • Me gustaría tener más información sobre los complementos. • No sé conectarme a una base de datos. Consulte la “Guía del usuario para el software” (PDF). No sé instalar la segunda impresora que he adquirido.
Especificaciones del producto ■ Especificaciones de la impresora Elemento Pantalla Impresión Especificación Lámpara de encendido (verde), lámpara de STATUS (ESTADO) (rojo), Lámpara de la interfaz directa USB (verde/rojo) (solamente PT-9800PCN) Método de impresión Impresión laminada con transferencia de calor/impresión térmica Cabezal de impresión 360 ppp/384 puntos Resolución de impresión Para casetes de cinta TZ: 360 × 360 ppp Para casetes de cinta HG: 360 x 180 ppp, 360 x 360 ppp o 360 x 720 ppp V
■ Entorno de funcionamiento Elemento Sistema operativo Especificación Windows® Windows® XP/Windows Vista®/Windows® 7, Windows Server® 2003/Windows Server® 2008/2008 R2 (sólo para PT-9800PCN) Macintosh® Mac OS® X 10.3.9 - 10.6 Windows® RS-232C, puerto USB (protocolo USB Spec. 1.1 o 2.0), Ethernet cableada 10/100BASE-TX (solamente para PT-9800PCN) Macintosh® Puerto USB (protocolo USB Spec. 1.1 o 2.
Apéndice Procedimiento general para la función BTP (Impresión de plantillas de códigos de barras) A continuación se describe el procedimiento general para utilizar la función BTP (Impresión de plantillas de códigos de barras). Si desea más información sobre cómo especificar los diversos ajustes, consulte “Función BTP (Impresión de plantillas de códigos de barras)” (→ P.40). 1 Utilice P-touch Editor 5.0 para crear una plantilla y, a continuación, transfiérala a la impresora.
Lista de códigos de barras para especificar ajustes Estos son los códigos de barras para especificar ajustes utilizados con “Función BTP (Impresión de plantillas de códigos de barras)” (→ P.40). Nota ● Al utilizar los códigos de barras de esta lista, ajuste “Activación para impresión de plantillas P- touch” (Trigger for P-touch Template Printing) y “Carácter de prefijo de comando” (Command Prefix Character) al valor predeterminado en P-touch Template Settings.
■ Para introducir números (For entering numbers)*2 •1 •2 •3 •4 •5 •6 •7 •8 •9 •0 • 00 ■ Número de plantilla predefinida (Preset template number) • Plantilla predefinida 1 (Preset template 1) • Plantilla predefinida 2 (Preset template 2) • Plantilla predefinida 3 (Preset template 3) • Plantilla predefinida 4 (Preset template 4) 57
• Plantilla predefinida 5 (Preset template 5) • Plantilla predefinida 6 (Preset template 6) • Plantilla predefinida 7 (Preset template 7) • Plantilla predefinida 8 (Preset template 8) • Plantilla predefinida 9 (Preset template 9) • Plantilla predefinida 10 (Preset template 10) ■ Seleccionar plantilla (Select template) ■ Delimitador (Delimiter) ■ Comenzar impresión (Begin printing) *1 Es el ajuste predeterminado.
Index A Interruptor de alimentación principal ........... 12 Adaptador de CA ................................... 11, 16 L B Lámpara de ESTADO ................................... 12 Lámparas LED ........................................ 13, 37 Limpieza del cabezal de impresión y del rodillo del cabezal ............................. 48 Limpieza del cortador de cinta..................... 49 Limpieza del exterior de la impresora .......... 48 Botón de apertura de la cubierta ............
Información de contacto (solamente para EE. UU.) Asistencia operativa Si necesita asistencia técnica y operativa, puede llamar al Servicio de atención al cliente de Brother en: Voz 1-877-BROTHER (1-877-276-8437). o Fax 1-901-379-1210 Asistencia por Internet Para obtener información sobre productos y descargar los controladores más recientes: http://solutions.brother.com/ Para adquirir accesorios y determinados productos Brother: http://www.brothermobilesolutions.
Printed in China LW5538001