
Use and Care Manual


Embroidering
66
d
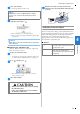
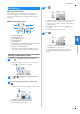
Lower the presser foot, then press the “Start/Stop”
button to start embroidering.
After 5-6 stitches, press the “Start/Stop” button again
to stop the machine.
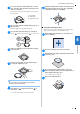
e
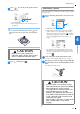
Trim the excess thread at the end of the seam. If the
end of the seam is under the presser foot, raise the
presser foot, then trim the excess thread.
• If the thread is left at the beginning of the stitching, it
may be embroidered over as you continue
embroidering the pattern, making it very difficult to
deal with the thread after the pattern is finished. Trim
the thread at the beginning.
f
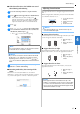
Press the “Start/Stop” button to start embroidering.
Stitching stops automatically with reinforcement after
one color has been completed. When automatic
thread cutting is set, the thread is cut.
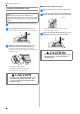
g
Remove the thread for the first color from the
machine.
h
Repeat the same steps for embroidering the remaining
colors.
When the last color is embroidered, the message
informing that the embroidering is finished will
appear on the display. Press , and the display
will return to the initial screen.
i
Cut the excess thread jumps within the color.
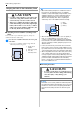
■ Changing the thread color display
You can display the name of the thread colors or embroidery
thread number.
a
Press and use or to display the following
settings screen.
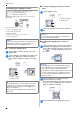
b
Use or of the menu to select [Name of
Color] or [#123] (thread number).
• When [Name of Color] is selected, the name of the
thread colors is displayed.
• When [#123] is selected, the embroidery thread
number is displayed. Use or of the
menu to select the thread brand.
c
Press .
Memo
• Colors on the screen may vary slightly from actual spool
colors.