DE Bedienungsanleitung Bohr- und Meißelhammer ES Manual de Instrucciones Martillo Perforador PT Manual de operação Berbequim-martelo electr. GB Instruction manual Rotary hammer FR Manuel d’instructions Marteau perforateur burineur NL Handleiding Boor- en beitelhamer Art.-Nr.
= 3 – 11 = 12 – 20 = 21 – 29 = 30 – 38 = 39 – 47 = 48 – 56 DE - 2
Bohr- und Meißel-Hammer Modell: Art.-Nr. 12591 B E D I E N U N G S AN L E I T U N G In dieser Bedienungsanleitung und auf dem Gerät werden folgende Piktogramme und Symbole verwendet: Wechselspannung Dreh- / Schlagzahl pro Minute Bedienungsanleitung lesen Schutzbrille und Gehörschutz tragen Staubmaske tragen Schutzhandschuhe tragen Schutzhelm tragen Schutzklasse II (Gerät ohne Schutzleiter) CE-Zeichen.
Inhaltsverzeichnis Kapitel Allgemeine Sicherheitshinweise für Elektrowerkzeuge Spezielle Sicherheitshinweise für Bohr- und Meißelhammer Zusätzliche Sicherheitshinweise Bestimmungsgemäße Verwendung Gerätebeschreibung Technische Daten Beschreibung der Bedienelemente Wartung und Pflege Ersatzteile, ausgediente Elektrowerkzeuge und Umweltschutz Garantie Seite 4 4 4 5 6 6 7 10 10 11 Vor dem Gebrauch von Elektrowerkzeugen sind die beiliegenden Allgemeinen Sicherheitshinweise zu lesen und zu
Tragen Sie Arbeitshandschuhe. Sie schützen dadurch Ihre Hände vor Quetschungen und Hautabschürfungen. Schützen Sie sich und evt. Mitarbeiter gegen Verletzungen durch absplitternde und herumfliegende Teile durch Tragen eines Schutzhelmes und stellen Sie ggf. Trennwände auf. Halten Sie die Maschine beim Arbeiten immer mit beiden Händen und achten Sie auf einen sicheren Stand.
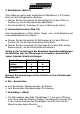
Gerätebeschreibung (Abb.1) 1. 2. 3. 4. 5. 6. 7. 8. 9. 10. 11. Staubschutz Verriegelungshülse Umschalter für Drehstop Getriebeabdeckung Betriebsschalter Umschalter für Schlagstop Netzkabel Lüftungsschlitze Zusatzhandgriff Tiefenanschlag Staubfänger Technische Daten Nennspannung 230V~ / 50Hz Nennleistung 900 Watt Max. Leerlaufdrehzahl 800 min-1 Max.
Geräusch-/Vibrationsangaben Messwerte wurden ermittelt entsprechend EN 60745 - Der angegebene Schwingungsemissionswert ist nach einem genormten Prüfverfahren gemessen worden und kann zum Vergleich eines Elektrowerkzeugs mit einem anderen verwendet werden. - Der angegebene Schwingungsemissionswert kann auch zu einer einleitenden Einschätzung der Aussetzung verwendet werden.
Zum Einsetzen des Tiefenanschlags (10) den Zusatzhandgriff (9) so weit lösen, bis sich der Tiefenanschlag (10) in die Öffnung des Zusatzhandgriffs einsetzen lässt. Tiefenanschlag (10) einsetzen und durch Festdrehen des Zusatzhandgriffes (9) arretieren. Durch Verschieben des Tiefenanschlags können, in Abhängigkeit von der Bohrerlänge, Serienbohrungen mit gleichen Bohrtiefen durchgeführt werden. 2. Einsetzen und Auswechseln von Werkzeugen (Abb.
4. Bohrarbeiten (Abb.3/4) Zum Anbohren glatter oder empfindlicher Oberflächen (z.B. Fliesen) lässt sich die Schlagfunktion abstellen. Drehen Sie den Umschalter für Schlagstop (6) mit dem Pfeil auf Position (c), um die Schlagfunktion abzustellen. Der Umschalter für Drehstop (3) muss in Stellung (b) stehen. 5. Hammerbohrarbeiten (Abb. 3/4) Zum Hammerbohren in Stein, Beton, Ziegel, usw., ist die Maschine auf Hammerbohrbetrieb einzustellen.
Wartung und Pflege Ziehen Sie vor allen Arbeiten am Gerät den Netzstecker! Halten Sie Ihr Gerät immer sauber. Reinigen Sie das Gehäuse nach jedem Gebrauch mit einem trockenen Tuch. Verwenden Sie keine Reinigungsmittel, da sie das Gehäuse angreifen können. Um Staubablagerungen zu vermeiden, sollen die Lüftungsschlitze nach Arbeitsende durch Druckluft (max. 3 bar) gereinigt werden. Tragen sie bei dieser Arbeit eine Schutzbrille.
Das Symbol der durchgestrichenen Mülltonne steht für die Verpflichtung, dass das gekennzeichnete Gerät einer getrennten Sammlung von Elektro- und Elektronikgeräten zur Wiederverwertung zugeführt werden muss. Bei Fragen wenden Sie sich an Ihren BRÜDER MANNESMANNHändler. 2 Jahre Vollgarantie Die Garantiezeit für dieses Gerät beginnt mit dem Tage des Kaufes. Das Kaufdatum weisen Sie uns bitte durch Einsendung des OriginalKaufbeleges nach.
Martillo perforador y cincelador Modelo: N.º de art. 12591 M AN U AL D E F U N C I O N AM I E N T O En este manual de funcionamiento se usan los siguientes pictogramas y símbolos: Corriente alterna Giros / impactos por minuto Leer el manual de funcionamiento Utilizar gafas protectoras y protección auditiva Utilizar máscara antipolvo Utilizar guantes de protección Utilizar casco de protección Clase de protección II (aparato sin conductor de protección) Símbolo CE.
Índice de contenido Capítulo Indicaciones generales de seguridad para herramientas eléctricas Indicaciones especiales de seguridad para el martillo perforador y cincelador Indicaciones de seguridad adicionales Utilización correcta Descripción del aparato Datos técnicos Descripción de los elementos de control Mantenimiento y cuidados Piezas de repuesto, herramientas eléctricas fuera de uso y protección medioambiental Garantía Página 13 13 13 14 15 15 16 19 19 20 Antes de usar herramient
Utilice gafas de protección y una máscara antipolvo si realiza trabajos que generen polvo. Utilice guantes de trabajo. De este modo protege sus manos de contusiones y excoriaciones. Utilice un casco de protección y levante si es necesario paredes de separación para protegerse a sí mismo o, en su caso, a sus trabajadores de las lesiones provocadas por astillas o piezas proyectadas. Cuando utilice la máquina sujétela con las dos manos y mantenga una postura segura.
Descripción del aparato (fig. 1) 1. 2. 3. 4. 5. 6. 7. 8. 9. 10. 11. protección antipolvo manguito de bloqueo conmutador de parada de rotación cubierta del motor interruptor de funcionamiento conmutador de parada de percusión cable de red rejillas de ventilación asa de mano adicional guía de profundidad colector de polvo Datos técnicos Tensión nominal 230V~ / 50Hz Potencia nominal 900 vatios Número máx. de revoluciones de marcha en vacío 800 min-1 Diámetro máx.
Información sobre ruidos y vibraciones Determinación de los valores de medición según EN 60745 - El valor de emisión de vibraciones especificado se ha calculado según un procedimiento de control normativo y puede utilizarse como base para la comparación con otras herra-mientas electrónicas. - El valor de emisión de vibraciones especificado también puede utilizarse para una estimación preliminar de suspensión.
Introducir la guía de profundidad (10) y fijarla apretando el asa de mano. Desplazando la guía de profundidad se pueden realizar, dependiendo de la longitud de la broca, perforaciones en serie con la misma profundidad de perforación. 2. Colocación y cambio de herramientas (fig. 2) Antes de cambiar la herramienta, ¡desconectar de la corriente! La máquina está equipada con un sistema de alojamiento SDS-plus.
5. Trabajos de perforación con el martillo (fig. 3/4) Para perforar piedra, hormigón, ladrillo, etc., hay que poner la máquina en modo de perforación. Gire el conmutador de parada de percusión (6) con la flecha a la posición (d) para ajustar la función del martillo. Gire el conmutador de parada de rotación (3) con la flecha a la marca (b) para ajustar la función de rotación.
Mantenimiento y cuidados Antes de cualquier trabajo desenchufe el aparato de la corriente. Mantenga el aparato siempre limpio. Limpie la carcasa tras cada uso con un paño seco. No utilice detergentes, ya que éstos pueden dañar la carcasa. Para evitar acumulaciones de polvo deben limpiarse las rejillas de ventilación tras cada trabajo con aire comprimido (máx. 3 bar). Durante este trabajo utilice gafas de protección.
2 años de garantía total Este período de garantía para este aparato comienza el día de la compra. Confirme la fecha de compra enviándonos por favor el comprobante original de compra. Garantizamos durante el período de garantía: la solución gratuita de cualquier avería. el repuesto gratuito de todas las piezas que se deterioren. el servicio técnico especializado gratuito (es decir, montaje sin costes por parte de nuestros especialistas).
Berbequim-martelo eléctrico Modelo: Nº do artigo 12591 M AN U AL D E O P E R AÇ Ã O Neste manual de operação são utilizados os seguintes pictogramas e símbolos: Tensão alternada Número de rotações / impactos por minuto Consultar o manual de operação Utilizar óculos de protecção e protecção para os ouvidos Usar máscara de protecção contra pó Utilizar luvas de protecção Utilizar capacete de segurança Categoria de protecção II (aparelho sem condutor de protecção) Símbolo CE.
Índice Capítulo Indicações de segurança gerais para ferramentas eléctricas Indicações de segurança especiais relativas ao berbequimmartelo eléctrico Indicações de segurança adicionais Utilização correcta Descrição do aparelho Dados técnicos Descrição dos elementos de comando Manutenção e conservação Peças sobressalentes, ferramentas eléctricas sem uso e protecção do meio ambiente Garantia Página 22 22 22 23 24 24 25 28 28 29 Antes da utilização de ferramentas eléctricas, deve ler e ter
Utilize luvas de protecção. Deste modo, protege as suas mãos contra ferimentos. Através da utilização de capacetes de segurança e, se for necessário, da montagem de paredes de separação, proteja os trabalhadores e a si mesmo contra ferimentos causados por peças projectadas. Ao utilizar a máquina, segure-a sempre com as duas mãos e certifique-se quanto ao posicionamento seguro.
Descrição do aparelho (fig.1) 1. 2. 3. 4. 5. 6. 7. 8. 9. 10. 11. protecção contra pó luva de travamento comutador para paragem de rotação cobertura do motor botão de funcionamento comutador para paragem de percussão cabo de rede ranhuras de ventilação pega adicional guia de profundidade colector de pó Dados técnicos Tensão nominal 230V~ / 50Hz Potência nominal 900 Watt Velocidade máx. de rotação aberto 800 min-1 Diâmetro máx.
Informação sobre ruidos / vibrações Valores de medição averiduados conforme EN 60745 - O valor indicado de emissão de vibrações foi medido em conformidade com um método de ensaio padronizado e pode ser utilizado para comparação de uma ferramenta eléctrica com outra. - O valor indicado de emissão de vibrações pode também ser utilizado para uma estimativa inicial da exposição.
Inserir a guia de profundidade (10) e fixar esta apertando o parafuso de fixação (9). Uma vez é possível deslocar a guia de profundidade, podem ser efectuadas perfurações em série com a mesma profundidade, dependendo do comprimento da broca. 2. Aplicar e substituir ferramentas (fig.2) Antes de cada substituição de ferramentas retirar sempre a ficha da tomada! A máquina está equipada com um sistema de alojamento SDS-plus.
5. Trabalhos com martelo perfurador (fig. 3/4) Para utilizar o martelo perfurador em pedras, betão, tijolos etc. deve ajustar a máquina para o função de martelo perfurador. Rode o comutador para a paragem de percussão (6) com a seta para a posição (d) para ligar a função de martelo. Rode o comutador para a paragem de rotação (3) com a seta para a marcação (b) para ligar a função de rotação.
Manutenção e conservação Antes de iniciar qualquer trabalho, retire sempre a ficha de rede do aparelho! Mantenha o aparelho sempre limpo. Limpe a máquina com um pano seco após cada utilização. Não utilize produtos de limpeza para evitar que a máquina seja danificada. Para evitar acumulações de pó, deve limpar as ranhuras de ventilação após cada trabalho através de ar comprimido (máx. 3 bar). Utilize durante este trabalho sempre óculos de protecção.
2 Anos garantia completa O prazo de garantia começa no dia da compra do aparelho. A data da compra deve ser comprovada através do envio do talão de compra original. Dentro do prazo, a garantia abrange: reparação gratuita de eventuais avarias. substituição gratuita de peças danificadas. assistência técnica gratuita (ou seja, montagem gratuita pelo nosso pessoal de assistência) Com a condição que a avaria não tenha sido causada por um manuseamento incorrecto.
Hammer/Chisel Drill Model: Item No. 12591 I N S T R U C T I O N M AN U AL The following pictograms and symbols are used in this Instruction Manual: Alternating current Turns or blows per minute Read the manual Wear eye- and ear protection Wear a dust mask Wear hand protection Wear a helmet Appliance Class II (appliance without earth) CE kitemark. By applying this kitemark, the manufacturer declares that the product labelled with the kitemark complies with the technical and legal requirements.
Contents Section Page General safety precautions for power tools 31 Specific safety precautions for chisel drills 31 Additional safety precautions 31 Intended purpose 32 Tool description 33 Technical specifications 33 Description of controls 34 Maintenance and care 37 Spare parts, disused tools and environmental protection 37 Guarantee 38 Read and observe the general safety precautions enclosed before using power tools.
Wear hand protection, as this will protect your hands from crushing and grazing. Wear a helmet and, if applicable, install partition walls to protect yourself and any other staff from flying broken-off debris. Always hold the tool in both hands, and make sure you are standing firmly. Before you begin, always check that the chisel and bit are firmly secured into the chuck, and will not spin out of the machine by accident. Check the chuck for damage and wear on a regular basis.
Tool description (Fig. 1) 1. 2. 3. 4. 5. 6. 7. 8. 9. 10. 11.
Noise and vibration information Measured values determined according EN 60745 - The vibration emission level given in this information sheet has been measured in accordance with a standardized test given in EN 60745 and may be used to compare one tool with another. - The given vibration emission level may be used for the initial estimation of the real exposure.
Depending on the length of the drill bit, adjusting the depth stop will allow you to drill a series of holes at a preset depth. 2. Fitting and changing bits (Fig. 2) Always unplug your drill from the mains before changing the bit. Your drill is equipped with an SDS-plus bushing system. Clean the bit shaft from dust and coarse dirt with a dry cloth before you insert the bit into the bushing. Add a little grease (can supplied) to the shaft with a clean cloth or brush.
5. Hammer-action drilling (Fig. 3/4) Set your drill to hammer action for drilling into stone, concrete, bricks and roof tiles etc. Turn the hammer-action stop switch (6) with the arrow in position (d) to switch on the hammer-action function. Turn the turning stop switch (3) with the arrow in position (b) to switch on the turning function.
Maintenance and care Always unplug your drill before working on it. Always keep your drill clean. Clean the casing with a dry cloth every time you have used your drill. Do not use cleaning solvents that may damage the casing. We recommend cleaning the vents with compressed air at 3 bar max after work to prevent dust from accumulating. Wear eye protection while doing this.
Full two-year guarantee The guarantee period for your hammer/chisel drill begins on the day of purchase. Please supply proof of the day of purchase by sending in the original receipt. During this period, the guarantee covers the following: Free removal of any faults Free replacement of defective parts Including free expert service (free assembly by our experts) This guarantee is conditional upon the fault not being the result of improper handling.
Marteau perforateur burineur Modèle : n° art.
Table des matières Chapitre Instructions de sécurité générales pour les outils électriques Instructions de sécurité spécifiques pour le marteau percuteur burineur Instructions de sécurité supplémentaires Utilisation conforme Description de l’appareil Caractéristiques techniques Description des éléments de commande Maintenance et entretien Pièces de rechange, outils électriques usagés et protection de l’environnement Garantie Page 40 40 40 41 42 42 43 46 46 47 Veuillez lire et observer
Portez des gants de travail. Ils protègent vos mains des contusions et des écorchures. Protégez-vous et protégez éventuellement les collègues contre les blessures liées aux éléments de démolition volant en éclat en portant un casque de protection et installez le cas échéant des cloisons de séparation. Tenez toujours la machine à deux mains lors des travaux et mettezvous dans une position sûre.
Description de l’appareil (fig. 1) 1. Pare-poussière 2. Douille de verrouillage 3. Commutateur pour l’arrêt de la rotation 4. Cache du mécanisme d’entraînement 5. Interrupteur de fonctionnement 6. Commutateur pour l’arrêt de la percussion 7. Câble d’alimentation 8. Ouvertures d’aération 9. Poignée supplémentaire 10. Butée de profondeur 11. Collecteur de poussière Caractéristiques techniques Tension nominale 230 V~ / 50 Hz Puissance nominale 900 Watts Vitesse max. à vide 800 min-1 Diamètre de perçage max.
Bruits et vibrations Valeurs de mesure déterminées conformément à EN 60745 - La valeur d'émission de vibrations indi-quée a été mesurée selon une procédure de contrôle normalisée et peut être utilisée pour comparer les outils électriques. - La valeur d'émission de vibrations indiquée peut également être utilisée pour donner une idée du bruit causé. - La valeur d'émission de vibrations peut diverger des valeurs indiquées pendant l'utilisation réelle de l'outil électrique selon la façon dont il est utilisé.
Pour l’installation de la butée de profondeur (10), desserrez la poignée supplémentaire (9) jusqu’à ce que la butée de profondeur (10) puisse être introduite dans l’ouverture. Introduisez la butée de profondeur (10) et bloquez-la en serrant la poignée supplémentaire (9). En déplaçant la butée de profondeur, il est possible de réaliser des perçages en série avec la même profondeur quelle que soit la longueur du foret. 2. Montage et remplacement des outils (fig.
4. Travaux de perçage (fig. 3/4) Pour percer des surfaces lisses ou fragiles (par ex. carrelage), la fonction percussion doit être désactivée. Tournez le commutateur pour l’arrêt de la percussion (7) de sorte que la flèche soit sur la position (c) afin de désactiver la fonction de percussion. Le commutateur pour l’arrêt de la rotation (8) doit être sur la position (b). 5. Travaux de perçage en frappe (fig. 3/4) Pour le perçage en frappe de la pierre, du béton, de la brique, etc.
7. Collecteur de poussière (fig. 5) Avant de procéder à des travaux au-dessus de la tête, glissez le collecteur de poussière (9) avec son ouverture vers l’avant sur le foret. La poussière de perçage s’accumule dans le compartiment intérieur du collecteur de poussière et ne tombe donc pas sur la machine ou sur l’utilisateur. Maintenance et entretien Débranchez l’appareil avant tous travaux sur la machine ! Veillez à ce que l’appareil soit toujours propre.
Les appareils électriques contiennent des matières premières recyclables. Vous contribuez au recyclage de ces précieuses matières premières en amenant vos vieux appareils dans un centre de collecte. Les appareils électriques contiennent également des matériaux qui peuvent nuire à l’homme et à l’environnement s’ils ne sont pas correctement traités.
Boor- en beitelhamer Model: artikelnr. 12591 H AN D L E I D I N G In deze handleiding worden de volgende pictogrammen en symbolen gebruikt: Wisselspanning Toerental / slaggetal per minuut Lees de handleiding Veiligheidsbril en gehoorbescherming dragen Stofmasker dragen Veiligheidshandschoenen dragen Veiligheidshelm dragen Beschermingsklasse II (apparaat zonder veiligheidsgeleider) CE-teken.
Inhoudsopgave Hoofdstuk pagina Algemene veiligheidsinstructies voor elektrisch werktuig Speciale veiligheidsinstructies voor boor- en beitelhamer Extra veiligheidsinstructies Gebruik volgens de voorschriften Beschrijving van het apparaat Technische gegevens Beschrijving van de bedieningselementen Schoonmaken en onderhoud Reserveonderdelen, uitgediend elektrisch werktuig en milieubescherming Garantie 49 49 49 50 51 51 52 55 55 56 Voor u een elektrisch werktuig in gebruik neemt dient
Draag werkhandschoenen. Die beschermen uw handen tegen kneuzingen en schaafwonden. Beschermt u zichzelf en eventuele medewerkers tegen verwondingen door deeltjes die losraken en rondvliegen door het dragen van een veiligheidshelm en zet eventueel scheidingswanden neer. Houd de machine bij uw werk altijd met beide handen vast en zorg ervoor dat u stevig staat.
Beschrijving van het apparaat (fig. 1) 1. 2. 3. 4. 5. 6. 7. 8. 9. 10. 11. Stofbescherming Vergrendelingsbussen Omschakelaar voor draaistop Afdekking overbrengingsmechanisme Bedrijfsschakelaar Omschakelaar voor slagstop Netkabel Beluchtingssleuven Extra handgreep Diepteaanslag Stofvanger Technische gegevens Nominale spanning 230V~ / 50Hz Nominaal vermogen 900 Watt Max. toerental leegloop 800 min-1 Max.
Informatie over geluid en trillingen Meetwaarden bepaald volgens EN 60745 - De opgegeven vibratiewaarde is volgens een genormeerde controleprocedure gemeten en kan voor het vergelijken van het ene elektrische werktuig met het andere worden gebruikt . - De opgegeven vibratiewaarde kan ook voor een inschatting van de blootstelling vooraf worden gebruikt.
Diepteaanslag (10) inzetten en door vastdraaien van de extra handgreep (9) vastzetten. Door het verschuiven van de diepteaanslag kunnen, al naar gelang de lengte van de boor, serieboringen met dezelfde boordiepte worden uitgevoerd. 2. Het inzetten en wisselen van werktuigen (fig. 2) Voor het wisselen van het werktuig – de stekker uit het stopcontact! De machine is voorzien van het SDS-plus opnamesysteem.
5. Werken met de hamerboor (fig. 3/4) Voor het hamerboren in steen, beton, tegels, enz. moet de machine op hamerboorbedrijf worden ingesteld. Draai de omschakelaar voor slagstop (6) met de pijl op positie (d), om de hamerfunctie in te stellen. Draai de omschakelaar voor draaistop (3) met de pijl op de markering (b), om de draaifunctie in te stellen.
Schoonmaken en onderhoud Trek voor u aan het apparaat komt altijd de stekker uit het stopcontact! Houd uw apparaat altijd schoon. Reinig de kast na ieder gebruik met een droge doek. Gebruik geen schoonmaakmiddelen, omdat die de kast kunnen aantasten. Om stof in het apparaat te vermijden moeten de beluchtingssleuven door druklucht (max. 3 bar) worden gereinigd. Draag bij dit werk een veiligheidsbril.
Elektrische apparatuur bevat ook stoffen, die bij ondeskundige verwijdering tot schade voor mens en milieu kunnen leiden. Het symbool van de doorgestreepte afvalton staat voor de verplichting om de zo gekenmerkte apparatuur apart af te geven bij een inzamelplaats voor elektrische en elektronische apparatuur. Twee jaar volledige garantie De garantieperiode voor dit apparaat begint met de dag waarop u het koopt. De datum van koop toont u aan door het meesturen van de originele kassabon.
1 2 3 4 5 6 10 9 1 8 3 2 2 3 11 d c 6 4 5 b 7 a