No part of this manual may be copied, reproduced, republished, transmitted or distributed for any purpose, without prior written consent of Brunton. Any unauthorized commercial distribution of this manual is strictly prohibited. Atlas™ and Brunton® are registered trademarks of Brunton MapCreate™, FreedomMaps™ and IMS™ are trademarks of LEI. Fishing Hot Spots® is a registered trademark of Fishing Hot Spots Inc. Navionics® is a registered trademark of Navionics, Inc.
Table of Contents Sec. 1: Introduction ....................................................................... I Quick Start Reference .................................................................... 2 How MapCreate Works: The Basics............................................... 5 File Formats & Functions................................................................ 6 Map Border File .......................................................................... 7 Custom Map File..........................
Moving around the Master Map.................................................... 44 Pan Arrows ............................................................................... 44 Center Map ............................................................................... 44 Zoom Area ................................................................................ 44 Zoom in/Zoom Out .................................................................... 45 Zoom Range Window .......................................
Notes iii
WARNING! A CAREFUL NAVIGATOR NEVER RELIES ON ONLY ONE METHOD TO OBTAIN POSITION INFORMATION. CAUTION When showing navigation data to a position (waypoint), a GPS unit will show the shortest, most direct path to the waypoint. It provides navigation data to the waypoint regardless of obstructions.
Section 1: Introduction How this manual can get you into the field, fast! Thanks for buying MapCreate™, the custom mapping software for Brunton units. This manual was written using MapCreate™ U.S.A. Beginning with version 6.3, all MapCreate packages work identically, but contain different mapping data. We know you're eager to install the program and make some maps, but we have a favor to ask.
In addition to the Command Reference, the Help file includes material from this manual's User's Guide segment. Just press the F1 key to launch Help. You can find facts fast by electronically searching the Help File for the word or phrase you want. In our printed manual, we've included other general supplemental material as appendices in the back of the book. Check out the Table of Contents to see the topics contained in each appendix.
ton. You have just drawn a Map Border. 4. With the Map Border displayed, click the ESTIMATE CUSTOM MAP SIZE button, on the Create Map toolbar. After a moment it will tell you your map's file size. If it fits the card, click OK to clear the message and jump to step 5. If the map file is too large for the card, click OK to clear the message, then redraw your map border a little smaller. Click the DELETE MAP BORDER button, click on any green border line, then re-draw a smaller border box.
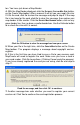
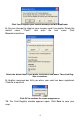
Click Yes to register your current memory card with MapCreate. 8. You can change the label on your memory card if you prefer. Delete the default name, "Card1," and enter the new name. Click REGISTER to continue. Delete the default label, if you prefer, and enter a new name. Then click Register to continue. 9. Another message box tells you when your card has been registered. Click OK to continue. Click OK to continue the create map process. 10. The Card Registry window appears again.
Click Done to complete the registry process. NOTE: If the AUTOMATICALLY APPEND LABEL TO SAVED MAPS box is selected (see figure above), MapCreate will automatically add your card's label to the end of whatever name you give the file you are saving. Let's use the figure above as an example. If we name our map "Phoenix.lcm," MapCreate will automatically name the file "Phoenix_CARD1.lcm." To cancel this option, click the Automatically Append… box to remove the check mark. 11.
jump through to cram a high-detail map into your GPS unit. First of all, those CDs you just purchased contain a whole bunch of raw digital cartography data. There are several hundred files of digital mapping information containing lake shorelines, navigation aids, roads, rivers and all the other information that goes into our high-detail maps. It takes some fancy formatting to fit the whole world onto a few compact discs. Your GPS unit can't read those raw files (called atlas files).
ual easy to skim. If that's the case, move on to "How to Use This Manual: Typographical Conventions" on page 14. But, if you want to pick up an extra tip or two, look over this segment describing the file formats and memory cards MapCreate works with. Map Border File This file defines the boundary of the raw cartography data that is extracted and converted to a GPS custom map, or Map File.
You cannot make changes to a Map File once it has been created. If you want to make changes to a map, return to its original companion Map Border File or retrieve the map borders by opening the Map File (*.lcm). Make your changes to the border, then create a fresh Map File. You can delete the old one, or just save the new map over the old map. Important Notes: File Encryption and Card Limits We collect and purchase cartography data from several sources.
ples using the regular versions (no topographic data) of MapCreate USA and MapCreate Canada, with all mapping categories included. (Size will vary depending on which package of MapCreate you have.) In the U.S., Lake Michigan is approximately 26 MB, all of Missouri is 41 MB and the entire state of California is approximately 87 MB. A six-milewide corridor map from San Diego, California to the Maine-Canada border, following Interstate highways, is about 50 MB.
don't have to take a computer and cable with you to load a new map in the field. If the unit is mounted in a vehicle, there is no need to dismount it and carry it to a computer. The effective mapping memory capacity of your GPS unit is restricted only by the capacity and number of memory cards you want to carry with you, up to the five-card limit. This is a handy feature for long journeys or for users who can't lug a laptop computer along. Four factors control Map File size: 1.
MapCreate can be used to save valuable travel or adventure data for a later trip. This also makes it easy to exchange GPS data with friends using Brunton Atlas GPS units. ASCII Text File This is a universal text file format compatible with word processors and other software. MapCreate can exchange routes and waypoint lists with other mapping programs by importing and exporting GPS information as comma-delimited ASCII text files. ASCII (pronounced "ask-ee") uses the *.txt file extension.
older GPS Data Files in the *.low format, MapCreate 6.0 will only save GPS Data Files in the newer *.usr format. Please note that your MapCreate 6compatible GPS unit can only read *.usr files. Atlas File This is the "raw" file format for layer after layer of cartographic and hydrographic data on our CDs. You never have to work with these files directly. MapCreate pulls data from these files to display the Master Map you see in the main window on your computer.
Mapping Detail: There's more here than meets the eye. The Map Files you make with MapCreate contain more mapping detail than what is visible on your computer screen. Your MapCreate-6-compatible GPS unit takes full advantage of this extra information. Find Highway Exit Services For example, move your mouse pointer over a highway exit symbol on the computer map, and all you'll see is a pop-up tool-tip box listing the name of the exit.
In a Brunton Atlas GPS, all POI's include the name, address and phone number. Cursor over POI symbol Pop-up box At left, an iFINDER GPS screen showing a POI pop-up name box. At right, you can call up a page of information on the POI, and the GPS unit can lead you to the POI's location. Find an Address You won't see addresses on your computer map (except listed in the popups for some POIs).
In the printed User's Guide and the Help file Command Reference, the actual command clicks and keystrokes appear as sans serif, boldface type. So, if you're in a real hurry (or just need a reminder), you can usually skim the instructions and pick out where to click by finding the boldface commands. The paragraphs below explain how to interpret the text formatting for those commands and other instructions.
priate hot key or shortcut key on the keyboard. Commands are sometimes described as menu sequences, to help you find the command faster. For example, "to open the Trail List window, click VIEW|TRAIL LIST," means to mouse click on the main menu's View command and then click the Trail List command on the submenu. Specific text or numbers you must type are shown in bold, sans serif type.
Section 2: Installing MapCreate 6.3 System Requirements MapCreate 6 requires the following minimum system resources: • IBM® compatible PC. • Pentium® 133 MHz or faster processor. • 32 MB RAM • approximately 300 MB free hard disk space, depending on your version of the program. • 256 color display. • Microsoft® Windows® 98 or later. • CD-ROM drive. MapCreate will run on a system with the above specifications, but the program will work slowly.
on the hard drive. Caution: Be patient if you choose custom install. It may take several minutes for all the files to install to the hard drive. You will be prompted to insert the appropriate disc(s) throughout the installation. Full - Installs every possible option and all the mapping data. MapCreate runs fastest with this option. Caution: Be patient if you choose full install. It may take several minutes for all the files to install to the hard drive.
Type the setup command directory path and file name. 4. Click OK to begin installation. NOTE: If you are using Windows 2000 or Windows XP Professional, you may receive an error message if you are not logged on with administrator privileges. If this occurs, you can complete the MapCreate installation by first logging on as an administrator, then proceeding with step 1 on page 18. 5.
A. InstallShield® will load. A message box will appear, reminding you to disable any anti virus software. Click OK to continue. B. Read the complete License Agreement. If you accept the agreement, click the YES button; if you do not accept, click the NO button, and MapCreate will not be installed on your computer.
C. Choose a destination folder for the program. You can accept the default (recommended) or you can choose another location. Click NEXT to continue the installation. D. Select the type of setup, and click the NEXT button to continue the installation. (See page 17 for a description of the options.
E. If you chose Custom install, select the components to install. Then click NEXT to continue. F. With all your preferences determined, InstallShield will begin copying files. A progress window is shown.
G. If needed, the install will prompt you for additional discs. When asked, insert the appropriate CD and click OK to continue the setup. H. The Setup Status window shows the progress of the installation. I. When the program files have been copied, InstallShield Wizard will display a message that setup is complete. Click FINISH to close the wizard program.
J. After the MapCreate files have been installed on your computer, you are prompted to install the MMC card reader drivers. Make sure the card reader is not plugged in yet, then click OK to continue. (If you stop the program, you can install the card reader later, but MapCreate will not run until the card reader is installed. To install later refer to the instruction sheet that came with the card reader.) K. The setup program for the USB SD/MMC Reader loads. L.
M. Read the complete License Agreement. If you accept the agreement, click YES. (If you do not accept, click NO, and the SD/MMC Reader software will not be installed on your computer, and MapCreate will not run.) N. Choose a destination folder for the SD-MMC Reader program. This is where you want the files to be located on your hard drive. You can accept the default (recommended) or choose another location. Click NEXT when you're ready to continue.
O. Select the folder where you want to place the shortcut for the SD/MMC Reader program. You can accept the default or choose another location. Click NEXT to continue the installation. P. The setup program is ready to install the SD-MMC Reader program on your computer. Click NEXT to continue.
The setup program displays the progress of the installation. Installation complete. 6. When the card reader install program is finished, the InstallShield wizard completion window appears.
computer now. MapCreate and the card reader will not run until your computer restarts. With the "restart my computer now" option selected, click FINISH. After the computer restarts and Windows has finished loading, plug the card reader into a USB port. After Windows finishes installing the card reader, it will appear as an additional drive letter in My Computer. The card reader and MapCreate are ready to use. If you are running an anti virus program on your computer, be sure to turn it back on at this time.
Double-click MapCreate.exe to start MapCreate 6.3 from Windows Explorer. For more details on the many other ways to create and manipulate shortcuts, open your Windows help file and search for the word "shortcut.
Notes 30
Section 3: User's Guide Working With MapCreate Starting MapCreate If you installed the Compact version of MapCreate, make sure the CD-ROM for the area you intend to use is in the CD-ROM drive. Otherwise, you can insert any MapCreate CD. (Remember, even if you installed the Full version, a disc must be in the drive each time you start the program. This is one of MapCreate's copy protection features.) NOTES: • For earlier MapCreate owners: If you have both an earlier version of MapCreate and MapCreate 6.
The MapCreate Screen When you start MapCreate, the opening splash screen appears while the program is loading. It will take a moment or two for the program to load the map detail. MapCreate 6 splash screen appears while program is loading. Once it's finished loading, you'll see a screen that looks like this, with a map of the world and the Map Categories window open: MapCreate 6 opening screen. MapCreate has several other windows that are used to control mapping data.
Status bar MapCreate 6 GPS text list windows. You can drag the borders of these windows to resize them to suit your viewing preferences. The windows can also be manually arranged around the screen, or you can just use the default Auto Arrange setting, under the Window menu. When you close the program, MapCreate remembers the windows and map you were using. The next time you start MapCreate, the program opens the previous map and windows, just as you left them.
your GPS. You can close the other list windows if you're not using them. (You can always open them later when you need them. Click VIEW and then click the window name.) This allows you to see as much of the Master Map as possible on your computer screen. To close the other windows, click the X CLOSE WINDOW button in the top right corner of each window frame. You cannot close the Master Map window.
Selected Symbol Tip Box Pop-up Tool Tip box. When the cross-hair pointer hovers over the visible wreck symbol, a red border surrounds the symbol and the tip box appears. This wrecked vessel is the "Three Brothers." Main Menu MapCreate's main menu is similar to that of other Windows programs. It consists of the File, Edit, View, Insert, Tools, Window and Help menus. You can click with a mouse or use the hot keys to access the menus and their submenus.
to display. A check mark appears, and the toolbar is displayed on your screen. 3. To remove a toolbar click the check box beside the name of the toolbar you wish to close. The check mark disappears, and the toolbar is removed from your screen. 4. Repeat the procedure for each toolbar you wish to display or remove. At left, the Create Map (Advanced) toolbar is checked, so it is active, or visible. The figure at right shows that all four toolbars are active. To remove a toolbar, simply click the check mark.
Create Map (Advanced) toolbar Draw Map Borders: draws map borders as green rectangles. Draw Corridor Map Borders: draws irregularly-shaped magenta corridor borders. Useful for areas that don't fit neatly into rectangle borders, or for making strip maps that follow cross-country routes. Delete Map Border: clicking anywhere on a green map border or repeatedly clicking the handle boxes of a magenta map border with this tool removes the border from your map.
Save Map Border File: saves to disk any new or edited map borders displayed on the Master Map. Open Map: opens a map saved to disk. Save All: saves a map border file and then a GPS data file, when both types of information are displayed on the Master Map. Print Master Map: prints the current Master Map window display, including any GPS information shown on the map. GPS Data toolbar Create Waypoints: lets you set a waypoint on the Master Map.
Undo: lets you reverse a command or function you have executed. Redo: lets you re-run a command or function you had previously reversed using the Undo command. Delete: erases a selected item from a waypoint list, route waypoint list or icon list. Map Navigation toolbar Center Map: clicking with your mouse anywhere on your map puts the point you clicked on at the center of the screen. Full Map: displays the map at the original default zoom setting.
Move Down: click this to see additional area at the bottom of the map (i.e., a given point will shift up, bringing into view an area that was previously off the map at the bottom.) Map Category Options Window This window controls how much mapping detail is displayed in the Master Map. Open and close the window by clicking VIEW|MAP CATEGORY OPTIONS. You can turn detail categories off and on by clicking in the check box beside them. A check mark shows that the category is turned on for display.
menu. (You don't need to make any changes there now, but after a little practice you'll want to see the entry View Map Display Options in the Help file's Command Reference for how this works.) Waypoint List Window This window shows the waypoints on the Master Map in a text list format. The symbol, name, latitude, longitude, date created and number are listed. The symbol, name, latitude and longitude can all be edited either on the Master Map or in the list window. To edit, right-click the waypoint.
2. Pause a moment; then click the name again. (This is not a regular double-click.) 3. Type a new name and press ENTER. The waypoints in a route can be edited. Double-click the route name and you'll open the Route Waypoint List Window, which we describe next. Route List Window Route Waypoint List Window (This is not shown when the program starts for the first time; a route must be created first. With the Route List window open, double-click on the route name to open the Route Waypoint List window.
Moving Around the Master Map Pan Arrows You can move around the Master Map display by clicking the Pan Arrow buttons, which appear at the north, south, east and west sides of the Master Map. For example, click the RIGHT PAN ARROW on the east side of the window to pan or move the Master Map to the left. Clicking on the Right Arrow reveals a portion of the map previously out of sight to the right of the screen. The other three arrows work the same way.
Zoom Box Cross-hair At left, the zoom area pointer was used to drag a selection box around the word "Chicago." When the mouse button was released, the map jumped to a tighter, zoomed-in view of Chicago. (These figures show only the center portion of the Master Map.) You can find the exact zoom range in miles by checking the Zoom Range Window (see page 46 for more information). NOTE: The Zoom Area button can only zoom in on a map. To zoom back out, use the Zoom Out button or the Z-Out button (see below).
ter. Zoom Range Window The current zoom range shows in the Zoom Range Window next to the ZIn button (see previous figure). The Zoom Range Window is the third common zoom tool. You can use this window in at least two ways: 1. Click the down arrow at the right of the box, and click on a preset range. 2. Click inside the box, type the desired range number and press ENTER. At left, Chicago is centered on the map with a range of 3000 miles; the figure on the right shows a zoom range of 200 miles.
Handle Box Map Border shown in green on screen. Mouse Pointer Click and drag to draw a Map Border around Corpus Christi Bay area. 6. When the green border surrounds the desired area, release the mouse button. 7. To stop the command, click the CENTER MAP button or the ZOOM AREA button. If you are satisfied with this map border and want to finish processing it for use in your GPS unit, you can jump ahead to "Creating and Saving a Custom Map," on page 52.
File. Saving a Map Border file is not necessary because you can create a map without saving the border, and you can even extract borders from finished Map Files. However, this option is useful if you like to tinker with your map borders, and you don't want to start over each time you want to change a border. Here's how to save the border: (Refer as needed to the "Toolbars" section, beginning on page 35.) 1. Click the SAVE MAP BORDER button dialog box appears. on the FILE toolbar.
Open Map Border File dialog box. With the border displayed on the Master Map screen, you're ready to process it into a map your GPS unit can use. If so, you can jump ahead to "Creating and Saving a Custom Map," on page 52. MapCreate can also draw a polygon-shaped border useful for following an irregularly shaped route, lake or other geographic feature. These corridor maps are made with the Draw Corridor Map Borders command, and we tell you how in the next lesson.
anchor point. Point 1 Point 2 Point 3 Corridor with first and second anchor points set, left. Add a second segment to the corridor with a third point, right. 7. Now move the mouse pointer off at an angle, in the new direction needed to follow the irregular terrain. You'll see that the active corridor border box now rotates around the last anchor point you set.
move off in any direction, with the new segment of the corridor attached to the previous segments. Click to set your third anchor point. 8. Continue to click and add additional segments to your corridor until you reach your destination or have enclosed the desired area. 9. Click the right mouse button to stop drawing the corridor map. To close the map borders command, click the CENTER MAP button or the ZOOM AREA button. Finished corridor map. NOTE: Corridor width is adjustable.
map border for future use. These optional steps were discussed in the previous segment on Creating Rectangle Map Borders.) Creating and Saving a Custom Map Once you have a Map Border, MapCreate can use it to make a Custom Map File for your Brunton Atlas unit. Before you can proceed, however, your MMC or SD card must be registered with MapCreate. This is a onetime step for each of the five cards you are allowed to use with MapCreate.
Building Map Progress dialog box. 4. When the map has been built, the Save As dialog box appears. Note that the file size of the map is shown in the title bar and in the status bar at the lower left corner of the MapCreate screen. In the example below, the size is approximately 1.94 MB. Type a name in the FILE NAME text box and click SAVE. Save As dialog box showing map size in title bar Congratulations, you've made your first Map File! Your map was placed directly on your MMC or Secure Digital card.
came with the card reader. Refer to your GPS unit's manual for instructions on inserting the MMC. When the GPS unit is turned on, it will automatically display your MapCreate custom map. Now you're ready to hit the road, but if you'd like to add a little GPS navigation information to your unit, read the following lessons. Creating a Waypoint Waypoints are the building blocks of GPS navigation. A waypoint is simply an electronic "address," based on the latitude and longitude of a position on the earth.
Create a waypoint: First, find the location on the Master Map. The longer arrow shows the location of a public hunting area parking lot. Move the pointer arrow tip over the location (left) and click to create the waypoint. The waypoint appears (right) with the default waypoint symbol and name, both of which can be changed. These figures were taken from a zoom range of 4.05 miles.
• There are other ways to delete waypoints, and you can also change the symbol, name and location. For instructions on these functions, along with other tips, see Create Waypoint, Delete Waypoint, Insert Waypoint and Edit Waypoint in the Help file's Command Reference section. If this is all the GPS information you need for now, skip ahead to the lesson "Saving a GPS Data File" on page 61. Remember, to get the waypoints you just made into your GPS unit, they must be saved in a GPS Data File.
Create an icon: First, find the location on the Master Map. The bottom arrow shows the location of a public boat ramp on this river. Move the pointer arrow tip over the location (left) and click to create the icon. The icon appears (right) with the default waypoint symbol but no name. To change this symbol to the boat ramp symbol, see Edit Icon in the Help file's Command Reference. 5. Relocate your mouse pointer and click to create additional icons as needed. 6.
tion and click to set it there. • There are other ways to delete icons, and you can also change the symbol and location. For instructions on these functions, along with other tips, see Create Icon, Delete Icon, Insert Icon and Edit Icon in the Help file's Command Reference section. If you don't want to plan a route this trip, skip ahead to the lesson "Saving a GPS Data File" on page 61. But don't forget, planning a route is one of MapCreate's coolest capabilities.
the cross-hair mouse pointer on the area you want centered. 2. If needed, click the ZOOM IN or ZOOM OUT buttons so see enough detail to accurately place the route waypoints. you can Tip: As you move along your intended course, you may need to pan the Master Map and periodically zoom in and out to see where to place route waypoints, and where you are going next. The pan and zoom buttons will always work, even when the CREATE ROUTE command is active.
sically, you will set a new waypoint every time you need to change direction. 6. To close the CREATE ROUTE command, right-click or press Esc. Finished route with six waypoints. Notice the straight line-of-sight line connecting the waypoints that make up the route. The route segment from one waypoint to another is called a leg; this route has five legs. Waypoints 3 and 4 are near oil drilling platforms and waypoint 5 is near a visible wreck.
menu click DELETE ROUTE. • You can easily reposition a route waypoint with your mouse. Just move the cross-hair pointer or the zoom area pointer over the waypoint and right-click. In the pop-up menu, click MOVE WAYPOINT, and the pointer grabs the route waypoint. Move it to the new position and click to set it there Now that you've created all the GPS information you want, you need to prepare it for use in your GPS unit. We'll do that in the next lesson, "Saving a GPS Data File.
your card reader like a removable disk drive, so copying a GPS Data File to the MMC card is like copying a file from the hard drive to a floppy disk. Tip: You also have the option of saving the GPS data file directly to the card. When the Save As dialog box appears, select the card reader's drive letter in the Save In box before you click Save. For help transferring files with Windows Explorer, click START|HELP and in the Windows Help program, look for the topics "copying files" or "moving files.
Now you know all the basics for getting custom maps and GPS data into your GPS unit — you're ready to travel! You don't need them at this moment, but there are two more optional operations you ought to hear about. One is making a corridor map from a route. You can use that method instead of drawing corridor border boxes manually with the mouse. The other operation is creating a route from a trail.
Route from Dallas to Corpus Christi, Texas (left) and the corridor map created automatically from the route (right). You can save this as a Map Border File and then create a Map File, or create a Map File without saving the border. (Click the SAVE MAP BORDER button, on the FILE toolbar, and then click the CREATE MAP button.) Tip: You can control the width of any corridor map. Click VIEW|MAP DISPLAY OPTIONS, and the Map Display Options dialog box appears.
Map Display Options dialog box. Click on the MAP BORDERS tab. Near the bottom of the box, drag the Corridor Width slider bar left to decrease or right to increase the width of your corridor. This allows you to make very narrow corridors, which in turn results in conveniently small Map File sizes. Corridor Width slider bar Map Borders tab in the Map Display Options dialog box. Drag the Corridor Width slider bar to the left to narrow corridor width. Drag the slider bar to the right to widen corridor width.
the path you took. You can even share the information with friends. Using the Create Route From Trail command is a snap. Here's how you do it: 1. Open a GPS Data file containing a trail. (To open a GPS Data File, click FILE|OPEN|OPEN GPS DATA FILE.) NOTE: GPS Data Files with relatively long trails take a few moments to open. Please be patient when you open a data file containing a long trail. Once the trail information has been processed, the remainder of the data file will open very quickly.
3. Open the Route List Window: click VIEW|ROUTE LIST. 4. Right-click on the trail name. In the pop-up menu, click the CREATE ROUTE FROM TRAIL command. Plot Trail. Shown in green on MapCreate screen. The Create Route From Trail pop-up menu appears when you right-click a trail name in the Trail List Window. Notice the absence of waypoints along the trail. MapCreate converts the green trail line into a magenta route line with red waypoints.
You can save this as a different GPS Data File. (Click the SAVE GPS DATA FILE button on the FILE toolbar.
Appendix 1: MapCreate Command List Complete documentation on all MapCreate commands is available in the program's Help File. To access Help and its Command Reference section, press F1. An example entry from the Command Reference (for the Help Command) appears at the end of this command list.
Help Topics Command Menu: HELP Submenu: n/a Menu Command: HELP TOPICS Menu Command Sequence: HELP|HELP TOPICS Hot Key Sequence: Alt+H|H Shortcut Key(s): F1 Toolbar button: n/a The Help Topics command opens the on-line Help system in your default web browser. Our help information is in HTML format, but it runs from the CD or your hard drive, not from the Internet.
for, adjust any options such as up or down, then click FIND NEXT. Search a Help document for the term "map border." Netscape 6 browser: 1. Click somewhere on the help page you intend to search. This makes sure your browser will search the correct page. 2. Click SEARCH|FIND IN THIS PAGE or use the shortcut keys Ctrl+F to begin your search. Use Netscape's Find command to search Help documents. 3.
Notes 72
Appendix 2: Map Category List This list contains the different categories of mapping information available in MapCreate 6. These categories and their subcategories can be turned off or on. Only those categories turned on (displayed in the Master Map) will be included in Custom Map Files for your GPS unit. See Appendix 3 for symbols used to represent these items. POI stands for Point of Interest. U.S. and Canadian category groupings are listed here.
Marine Services Medical Service Museums/Zoos Postal Service Places of Worship RV Parks/Services Shopping Sporting Goods/Wear Sports Transportation Universities/Schools Minor City Rural Names Rural State/Province Boundaries Names Water Canals/Streams Canals/Stream Names Lake/Rivers Lake/River Names Ocean/Seas Ocean/Sea Names Other Names Wrecks & Obstructions POI-Lodging Bed & Breakfast Cabins Camps/Campgrounds Hotels/Motels Resorts RV Parks Canadian Categories POI-Restaurants Asian Banquet Rooms Barbecu
Scenic Areas Service Areas Toll Plazas Welcome Centers Weigh Stations Libraries Lodging Marine Services Medical Service Museums/Zoos Postal Services Restaurants RV Parks/Services Shopping Sporting Goods/Wears Sports Tours Transportation Universities/School Highways US International Minor International Major Interstate Symbols Interstate State State Symbols US Symbols Public Lands National Forests National Park Service Park Symbols Railroads Roads Major City Major City Names Minor City Names Minor City Ru
76
Appendix 3: MapCreate 6 Symbol Key MapCreate 6 contains hundreds of mapping symbols used to represent items ranging from geographic features to commercial Points of Interest (POI). The following list displays these symbols and the name of the item the symbol represents. Interstate Highway Highway Exit with Scenic Area U.S.
Shopping Center Green Unlighted Buoy (Navaid) Summit Red Unlighted Buoy (Navaid) Tower White or Unidentified Unlighted Buoy (Navaid) Trail Name Light (Navaid) City, Community, or Subdivision Name Nautical Chart Note Land Feature Name Platform (Navaid) Water Feature Name Radiobeacon (Navaid) Miscellaneous Landmark Name Awash or Visible Obstruction Square Green Daybeacon (Navaid) Awash Rock Square White or Unidentified Daybeacon (Navaid) Covered Rock Dangerous Submerged Wreck Red Triangle
College or University (POI) Fishing-Related (POI) Hall or Auditorium (POI) Lodging (POI) Hospital (POI) Camp or Campground (POI) Medical Service (POI) RV Park or RV Service (POI) Miscellaneous Attraction (POI) Marina (POI) Museum or Historical Place (POI) Boating Dealer or Service (POI) Post Office Boat Equipment & Supplies (POI) Tourist Attraction or Tour (POI) Gas Station (POI) Zoo (POI) Auto Parts or Service(POI) Movie Theater (POI) Truck Stop, Trailer Rental, or Other Transportation (
Financial Service (POI) Sporting Goods or Sportswear (POI) Bowling Center (POI) Golf-Related (POI) Swimming Pool (POI) Park or Park Office (POI) Railroad (POI) Synagogue (POI) Recreation Center, Stadium, or Other Sports-Related (POI) Church (POI) Police or Sheriff (POI) Taxi (POI) Bar or Club (POI) Bus Line (POI) Live Theater (POI) Auto Rental or Lease (POI) Hunting-Related (POI) Car Wash (POI) 80
Appendix 4: Displaying Specialty Maps With Fishing or Aeronautical Data A new feature in MapCreate 6.3 allows you to view LEI's special fishing or aviation mapping products on the MapCreate screen. The feature works with Inland Mapping System™ Fishing Hot Spots® fishing maps or Jeppesen® Americas and Jeppesen® International aeronautical databases, along with the LEI® Obstructions aeronautical database.
IMS Fishing Hot Spots Maps Park areas appear in green. Fishing Tips & Techniques Submerged stream Lake Profile Flooded timber Submerged pond Underwater contours & Fishery Pop-up box Foundations Brush shelter Master Map window showing detail from an IMS Fishing Hot Spots map of Lake Skiatook. Place the Center Map or Zoom Area pointer over an item and a pop-up information box appears. Move your mouse pointer over an item and a pop-up tool-tip box appears, identifying the item.
There are other important Fishing Hotspot symbols that display information only on your GPS unit. They are all accessed with the cursor and either the Wpt or Find key. These symbols are usually (but not always) located near the dam site, and they include: Fishing Tips & Techniques: the Waypoint Information screen will display an article covering topics ranging from lures to locations.
Jeppesen airspace data displayed in a MapCreate pop-up box. Point to an airport identifier and you'll see a pop-up box with the number of communication frequencies, number of runways and number of services available at that field. Point to a runway, and you can see its length, surface type and lighting. Jeppesen airport (left) and runway information (right) displayed in MapCreate pop-up boxes.
Master Map window at the 60 mile zoom level showing detail from a Jeppesen Americas aeronautical database. Intersections appear as gray Xs; other symbols appear as they do in sectional paper charts.
Notes 86
Appendix 5: Considerations When Planning Highway Routes Tips on Making Better Routes for Highway Navigation How you make a highway route depends on your type of travel and whether you prefer to use the GPS unit's compass rose screen, the map screen or both for navigation. These factors determine how many route waypoints to use, and where you place them. A simple, straight-legged route by water or by air is easy to make, as is a route following a square grid of city streets.
build highly detailed highway routes. These "high res" routes are fun to use, but they have some drawbacks. They require placing a route waypoint at practically every curve in the road. This takes a relatively large number of waypoints for the distance traveled. A large set of waypoints close together can give your Custom Map a cluttered look. If the route is very long, it takes more time for you to make it in MapCreate.
course. As you come around the mountain and the pavement turns back south, the compass rose, the route and the pavement will all line up together once again. The off course alarm also requires some adjustment when using low res routes. In our mountain curve example, if the alarm was set at 0.1 mile, it would go off as we rounded the curve and "deviated" more than 0.1 mile from the route center line. Some navigators avoid this by turning the course deviation alarm off.
Notes 90
Index Saving, 56, 58, 61 A I Accessories, 9 Airspace, 83, 84 Alarms, 87, 89 Appendices 1, MapCreate Command List, 69 2, Map Category List, 73 3, MapCreate 6 Symbol Key, 77 4, Displaying Specialty Maps, 81 5, Considerations When Planning Highway Routes, 87 Arrival Alarm, 87 Icons, 5, 11, 13, 31, 34, 38, 39, 41, 42, 45, 56, 57, 58, 61, 69 Creating, 56 Installation, 1, 15, 17, 18, 27 Sec. 2, Installation, 17 Introduction Sec.
Trail List Window, 43, 44, 67 Waypoint List Window, 41 Searching, 13, 14, 70, 71, 82, 83 Addresses, 14 Highway Exits, 13 POIs, 14 Streets, 14 Specialty Maps, 13, 81, 82, 83, 84, 85 System Requirements, 17 78, 79, 80 Position Format, 11 R Route, 5, 6, 11, 12, 16, 34, 37, 38, 39, 42, 43, 44, 49, 54, 56, 58, 59, 60, 61, 63, 64, 66, 67, 68, 69, 81, 87, 88, 89 Create, 58, 63, 66 Delete, 60 Runways, 73, 74, 84 T S Trail, 5, 6, 10, 11, 16, 43, 44, 61, 63, 66, 67, 68, 69, 73, 75, 78 Convert to Route, 63, 66 Tr
Notes 93
Notes 94
LEI End User License Agreement THESE PRODUCTS (AS DEFINED BELOW) ARE OWNED BY LEI AND ARE PROTECTED UNDER COPYRIGHT LAWS AND INTERNATIONAL COPYRIGHT TREATIES. THESE PRODUCTS ARE LICENSED, NOT SOLD. THESE PRODUCTS ARE PROVIDED UNDER THIS END USER LICENSE AGREEMENT ("LICENSE"), WHICH DEFINES WHAT YOU MAY DO WITH THE PRODUCTS, AND CONTAINS LIMITATIONS ON WARRANTIES AND/OR REMEDIES. IMPORTANT – PLEASE CAREFULLY READ THE FOLLOWING TERMS AND CONDITIONS.
underlying source code of the Products, for any purpose; d. You shall not host or use, or allow any third party to host or use, the Products as a service bureau or in any other manner that involves the processing of data for any third party; e. You shall not transfer the Products except in the event of a computer malfunction, and then only on a temporary basis; and f.
replace the software to comply with the Warranty.
license fees or payments paid by You for use of the Products; or (ii) LEI’s standard list price for the Products as of the Effective Date of this License. LEI’s liability shall further be limited to direct damages suffered by You. 6. Indemnification.
10. Observance of Laws and Export Controls. You agree to abide by all foreign and United States federal, state and local laws, ordinances, rules and regulations applicable to Your use of the Products or any direct product thereof. Without limiting the generality of the foregoing, You agree to abide by any applicable export control laws and regulations. 11. Miscellaneous.
How to Obtain Service… …in the USA: We back your investment in quality products with quick, expert service and genuine Brunton parts. If you're in the United States and you have technical, return or repair questions, please contact the Factory Customer Service Department. Before any product can be returned, you must call customer service to determine if a return is necessary. Many times, customer service can resolve your problem over the phone without sending your product to the factory.
Accessory Ordering Information for all countries To order Brunton GPS accessories such as computer cables or MMC cards, please contact: 1) Your local outdoor dealer or consumer electronics store. Most quality dealers that handle outdoor electronic equipment or other consumer electronics should be able to assist you with these items. To locate a Brunton dealer near you, visit our web site at www.brunton.com and click on Info and then click Contact or you can consult your telephone directory for listings.
visit our web site: www.brunton.com 620 East Monroe Riverton, WY 82501 307-856-6559 Brunton Pub.