
User's Manual


Connected
Settings
On
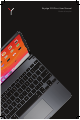
12.9 Pro+
IMPORTANT
Remove non-Brydge screen protectors before attaching your Brydge keyboard. This will ensure a
perfect fit and eliminate unnecessary pressure to your screen when inserted into the hinges.
TO INSERT: Place your Brydge on a flat surface and set the hinges upright to 90 degrees.
Insert your iPad into the hinges with the home button on the right, one side at a time.
If your iPad is loose, remove it and gently squeeze the hinges. Repeat this process until your iPad is
held firmly.
TO REMOVE: Ensure your Brydge is on a flat surface.
Place your hand towards the back of the keyboard and pull up, one side at a time.
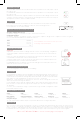
TO TURN ON: Press the power key for one second until the LED flashes green.
TO TURN OFF: Press and hold the power key for three seconds until the LED flashes red.
NOTE: To conserve battery, your Brydge will enter sleep mode after 20 minutes of non-use. Press any key to
turn back on. Your Brydge will enter sleep mode when both devices are closed like a laptop.
TO PAIR: Press and hold the Bluetooth key for three seconds until the LED flashes blue.
On your iPad, under Settings > Bluetooth select Brydge 12.9 Pro+.
When successfully paired, the blue LED will turn off.
TO CHECK BATTERY LIFE: In Today View, go to the BATTERIES section to check battery life. If not
available, swipe left on your Home Screen to show Today View, scroll to the bottom and click edit. Scroll
down to Batteries, and click the green ‘+’ icon to add.
NOTE: If battery life is below 15%, backlit key functionality will be disabled to conserve battery.
TO CHARGE: Insert the charging cable into the keyboard and plug the other end into a power source. A
solid red LED indicates the Brydge is charging.
When the keyboard is fully charged, the red LED will turn off. A full charge can take up to three hours.
Thank you for purchasing a Brydge product. This product comes with a 1-year limited hardware warranty on the terms and conditions set out in this document and
atwww.brydge.com/warranty. All Brydge warranties are non-transferrable and are only available to the original end-user of the product. Warranties do not apply to
products purchased from online vendors unauthorized to sell Brydge-branded product. If a defect arises during the warranty period, cease using the product and contact
Brydge. To obtain warranty service, visitwww.brydge.com/support or call +1 (435) 604-0481. Brydge, at its sole discretion and option, will (1) repair the product at no
charge using new parts or parts that are equivalent to new in performance and reliability, or (2) replace or exchange the product with a product of equivalent functionality
and value.Brydge offers free return shipping on any approved warranty claims.A shipping label will be provided to you if you arewithin the United States. If you are
outside the United States, Brydge will reimburse your return shipping to a maximum of US$15.00 after providing a copy of the shipping receipt.
Australia Only: Our goods come with guarantees that cannot be excluded under the Australian Consumer Law. You are entitled to a replacement or refund for a major
failure and compensation for any other reasonably foreseeable loss or damage. You are also entitled to have the goods repaired or replaced if the goods fail to be of
acceptable quality and the failure does not amount to a major failure.
Brydge Technologies LLC | 1912 Sidewinder Dr., Suite 104, Park City, UT 84060 USA
HAVE A QUESTION? Visit www.brydge.com/support
INSERT/REMOVE
POWER
PAIR
CHARGE
KEYBOARD SHORTCUTS
WARRANTY
Copy
Command + C
Paste
Command + V
Cut
Command + X
Underline
Command + U
Italic
Command + I
Home Screen
Command + H
Switch App
Command + Tab
Show Dock
Command + Option + D
Search
Command + Space
Undo
Command + Z
Switch Language
Ctrl + Shift + Spacebar (Spacebar allows you to toggle through available languages)
ENABLE TOUCH
GO TO: Settings > Accessibility > Touch > AssistiveTouch and toggle it on.
CONFIGURE SETTINGS
GO TO: Settings > Accessibility > Touch > AssistiveTouch > Devices (Pointer Devices) > Brydge 12.9 Pro+ (Connected Devices) and adjust
the Button shortcuts to the recommmended settings below:
SETTING UP THE TRACKPAD
Magnetic cover is located in the bottom of the packaging.
MAGNETIC COVER
For up-to-date settings and video instructions, visit:
www.brydge.com/pro-plus-instructions