Table of Contents Getting Started ................ 4 Set Alert .................................... 19 Your Rider 330 ............................. 4 Smart Pause .............................. 19 Accessories .................................. 5 Status Icons ................................. 5 Data Record .............................. 20 ............ 21 Step 1: Charge your Rider 330 ... 6 ............ 22 Step 2: Turn On Rider 330 ........... 6 Change System Settings ...........
ENGLISH WARNING Always consult your physician before you begin or modify any training program. Please read the details in Warranty and Safety Information guide in the package. Product Registration Help us better support you by completing your device registration using Bryton Update Tool. Go to http://corp.brytonsport.com/products/support. Bryton Software Go to http://brytonsport.com to upload tracks and analyze your data on the web.
Getting Started This section will guide you on the basic preparations before you start using your Rider 330. Rider 330 is equipped with barometer which shows the real time altitude. NOTE: To adjust the altitude settings on Rider 330, refer to page 16. Your Rider 330 1 1 BACK ( 2 ) 3 PAGE ( t Press and hold to turn the devic t Press to return to the previous page or cancel an operation. t When recording, press to pause recording. Press it again to stop recording.
ENGLISH Accessories The Rider 330 comes with the following accessories: t USB cable t Bike mount Optional items: t Speed sensor t Heart rate belt t Cadence sensor t Speed/Cadence Dual sensor t Out-front Bike Mount Status Icons Icon Description Icon Bike Type Description Heart Rate Sensor Active 1 Bike 1 Cadence Sensor Active 2 Bike 2 Speed Sensor Active GPS Signal Status Dual Sensor Active Weak signal Log Record in Progress Strong signal Recording is paused /- - - Power Status B
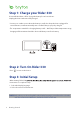
Step 1: Charge your Rider 330 Connect Rider 330 to a PC to charge the battery for at least 4 hours. Unplug the device when it is fully charged. t You may see a white screen when the battery is really low. Keep the device plugged for several minutes, it will automatically turn-on after battery is properly charged. o o t The temperature suitable for charging battery is 0 C ~ 40 C. Beyond this temperature range, charging will be terminated and the device will draw power from battery.
ENGLISH Step 4: Acquire Satellite Signals Once the Rider 330 is turned on, it will automatically search for satellite signals. It may take 30 to 60 seconds to acquire signals. Please make sure you acquire the satellite signal for the The GPS signal icon ( t / icon appears on the screen.
Download Bryton Update Tool NOTE: Bryton Update Tool can notify you if a new software version or GPS data is available. The newer GPS data can speed up the GPS acquisition. We highly recommend you to check for updates every 1-2 weeks. 1. Go to http://www.brytonsport.com/help/start and download Bryton Update Tool . 2. Follow the on-screen instructions to install Bryton Update Tool. Share Your Records Share Your Tracks to Brytonsport.com 1. Sign up/log in on Brytonsport.com a. Go to http://www.brytonsport.
Bicycling is one of the best types of exercise for your body. It helps you to burn your calories, 330 Training feature, you can set simple/interval workouts and use the Rider 330 to track your training or workout progress. 08:08 09/09 Cycling Train & Test View History Settings 1. In the main screen, press to select Train&Test. 2. Press to enter the Training menu. To Plan You can set simple workouts by entering your time or distance goals.
Using the On-screen Keyboard Name Name 001 A 001 Save 1. Press / END Save to select the input character. t Select DEL to erase the data. 2. Press s / to select END and press NOTE: name according to the current date and time. Interval Workouts With the Interval training feature, you can use your device to customize interval workouts which include the warm up, interval, and cool down sections. Warm Up Duration Target OK 10 Training 1.
Work 1 Work 6’00” 158~170bmp Recovery 2’00” 137~149bpm Repeat Time 2 Cooldown Duration Target OK ENGLISH 3. Set the interval workout settings (Work, Recovery press to select Next and press . 4. A “Create a new main set?” message appears on the screen. To creat another set of interval workout, select Yes 5. A “Set cool down?” message appears on the screen. Select Yes to set the “Cool down”. After the settings are complete, select OK and press to continue. 6.
My Workout With My Workout feature, you can start your workout using the training plan that you have saved in To Plan menu. My Workout 1. In the Training menu, press My Workout and press . View to select 2. Press to select View and press enter its submenu. Delete to t Press to select your desired training plan and press t Go for a ride. Press to start training and record log. Delete All 3. To choose which workouts to delete, select Delete. 4.
ENGLISH Stop Training You can stop the current training after you have reached your goal or when you decide to end the current training. r p m 1/1 Do you want to stop? 1. Press press to pause the recording and again to stop the recording. 2. A “Do you want to stop?” message appears on the screen. To stop the current training, press / to select Yes and press Yes View Exercise/Training Record Use View History to view or delete your exercise/training history. History View To view your history: 1.
To delete your history: 09/19 1. In the main screen, press to select . View History > View and press 21:44 00:03:08 trip Backup data 00:02:25 ride to web first. 3.69Delete? km 39 kcal Yes 04 laps 2. Press to select Delete and press to enter the history list. 3. Press to select a training history from the list and press to delete the selected history. 4. A “ ?” message appears on the screen.
With the Settings feature, you can customize exercises settings, altitude, general settings, sensor settings, bike and user pr Settings Exercises Altitude General Sensors 1. In the main screen, press 2. Press to select Settings. to enter the Settings menu. Smart Lap With Smart e. Lap by Location By Location Use current location as lap location? Yes 1. In the Settings menu, press to select Exercises> Smart Lap and press . 2. Press Press to enter the editing menu. / to select Location and press 3.
Lap by Distance By Distance 10.0 KM 1. In the Settings menu, press to select Exercise > Smart Lap and press . 2. Press Press to enter the editing menu. / 3. Press / to select Distance and press to select your desired distance and press 4. Press to exit this menu. Altitude You can set the altitude setting for the current location and four other locations. Current Altitude Altitude 1. In the Settings menu, press to select Altitude > Altitude and press . 2.
Other Location Altitude Location 1 1. In the Settings menu, press to select Altitude > Location 1, Location 2, Location 3, Location 4, Location 5 and press . Altitude 10m Calibrate 2. To set the altitude, press to select Altitude and press 3. Press / to adjust the desired altitude and press setting. 4. To calibrate the set altitude, press to select Calibrate and press to 5. Press to exit this menu. Data Page You can set the display settings for the Meter and Lap.
3. Press the selection. 4. Press 5. Press / to select the desired setting and press to exit this menu. NOTE: selection. 2-grid display 3-grid display 33 NOTE: If Data Page is setted as Auto display when detecting the paired sensors. Lap Display 1. In the Settings menu, press to select Exercises > Data Page > Data Page 1 or . Data Page 2 and press Cycle Lap Data Page 1 On 2. Press On 3. Press you want to customize, and press / to select the number of Data Page 2 4. Press / and press 5.
ENGLISH Set Alert With the Alert feature, the device displays a message to notify you if: t t you exceed or drop below a custom speed setting during your ride. t arm per minute (rpm). t you reach a certain amount of distance for the long workouts. t you reach a certain amount of time for the long workouts. Alert 1. In the Settings menu, press Exercises > Alert and press its submenu. Time 2. Select Time , Distance, Speed, HR , or Cadence to select to enter and pr 3. Press settings.
Data Record With Data Record function, you can set your odometer and activate 1 second mode to get more accurate data. Set ODO ODO Setup O DO Setup All 1. In the Settings menu, press to select Exercise > Data Record and press . 2. Press to select ODO Setup and press to enter. 3. Press / to enter its submenu and press to select the desired setting, then NOTE: All means the odometer would show the cumulative distance of all trips; Recorded would only show the cumulative distance of recorded trips.
ENGLISH You can change your personal information. User 1. In the Settings menu, press User and press . Gender Male Birthday 1982/01/01 Height 177 cm to select 2. Press to select the setting that you want to change and press to enter its submenu. t t t t t Gender: select your gender. Birthday : set your Birthday Height: set your height. Weight: set your weight. Max HR: set your maximum heart rate. t LTHR: set your lactate threshold heart rate. t FTP: set your functional threshold power.
Bike 1 1. In the Settings menu, press to select Bike > Bike 1 or Bike 2 and press . 2. Press to select the setting that you want to change and press to enter its Spd Source Weight 13kg Wheel 1700mm submenu. t Spd Source: set the priority of the speed sources t Weight: set the bike weight. t Wheel: set the bike wheel size. t Activate: select to activate the bike. / to adjust the desired 3. Press setting and press 4. Press to exit this menu.
ENGLISH Change System Settings sound, time/unit , on-screen display language. Back light Auto Never 1. In the Settings menu, press General > 2. Press / and press 3. Press to select and press to select the desired setting to exit this menu. 1 min 10 min Key Tone Key Tone On 1. In the Settings menu, press to select General > System > Key Tone and press 2. Press Off / and press 3. Press . to select the desired setting to exit this menu. Settings 23 .
Sound Sound to select 1. In the Settings menu, press General > System > Sound and press . On Off / 2. Press and press 13kg 3. Press to select the desired setting to exit this menu. Time/Unit Dlight Save Date Time +0:00 mmddyyyy 12hr +1:00 yyyymmdd 24hr ddmmyyyy Daylight Save Date format Time format 1033km Unit KM,KG MI,LB 1. In the Settings menu, press General > System > Time/Unit > Daylight Save, Date format , Time format , Unit Temperature and press . 2.
Language English 1. In the Settings menu, press to select General > System > Language and press 2. Press Deutsch / and press 3. Press . to select the desired setting to exit this menu. Français View GPS Status You can view the GPS signal information that your device is currently receiving. GPS Off 1. In the Settings menu, press General > GPS and press to select . 2. To set the signal search mode, press Full Power 3.
View Software Version You can view your device current software version. 1. In the Settings menu, press to select General > About. 2. Press The current software version is displayed on the screen. 3. Press to exit this menu. Bluetooth Before pairing Rider 330 with your bluetooth enabled mobile phone, make sure the bluetooth function of your mobile phone and Rider 330 is turned on. Enable Bluetooth Enable 1. In the Settings menu, press to select General > Bluetooth and press . 2.
ENGLISH When the feature is enabled, the data will automatically switch pages at the preset time. Auto Scroll Auto Scroll On Interval 1. In the Settings menu, press to select General > Auto Scroll and press . 2. Press to select the setting that you want to change and press to enter its submenu. t Auto scroll: enable/disable the auto switch. t Interval: set the interval time. 5 sec 3. Press / to adjust the desired setting and press 4. Press to exit this menu.
Start Reminder When Rider 330 detects the motion of your bike, it would pop up a reminder to ask you if you would like to record or not. You can set the frequency of start reminder. Start Remind Start remind Once 1. In the Settings menu, press to select General > Start Remind and press . 2. Press / 3. Press to enter its submenu and press to adjust the desired setting and to exit this menu. View Memory Usage View the storage status of the device. Memory % 50% 1.
ENGLISH Reset Data You can resotre your Rider 330 to factory setting. General Perform factoryOnce reset ? 1. In the Settings menu, press to select General > Data Reset and press . 2.
Sensors You can customize the respective sensor settings such as enable/disable the function or rescan the sensor for the device. Heart Rate Speed Cadence Status: active Status: active Status: active ID XXXXXXXXX ID XXXXXXXXX ID XXXXXXXXX Rescan Rescan Rescan Turn Off Turn Off Turn Off Heart Rate Speed Speed/CAD Cadence Power meter Status: active Status: active ID XXXXXXXXX ID XXXXXXXXX Rescan Rescan Turn Off Turn Off Speed/Cadence Power meter 1.
Appendix ENGLISH Rider 330 Item Description Display 1.8" Physical Size 45.1 x 69.5 x 17.3 mm Weight 56g Operating Temperature -10°C ~ 50°C Battery Charging Temperature 0°C ~ 40°C Battery Li polymer rechargeable battery Battery Life 36 hours with open sky RF Receiver 2.
Heart Rate Monitor Item Description Physical size 67~100 x 26 x 15 mm Weight 14 g (sensor) / 35g (strap) Water Resistance 20 m Transmission range 5m Battery life 1 hour per day for 24 months Operating temperature 5oC ~ 40oC Radio frequency/protocol 2.4GHz / Dynastream ANT+ Sport wireless communications protocol Accuracy may be degraded by poor sensor contact, electrical interference, and receiver distance from the transmitter.
ENGLISH Install Rider 330 Mount Rider 330 to the Bike 1 2 3 4 1 1 1 2 2 2 Appendix 33
Install the Speed/Cadence/Dual Sensor (Optional) 1 2 Remove battery tab before use 3 SP EED SPEED CADENCE 4a 5a 6a SPEED 7a Speed SPEED SPEED Status: active ID XXXXXXXXX Rescan m 3m Turn Off SP EE D Speed Status: active ID XXXXXXXXX Rescan SP EE D 4b 5b Turn Off SP EE D 6b 7b Cadence CADENCE Status: active ID XXXXXXXXX Rescan Turn Off m 3m Cadence Status: active ID XXXXXXXXX Rescan Turn Off 4c 5c 6c 7c Speed/CAD m 3m Status: active ID XXXXXXXXX Rescan Turn Off Speed/CAD
ENGLISH NOTE: t To ensure optimum performance, do the following: - Align both sensor and magnet as shown in the illustration (5a / 5b). Pay attention on the alignment points. - Ensure the distance between the sensor and the magnet is within 3 mm. t Ensure that both Speed sensor and Speed magnet are installed and aligned horizontally, not vertically. t On the initial usage, press the front button to activate the sensor and start pedaling.
Wheel Size and Circumference The wheel size is marked on both sides of the tires.
ENGLISH Basic Care For Your Rider 330 Taking good care of your device will reduce the risk of damage to your device. t Do not drop your device or subject it to severe shock. t Do not expose your device to extreme temperatures and excessive moisture. t The screen surface can easily be scratched. Use the non-adhesive generic screen protectors to help protect the screen from minor scratches. t Use diluted neutral detergent on a soft cloth to clean your device.
Data Fields Data Fields Sunrise Sunset RTime AvgSpd Max Spd HR Avg HR Max HR MHR Zone LTHR Zone 38 MHR% Complete Data Field Name Sunrise Time Sunset Time Ride Time Average Speed Maximum Speed Heart Rate Average Heart Rate Maximum Heart Rate Maximum Heart Rate Zone Lactate Threshold Heart Rate Zone Maximum Heart Rate Percentage LTHR% AvgCAD Lactate Threshold Heart Rate Percentage Average Cadence MaxCAD Maximum Cadence LapAvSpd Lap Average Speed LapMaSpd Lap Maximum Speed L'stLpAvSp LapDist Last
Complete Data Field Name LapMaP Lap Maximum Pace LAvCAD Lap Average Cadence LLAvCad Last Lap Average Cadence ODO Temp. Odometer Dist. Temperature Distance T to Dest Time to Destination D to Dest Distance to Destination Max Alt. Alt. Gain Alt.
Data Fields Complete Data Field Name CPB-LR Current Left and Right Power Balance MPB-LR Maximum Left and Right Power Balance APB L-R CTE-LR Average Left and Right Power Balance MTE-LR ATE-LR CPS L-R APS L-R MPS-LR IF NP SP TSS NOTE: 40 Appendix Right Right Current Left and Right Pedal Smoothness Average Left and Right Pedal Smoothness Maximum Left and Right Pedal Smoothness Intensity Factor Normalized Power Training Stress Score
Warranty and Safety Information Informations relatives à la garantie et à la sécurité Garantie-und Sicherheitshinweise Garanzia e Informazioni sulla sicurezza Información sobre la garantía y la seguridad Garantie-en veiligheidsinformatie Informações sobre Garantia e segurança Informações sobre garantia e segurança Oplysninger om garanti og sikkerhed Garanti och säkerhetsinformation Garanti-og sikkerhetsinformasjon Takuu- ja turvallisuustiedot Informacje o gwarancji i bezpieczeństwie Informace o záruce a bez
Safety Agreement IMPORTANT: Please Read This Notice before Using This Product Bryton products and accessories are not medical devices and its readings are for reference only. Bryton is not responsibile for the consequences of any erroneous readings. Always consult your physician before beginning any training program or using a heart rate monitor. Please do not operate the product during any activities, because lack of proper attention may cause injury, death or material damage.
EN § 15.105 (b) This equipment has been tested and found to comply with the limits for a Class B digital device, pursuant to part 15 of the FCC Rules. These limits are designed to provide reasonable protection against harmful interference in a residential installation. This equipment generates, uses and can radiate radio frequency energy and, if not installed and used in accordance with the instructions, may cause harmful interference to radio communications.
Industry Canada Compliance IC Regulations: This device complies with Industry Canada license-exempt RSS standard(s). Operation is subject to the following two conditions: (1) this device may not cause interference, and (2) this device must accept any interference, including interference that may cause undesired operation of the device. Le présent appareil est conforme aux CNR d'Industrie Canada applicables aux appareils radio exempts de licence.
EN Limited Warranty Bryton Inc. warrants its products to be free from defects in materials or workmanship for one year from the date of purchase. Bryton Inc. will repair or replace any component that fails in normal use within this limited warranty period at no charge to the customer for parts or labor. This warranty does not apply to 1. damage caused by misuse, accident, abuse, fire, or other external causes or acts of nature 2. physical damage to the surface, such as scratches and dents; 3.
11. For international purchases, a separate warranty may be provided by international distributors depending on the country. If applicable, this warranty is provided by the local in-country distributor and this distributor provides local service for your device. Distributor warranties are only valid in the area of intended distribution. EXCLUSION OF OTHER DAMAGES. TO THE FULL EXTENT ALLOWED BY LAW, BRYTON INC.
Accord relatif à la sécurité IMPORTANT : Veuillez lire cet avis avant d'utiliser ce produit Les produits et accessoires Bryton ne sont pas des dispositifs médicaux et leurs mesures sont pour référence seulement. Bryton n'est pas responsable des conséquences quelle que soit l'erreur de mesure. Consultez toujours votre médecin avant de commencer un programme de formation ou d'utiliser un moniteur de fréquence cardiaque.
remboursement intégral du prix d'achat, à son entière discrétion. 3. Bryton Inc. ne remplacera pas les composants manquants pour tout produit acheté dans une vente aux enchères en ligne. Un original ou une copie de la facture du détaillant d'origine est requis pour obtenir la garantie limitée. 4. Pour obtenir le service sous garantie, contactez Bryton Inc. (www.brytonsport.com) pour les instructions d'expédition. 5.
Sicherheitsvereinbarung WICHTIG: Bitte lesen Sie sich diesen Hinweis vor der Inbetriebnahme des Produktes durch Die Produkte und das Zubehör von Bryton sind keine medizinischen Geräte; die Messwerte dienen nur DE als Referenz. Bryton haftet nicht für die Konsequenzen jeglicher fehlerhafter Messwerte. Wenden Sie sich vor dem Beginn eines Trainingsprogramms bzw. der Nutzung eines Herzfrequenzmessers an Ihren Arzt.
Diese eingeschränkte Garantie unterliegt den folgenden Bedingungen: 1. Zur Inanspruchnahme des Garantiedienstes benötigen Sie einen Kaufbeleg - das Original bzw. eine Kopie der Rechnung vom Originalhändler. 2. Die Bryton Inc. behält sich das exklusive Recht vor, im eigenen Ermessen zwischen der Reparatur oder dem Ersatz des Produktes bzw. der Erstattung des vollen Kaufpreises zu wählen. 3. Die Bryton Inc.
Accordo sulla sicurezza IMPORTANTE: Leggere questo avviso prima di usare il prodotto I prodotti e gli accessori Bryton non sono dispositivi medici e le loro letture sono solo indicative. Bryton non è responsabile per le conseguenze di qualsiasi lettura sbagliata. Consultare sempre il medico prima di iniziare un programma di preparazione o prima di usare il IT cardiofrequenzimetro.
Questa garanzia limitata è soggetta ai seguenti termini e condizioni: 1. Per ottenere l’assistenza in garanzia è necessaria la prova d’acquisto, l’originale o la copia dello scontrino o fattura emessa dal rivenditore. prezzo d’acquisto a sua discrezione. 3. Bryton Inc. non sostituirà componenti mancanti dalle confezioni dei prodotti acquistati online. Per ottenere l’assistenza in garanzia è necessaria la copia o l’originale della prova d’acquisto emessa dal venditore originale. 4. Contattare Bryton Inc.
Contrato de seguridad IMPORTANTE: Los productos y accesorios Bryton no son dispositivos médicos y sus lecturas solamente deben interpretarse como una referencia. Bryton no se responsabilizará de las consecuencias de lecturas erróneas. Consulte siempre a su médico antes de iniciar cualquier programa de entrenamiento o utilizar un monitor de frecuencia cardíaca.
Esta garantía limitada está sujeta a los siguientes términos y condiciones: 1. Para obtener el servicio de garantía, se necesita una prueba de compra, ya sea la factura del proveedor original o una copia de la misma. 2. Bryton Inc. conserva el derecho exclusivo de reparar o reemplazar el producto u ofrecer el reembolso completo del precio de compra, lo que estime más oportuno. 3. Bryton Inc. no reemplazará los componentes que falten de ningún paquete adquirido a través de subastas en línea.
Veiligheidsovereenkomst BELANGRIJK: Lees deze mededeling voordat u dit product gebruikt uitsluitend als referentie bedoeld. Bryton is niet aansprakelijk voor de gevolgen van verkeerde hartslagmonitor gebruikt. Gebruik het product niet tijdens eventuele activiteiten omdat gebrek aan aandacht letsels, overlijden of materiële schade kan veroorzaken.
Ta ograniczona gwarancja podlega następującym terminom i warunkom: 1. Aby uzyskać usługę gwarancyjną wymagany jest dowód zakupu, oryginał lub kopia pokwitowania sprzedaży od oryginalnego sprzedawcy. 2. Bryton Inc. zachowuje sobie wyłączne prawo, według własnego uznania, do wyboru do naprawy lub wymiany produktu lub zaoferowania pełnego zwrotu kosztów zakupu. 3. Bryton Inc. nie wymieni żadnych brakujących komponentów z opakowań zakupionych w trybie aukcji online.
Dohoda o bezpečnosti DŮLEŽITÉ: Před používáním tohoto produktu si přečtěte toto upozornění Produkty a příslušenství Bryton nejsou zdravotnické přístroje a hodnoty, které indikují, jsou pouze orientační. Společnost Bryton nenese odpovědnost za důsledky jakýchkoli chybových indikací. Před zahájením tréninkového programu nebo před použitím monitoru srdeční činnosti se vždy poraďte s lékařem.
Na tuto omezenou záruku se vztahují následující podmínky 1. Aby bylo možné využít záruční servis, je vyžadován doklad o nákupu, originál nebo kopie paragonu od původního prodejce. 2. Společnost Bryton Inc. si zachovává výsadní právo podle vlastního uvážení opravit nebo vyměnit produkt nebo nabídnout vrácení nákupní ceny v plné výši. 3. Společnost Bryton Inc. nevymění chybějící součásti ze žádné sady zakoupené prostřednictvím aukce online.
Biztonsági Megállapodás FONTOS! Kérjük, olvassa el a felhívás szövegét, mielőtt használni kezdené a terméket. A Bryton termékei és kiegészítői nem minősülnek orvosi eszköznek, ezért a kijelzett adatok kizárólag hivatkozás célját szolgálják. A Bryton nem vállal felelősséget a hibás adatok következményeiért. Tréningprogram megkezdése vagy a pulzusmérő használata előtt konzultáljon orvosával.
A jelen Korlátozott Jótállásra a következő feltételek és kikötések érvényesek: 1. Garanciális szolgáltatás igénybe vételéhez a vásárlást bizonyító szelvény, valamint az eredeti kiskereskedőtől származó számla vagy blokk eredeti, illetve másolati példánya szükséges. 2. A Bryton Inc. fenntartja a jogot, hogy saját döntése szerint megjavítsa vagy kicserélje a terméket, illetve hogy visszatérítse a teljes vételárat. 3. A Bryton Inc.
Ӽӄᖂܴ ݙཀǽ٬ҔҁౢࠔϐǴፎӃ᎙᠐ԜᖂܴǶ Bryton ౢࠔᆶځଛҹߚᙴᕍ܄ഢǴҗҁౢࠔ܌ғԋϐኧᏵٮ٬ҔୖޣԵǶBryton όॄ ೢҺՖӢኧᏵှ᠐ᒱᇤ܌Ꮴठޑ্ϷཞѨǶӧ໒ۈҺՖ૽ޑግीฝϐǴፎӃᒌ၌ᙴ ғ܈௲ግǶၮၸำύǴፎϮᏹբԜౢࠔǴલЮݙޑཀΚԖёૈЇଆཀѦޑΓي্܈ ࠔނཞᚯǶ٬Ҕ܈ӼးҁౢࠔፎᒥൻӦ࣬ޑᜢࡓݤೕۓǶҁϦљᆶځౢࠔғቷᇙکౢ ࠔஒό܍ᏼҺՖၮၸำύӢᏹբౢࠔǵόᏹբǵόӼးǵόёלΚǵၴϸҬ ೯ೕ߾ǵၴϸӼӄೕകǵ!ޣ܈Ӣ೬ᡏǴӦკኧᏵཞᚯ܌ᏤठϐཞѨǶҁౢࠔόߥคҺՖୢ ᚒǴҭคߥҺՖۓϐҞޑϷਏ݀Ƕ ႝԣ 2/ፎϮஒౢࠔܫܭྍೀ܈ଯྕᕉნǶdz 3/ፎϮჹౢࠔՉऀ܄ઇᚯ܈ᐯᐨǶ 4/ҁౢࠔ܌٬ҔޑႝԣࢂޣόёԾՉ׳ඤޑǶ 5/ᕉნྕࡋຬр܌ܭӈጄൎǴፎϮᏹբౢࠔǺ-4ډ131ʛ!)-20ډ55ʚ!*! 6/ౢࠔᓯӸྕࡋǺ32ډ77ʛ
аΠݩރόҔܭ୧ࡕߥڰጄൎǺ 1. ӢόᏹբǵཀѦ٣ࡺǵᔲҔౢࠔǵОؠǵѦচӢǵ܈Ϻฅ܌্ؠЇଆޑౢࠔཞ্Ƕ 2. ౢࠔ߄य़ཞǶٯӵǺڊ౩ǵп౩Ƕ 3. ܄႟ҹǶٯӵǺႝԣǵЈၢགෳᏔޑቸ܄-ନߚౢࠔࡺም܈ཞᚯࢂӢ႟ҹ܈ғౢ ྵ౪܌ЇଆǶ 4. ߚBryton܌ٮ୍ܺޑᔈ܌ЇଆޑౢࠔཞᚯǶ ୧ࡕߥڰҔܭаΠచҹǺ 1. ࣁ٦Ԗֹޑ୧ࡕߥڰǴᖼວౢࠔਔፎ୍Ѹӛᎍ҅ڗҁ܈ୋҁว౻Ƕ 2. ҁϦљԖჹౢࠔՉᆢঅǵඹඤౢࠔǵࢂ܈ӄᚐଏԵቾϐ،ۓǶ 3. ӧᆛၡᖼނ೯ၡ܌ᖼວډϐౢࠔಔӝǴऩԖ႟ଛҹᒪѨҁϦљஒόϒॄೢǶࣁ٦ԖҁϦ љ୍ܺڰߥޑǴፎ୍ѸԖ٠ߥӸচۈ႟୧໒ҥϐว౻҅ҁ܈ୋҁǶ 4. ୧ࡕߥڰᆶౢࠔଌঅ࣬ᜢૻ৲ǴፎBrytonᆛઠ၌Ƕ(Brytonsport.com) 5.
ᅝܼໄᯢ ⊼ᛣΉՓ⫼ᴀѻકПࠡ, 䇋ܜ䯙䇏ℸໄᯢ Bryton ѻકϢ݊䜡ӊ䴲ए⭫ᗻ䆒ˈ㒣⬅ᴀѻક᠔⫳៤П᭄ҙկՓ⫼㗙খ㗗DŽBryton ϡ Ӯ䋳䋷ӏԩ᭄㾷䇏䫭䇃᠔ᇐ㟈ⱘӸᆇঞᤳ༅DŽᓔྟӏԩⱘ䆁㒗䅵ߦПࠡˈ䇋ܜ䆶ϧ Ϯए⫳ᬭ㒗DŽ䖤ࡼ䖛Ё, 䇋࣓᪡ℸѻકˈ㔎У䗖ᔧⱘ⊼ᛣ᳝ৃ㛑ᓩ䍋ᛣⱘҎ䑿Ӹᆇ ⠽કᤳണDŽՓ⫼ᅝ㺙ᴀѻક䇋䙉ᕾᔧഄⱘⳌ݇⊩ᕟ㾘ᅮDŽ ᴀ݀ৌϢ݊ѻક⫳ॖࠊ䗴ଚ ѻકᥜᴗଚᇚϡᡓᢙӏԩ䖤ࡼ䖛ᔧЁ᪡ѻક ǃϡᔧ᪡ǃ ϡᔧᅝ㺙ǃϡৃᡫǃ 䖱 ডѸ䗮㾘߭ǃ䖱ডᅝܼ㾘ゴǃ 㗙䕃ӊ,ഄ᭄ᤳണ᠔ᇐ㟈Пᤳ༅DŽ ᴀѻકϡֱ䆕᮴ӏ ԩ㔎䱋䯂乬, Ѻ᮴ֱ䆕ӏԩ⡍ᅮПⳂⱘঞᬜᵰDŽ ⬉∴䄺ਞ 1. 䇋࣓ᇚѻકᬒ㕂Ѣ⛁⑤໘催⏽⦃๗DŽ 2. 䇋࣓ᇍѻક䖯㸠こ䗣ᗻ⸈ണ➗⚻DŽ 3. ᴀѻક᠔Փ⫼ⱘ⬉∴ᰃ⫼᠊ϡৃ㞾㸠ᤶⱘDŽ o o 4. ᔧ⦃๗⏽ᑺ䍙ߎѢ᠔߫㣗ೈˈ䇋࣓᪡ѻક˖-4ࠄ131 F (-20ࠄ55 C) o o 5. ѻક䗖ᔧټᄬ⏽ᑺ˖32ࠄ77 F(0ࠄ25 C) 6.
3. 㔥㒰䌁⠽䗮䏃᠔䌁фࠄПѻક㒘ড়ˈ㢹᳝䳊䜡ӊ䘫༅ᴀ݀ৌᇚϡќ䋳䋷DŽЎѿ᳝ᴀ݀ৌ ⱘֱ᳡ࡵˈ䇋ࡵᖙᣕ᳝ᑊֱᄬॳྟ㒣䫔ଚᓔゟПথ⼼ℷᴀࡃᴀDŽ 4. ଂৢֱϢѻક䖤䗕䗕ׂⳌ݇䆃ᙃ, 䇋ϞBryton㔥キᶹ䆶DŽ(www.brytonsport.com) 5. ѻકֱᳳ䯈ˈݙBrytonᇚᡓᢙѻકẔᶹঞ㓈ׂ᠔ѻ⫳ⱘ䌍⫼DŽ䳔ẔׂПѻકˈ䌁ф㗙䳔 䖲ৠ䌁ф䆕ᯢ㞾㸠䗦Ѹ䖤䗕㟇ᣛᅮ㓈ׂഄ⚍DŽ 6. ᠔᳝㓈ׂᯊ㹿᳓ᤶⱘѻક䳊ӊˈЎBrytonП䋶ѻDŽ 7. 㒣䖛㓈ׂ᳓ᤶ䳊ӊⱘѻકҡ㒻㓁ѿ᳝݊࠽ԭⱘֱᳳ䰤ˈᰃ㞾䗕㓈ׂ᮹䍋ㅫ,ѿ᳝90 ⱘֱᳳ䰤DŽϸ㗙প᭄݊䕗䭓㗙Ў᳔㒜ᳳ䰤DŽ 8. ѻક䗕ׂࠡ䇋㞾㸠ӑ᭄᭄ᑊϨߴ䰸ӏԩᴎᆚǃ䋶ѻϾҎ⾕ᆚⱘ䆃ᙃDŽ㢹᭄᭄᳝ ⱘ䘫༅↕ᤳˈBrytonϡќ䋳䋷DŽ 9. BrytonⱘѻકᰃሲѢ⍜䌍ൟ⬉ᄤѻકDŽ䇋࣓ᇚѻક⫼Ѣ㊒⹂ⱘᮍ⌟䞣ǃԡ㕂䎱⾏⌟䞣ˈ ഄᔶ䞛䲚DŽᴀѻકϡֱ䆕݊ॖଚПഄ᭄ⱘᕏᑩℷ⹂ঞᅠᭈᗻDŽ 10. ѻકՓ⫼᳡ࡵᰃ䖱ডӏԩᆊᔧഄⱘ⊩ᕟᯊ, Bryton݀ৌ᳝ᴗᢦ㒱ሹ㸠ѻકଂৢ᳡ ࡵ 11.
ో䈮㑐䈜䉎หᗧᦠ 㪙㫉㫐㫋㫆㫅㩷䈱ຠ䈍䉋䈶䉝䉪䉶䉰䊥䊷䈲䇮ක≮ౕེ䈪䈲䈅䉍䉁䈞䉖䇯䉁䈢䇮䈠䈱⸘᷹୯╬䈲ෳ⠨↪䈫䈚䈩䈍 䈇䈇䈢䈣䈒䈢䉄䈱䉅䈱䈪䈜䇯 㪙㫉㫐㫋㫆㫅㩷䈲䇮ᱜ⏕䈪䈭䈇⺒ข୯䈏ᒁ䈐䈖䈚䈢⚿ᨐ䈮䈧䈇䈩䈲⸽䈇䈢䈚䈎䈰 䉁䈜䈱䈪䈗ੌᛚ䈒䈣䈘䈇䇯 䊃䊧䊷䊆䊮䉫 䊒䊨䉫䊤䊛䉇ᔃᜉ⸘䈱↪䉕㐿ᆎ䈘䉏䉎䈫䈐䈲䈇䈎䈭䉎႐ว䉅䇮䈍 ㄭ䈒䈱කᏧ䈮䈗 ⋧⺣䈒䈣䈘䈇䇯 䉌䈎䈱䉝䉪䊁䉞䊎䊁䉞䈱ᦨਛ䈮䈲䇮ᧄຠ䉕Ⓙേ䈚䈭䈇䈪䈒䈣䈘䈇䇯ㆡಾ䈭ᵈᗧ䉕ᕃ䉎䈫䇮ᕋ ᚒ䇮ᱫ䇮䉁䈢䈲㊀ᄢ䈭៊ኂ䈮⥋䉎ᕟ䉏䈏䈅䉍䉁䈜䇯 ᧄຠ䉕↪䈜䉎䇮䉁䈢䈲ข䉍ઃ䈔䉎㓙䈲䇮ᒰ䈜䉎 ၞᴺ䉇ⷙ䈮ᓥ䈦䈩䈒䈣䈘䈇䇯 ᒰ␠䈫ᒰ␠䈱ㅧ⠪䈍䉋䈶䊤䉟䉶䊮䉰䊷䈲䇮ᧄຠ䈱䉝䉪䊁䉞䊎䊁䉞ਛ䈱↪䇮 ⺋䈦䈢↪䇮ਇㆡಾ䈭ขઃ䇮ਇน᛫ജ䇮ㅢⷙೣ⧯䈚䈒䈲ోⷙ䈱㆑䇮䉁䈢䈲ᧄຠ䈮䉁䉏䉎䉸䊐䊃 䉡䉢䉝⧯䈚䈒䈲䊙䉾䊒䊂䊷䉺䈱↪䈮䉋䈦䈩⊒↢䈚䈢៊ኂ䈮 䈧䈇䈩䇮䉌⽿છ䉕⽶䉒䈭䈇䉅䈱䈫䈚䉁䈜䇯 ᧄຠ䈲䇮⺋േ䉇ᰳ㒱䈏ή䈇䈖䈫䉕 ⸽䈜䉎䉅䈱䈪䈲䈭䈒䇮ቯ⟵䈘䉏䈢䈅䉌䉉䉎⋡⊛䈮ㆡว䈜䉎䈖䈫䉕⸽䈜䉎䉅䈱䈪䉅䈅䉍䉁䈞䉖䇯 䊋䉾䊁䊥䊷䈮㑐䈜䉎䈗ᵈᗧ 1.
㒢ઃ䈐⸽䈲䇮ᰴ䈱᧦ઙ䈮ᓥ䈇䉁䈜䇯 1. ⸽䉰䊷䊎䉴䉕ฃ䈔䉎䈮䈲䇮⾼⸽ᦠ䇮ᧄຠ䉕䈍⾈᳞䉄䈮䈭䈦䈢ᐫ⥩䈏⊒ⴕ䈚䈢㗔ᦠ䈱ේᧄ䉁 䈢䈲䈠䈱䉮䊏䊷䈏ᔅⷐ䈪䈜䇯 2. Bryton Inc.䈲䇮ᧄຠ䉕ୃℂ䈜䉎䇮឵䈜䉎䇮䉁䈢䈲䈍⾈䈇᳞䉄ଔᩰ䉕ో㗵䈍䈚䈜䉎䇮䈱䈇䈝䉏䈎䉕 ㆬᛯ䈜䉎䈮ᒰ䈢䉍䇮න⁛䈱್ᢿ䈮䉋䈦䈩䈖䉏䉕ⴕ䈉䈢䉄䈱ឃઁ⊛䈭ᮭ䉕ᜬ䈚䉁䈜䇯 3. Bryton Inc.䈲䇮䉥䊮䊤䉟䊮 䉥䊷䉪䉲䊢䊮䈮䉋䈦䈩䈍⾈᳞䉄䈮䈭䈦䈢䊌䉾䉬䊷䉳䈮䈧䈇䈩䇮ਇ⿷䈜䉎ㇱຠ䈱 ల䉕ⴕ䈇䉁䈞䉖䇯 㒢ઃ䈐⸽䈱䉰䊷䊎䉴䉕䈗↪䈇䈢䈣䈒䈮䈲䇮ᦨೋ䈱⽼ᄁᐫ䈎䉌ขᓧ䈚䈢㗔 ᦠ䈱ේᧄ䉁䈢䈲䉮䊏䊷䈏ᔅⷐ䈪䈜䇯 4. ⸽䉰䊷䊎䉴䉕䈗↪䈇䈢䈣䈒䈮䈲䇮Bryton Inc. (www.brytonsport.com) 䈮ㅪ⛊䈚䈩ᧄຠ䈱㈩ㅍᚻ⛯ 䈐䉕䈗⏕䈒䈣䈘䈇䇯 5. 䈖䈱㒢ઃ䈐⸽䈲䇮㒢ઃ䈐⸽ᦼ㑆ౝ䈱ᧄຠ䈱ὐᬌ䈍䉋䈶ୃℂ䈮㑐䈜䉎⾌↪䉕ኻ⽎䈫䈚䉁䈜䇯 ᰳ㒱䈱䈅䉎ຠ䈲䇮䈗⾼䉕⸽䈜䉎ᦠ㘃䈫䈫䉅䈮䇮ᜰቯ䈘䉏䈢႐ᚲ䈮䈍ቴ᭽䈱⾌↪䈪䈍ዯ䈔䈇䈢䈣䈒 ᔅⷐ䈏䈅䉍䉁䈜䇯 6.
㵹㢸 ⵤ㥐 㩅㟈aG⸬G㥐䖼㡸G㇠㟝䚌ὤG㤸㜄G㙸⣌G䋩㫴ⱬ㡸G㢱㡰㐡㐐㝘U Bryton 㥐䖼 ⵃ 㚕㉬㉐⫠⏈ 㢌⨀ ὤὤᴴ 㙸⏼⮤ 㢨㜄 ♤⪬ ⇨㟝㡴 㵬㦤㟝㢹⏼␘. Bryton㡴 㣌⯯═ ⇨㟝㡰⦐ 㢬䚐 ᷤḰ㜄 䚨 㵹㢸㡸 㫴㫴 㙾㏩⏼␘. 䟼⥜ 䘸⦐Ἤ⣜ ❄⏈ 㐠㣙 ⵉ┍ ⯜⏼䉤⪰ 㐐㣅䚌ὤ 㤸㜄 䚡ㇵ 㢌㇠㝴 ㇵ㢌䚌㐡㐐㝘. 䞐┍ 㩅㜄⏈ 㥐䖼㡸 㣅┍䚌㫴 ⫼㐡㐐G 㝘. 㣅┍ 㐐 㬅㩅䚌㫴 㙾㡰⮨ 㢬㷨㜄 䚨⪰ 㢹䢼ᶤ⇌ Ɒ⫠㤵㢬 䙰䚨 ❄⏈ 㨱㢀㜄 㢨⪰ ㍌ 㢼㏩⏼␘. ⸬ 㥐䖼㡸 ㇠㟝 ❄⏈ ㉘㾌䚔 ⚀㜄⏈ 䜸㫴 ạᴴ㢌 ⷉ ⵃ ἐ㥉㜄 ♤⪨㐡㐐㝘. ㇠ Ἤ⫠Ḕ ⸬ 㥐䖼 㥐㦤㛹㷨 ⵃ ⢰㢨㉰㏘ ⸨㡔㣄⏈ ⸬ 㥐䖼㢌 ㇠㟝, 㝘㟝, ⺴㤵㤼䚐 ㉘㾌, ⺼ᴴ䚡⥙, Ẅ䋩 ⷉἐ ❄⏈ 㙼㤸 ἐ㥉 㠸ⵌ, ㋀䘸䏬㠜㛨, ❄⏈ Ἤ㜄 ♤⪬ 㫴⓸ ⒤㢨䉤 㥐䖼㡰⦐ 㢬䚐 ㋄䚨㜄 䚌㜠 㵹㢸㡸 㫴㫴 㙾㏩⏼␘. ⸬ 㥐䖼㡴 ⱨᷤ㥄, ⱨ㝘⪌⪰ ⸨㫑䚌㫴 㙾㡰⮤ 㛨⛔䚐 㥉㢌═ ⯝㤵㜄 㤵䚝䚜㡸 ⸨㫑䚌㫴 㙾㏩⏼␘. ⵤ䉤⫠ ᷱḔ 1. ⸬ 㥐䖼㡸 㜨㠄 ❄⏈ Ḕ㝜 ㇵ䈐㜄 ⋇㫴 ⫼㐡㐐㝘. 2.
⸬ 䚐㥉 ⸨㫑㡴 ␘㢀Ḱ ᵍ㡴 㦤ᶨ㡸 ᵊ㻈㛨㚰 䚝⏼␘: 1. ⸨㫑 ㉐⽸㏘⪰ ⵏ㡰⥘⮨ Ạ㢹㷌㜄㉐ ⵐ䚽䚐 㜵㍌㫑 㠄⸬㢨 㢼㛨㚰 䚝⏼␘. 2. Bryton Inc.⏈ 㥐䖼㢌 ㍌⫠ ❄⏈ Ẅ㷨㜄 䚐 ⓹㥄Ề㡸 ⸨㡔䚌Ḕ 㢼㡰⮤ ❄⏈ ␜⓹ 㣠⣽㡰⦐ Ạ㢹ᴴᷝ㡸 䞌⺼䚨 㨸 ㍌ 㢼㏩⏼␘. 3. Bryton Inc.⏈ 㢬䉤≫ ᷱ⬘⦐ Ạ㢹䚐 㥐䖼㜄 䚐 ⌸⢱═ ⺴䖼㡴 ⸨㝸䚨 㨰㫴 㙾㏩⏼␘. 䚐㥉 ⸨㫑㡰⦐ ㉐⽸㏘⪰ ⵏ㡰⥘⮨ 㜵㍌㫑 㠄⸬ ❄⏈ ㇠⸬㢨 㢼㛨㚰 䚝⏼␘. 4. ⸨㫑 ㉐⽸㏘⪰ ⵏ㡰⥘⮨ Bryton Inc. (www.brytonsport.com)㜄 㜤⢱䚌㜠 㥐䖼 ⵐ㋕㜄 䚐 㙼⇨⪰ ⵏ㡰㐡㐐㝘. 5. ⸬ 䚐㥉 ⸨㫑㡴 ⸨㫑 ὤᴸ ┍㙼 ᶴ㇠ ⵃ ㍌⫠ ⽸㟝㡸 ⱨㇵ㡰⦐ 㥐ḩ䚝⏼␘. ᷤ䚜 㥐䖼㡴 ⵐ㋕ ⽸㟝 ㋀⽸㣄 ⺴㡰⦐ Ạ⬘ 㜵㍌㫑Ḱ 䚜 㫴㥉═ 㣙㋀⦐ ⸨⇨㚰 䚝⏼␘. 6. ⯜☔ Ẅ㷨═ ᷤ䚜 㥐䖼 ❄⏈ Ạ㉥ ⺴䖼㡴 Bryton Inc.㢌 㣄㢹⏼␘. 7. Bryton Inc.
Model Number: Distributor Stamp Here WSI_R004_AUG