1593559 en PrepChrom C-700 Operation Manual
Imprint Product Identification: Operation Manual, PrepChrom C700 11593559 en Publication date: 09.
BÜCHI Labortechnik AG Table of contents Table of contents 1 General............................................................................................................................................................. 7 1.1 About this manual ..................................................................................................................................... 7 1.1.1 Structure of the manual ...............................................................................................
Table of contents 4.4.4 4.4.5 4.4.6 4.4.7 BÜCHI Labortechnik AG Racks and glass tubes overview ................................................................................................. 30 Synoptic....................................................................................................................................... 31 Stop modes ................................................................................................................................. 32 Collection............
BÜCHI Labortechnik AG Table of contents 6.11 Tracing.................................................................................................................................................... 86 7 Maintenance .................................................................................................................................................. 87 7.1 Maintenance plan .........................................................................................................................
Table of contents vi BÜCHI Labortechnik AG PrepChrom C700
BÜCHI Labortechnik AG General | 1 1 General 1.1 About this manual Read this manual carefully before installing and running the device. Note the safety precautions in chapter 2 in particular. Store the manual in the immediate vicinity of the device, so that it can be consulted at any time. It is addressed to laboratory personnel in particular. 1.1.1 Structure of the manual The operation manual consists of 11 chapters which cover all information rele vant to the operator of the device.
1 | General BÜCHI Labortechnik AG Note NOTE Paragraphs starting with NOTE transport helpful information for working with the device/software. NOTE’s are not related to any kind of hazard or damage. 1.1.3 Available manuals The operation manual of the PrepChrom C700 is available in the following lan guages: Language English German French Order number 11593559 11593560 11593561 1.1.4 Abbreviations Abbr.
BÜCHI Labortechnik AG General | 1 Fig. 1: Type plate (example) 1 3 5 7 Company name Serial number Maximum current Maximum power rating 2 4 6 8 Device name Input voltage range Frequency of input voltage Country of manufacture 1.
1 | General BÜCHI Labortechnik AG Description Injection loop, 2 mL Pre column holder complete (incl. stainless steel connectors for prep HPLC) Tubing, PEEK, pump outlet to valve port 4, 1.6 mm ID Tubing, PEEK, column inlet to valve port 3, 1.6 mm ID Tubing, PEEK, precolumn outlet to valve port 5, 1.6 mm ID Tubing, PEEK, precolumn inlet to valve port 2, 1.6 mm ID Tubing, ETFE, column inlet to valve port 3, 1.6 mm ID Tubing, ETFE, precolumn outlet to valve port 5, 1.
BÜCHI Labortechnik AG Safety | 2 2 Safety The safety of the user and personnel can only be ensured if the safety instruc tions and the safety related warnings in the individual chapters are strictly ob served and followed. Therefore, the manual must always be available to all per sons performing tasks described herein. 2.1 User qualifications Before using the PrepChrom C700 the operation manual must be read and un derstood.
2 | Safety BÜCHI Labortechnik AG Fig. 2: Example of a safety warning 1 3 5 Safety symbol Instruction to avoid danger Signal word, warning 2 4 Source of danger Result of danger if not avoided 2.3.2 Symbols The reference list incorporates safety symbols and their meaning. The symbols can occur in this operation manual or on the device.
BÜCHI Labortechnik AG Safety | 2 2.4 General safety rules 2.4.1 Responsibility of the operator The head of the laboratory is responsible for training his personnel. The operator shall inform the manufacturer without delay of any safetyrelated incidents which might occur during operation of the device or its accessories. Issues can be reported to the email address: quality@buchi.com.
2 | Safety BÜCHI Labortechnik AG Additional warning messages can be found whenever actions and situations de scribed in this manual are related to situational hazards. • Ensure adequate ventilation • Wear eye protection • Wear gloves when handling chemicals • Wear protective clothes • Ensure all liquid bottles are secure • No smocking or open flames • Clean up all spillages 2.5.2 Specific hazard NOTICE Risk of spilled liquids. Liquid from a leak can cause a fire or damage components of the device.
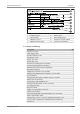
BÜCHI Labortechnik AG Technical data | 3 3 Technical data 3.1 Device dimensions 3.2 Technical data 3.2.1 General Description Weight of the system without accessories Approval Degree of protection Pollution degree Value 53 kg CE IP20 2 3.2.2 Detector module Description Light source Wavelength Typical spectra halfwidth Accuracy Reproducibility Flow cell Noise level Drift PrepChrom C700 Value discharge deuterium lamp 200–600 nm 8 nm ±1 nm ±0.5 nm 0.
3 | Technical data BÜCHI Labortechnik AG Description Maximum flow rate Time constant Value 500 mL/min 1 sec. 3.2.3 Valve module Description Loop volume Value 2 mL 3.2.4 Control unit Description Screen resolution Screen resolution Operating system Harddisk memory Working memory (RAM) Processor USB Value 10.1" touch screen 1024×600 pixel Windows 7 Ultimate 32 bit 320 GB 4 GB Atom D2550, Dual core, 1.86 GHz 2.0 3.2.
BÜCHI Labortechnik AG Technical data | 3 3.2.8 Environmental conditions Description Temperature Altitude above sea level max.
3 | Technical data 18/110 BÜCHI Labortechnik AG PrepChrom C700
BÜCHI Labortechnik AG Description of function | 4 4 Description of function 4.1 Purpose The PrepChrom C700 is a modern device designed for Flash Chromatography and Prep HPLC. The system allows to use up to 4 different solvents (quaternary gradients), inject a liquid or solid sample, separate it on a chromatography col umn and collect the desired compounds.
4 | Description of function BÜCHI Labortechnik AG 4.2 Device overview 4.2.1 Front and right side Fig.
BÜCHI Labortechnik AG Description of function | 4 4.2.2 Left side Fig.
4 | Description of function BÜCHI Labortechnik AG 4.2.3 Rear view Fig.
BÜCHI Labortechnik AG Description of function | 4 4.3 Function Fig. 6: Principle of the chromatography system 1 3 5 7 9 6way electrical valve Waste valve Fraction collector UV Detector Air purge 2 4 6 8 10 Column Waste bottle Glass tubes Solvent bottles A–D Pump 4.3.1 UV Detector The UV/Vis diode array detector measures the amount of light absorbed by a liquid passing through the cell at a given wavelength. It is equipped with a deu terium discharge lamp.
4 | Description of function BÜCHI Labortechnik AG 4.3.3 Control unit The system is controlled by the central processing unit via a 10.1" touch screen, the keyboard and mouse can be used optionally. The operator uses the control software to run the device. The control unit centralizes the connection for data to the other modules. 4 USB connectors are available, 1 in the rear and 3 on the right side of the touch screen (cable maximum length = 2 m). 4.3.4 Pump Fig.
BÜCHI Labortechnik AG Description of function | 4 4way aspiration valve The 4way aspiration valve allows to perform quaternary gradients. A 5th port can be used for air purge of flash columns. Note External connectors allow to plug in a solvent level sensor (see 10.3 Optional accessories [} page 102]. The maximum length of all external cables connected to the system is 2 meters. 4.3.
4 | Description of function BÜCHI Labortechnik AG 4.4 Software 4.4.1 Touch screen overview Fig. 8: Overview touch screen 1 3 5 Menu and tool bar Collection table Chromatogram 2 4 6 Rack and glass tubes Spectrum Synoptic 4.4.2 Icons overview Icon 26/110 Menu func tion File Dialog win dow Open Data Description Opens the results of a method al ready executed (*.Prep). This con tains the method itself, the chro matography and its associated ta ble.
BÜCHI Labortechnik AG Description of function | 4 Icon Menu func tion File Dialog win dow Open Data Description Current Method – opens the edition of the current method, the method currently edited graphically or the method issued of the data currently displayed on the screen. Manual Method – opens the edition of a manual method, brand new method, which is basic at the open ing but easily modifiable manually on main screen or in the tabbed window.
4 | Description of function BÜCHI Labortechnik AG Icon Menu func tion Setup Dialog win dow View Method Description File File Manage ment Control Next Opens the wizard for methods and data file management. That com prises the creation, edition, copying, backup and deletion of all the files in relation with the software. Change collection to the next tube. Control Waste Change from collect to waste. Control Collect all Continuous collection into glass tubes.
BÜCHI Labortechnik AG Description of function | 4 Icon Menu func tion Control Dialog win dow Start Description Control Pause Pauses the pump but keeps the current parameters. Control Hold Gradient Fixes the gradient in progress but lets the pump on with the current parameters. The curve(s) plotting continues. Resume After a pause – restart the pump. Resume the method interrupted by pause (time, gradients, signal acqui sition…).
4 | Description of function BÜCHI Labortechnik AG Menu Setup Allows to: View current method Edit current and saved method Setup bottles, racks, columns, solvents Control Setup user profile and system configu ration Control collector (Flow To Waste, Flow To Next Tube, All Collection, Threshold Collection, Waste Collection, Auto matic Gradient Optimization AGO, Lo cal Minimum) Run, Start, Pause, Hold Gradient, Re sume, Stop Change the software language View View or hide Gradient, Pressure, Flow Rat
BÜCHI Labortechnik AG Description of function | 4 4.4.5 Synoptic Fig. 10: Changeable parameters during a run 1 3 5 7 9 Gradient Threshold value Flow rate Volume glass tubes Solvent bottle 2 4 6 8 Pump pressure Detector wave length Detector autozero Waste bottle Fig. 11: Synoptic during a loop injection Parameters can be changed during a run by pressing any of the fields/symbols. Detector autozero During a run, a autozero can be done at any time.
4 | Description of function BÜCHI Labortechnik AG 4.4.6 Stop modes Corresponds to the way the system behaves at the end of the method, namely the time of the last elution step and the possible actions done. It does not con cern the manual stop by clicking on the stop button in the tool bar (by default: Pause). Pause When the method is finished, the message Method ended: Do you wish to continue? is displayed on the screen and the pump immediately stops.
BÜCHI Labortechnik AG Description of function | 4 4.4.7 Collection 4.4.7.1 Collect all Fig. 12: Collect all 1 Chromatogram/peak 2 Collection time During a run a continuous collection into glass tubes will be performed. 4.4.7.2 Threshold collection Fig. 13: Threshold collection 1 3 Chromatogram Collection time 2 Threshold During a run a collection above the threshold (2) will be performed. Elution be low the threshold is directed to the waste bottle.
4 | Description of function BÜCHI Labortechnik AG 4.4.7.3 Waste Fig. 14: Collection to waste 1 Chromatogram 2 Collection time During a run a continuous collection into the waste bottle will be performed. 4.5 Optional accessories 4.5.1 Switching valve The switching valve is used to have two columns simultaneously connected with the pump and the detector.
BÜCHI Labortechnik AG Description of function | 4 4.5.2 Back flush valve The back flush valve is used to flush the column backwards.
4 | Description of function BÜCHI Labortechnik AG 4.5.3 Purge valve The purge valve is used to rinse the solvent line without disconnecting the col umn. It is directly connected with the column.
BÜCHI Labortechnik AG Description of function | 4 4.5.4 Fume enclosure The fume enclose allows to work without using a fume hood. It is mounted on the fraction collector.
4 | Description of function 38/110 BÜCHI Labortechnik AG PrepChrom C700
BÜCHI Labortechnik AG Installation | 5 5 Installation 5.1 Modules, assembly Fig. 15: Assembly order 1 3 5 u Fraction collector module Control unit UV Detector module 2 4 Pump module Valve module Select a suitable location by ensuring adequate airspace of 15 cm around the system to provide ventilation of the controller, the pump and the detec tor cooling fans. • Total weight: 53 kg NOTICE Risk of spilled liquids. Liquids or material placed on top of the UV Detector module can fall down.
5 | Installation 40/110 BÜCHI Labortechnik AG u Position the column holder (2) on the left side and secure it with 2 hex screws (1), washers and spacers. • The spacer is placed between the column holder and the device. The spacer is placed between the column holder and the device. • Tighten the screws using the Allen wrench 3 mm. u Repeat the previous step for the 2nd column holder on the right side. u Place the stylus holder on a suitable place next to the touch screen.
BÜCHI Labortechnik AG Installation | 5 5.2 Tubing, installation 5.2.1 6way electrical valve, overview Mixing chamber Column or loop Waste Pre-Column Injection adapter Fraction collector Fig. 16: Overview 6way electrical valve connection 5.2.2 Tubing general, installation u Install the tube (2) between the mixing chamber (4) and the 6way electri cal valve (1), port no 4. • HAF780 Tubing PEEK, 1.6 mm ID u Tighten the fitting on the 6way electrical valve.
5 | Installation BÜCHI Labortechnik AG NOTICE Risk of pump damage. The port "air" on the 4way aspiration valve is for air purge only. u Don’t put the ETFE plug into the port “air”. u Install the 4 solvent supply tubes (3) into the 4way aspiration valve (1) and tighten the PEEK nuts (2). • HAF700 Tubing ETFE, 150 cm, 2.4 mm ID, equipped with spring, 4 pcs. NOTE Watch for the protection spring around the solvent supply tubes. They might have sharp ends.
BÜCHI Labortechnik AG Installation | 5 u Install the loop (2) between the port no 2 and 5. • HAF560 Injection loop, 2 mL 5.2.3 Tubing Flash/prep column, installation Tasks u Install luer lock adapters (6) and (4). • HAF450 Adapter luer lock male to 1/4"–28 male • HAF630 Adapter 1/4"–28 female to luer male u Install the tube (1) between the port no 3 of the 6way electrical valve and column inlet. • HAF830 Tubing ETFE, 1.
5 | Installation BÜCHI Labortechnik AG Followon tasks u 5.5.1 Flash/prep column, preparation [} page 47] 5.2.4 Tubing prep HPLC column, installation Tasks 44/110 u Install the PEEK tube (1) between the port no 3 of the 6way electrical valve and the HPLC column inlet. • Wrench 1/4" • HAF790 Tubing PEEK, 1.6 mm ID u Install the ETFE tube (2) between the HPLC column outlet and inlet of the UV Detector module. • HAF820 Tubing, ETFE, 1.
BÜCHI Labortechnik AG Installation | 5 Followon tasks u 5.5.3 Prep HPLC column, installation [} page 48] 5.3 Electrical, connection 5.3.1 Communication and power supply, connection NOTICE Risk of communication error. RS232 cables which are not secured with the 2 screws on the plug can cause a communication error. PrepChrom C700 u Always tighten the 2 screws on the plug when connected.
5 | Installation BÜCHI Labortechnik AG 5.3.2 External devices, connection NOTICE Risk of software damage due to malware. No antivirus software is installed on the C700. The internal software can be damaged by plugging in external devices. u The primary use of the RJ45 connection is printing. u The primary use of the USB connections are the use of a mouse, Key board and memory stick. u Connecting to any network or connecting a memory stick requires a safe and virus free network.
BÜCHI Labortechnik AG Installation | 5 5.5 Column, preparation 5.5.1 Flash/prep column, preparation CAUTION Risk of chemical burns due to wrong set pressure or a wrong se lected column. The column can burst and serious injuries can result. u Wear protective goggles. u Wear protective gloves. u Wear protective clothes. Preliminary tasks u Install the loop on the port no 2 and 5 of the 6way electrical valve. • 5.2.
5 | Installation BÜCHI Labortechnik AG u Tighten the knurled knob (1) to secure the upper holder. 5.5.2 Dry load column, preparation u Set up a dry load column according to: • 5.5.1 Flash/prep column, preparation [} page 47] 5.5.3 Prep HPLC column, installation Preliminary tasks u Install the tube between the upper column holder and port no 3 of the 6 way electrical valve. u Install the tube between the lower column holder and the inlet of the UV Detector module.
BÜCHI Labortechnik AG Installation | 5 u Move the upper holder down onto the column and tighten the PEEK adapter (5). u Tighten the upper knurled knob (1). 5.6 Mixing chamber volume, adjustment NOTE The adjustment of the mixing chamber is recommended to minimize the dead volume. u Turn the wheel (2) to adjust the mixing chamber (3) according to the de sired flow rate of the pump. • Turning the wheel clockwise will increase the mixing value.
5 | Installation BÜCHI Labortechnik AG 5.7 Software, setup 5.7.1 System configuration, setup NOTE The communication setup has to be done after connecting RS232 cables to the control unit. 50/110 u Press Setup > System configuration on the main menu. • The tab General appears. u Make sure the correct device name is selected in the field (1). u Select the connected detectors (UV DETECTOR 600, ELSD C650, USB 1408 FS) in the field (2).
BÜCHI Labortechnik AG PrepChrom C700 Installation | 5 u Activate/Deactivate Air Purge (3) if needed. u Select the tab Detector. u Click into the field (1) to find the right COM port. u The wavelength range of the UV Detector is preset (2). u Define the delay volume between the UV Detector and another connected detector (3). u Select the tab Collector. u Click into the field (1) to find the right COM port. u Define the dead volume between the UV Detector and collector (2).
5 | Installation BÜCHI Labortechnik AG u Select the tab Valves. u Click into the field (1) to find the right COM port. All modules have now an established communication to the control unit. NOTE The type of the valve is preset (2). The default position(reverse/normal) of the valve is preset (3). 52/110 u Press Yes if a back flush valve is used (4). For the installation please con tact the BUCHI customer service organization. • 8.
BÜCHI Labortechnik AG Installation | 5 u Choose Global Signal or Separate Signal. 5.7.2 User profile u Press Setup > User Profile on the main menu. u Adjust the different settings in the menu according to personal require ments.
5 | Installation BÜCHI Labortechnik AG Pressure Flow Rate Tubes Peaks Time Lines Grid Keyboard Change the color of Pressure plot (= is sued of Pressure Transducer) and its curve thickness Change the color of Flow Rate plot (= user setting) and the curve thickness Change the color of collection Tubes filled (repeated every 4 tubes) in Peak Tracing and curves panel Change the color of Peaks detected (repeated every 4 peaks) in Peak Trac ing and curves panel Show or hide the vertical time lines repres
BÜCHI Labortechnik AG Installation | 5 Detector Lamp Cooling Time Indicator Bottles Bottles (max.) Waste (max.) Tubes (max.
5 | Installation BÜCHI Labortechnik AG Column Racks Solvents Panels Show/Hide Buttons Enable or disable the modification of columns available in the database Enable or disable the modification of racks available in the database Enable or disable the creation/modifi cation of solvents used Display or hide the buttons used to show or hide the different panels Curves Display Elution Gradient Pressure Flow Rate Tubes/Peaks UV Signal 1 UV Signal 2 UV Signal 3 UV Signal 4 Signal Ratio Collection Thre
BÜCHI Labortechnik AG Installation | 5 General Panel When Editing a Method Eluent A Eluent B Eluent C Eluent D Settings Panel Columns Racks Equilibration Mode Injection Mode Stop Modes Lamp Switching Off Air Purge Automatic Gradient Optimization Elution Unit Gradient Mode PrepChrom C700 Choose if the edition of a method can be performed directly in the main screen or by opening a separate win dow Show or hide the bottle A and the elu ent A fields in all the software (when A is never use
5 | Installation BÜCHI Labortechnik AG Elution Panel Gradient Management Segments Management Flow Rate Management When Step Time changes Gradient Mode Detection Panel Time Table Use Signals Filters Collection Threshold Collection Panel Timetable Use Local Minimum Collection Mode Choose the way to manage the modifi cation of gradients during method edi tion, either clearly by displaying all gra dient curves (as usual), or differently by enabling the displaying of an eluent curve only if the p
BÜCHI Labortechnik AG Installation | 5 Curves Peak Tracking Collection Table Elution Steps Detection Steps Collection Steps Plates Nb.
5 | Installation BÜCHI Labortechnik AG 5.7.3 Bottle, setup u Press Setup > Bottles on the main menu. u Adjust the value of each bottle by the up and down arrows (1). NOTE The minimum value is 100 mL. u Select the desired solvent from the drop down menu or type the name into the field (2). u Press Ok to finish the bottle setup. 5.7.4 Column, setup 60/110 u Press Setup > Columns on the main menu. u Press Load (1) to load the file buchi.csv which includes all the flash col umns from BUCHI.
BÜCHI Labortechnik AG Installation | 5 u Press Import or Export (5) to recover or save the current columns list (files *.cart) NOTE The list can be exported as a .cart file. 5.7.5 Rack, setup u Press Setup > Racks on the main menu. • A window appears Do you want to Upload Rack Table? Press Yes to modify the data and values of those that already exist. u Press Add (1) to create new ones or press Delete (2) to remove any from the list.
5 | Installation BÜCHI Labortechnik AG Fig. 17: Fraction collector offset adjustment 1 3 5 7 Offset X=1 Spacing X=3 Offset RX=5–3 Rack 2 2 4 6 Offset Y=2 Spacing Y=4 Rack 1 u Press Load (4) to save the data in the fraction collector u Press OK (5) to finish the setup. Note: Offset RY = 0 because the number of racks on the Y axis is 1. 5.7.6 Needle, offset Note: the offset of the needle is preset and should only be changed in case of a drift.
BÜCHI Labortechnik AG Installation | 5 5.7.7 Solvent, setup u Press Setup > Solvents on the main menu. u Press Add to define all solvents which will be frequently used by typing in their name. u Press Ok to finish the solvent setup. • 11.1 Solvent characteristics for normal phase columns [} page 105] 5.7.8 User management, setup PrepChrom C700 u Press Log > User Table on the main menu. u Press Add to create a new user. u Type in a new user name (1) and password (2).
5 | Installation BÜCHI Labortechnik AG 5.7.9 Language, change u Press View > Language and select the desired language. • The software changes to the selected language. 5.7.10 Air purge, activation/deactivation 64/110 u Press Setup > System configuration on the main menu. u Select the tab Pump. u Activate the air purge button (1). u Press Setup > User Profile on the main menu. u Open Edit Method > Settings Panel > Air Purge. u Change the field (1) to Show or Hide.
BÜCHI Labortechnik AG Installation | 5 5.7.11 Detection step, activation/deactivation u Press Setup > User Profile on the main menu. u Open Edit Method > Detection Panel > Time Table Use. u Select the List of Steps or Only one Step (1). u Press Ok. 5.7.12 Collection step, activation/deactivation PrepChrom C700 u Press Setup > User Profile on the main menu. u Open Edit Method > Collection Panel > Time Table Use. u Select the List of Steps or Only one Step (1). u Press Ok.
5 | Installation BÜCHI Labortechnik AG 5.7.13 Automatic gradient optimization, activation/deactivation u Press Setup > User Profile on the main menu. u Open Edit Method > Settings Panel > Automatic Gradient Optimiza tion. u Select Show or Hide (1). u Press Ok. 5.7.14 Switching valve activation/deactivation Note The installation of the switching valve needs to be done by a BUCHI customer service representative.
BÜCHI Labortechnik AG PrepChrom C700 Installation | 5 u Select the valve type ACTV (1), search for the right COM port (2), deter mine the configuration of the valve (Reverse or Normal) (3) and confirm with OK (4). u Select column 1 or column 2 in the tab Settings when creating a method (1).
5 | Installation BÜCHI Labortechnik AG Note Column 1 or column 2 can be also selected in the synoptic by clicking on the column 1 or 2 (1). 5.7.15 Back flush activation/deactivation Note The installation of the back flush valve needs to be done by a BUCHI customer service representative. 68/110 u Press Setup > System configuration on the main menu and select the tab Valves.
BÜCHI Labortechnik AG Installation | 5 u Determine the direction of the flow through the column (Dir = Direct, Rev= Reverse) in the tab Elution when creating a method (1). Note The direction of the flow through the column can be also determined in the syn optic by clicking on the Rev./Dir. (1).
5 | Installation BÜCHI Labortechnik AG 5.8 System fixation (earthquake) NOTICE Risk of device damage from earthquakes. An unsecured device can be damaged in earthquake prone regions. 70/110 u Tie down the device on the designated spots. u Tie down the device on the left side through the lower fixation of the col umn holder (1). u Tie down the device on the right side through the upper fixation of the col umn holder (2).
BÜCHI Labortechnik AG Operation | 6 6 Operation CAUTION Risk of fire due to leakages. Solvent can escape the system in case of a leakage and cause burns. u Wear protective goggles. u Wear protective clothes. u Wear protective gloves. u Regularly check the device during operation for any leakages. u Stop the pump immediately if a leak has been detected. u Do not operate the device if any leakages occur. 6.1 Switch on the system u Switch on all 5 main switches on the rear of the modules.
6 | Operation BÜCHI Labortechnik AG 6.3 Create a quick manual method Fig. 18: Overview touch screen 1 3 5 Menu and tool bar Collection table Chromatogram 2 4 6 Rack and glass tubes Spectrum Synoptic NOTE Parameters can be changed during a run by pressing any of the fields/symbols. 72/110 u Select the Manual Method. u Write a sample name for the method. u Select a column from the list by clicking on the column in the synoptic. u Select the solvent(s) (A– D). u Adjust the percentage.
BÜCHI Labortechnik AG PrepChrom C700 Operation | 6 u Select the detector channel(s) and wavelength. u Select the rack.
6 | Operation 74/110 BÜCHI Labortechnik AG u Select glass tube volume. u Select the equilibration and adjust the duration time in the upper left corner of the chromatogram. See 6.5 Equilibration and injection modes [} page 81] u Select the injection mode. See 6.
BÜCHI Labortechnik AG Operation | 6 u Press Start. 6.4 Create a new method u Press the file management button on the main screen. u Select Create and press Continue. u Select Create a New Method and press Continue. u Open the tab General. NOTE The fields in the tab General are not mandatory to run the method. PrepChrom C700 u Type into the field Title (1) a name, fill out the fields Sample and Author. u Select a solvent from the drop down menu (2) (Eluent A–D).
6 | Operation BÜCHI Labortechnik AG u Select the tab Settings. u Select a column from the drop down menu (1). u Select the equilibration mode (2). • None • Equilibration • Equil. + dry load • 6.5 Equilibration and injection modes [} page 81] u Select the injection mode (3). • Auto • Valve injection • Wait for injection • Valve injection + wait • 6.5 Equilibration and injection modes [} page 81] CAUTION Risk of eye damage or burns due to a bursting column.
BÜCHI Labortechnik AG Operation | 6 u Select the tab Elution. u Press the icon (1) to switch between the graphical and classical table. u Press the gradient mode button (2) to choose between linear and step gra dient mode. • Linear gradient mode Note The first step is used as a start point only and corresponds to the condition used during equilibration (if activated). The time of the first step can not be modified.
6 | Operation BÜCHI Labortechnik AG • Step gradient mode Note The first step is used as a start point only and corresponds to the condition used during equilibration (if activated). The time of the first step can not be modified. u Adjust the flow rate (1). Note When using the BUCHI column methods, the system sets the optimal flow rate for the column (only flash columns). u Adjust the percentage of the used solvents (2). Note Always start adjusting the solvent percentages from the right to the left.
BÜCHI Labortechnik AG Operation | 6 u Select the desired signal (1) for the channel 1–4 or use the scan mode. u Adjust the wavelength (nm) (2). • Additional wavelengths can be chosen for the channels 2–4. • 5.7.11 Detection step, activation/deactivation [} page 65] u Choose Yes (3) in Collect if you want to monitor the collection at the cho sen wavelength. u Select the desired threshold.
6 | Operation BÜCHI Labortechnik AG NOTICE Risk of spilled liquids due to wrong glass tubes. Liquid is spilled by the fraction collector if non or wrong glass tubes are used. 80/110 u Use correct glass tubes according to the planned application. u Check the correct glass tube size in the synoptic of the touch screen. u Regularly check the device during operation for spilled liquids. u Press the glass tube button (2) for the volume setup.
BÜCHI Labortechnik AG Operation | 6 6.5 Equilibration and injection modes u Choose an equilibration mode to condition the column before injection. Mode None Equilibration Equil. + Dry load u Action No column conditioning before injec tion Column conditioning before injection; time designation Column conditioning before injection; no timing; no possibility for loop injec tion at the 6way electrical valve Choose injection mode Mode Auto Valve injection Wait for injection Valve inj.
6 | Operation BÜCHI Labortechnik AG u Select the injection mode (equilibration and valve injection). u After start of the method the liquid sample will be injected to the column. 6.7 Automatic method TLC, setup 82/110 u Press the file management button on the main screen. u Select Create and press Continue. u Select Create an Automatic Method (TLC) and press Continue. u Type the name of the sample into the field (1).
BÜCHI Labortechnik AG PrepChrom C700 Operation | 6 u Select the solvent names (1) for the Low Elution Force (X) and for High Elution Force (Y). u Choose the eluent (A, B, C or D) from the drop down menu (2). u Increase or decrease the value in the field (3). u Press Continue. u Type the weight of the sample into the field (1). • Activate Display compatible columns only? u Select a column from the drop down menu (2). u Press Continue.
6 | Operation 84/110 BÜCHI Labortechnik AG u Select Liquid Injection or Dry Loading (1) depending of the application. • If Liquid Injection is selected, the elution force can be adjusted. u Press Continue. u Select the elution unit Time (1) or Column Volume (2). u Press Finish.
BÜCHI Labortechnik AG Operation | 6 6.8 Purge NOTE Purge the system before the first use or when the solvent in the bottle has been changed. u Press the purge button (1) on the main screen. u Select Purge (2). u After the system is purged press the stop button on the main screen. 6.9 Air purge Preliminary tasks u 5.7.10 Air purge, activation/deactivation [} page 64] Tasks PrepChrom C700 u Press the purge button on the main screen. u Select Air Purge (1).
6 | Operation BÜCHI Labortechnik AG 6.10 Data storage The results are stored in 4 files of which the root of the name is identical. These files can be exported into Excel or Notepad for instance: • Collection table: YYMMDDHHMNSAMPLECol.xls • Data of curves: YYMMDDHHMNSAMPLEDat.xls • Method done: YYMMDDHHMNSAMPLEMth.Lfh • Trace events: YYMMDDHHMNSAMPLE.Prep 6.11 Tracing u Activate Traces in the ? Menu enables the generation of "Traces" files to debug an abnormal behavior.
BÜCHI Labortechnik AG Maintenance | 7 7 Maintenance WARNING Risk of hand injury. Moving parts e.g. pulley or a belt can cause serious hand injuries. u Do not open or remove covers which are not described in this manual. u Switch of the device before opening covers. 7.1 Maintenance plan The frequency of the maintenance activities depends on the nature of the appli cation (the solvents used, the quantity of the mobile phase delivered by the pump, the level of cleanliness of the facility, etc...).
7 | Maintenance BÜCHI Labortechnik AG u Purge the system with a suitable solvent or alcohol (1propanol or 2 propanol) during approx. 3 minutes. • The 6way electrical valve is on the LOAD position during a purge. u Click on the loop in the synoptic to switch the position of the 6way electri cal valve and clean the RUN position (containing the loop or the solid de posit). u Stop the purge. 7.2.2 Flow cell, cleaning Preliminary tasks u Purge the system with a suitable solvent (isopropanol).
BÜCHI Labortechnik AG Maintenance | 7 u Hold the flow cell (2) with one hand while lifting the lever (1) further up. u Remove the flow cell. u Flush the cell with pure solvent and rinse extensively. u Reassemble the UV Detector module in reverse order to disassembly. Followon tasks u Purge the system and verify there is no baseline drift. 7.2.3 Check valve, cleaning Preliminary tasks u Purge the system with a suitable solvent (isopropanol). u Air purge the system. • 6.
7 | Maintenance BÜCHI Labortechnik AG 7.2.4 Piston cleaning disc, cleaning NOTICE Risk of electrical damage. Connecting the piston cleaning discs can cause electrical damage due to miss ing tubes. u Do not remove the plugs of the piston cleaning disc in and outlet. u The piston cleaning discs need to be installed by a BUCHI customer ser vice representative. ð 8.1 Customer service [} page 97] 7.3 Replacement CAUTION Risk of chemical burns due to high pressure in the system.
BÜCHI Labortechnik AG Maintenance | 7 u Remove 2 countersunk screws on top of the UV Detector module. u Remove 4 hex screws (1) and washers. u Remove the cover (2). 7.3.2 Flow cell, replacement u Replace the flow cell according to the instruction of the flow cell cleaning. • 7.2.2 Flow cell, cleaning [} page 88] 7.3.3 Flow cell windows, replacement Preliminary tasks u Remove the flow cell according the following task: • 7.2.
7 | Maintenance BÜCHI Labortechnik AG NOTICE Risk of flow cell window damage. Touching the flow cell windows with bare hands can damage the surface of the cell window. u Wear protective gloves. u Remove both flow cell windows (4). u Remove all PTFE seals (5). u Reassemble the flow cell in reverse order to the disassembly. u Depending on the required thickness of the liquid layer, the installation of the flow cell windows can be changed.
BÜCHI Labortechnik AG Maintenance | 7 u 7.3.1 UV Detector cover, removal [} page 90]. Tasks u Loosen the TORX screw (1). • TORX screw driver T20 u Turn the lamp socket (2) to get access to the lamp mounting base. u Disconnect the electric plug (2). u Remove the 2 TORX screws (3). • TORX screw driver T10 u Remove the lamp (1). 7.3.4.2 Detector lamp, installation NOTICE Risk of deuterium lamp damage. Touching the lamp with bare fingers can cause a faulty detector.
7 | Maintenance BÜCHI Labortechnik AG Tasks u Install the lamp (1). NOTE The lamp has a predefined installation position. u Tighten the 2 TORX screws (3). • TORX screw driver T10 u Connect the electric plug (2). u Turn the lamp socket (2) to the horizontal position. u Tighten the TORX screw (1). • TORX screw driver T20 u Reassemble the UV Detector module in reverse order to the disassembly. Followon tasks u Contact your local service department for detector lamp zeroing.. 7.3.
BÜCHI Labortechnik AG Maintenance | 7 u Air purge the system. • 6.9 Air purge [} page 85] Tasks u Open the service door of the pump module. u Remove both fittings (1) on the outlet of the pump. • The tubes can now be lifted off the valve inserts (2). • Wrench 3/8" u Disconnect both tubes (3) on the inlet of the pump. u Remove the check valve inserts (2). • Wrench 17 mm u Remove the check valve from the check valve insert. 7.3.5.
7 | Maintenance BÜCHI Labortechnik AG Fig. 19: Check valve installation position, pump inlet Fig. 20: Check valve installation position, pump outlet 96/110 u Install the check valve insert (2). • Wrench 17 mm u Connect the tubes (3) on the inlet of the pump. u Tighten both fittings (1) on the outlet of the pump. u Close the service door of the pump module.
BÜCHI Labortechnik AG Troubleshooting | 8 8 Troubleshooting 8.1 Customer service Only authorized service personnel are allowed to perform repair work on the de vice which is not described in this manual. Authorization requires a comprehen sive technical training and knowledge of possible dangers which might arise when working at the device. Such training and knowledge can only be provided by BUCHI.
8 | Troubleshooting 98/110 BÜCHI Labortechnik AG PrepChrom C700
BÜCHI Labortechnik AG Taking out of operation | 9 9 Taking out of operation 9.1 Transport Preliminary tasks u Prepare the original packaging. u Make sure the device is free of any liquids and residues. • 6.9 Air purge [} page 85] u 6.2 Switch off the system [} page 71] Tasks u Disconnect all electrical connections. u Remove all tubes connected between the different modules. u Disassemble the device in reverse order according to: • 5.
9 | Taking out of operation 100/110 BÜCHI Labortechnik AG PrepChrom C700
BÜCHI Labortechnik AG Spare parts | 10 10 Spare parts 10.1 General information Always state the part number and product description when ordering spare parts. Use only genuine BUCHI consumables and spare parts for maintenance to as sure good system performance, reliability and safety. Any modifications of spare parts or assemblies are only allowed with the prior written permission of BUCHI. Description: • Shows the nomenclature of item. • Shows technical information e.g. diameter, length, weight.
10 | Spare parts BÜCHI Labortechnik AG Description Column holder blocking assembly Column holder connection plates Column holder knurled knob Solvent aspiration tubing, ETFE, 1.5 m, 2.4 mm ID, equipped with spring Stainless steel Tconnector 1/8” Stainless steel bulkhead union 1/8” Cable RS232 9F/9F link Cable subminD 9M/9F 2 m Rubber feet Short collection needle Set of fuses 1.25 A TT, 5x20 Set of fuses 2.
BÜCHI Labortechnik AG Spare parts | 10 Description Module for the acquisition of an external data channel Analogic signal – USB interface module. Used to connect an external detector (from BUCHI or not).
10 | Spare parts 104/110 BÜCHI Labortechnik AG PrepChrom C700
BÜCHI Labortechnik AG Appendix | 11 11 Appendix 11.1 Solvent characteristics for normal phase columns Solvent nPentane Hexane Isooctane Petroleum ether Cyclohexane Xylene Diisopropyl ether Toluene Diethyl ether Chloroform Dichloromethane Tetrahydrofuran Acetone Dioxane Ethyl acetate Acetonitrile Propanol Ethanol Methanol Water PrepChrom C700 Solvent strength S Dipole param eter 0.00 0.00 0.01 0.01 0.04 0.26 0.28 0.29 0.38 0.40 0.42 0.45 0.56 0.56 0.58 0.65 0.82 0.88 0.95 large 0 0 0 0 0 0 0.
11 | Appendix 106/110 BÜCHI Labortechnik AG PrepChrom C700
BÜCHI Labortechnik AG Index Index Numerical 4way suction valve 6way electric valve M 21 21 A AGO Assembly order 8 39 24 52 20, 24 27 D Detected level alarms Detector autozero Detector lamp zeroing 52 31 94 70 81 F File method Flow cell window Fraction collection needle Fraction collector 27 92 21 20 G Glass tube N Numbered method Optical path, adjustment Personal protective equipment Predefined method Pressure sensor Pump module 21 H 13 Injection adapter Injection modes Inlet fraction c
Index 108/110 BÜCHI Labortechnik AG PrepChrom C700
Quality in your hands BUCHI Affiliates: BÜCHI Labortechnik AG CH – 9230 Flawil 1 T +41 71 394 63 63 F +41 71 394 65 65 buchi@buchi.com www.buchi.com BUCHI Italia s.r.l. IT – 20010 Cornaredo (MI) T +39 02 824 50 11 F +39 02 57 51 28 55 italia@buchi.com www.buchi.it BUCHI Russia/CIS United Machinery AG RU – 127787 Moscow T +7 495 36 36 495 F +7 495 981 05 20 russia@buchi.com www.buchi.ru Nihon BUCHI K.K. JP – Tokyo 110-0008 T +81 3 3821 4777 F +81 3 3821 4555 nihon@buchi.com www.nihon-buchi.