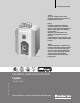
Low-temperature oil boiler Caution! Observe the safety instructions of this installation and maintenance manual before placing the boiler in operation. Danger! If installation, adjustment, modification, operation or maintenance of the heating system is carried out by an unqualified person, this may result in danger to life and limb or property damage. The directions of this installation and maintenance manual must be followed precisely.
Contents 5.7 5.8 5.8.1 5.8.2 Blocked vent switch (required in Canada) . . . . . . . . . . Electrical connections . . . . . . . . . . . . . . . . . . . . . . . . . . Fitting the controls . . . . . . . . . . . . . . . . . . . . . . . . . . . . . Fitting temperature sensor assembly and burner cable . . . . . . . . . . . . . . . . . . . . . . . . . . . . . . . . . . 5.8.3 Connecting the power supply and additional components . . . . . . . . . . . . . . . . . . . . . . . . . . . . . . . . . . 5.8.
Safety Considerations and Symbol Descriptions 1 Safety Considerations and Symbol Descriptions 1.1 Regarding this Manual 1.3 1 Observe the following Symbols This document contains important information regarding safe and proper installation, operation and maintenance of the boiler. All applicable local, state, and national codes and regulations must be observed for the installation of the boiler: The high tech G115 WS boiler is designated as a hot water heating boiler.
1 1.3.1 Safety Considerations and Symbol Descriptions Installation Guidelines CAUTION: DANGER TO LIFE from electric shock. ▶ Do not work on electrical components unless you have the required qualification.Do not work on electrical components unless you have the required qualification.Prior to opening the control: shut down the power supply by turning off the emergency shutoff switch or disengaging the heating system circuit breaker, and prevent from accidental reactivation.
Product description 2 2 Product description This installation and maintenance manual contains important information for the safe and intended installation, initial start-up and maintenance of this boiler. The special oil fired boiler Logano G115 WS is generally referred to below as a boiler. The installation and maintenance manual is provided for technicians who have been trained and have experience in working with heating systems and oil fired installations. 2.
2 2.5 Product description Product description The boiler is a low-temperature oil-fired appliance with automatic control panel or aquastat for boiler water temperature. The boiler consists of: • Boiler heat exchanger with insulation • Boiler jacket • Control panel or aquastat The controls monitor and control all electrical boiler components. The boiler can alternatively be fitted with a simple aquastat control. The boiler jacket prevents heat loss and acts as a noise insulator.
Product description 2.6 2 Pack contents Upon delivery, check that the packaging is complete and undamaged.
2 Product description 2.7 Dimensions Specifications 2.7.1 Logano G115 WS dimensions L LK 23 5/8" 39 5/8" 1 3/4" 30 3/8" 25 1/4" Ø 5" VK Rp1 1/4" 5 7/8" 4 3/8" 8 7/8" 10 3/8" 20" 3 1/4" 12 1/4" 5/8" - 1" 2 7/8" EL Rp 3/4" RK 1" NPT FL 2 7/8" 8 7/8" 7 747 019 141-02.1RS Fig.
Product description 2.8 2 Conditions for operation Maintaining the specified operating conditions will enable the boiler to provide a high level of reliability and long service life. Some details relate only to operation with Buderus Logamatic control panels. CAUTION: Risk of system damage if operating conditions are not maintained. Irreversible damage to individual components of the boiler as a whole or the heating system may occur. ▶ The information on the rating plate is binding and must be observed.
2 2.8.2 Product description Conditions for the boiler room and the environment Notes – Requirement in greater detail Operating conditions Temperature in the boiler room relative humidity Dust/airborne particles +40 to +104 °F max. 90 % No condensation or precipitation inside the boiler room Excessive dust inside the boiler room must be avoided when the boiler is operating, e. g.
Product description 2.8.5 2 Conditions power supply Operating conditions Power supply voltage Circuit breaker Frequency Enclosure rating 120 V AC nominal 10 A 60 Hz Notes – Requirement in greater detail Observe the voltage range of the burner and controls used. The outer casing/boiler must be grounded for safety reasons and in order to function correctly. IP 40 (protected against contact by entry of foreign objects > 0.04 inches Ø (> 1 mm Ø ), no water proofing) Table 8 Power supply 2.8.
3 3 Moving the boiler Moving the boiler This chapter details how to move the boiler safely. CAUTION: Risk of system damage from impact. Fragile components could be damaged. ▶ Observe the transport instructions on the packaging. Protect boiler connections from damage and dirt if the boiler is not installed immediately. Dispose of packaging in an environmentally responsible manner. 3.
Moving the boiler 3.2 Lifting and carrying the boiler 3.3 Using transportation aids to transport the boiler CAUTION: Risk of injury if load is inadequately secured during transportation. ▶ Use suitable means of transportation, e.g. the boiler hand truck with strap. ▶ Secure the load against falling. The boiler is secured to the pallet by 2 screws for transportation purposes. The boiler can be held and carried at the grip positions shown. ▶ Undo the transit screws.
4 4 Installing the boiler Installing the boiler This chapter describes how to install and place the boiler in the boiler room. CAUTION: Risk of system damage from freezing. ▶ Install the heating system in a frost-free room. 4.1 Wall clearances Position the boiler with the recommended wall clearances. Reducing the minimum clearances makes the boiler more difficult to access during installation, maintenance and cleaning. The boiler base or foundation must be perfectly flat and level.
Installing the boiler 4.2 4 Reversing boiler door The burner door is factory-fitted with the hinges on the right – the burner door opens to the right.You can change the burner door hinges over to the left-hand side if desired to suit the installation site. Remove the burner hood/burner door panel first ( Chapter 3.1, page 12). ▶ Removing the burner door ( Chapter 3.1, page 12). ▶ Unscrew the hinge bolts and remove the hinges. ▶ Mount the hinges on the left-hand side of the boiler using the hinge bolts.
4 4.3 Installing the boiler Mounting the adjustable feet (included with B-kit) Level the boiler with the adjustable feet to prevent air pockets forming inside the boiler. Requirement: the burner hood/burner door panel must have been removed first ( Chapter 3.1, page 12). If the boiler is mounted on top of a horizontal hot water tank, the adjustable feet are not needed. 4.4 Positioning and leveling the boiler ▶ Position the boiler in its final location.
Installing the boiler 5 5 Installing the boiler This chapter details how to install your boiler correctly. The individual steps involved are: • Connecting the flue • Connecting the water pipes • Making the electrical connections • Fitting the burner • Connecting the fuel supply 5.1 Flue pipe installation 5.1.1 Chimney venting Connect boiler to vertical chimney with a 5" vent pipe. Use only venting systems that comply with local codes and regulations.
5 Installing the boiler Minimum clearances to combustible material Flue pipe Double-wall Single-wall Type L L Minimum clearance 6" 18" Table 11 Minimum clearances to combustible objects for flue systems Minimum size of chimney The minimum recommended chimney size is 8" x 8" (6 ¾ " x 6 ¾ " inside liner) or 6" diameter with a minimum height of 15 feet. Use a 5" flue pipe for connection to an existing chimney. Installing the flue pipe DANGER: Risk of death from escaping flue gases.
Installing the boiler 5.2 5 Fitting the water connections CAUTION: Risk of system damage from leaking connections. ▶ Support the pipes to the boiler to prevent them from being under stress. 5.2.1 Fitting the B-kit The safety relief valve and the pressure/temperature gauge are mounted on the supply manifold (included in B-Kit) on the VK boiler supply connection as follows: ▶ Fit and seal unmarked end of double nipple into connection VK on the boiler.
5 Installing the boiler 5.2.2 Installation of boiler drain (included in B-Kit) ▶ Seal boiler drain to connection EL. Install a fill connection in the supply piping to the boiler. 5.2.3 Installing system components See the installation diagram for installation of the heating system components. For more installation examples refer to Chapter 10, page 42. 3 RK EL 1 2 4 3 5 6 3 8 10 3 7 EL 9 VK 3 11 RK 7 747 019 141-15.1RS Fig.
Installing the boiler 5.3 5 Filling the heating system and checking for leaks The boiler is tested for leaks at the factory. Before putting the heating system into operation, it must be checked to ensure that no leaks will occur during operation. CAUTION: Risk of system damage from excess pressure when testing for leaks. Pressure, control and safety equipment may be damaged by excessive pressure.
5 Installing the boiler CAUTION: Health risk from contaminated domestic water. ▶ Always observe the regulations and standards applicable in your jurisdiction for the prevention of contamination of drinking water (e.g. by water from heating systems). ▶ Open the cap of the automatic air vent by one full turn to allow air to escape. ▶ Slowly fill the heating system. Observe the pressure gauge whilst filling. ▶ Check the connections and pipework for leaks.
Installing the boiler 5.4 Mounting the burner 5.5 Only burners that comply with the boiler specification can be used with this boiler. ( Chapter 2.7, page 8). CAUTION: Risk of system damage from use of incorrect fuel. ▶ Only use burners which meet the technical boiler requirements. 5 Connecting the fuel supply Make the fuel connection in accordance with all applicable local and national codes and regulations. We recommend fitting a fuel filter and de-aerator.
5 5.6 Installing the boiler Installation 5.6.1 Aquasmart installation The Aquasmart controls the boiler supply temperature. ▶ For Installation and Operation of the Aquasmart Control and sensor well see the Aquasmart Installation Instructions supplied with the control. ▶ Install Aquasmart and sensor well as specified by the installation manual. For wiring diagrams of the Aquasmart Chapter 12 , page 50 . 5.6.2 HydroStat installation The HydroStat controls the boiler supply temperature.
Installing the boiler 5 5.8.1 Fitting the controls ▶ Position the tabs of the controls in the slots. ▶ Slide the controls forwards towards the burner door. ▶ Let the flexible hooks of the control panel click into the openings by pushing the control panel down. 1 2 3 7 747 019 141-21.1RS Fig. 20 Fitting the controls [1] [2] [3] [4] Flexible catches Locating tabs Slots Locating holes ▶ Remove the controls cover. – Unscrew the cover screws. ▶ Secure the controls with self-tapping screws.
5 5.8.2 Installing the boiler Fitting temperature sensor assembly and burner cable CAUTION: Risk of system damage due to severe kinking or sharp burrs on capillary tubes. Capillary tubes can get damaged from severe kinking or sharp burrs. ▶ Route capillary tubes carefully, avoiding bending them excessively. ▶ Route capillary tubes and sensor wiring through the cable opening of the front boiler jacket and connect to test port.
Installing the boiler 5.8.3 Connecting the power supply and additional components Establish a permanent connection to the mains power supply in accordance with the locally applicable regulations. WARNING: Fire hazard from hot boiler components. Hot boiler components may damage electrical cables. 5.9 5 Fitting outer casing panels ▶ Position and secure the control device cover. ▶ Fit the rear boiler cover. ▶ Secure by reinstalling cover screws and jacket panel screws.
6 6 Commissioning the heating system Commissioning the heating system This chapter describes the initial start-up procedure regardless of the installed control device. ▶ Complete the start-up protocol during this process ( Chapter 6.10, page 33). Further information on boiler room layout and clearances, combustion air requirements and venting systems and boiler operational requirements can be found in Chapter 2.8, page 9. 6.
Commissioning the heating system 6.3 Checking position of heat exchanger baffles 6.5 Prior to commissioning, check that the heat exchanger baffles are in a horizontal position: ▶ Open burner door by removing the two hexagon-head bolts at the sides. ▶ Slightly withdraw the flue gas baffles from the heat exchanger. ▶ Adjust the heat exchanger baffles to a horizontal position and push them back into the heat exchanger. ▶ Close burner door with the two hexagon bolts (approx. 90 inch-lbs).
6 6.6 Commissioning the heating system Notes on commissioning the burner Allow burner to operate for 15 to 20 minutes before performing a combustion test. Earlier combustion tests can lead to incorrect readings as a result of burning off the sealing rope. We recommend rechecking the burner after a few weeks of operation. Incorrect burner adjustment can cause contamination of the boiler (e.g. soot), leading to low efficiency, high emissions, and a greater risk of service calls.
Commissioning the heating system 6.7.2 Removing heat exchanger baffles You can remove the baffle plates in pairs to raise the flue gas temperature. ▶ Open burner door by removing the two hexagon-head bolts at the sides. ▶ Remove the baffle plates towards the front. ▶ Close burner door with the two hexagon bolts (approx. 90 inch-lbs) Tighten the hexagon bolts evenly to properly seal the burner door. ▶ Re-check the flue gas temperature. 3 6 3 2 1 2 1 6 720 813 418-01.1T Fig.
6 6.8 Commissioning the heating system Manual reset high limit (STB) The manual reset high limit interrupts the power supply if the maximum permissible flow temperature is exceeded. To enable a boiler reset and re-starting, the fault must be removed and the system temperature must have fallen below the limit. ▶ Check the function of the manual reset high limit ( controls maintenance instructions). 6.9 Installing the burner door jacket ▶ Position the burner door panel on the hooks on the boiler casing.
Commissioning the heating system 6.10 6 Commissioning log ▶ Initial and date the commissioning steps carried out. 1. Commissioning operations Fill heating system and check for leaks Page 21 Readings taken Comments ____________ psi • Heating system pressure 2. Bringing the system up to operating pressure 28 3.
7 7 Shutting down the heating system Shutting down the heating system CAUTION: Risk of system damage from freezing. If the heating system has been switched off, it may freeze up in cold weather conditions. ▶ Leave the heating system switched on as long as possible. ▶ Protect a disabled heating system from freezing by draining the heating system and hot water pipes at the lowest point. 7.1 Shutting down normally ▶ With Buderus controls: switch off the on/off switch on the controls (position "0").
Heating system servicing 8 Heating system servicing 8.1 Why is regular maintenance important? 8 Heating systems should be regularly maintained for the following reasons: • to achieve a high level of efficiency and to operate the system economically (low fuel consumption), • to achieve a high level of operational reliability, • to maintain the cleanest possible combustion, • to ensure reliable operation and long service life. Servicing work may only be carried out by a qualified service technician.
8 8.3 Heating system servicing Cleaning the boiler The boiler can be cleaned with brushes and/or by a wet method. Cleaning equipment is available as accessory. ▶ Close burner door with the two hexagon bolts (approx. 90 inch-lbs). Tighten the hexagon bolts evenly. CAUTION: Risk of burning by touching hot boiler parts. ▶ Wear appropriate protective personal safety equipment. ▶ Open burner door by removing the two hexagon bolts on the sides. 8.3.
Heating system servicing 8.4 8 Checking heating system operating pressure The system pressure for closed systems must be 15 – 30 psi (1.0 – 2.1 bar). ▶ Check system pressure. ▶ If the pressure gauge shows less than 15 psi, the pressure is too low. Top up the system with water. CAUTION: Risk of system damage due to frequent topping up. If you have to top up the heating water frequently, the heating system may suffer damage from corrosion or scaling, depending on the water quality.
8 8.6 Heating system servicing Servicing and maintenance logs ▶ Initial and date the servicing operations completed. Service work 1. Check general condition of heating system 2. 3. Visual inspection and function check of the heating system Checking fuel and water-carrying components of the system for: 4. 5. 6. 7. 8. 9. 10.
Heating system servicing 8 Date:______ Date:______ Date:______ Date:______ Date:______ Date:______ Date:______ Company stamp/ signature Company stamp/ signature Company stamp/ signature Company stamp/ signature Company stamp/ signature Company stamp/ signature Company stamp/ signature 1. 2. 3. 4. 5. 6. 7. 8. 9. 10. If any condition requiring maintenance work is identified in the course of servicing, that work must be carried out as necessary to ensure safe and proper operation.
8 Heating system servicing On-demand maintenance procedures Page 1. Shutting down the heating system 34 2. 3. 36 36 5. Removing and cleaning the heat exchanger baffles Cleaning heat exchanger heater flue (heating surfaces) and combustion chamber and afterwards refitting heat exchanger baffles in original positions Checking seals/cord gaskets on burner door and burner and replacing as necessary Commissioning the heating system 6. Final check of the servicing work 4. 7.
Troubleshooting 9 9 Troubleshooting Two type of fault are distinguished: • Burner faults and • Control and heating system faults. If there is a burner fault the fault indicator lamp on the burner comes on ( burner documentation). Such faults can generally be reset by pressing the reset button on the burner. Controls and heating system faults are indicated on the controls display if it has one. For further information see controls' documentation.
10 10 Installation examples Installation examples Key to abbreviations KR MAG PH PW Check valve Expansion tank System pump Hot water pump SH SV THV WH Heating circuit adjuster Pressure relief valve Thermostatic radiator valve Water compensation pipe (diversion) 1 1 1 THV SV PH G125WS/NA WS/NA G115 MAG 7 747 019 141-40.1RS Fig. 42 Multiple circuits with circuit valves [1] Baseboard 1 1 1 KR PH SV G115 WS/NA G125 WS/NA MAG 7 747 019 141-41.1RS Fig.
Installation examples 10 1 1 1 THV SV PH G115 G125WS/NA WS/NA 3/4" MAG 2 WH 7 747 019 141-42.1RS Fig. 44 Multiple circuits of water diversion for systems with a high water volume [1] [2] Radiator Boiler bypass 180˚ 1 160˚ KR PH 120˚ KR PS 100˚ PH R2107 SV M 180˚ 100˚ SH G115 G125WS/NA WS/NA MAG 7 747 019 141-43.1RS Fig.
11 11 Parts lists Parts lists The following parts are available from Buderus. If there are several Buderus article numbers for one item number, the numbers for the various models are listed in the relevant columns. Otherwise the table shows the number of components for each model. Legend for tables 14 and 15: x = no spare part (x) = component of a set, only available with set 0 = no picture available Boiler block and burner door ( Fig. 46) Item no.
Parts lists Item no. Description G115/3 WS 3 section 150 160 180 Hexagon bolt ISO4014-M10x65-8.8 Washer DIN125-A10.5-A3K Boiler feet M10x51mm complete 190 200 Flue pipe sealing collarDN130 complete Flue silencer DN130 complete, without condensate drain; higher sound absorption or: 210 Flue silencer D130 with an adaptor of 100mm length, with condensate drain; lower sound absorption Flue silencer components 190 Flue pipe sealing collarDN130 complete 220 Flue pipe sealing collar assy.
11 Parts lists Item no.
Parts lists 11 210 70 220 80 230 51 60 190 50 81 200 10 21 55 54 22 121 50 57 52 70 120 90 91 160 150 53 23 52 133 24 140 130 70 180 141 133 142 180 131 132 22 21 350 380 400 390 360 370 290 310 350 300 320 330 340 270 280 250 260 6 720 813 418-02.1T Fig.
11 Parts lists Boiler jacket ( Fig. 47) Item no. Description Part number G115/3 WS G115/4 WS G115/5 WS 3 section 4 section 5 section A complete outer panel set consists of: front panel, rating plate, front insulation, cross-member, 2 side panels, boiler insulation, retaining spring, front hood, rear hood, rear panel and fixings. Available outer panel components 10 Front panel assembly G115 18 Logano G115 name plate 20 Front insulation G115 40 hexagon bolt ISO4017-M8x12-8.
11 Parts lists 90 125 90 150 90 90 120 140 130 90 170 145 160 110 100 170 160 85 80 70 40 70 40 60 50 20 10 85 18 80 95 70 40 7747102154-00-boiler jacket 7747102154-00-Verkleidung G125G125 WS NA Fig.
12 12 Circuit diagrams Circuit diagrams Riello F3 or F5 Series Oil Burner Wiring N Neutral L Hot Thermostat, aquastat, or end switch, Fuse Service Switch T T Terminal strip on Riello Burner L1 L2 C2 Honeywell Operating Aquastat (L7248C1006) N X L Ground B2 C1 Quick connect plug Ground B1 Green wire White wire Red wire- NOT USED IN THIS APPLICATION WMO-1*) Black wire Low Voltage Field installed Field wiring Factory wired Riello F3 or F5 Series Oil fired Burner Using a L7248C1006 Aquasta
Circuit diagrams 12 Carlin EZ-1 HP Burner Wiring with L7248C Aquastat N Neutral L Hot Thermostat, aquastat, or end switch, Fuse Field installed jumper CCT 70200 Series Primary Control Service Switch T L2 T L1 IN T T L1 OUT F LIMIT F MOTOR BV VALVE L1 BV IGNITION L2 C2 Honeywell Operating Aquastat (L7248C1006) CAD Cell Eye A Ground A B2 Quick connect plug C1 Ground B1 Red wire White wire WMO-1*) Black wire Green wire Low Voltage Field installed Field wiring Factory wired Carl
12 Circuit diagrams Becket NX Burner Wiring N Neutral L Hot Thermostat, aquastat, or end switch, Fuse Service Switch Quick connect plug Honeywell R7184B series Primary Control or Beckett Genisys 7505B Primary Control T Ground T L1 L2 C2 Red Black wire Black White wire White A A Honeywell Operating Aquastat (L7248C1006) Violet Blue B2 T Orange C1 Ground B1 T Green wire CAD Cell Yellow Yellow Burner Junction Box WMO-1* Field installed jumper Low Voltage – Field installed Field wiring
Circuit diagrams 12 Fig.
12 Circuit diagrams Field installed jumper Carlin 70200 Series Primary Control T L2 T L1 IN L1 OUT F LIMIT F MOTOR BV VALVE CAD Cell Eye BV IGNITION A Ground A U 1 70200 3 70200 70200 70200 Carlin 70200 Fig.
Circuit diagrams 12 Fig.
12 Circuit diagrams Z I I Using Hydrolevel Hydrostat with Honeywell R7148B or Genisys 7505B 1. 2. 3. 4. 5. 6. 7. 8. Connect room thermostat or end switch to T and TV terminals on control. Connect incoming 120VAC power source to the control. Connect Line Voltage to terminal L1, and Neutral to terminal L2. Connect the black wire from the Honeywell or Genisys to terminal B1 on control. Connect the white wire from the Honeywell or Genisys to terminal B2 on control.
Circuit diagrams 12 Field installed jumper Carlin 70200 Series Primary Control T L2 T L1 IN L1 OUT F LIMIT F MOTOR BV VALVE CAD Cell Eye BV IGNITION Ground A A Z I I Using Hydrolevel Hydrostat 1. 2. 3. 4. 5. 6. 7. 8. Connect room thermostat or end switch to T and TV terminals on control. Connect incoming 120VAC power source to the control. Connect Line Voltage to terminal L1, and Neutral to terminal L2. Connect the black wire from the Carlin 70200 to terminal B1 on control.
12 Circuit diagrams Z I I Using Hydrolevel Hydrostat 1. 2. 3. 4. 5. 6. 7. Connect room thermostat or end switch to T and TV terminals on control. Connect incoming 120VAC power source to the control. Connect Line Voltage to terminal L1, and Neutral to terminal L2. Connect the black wire from the Riello to terminal B1 on control. Connect the white wire from the Riello to terminal B2 on control. Connect the green wire from Riello to ground screw on control. Install a jumper between TT on Riello.
Index Index A Aquasmart .......................................................... 24 B B-kit components ..................................................... 7 Boiler output .......................................................... 8 Boiler room ......................................................... 10 Boiler type ............................................................ 8 Burner, notes on commissioning ................................... 30 C Changing boiler hinges to left hand side ..............