
G115WS/3 Installation Manual
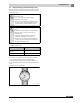


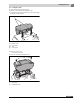
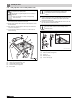
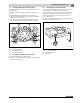
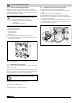
Table Of Contents
- Contents
- 1 Safety Considerations and Symbol Descriptions
- 2 Product description
- 3 Moving the boiler
- 4 Installing the boiler
- 5 Installing the boiler
- 6 Commissioning the heating system
- 6.1 Bringing the system up to operating pressure
- 6.2 Checking the safety valve
- 6.3 Checking position of heat exchanger baffles
- 6.4 Preparing the heating system for operation
- 6.5 Starting up the control and the burner
- 6.6 Notes on commissioning the burner
- 6.7 Raising flue gas temperature
- 6.8 Manual reset high limit (STB)
- 6.9 Installing the burner door jacket
- 6.10 Commissioning log
- 7 Shutting down the heating system
- 8 Heating system servicing
- 9 Troubleshooting
- 10 Installation examples
- 11 Parts lists
- 12 Circuit diagrams
- Index

5
Installing the boiler
Logano G115 WS US/CA – 6 720 813 418 (2019/09)22
▶ Open the cap of the automatic air vent by one full turn to allow air to
escape.
▶ Slowly fill the heating system. Observe the pressure gauge whilst
filling.
▶ Check the connections and pipework for leaks.
▶ Bleed the system via the radiator bleed valves if applicable.
▶ Top with water if the pressure drops as a result of bleeding the
system.
▶ Installing pressure relief valve ( Fig. 14 NOT DEFINED, page 19)
CAUTION: Health risk from contaminated domestic
water.
▶ Always observe the regulations and standards
applicable in your jurisdiction for the prevention of
contamination of drinking water (e.g. by water from
heating systems).