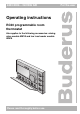
6303 8006 – 02/2006 GB Operating instructions RC30 programmable room thermostat Also applies to the following accessories: mixing valve module MM10 and low loss header module WM10 Please read thoroughly before use.
Contents 1 Introduction 2 What you should know about your heating system . 2.1 2.2 2.3 2.4 2.5 . . . . . . . . . . . . . . . . . . . . . . . . . . . . . . . . . . . 4 How does the RC30 work? . . . . . . . . . . . . . . . . . . . . . . . . Control modes for the RC30 . . . . . . . . . . . . . . . . . . . . . . . Why do the thermostatic radiator valves have to stay fully open? Why do I need a heating program? . . . . . . . . . . . . . . . . . . . What are heating circuits? . . . . . . . . . . . . . . . .
Contents 8.7 8.8 8.9 8.10 8.11 8.12 8.13 8.14 8.15 8.16 8.17 8.18 8.19 9 Special functions (additional menu). 9.1 9.2 9.3 9.4 9.5 9.6 9.7 9.8 9.9 9.10 9.11 9.12 10 Changing settings for another heating circuit . . . . . . . . . Selecting and modifying a heating program . . . . . . . . . . Selecting a preset heating program . . . . . . . . . . . . . . . Overview of the preset heating programs . . . . . . . . . . . . Modifying the heating program by moving switching points Creating a new heating program .
1 1 Introduction Introduction The RC30 makes it easy to operate your Buderus heating system and forms part of the Energy Management System (EMS). The heating system is controlled in such a way that you benefit from optimum heating comfort and minimum energy consumption. The RC30 is factory-preset. You can adjust these settings, such as the heating program for example, and match them to your requirements. Special functions help you to save energy, without sacrificing your personal comfort.
What you should know about your heating system 2 2 What you should know about your heating system 2.1 How does the RC30 work? The RC30 ensures comfortable heat and economical consumption of fuel and electricity. It switches the boiler and pumps ON if DHW (domestic hot water) or a higher room temperature are required.
2 2.2 What you should know about your heating system Control modes for the RC30 The RC30 can operate in three control modes: – outside temperature dependent control – room temperature control or – outside temperature control with room temperature influence Outside temperature dependent control With outside temperature dependent control, only the outside temperature measured by the outside temperature sensor is taken into account for the flow temperature level.
What you should know about your heating system 2 Or conversely: You measure the temperature in a south-facing room with different heat sources (solar or other heating sources, e.g. an open fireplace). Now the control unit "thinks" that it is as hot in all rooms as in the reference room; consequently the boiler output will be severely cut back so that, for example, the northfacing rooms are too cold.
2 2.4 What you should know about your heating system Why do I need a heating program? Unlike standard controls, the RC30 offers more choice than just ON/OFF. Modern heating systems offer a choice of heating programs. A heating program sets the times at which the system automatically switches between two different room temperatures. The first setting, called „day mode“, is for when the building is actively occupied and a higher temperature is required.
What you should know about your heating system 2 - "REDUCED" (also possible without remote control) Here the system heats to the set night temperature in setback heating mode. The heating circuit pumps operate constantly. The heating program is only switched on in automatic mode; night setback is not available in manual mode. 2.5 What are heating circuits? A heating circuit describes the circuit taken by the heating water from the boiler via the radiators and back to the boiler (Fig. 1 on page 5).
2 What you should know about your heating system Mixer module MM10 The supply of different flow temperatures to different heating circuits in a heating system can only be achieved if a three-way mixing valve is installed between the boiler and the second heating circuit. This valve is controlled by the mixer module MM10 (accessory).
Tips on economical heating 3 3 Tips on economical heating Here are a few tips on how to heat economically, without sacrificing comfort, using your RC30: z Only heat if you need warmth. Use the heating programs preset in the RC30 or those which you have tailored to your personal needs. z Ventilate correctly during the cold season: Open the windows wide three to four times per day for approx. five minutes.
3 Tips on economical heating z A comfortable room climate depends not only on the room temperature but also on the relative humidity. The drier a room, the cooler it feels. You can improve the relative humidity with houseplants. z You can also save energy when heating DHW by running the circulation pump in intermittent mode only. Research has shown that it is generally sufficient to run the DHW circulation pump for three minutes in every 30.
For your safety 4 4 For your safety The RC30 has been designed and built in accordance with currently recognised standards and safety requirements. However, dangers or material losses may arise if it is used improperly. z You should therefore only operate the heating system as intended and when it is in perfect working order. z Please read these instructions carefully. z Always observe the safety instructions to prevent injury and material losses. 4.
4 4.3 For your safety Cleaning z The RC30 should only be cleaned with a damp cloth. 4.4 Disposal z Dispose of packaging in an environmentally responsible manner. z Dispose of old components in an environmentally responsible manner. 4.5 Other notes Assembly, maintenance and repairs, as well as fault diagnosis, must only be carried out by installers. USER NOTE All changes and adjustments carried out on the RC30 must correspond to the heating system requirements. Never open the housing of the RC30.
First steps with your RC30 5 First steps with your RC30 5.1 Controls 5 2 3 1 4 5 Fig. 3 Controls on the RC30 Item 1: Temperature, percentage and summer mode display Item 2: Buttons for basic functions with LEDs Item 3: Dial for changing values and temperatures or for navigating through the menus Item 4: Buttons for extended functions and special functions Item 5: Hinged flap covering the buttons for extended functions and special functions Buttons for basic functions (Fig.
5 First steps with your RC30 Display (Fig. 3, Item 1) ACTUAL ROOM TEMP 21.5° As soon as you press a button or move the dial, the display shows the selected value (set value). After about 2 seconds the standard display is restored. The standard display shows the actual room temperature. This is the factory setting. You can also choose a different standard display (see Chapter 8.19 "Changing the standard display", page 55). LEDs (Fig.
First steps with your RC30 5.2 5 Quick reference guide For funktions press and hold button, turn dail to select value, release button.
5 First steps with your RC30 Additional menu (Chapter 9, page 56) Buttons + + Press the "Time" and "weekday" buttons at the same time to open the additional menu. 5.3 Menu Menu HOLIDAY THERM DISINF BNK HOLIDAY STD DISPLAY CALIBRATION KEY LOCK PARTY SU/WI CHANGE PAUSE SU/WI TIME Switching on and off The RC30 is powered by the heating system and is permanently switched on. It is only switched off if the heating system is switched off, e.g. for maintenance purposes.
Language 6 6 Language You can choose the language in which messages on the RC30 are displayed. Proceed as follows: z Open the flap (by pulling the recessed grip on the left). Simultaneously press the "Display", "Heating circuit" and "Back" buttons. SERVICE MENU LANGUAGE The main service level menu is displayed, indicated by "SERVICE MENU". Press the "Display" button to select "SERVICE MENU LANGUAGE". Hold down the "Display" button and select the required language with the dial.
7 7 Basic functions Basic functions This chapter describes how to change room and DHW temperatures, the advantages of automatic mode, how to make effective use of manual mode, etc. The basic functions are controlled by pressing and holding a button on the right-hand side of the RC30 and turning the dial. 7.1 Changing the room temperature directly If it is too cold in the house in general, increase the room temperature on the RC30 and leave the thermostatic radiator valves unaltered.
Basic functions 7 7.2.1 Selecting automatic mode Generally, buildings are heated less at night than during the day. In automatic mode the RC30 changes over automatically between day mode (standard heating mode) and night mode (reduced heating mode). This means that you do not have to adjust the thermostatic radiator valves every morning and evening. The times at which the heating system changes from day to night mode – and vice versa – are factory-set via the heating program.
7 Basic functions USER NOTE During spring and autumn, you may find that your home feels too cold, even though the heating system is in summer mode (DHW heating only) because of the outside temperature. In such a case choose manual mode to run the heating. The heating is then permanently on and must be turned off by pushing the "AUT" button. You can also change the setting for automatic summer/winter changeover (see Chapter 9.10 "Setting summer/winter changeover", page 72).
Basic functions 7 7.2.2 Selecting manual mode For example, if you want the heating to run for longer in the evening or earlier in the morning, you can also select the day and night mode manually. There are two temperatures for manual day and night mode. You can use manual day mode to run the heating on cooler days,when the system is operating in summer mode. Press the "Day mode" button to switch to manual mode. HEAT CIRC 1 MAN DAY 21.0° The LED in the "Day mode" button lights up.
7 7.3 Basic functions Setting the room temperature The room temperature applies to the currently active heating mode, i.e. day or night mode. The currently active heating mode is indicated by an illuminated green LED. 7.3.1 Setting the room temperature for the current operating mode Condition: The RC30 flap is closed. You are currently in automatic "Day" mode and would like to alter the room temperature. Set the required room temperature by turning the dial.
Basic functions 7 7.3.2 Setting the room temperature for an operating mode that is currently inactive You can also adjust the room temperature for an operating mode that is currently inactive. For example, you are currently in automatic "Day" mode and would like to alter the night setback temperature. + HEAT CIRC 1 MAN NIGHT Hold down the "Night mode" button and at the same time select the required room temperature with the dial. Release the "Night mode" button.
7 7.4 Basic functions Heating domestic hot water The RC30 also allows you to heat the DHW in an energyconscious manner. With the factory setting, DHW heating begins automatically 30 minutes before day mode starts the first heating circuit, and ends when the last circuit switches to night mode (see Fig. 6). Outside the times set in the heating program, DHW heating is switched off, i.e. no DHW is heated in night mode.
Basic functions 7 USER NOTE In a modern Buderus DHW cylinder, the water only cools down at a rate of around 0.5 °C per hour when not being drawn, i.e. reloading only occurs after 10 hours. If necessary you can manually reload the DHW to 60 °C (see Chapter 7.4.2 "Single DHW loading", page 28). If you regularly need large amounts of hot water in the evening, you can also set up a separate DHW program (see Chapter 8.16 "Entering a DHW program", page 51). 7.4.
7 Basic functions 7.4.2 Single DHW loading If the LED in the "DHW" button lights up, the DHW temperature has fallen below the set value. Should you require a large amount of hot water, proceed as follows: Press "DHW". The LED in the "DHW" button flashes, and single DHW heating begins. DHW SGL LOADING ACTIVE Depending on the size of the DHW cylinder and the boiler rating, the DHW will be available after approx. 10 to 30 minutes.
Basic functions 7 7.4.3 Activating thermal disinfection If you activate the "Thermal disinfection" [pasteurisation] function, the DHW is heated once a week or once a day to a temperature which is high enough to destroy pathogenic agents (e.g. legionella). RISK OF SCALDING WARNING! from hot water at the taps. During the thermal disinfection process the DHW can be heated to a temperature above 60 °C. z Only draw off mixed hot and cold water during or just after thermal disinfection.
8 8 Extended functions Extended functions The extended functions allow you to access other operating levels in which you can change the presets for your heating system. 8.1 Buttons for extended functions Fig. 7 8.2 Buttons for the extended functions "Display" button "Prog" button (Program) "Time" button "Heating circuit" button "Weekday" button (day / date) "Back" button Using the extended functions At this level, proceed according to the "Push, hold and turn" principle.
Extended functions 8.3 8 Displaying operating menu You can display and check the various operating values of the boiler, the selected heating circuit and the system. z Open flap. Turn the dial clockwise.
8 Extended functions Setting Explanation "HOURS RUN" Burner running time Stage 1 Stage 2 (if available) "FLUE GAS TEMPERATURE" Actual flue gas temperature (if additional sensor fitted) "CONTROL DEV USED" Control device for your heating system "MODE USED" Current programming unit for your heating system (RC30 / RC20) Tab. 2 1) Operating values which can be displayed DHW operating values can only be displayed if a DHW circuit is installed.
Extended functions 8.4 8 Setting the date The correct date must be set on your heating system in order for it to work properly. After an extended power failure, for example, you will therefore have to reset the date on the RC30. + Hold down "Weekday" and select the current day with the dial. The day of the week is automatically changed. Release the "Weekday" button. + Hold down "Weekday" again and select the current month with the dial. Release the "Weekday" button.
8 8.5 Extended functions Setting the time The correct time must be set on your heating system in order for it to work properly. After an extended power failure, for example, you will therefore have to reset the time on the RC30. Hold down "Time" and select the current time with the dial. + Release the "Time" button. The new time is saved.
Extended functions 8.6 8 Selecting a heating circuit Your heating system may be equipped with several heating circuits. If you want to change a setting – e.g. the heating program – first select the heating circuit with the setting you wish to modify.
8 Extended functions RC30 heating circuits Several heating circuits can be controlled at the same time using the RC30. These are grouped together under the term "RC30 heating circuits".
Extended functions 8.7 8 Changing settings for another heating circuit Room temperature and operating mode Your heating system may be equipped with several heating circuits (see Section 2.5, page 9). If you want to change the room temperature or operating mode for a different heating circuit than the one last selected, first select the required heating circuit.
8 Extended functions Automatic mode Hold down the "AUT" button and select the room temperature with the dial (here: "20 °C") which is required for the heating circuit. + HEAT CIRC 2 AUTO DAY 20.0° Release the button to store your input. The heating circuit is now in automatic mode and the day room temperature has been set to 20 °C. Then the selected standard display will be shown again.
Extended functions 8.8 8 Selecting and modifying a heating program What is a heating program? A heating program provides the automatic changeover of operating mode (day and night mode) at fixed times. In the factory setting the heating program also sets the times for DHW heating and operation of the circulation pump. You can also set up a separate DHW or circulation program.
8 8.9 Extended functions Selecting a preset heating program The RC30 comes with eight different preset heating programs. See the next page for a summary of the time settings for the preset heating programs. Please check which heating program best meets your requirements. In particular, check the number of switching points and then the times. The "FAMILY" program is factory pre-set. Each programme can be adjusted or you can enter a specific programme to meet your exact needs.
Extended functions 8 8.10 Overview of the preset heating programs Tab.
8 Extended functions 8.11 Modifying the heating program by moving switching points If the switching points, i.e. the times in a preset heating program at which the system changes over between day and night mode, only partially suit you, you may change them, or ask your installer to change them for you. The modified heating program is then saved under the new name "OWN PROG". Only one custom heating program can be stored for each period (Mon-Thur, Fri, Sat, Sun), for each heating circuit.
Extended functions + PROG SELECT FAMILY SWITCH POINT ON MO 8 Hold down the "Prog" button and select the required heating program with the dial. Release the "Prog" button. The first switching point (Monday, 05:30) appears. 05:30 + Hold down the "Time" button and select the required time with the dial. Example: "06:00". Release the "Time" button. The new time for the "On" [start "day mode"] switching point is now saved. Continue to turn the dial until the next switching point is displayed.
8 Extended functions Next switching point Continue to turn the dial until the next switching point is displayed. The next switching point (Tuesday, 05:30) appears. Change these switching points to 6:00 and 23:00 too. Continue to enter the new switching points in this way for the days up to and including Thursday. Now the system will heat from 6:00 to 23:00 from Monday to Thursday. Press "Back". The modified heating program is stored under the name "OWN PROG". Any previous own program will be overwritten.
Extended functions 8 8.12 Creating a new heating program You can also set up a new heating program that is tailored entirely to your personal requirements. The RC30 offers blocks of days, which makes programming easier. The new heating program is stored under the name "OWN PROG". Only one custom heating program can be stored. Per heating circuit, if you enter a new "OWN PROG", the previous one will be overwritten. For example, you want the heating to run on Monday to Thursday from 05.00 to 21.
8 Extended functions Hold down the "Day/Date" button and select the required day block with the dial. Example: "MO–TH". + SWITCH POINT ---MO-TH Release the "Day/Date" button. --:-Hold down the "Time" button and select the required time with the dial. Example: "05:00". + SWITCH POINT ---MO-TH Release the "Time" button. 05:00 Hold down the "Display" button and select the "ON" switch state with the dial. + SWITCH POINT ON MO-TH Release the "Display" button. The new switching point is stored.
Extended functions 8 USER NOTE The next switching point is not displayed until you have entered the day or group of days, time and operating mode (switch state). You can enter them in any sequence. If you press the "Back" or "AUT" button whilst entering a switching point, a switching point that has been partially entered will be lost. Make sure that you enter an OFF switching point for every ON switching point so that the heating system can also switch back to night mode. 8.
8 Extended functions Turn the dial anti-clockwise until the display illustrated below appears. SWITCH POINT ------- Enter the switching point (see Chapter 8.12 "Creating a new heating program", page 45). --:-USER NOTE If you have assigned all 42 switching points, the "SWITCH POINT" display no longer appears. You cannot enter any more switching points. 8.14 Deleting switching points You can delete individual switching points in a heating program.
Extended functions SWITCH POINT ON MO 8 The first switching point (Monday, 16:00) appears. 16:00 + Simultaneously press the "Display" and "Heating circuit" buttons. SWITCH POINT DELETE On the display all the eights appear and then disappear. When all the eights disappear, the selected switching point has been deleted. 888888 Release the "Display" and "Heating circuit" buttons. USER NOTE Make sure that you always delete both an ON switching point and an OFF switching point.
8 Extended functions 8.15 Setting the operating mode for domestic hot water This allows you to change the DHW temperature in the DHW cylinder. Hold down the "Heating circuit" button and select "DHW" with the dial. + Release the "Heating circuit" button. HEAT CIRC DHW Then the standard display will be shown again. ACTUAL ROOM TEMP 21.
Extended functions 8 Approximately one second after pressing the button, the display returns to the standard display. USER NOTE In automatic mode, the DHW temperature is reduced when all heating circuits are in night mode (see Chapter 7.2.1 "Selecting automatic mode", page 21) or if you have entered a separate DHW program. 8.16 Entering a DHW program In the factory setting, the ON and OFF times for DHW heating are linked to the chosen heating program.
8 Extended functions Release the "Heating circuit" button. HEAT CIRC DHW Then the standard display is shown again. ACTUAL ROOM TEMP 21.5° Hold down the "Prog" button and select the "NEW PROG" heating program with the dial. + Release the "Prog" button. SWITCH POINT ------- You can now enter the first switching point. Proceed in the same way as for entering a heating program (see Chapter 8.12 "Creating a new heating program", page 45).
Extended functions 8 8.17 Setting the operating mode for DHW circulation The DHW circulation pump provides an almost instantaneous supply of DHW to the taps. To this end, the DHW is circulated by a separate DHW circulation pipe twice an hour for three minutes. Your installer can adjust this interval at the service level. You can modify the operating mode of the DHW circulation as follows: + Hold down the "Heating circuit" button and select "CIRCULATION" with the dial.
8 Extended functions Choose the operating mode you require for DHW circulation by pressing a button: Button DHW circulation operating mode "AUT" "DHW CIRC AUTO DAY" (automatic mode) 30 minutes before the first heating circuit is switched on, the DHW circulation pump starts to run at the set interval and stops when the last heating circuit is switched off (factory setting). The "DAY" or "NIGHT" display indicates the current operating status, i.e. the DHW circulation pump is switched on or off.
Extended functions 8 8.19 Changing the standard display You can change the standard display on the RC30 as follows: + Hold down the "Display" button and select the required standard display with the dial.
9 9 Special functions (additional menu) Special functions (additional menu) You can use the special functions to operate your heating system economically in special circumstances, e.g. during a winter holiday. The special functions are grouped together in the additional menu on the RC30.
Special functions (additional menu) 9.1 9 Opening and using the additional menu Opening the additional menu + ADD MENU HOLIDAY Press the "Time" and "Weekday" buttons simultaneously and release them again. You are now in the additional menu and can access the special functions. Using the additional menu The special functions are selected using the dial and the "Display" button. Turn the dial to move between the menu options. Press and release the "Display" button to select a menu option.
9 Special functions (additional menu) Returning to the menu selection Press "Back". You are back in the additional menu and can choose the next setting. Returning to the standard display Press the "Back" button repeatedly or close the flap to return to the standard display. 9.2 Setting the holiday function You want to interrupt the current heating program because you are going on holiday for a few days and want less heating while you are away.
Special functions (additional menu) 9 z Open the additional menu (see "Opening and using the additional menu" page 57). Using the dial select "ADD MENU HOLIDAY". Press and release the "Display" button. You are now in the "HOLIDAY" menu. + HOLIDAY RC30 HEATCIR Hold down the "Display" button and select the required heating circuit with the dial. Release the "Display" button.
9 Special functions (additional menu) Release the "Display" button. The end date is stored. HOLIDAY END DATE 03.01.03 USER NOTE Make sure that the end date is after the start date. If the start and end dates are the same, the specified holiday period is deleted. You can cancel the holiday function at any time by setting the start date and the end date to the same date.
Special functions (additional menu) 9 Interrupting and continuing the holiday function If you are staying in your home during the holiday function period and want to run the heating, you can interrupt the holiday function. To run the heating (in day mode): Press "Day mode". To continue the holiday function: Press "AUT". We reserve the right to make any changes due to technical modifications.
9 9.3 Special functions (additional menu) Setting the bank holiday function You can choose to interrupt the current heating program if your daily routine changes for a short time. If there is a bank holiday coming, for example, or you want to spend a day off at home, you can adopt the heating times from your Saturday heating program for these days. The heating settings for this period are then the same as for a Saturday.
Special functions (additional menu) 9 Press the "Display" button. You can now enter the start date for the bank holiday. + BNK HOLIDAY START DATE 29.03.02 + BNK HOLIDAY END DATE Hold down the "Display" button and select the required start date with the dial. Release the "Display" button. The start date is stored. Now enter the date of the first normal day after the holiday: Hold down the "Display" button and select the required end date with the dial. Release the "Display" button.
9 Special functions (additional menu) Interrupting and continuing the bank holiday function If you leave home for an extended period during the current bank holiday function period and want to heat in setback mode only, you can interrupt the bank holiday function. To heat with a reduced temperature (in night mode): Press the "Night mode" button. To continue the bank holiday function: Press "AUT". 9.
Special functions (additional menu) 9 CALIBRATION ACT ROOM TEM You can enter a value in the range from –5.0 to +5.0 (factory setting 0.0). The "K" in the display stands for the unit Kelvin; 1 K corresponds to 1 °C. +0.5 K Example: If the temperature displayed by the thermometer is 0.5 °C higher than that displayed by the RC30, enter "+0.5 K" as the calibration value. Release the "Display" button. The set calibration value is stored. Press the "Back" button or close the flap.
9 9.5 Special functions (additional menu) Setting the Party function With the Party function you can set the time at which the heating normally switches to night mode to a later time. This extends heating in day mode so that you can enjoy the company of your guests later into the evening. z Open the additional menu (see Chapter 9.1 "Opening and using the additional menu", page 57). Using the dial select "ADD MENU PARTY". Press and release the "Display" button. You are now in the "PARTY" menu.
Special functions (additional menu) 9 USER NOTE Once the specified number of hours has elapsed, the Party function is deactivated. If you want to use the Party function again the next evening, enter the number of hours again. Cancelling the Party function early Set the number of hours in the Party function to "0" in order to end it before the specified number of hours has elapsed. 9.
9 Special functions (additional menu) You can now enter the period of time for which you want the heating to switch to setback mode. Hold down the "Display" button and select the required number of hours with the dial. Example: "4 h". + PAUSE NO OF HOURS Your heating system will interrupt the normal heating mode for 4 hours. You can enter a value from 0 to 99 (factory setting = 0). Release the "Display" button. 4h The number of hours is stored. Press the "Back" button or close the flap.
Special functions (additional menu) 9.7 9 Thermal disinfection If you activate the "Thermal disinfection" [pasteurisation] function, the DHW is heated once a week or once a day to a temperature which is high enough to destroy pathogenic agents (e.g. legionella). RISK OF SCALDING WARNING! from hot water at the taps. During the thermal disinfection process the DHW can be heated to a temperature above 60 °C. z Only draw off mixed hot and cold water during or just after thermal disinfection.
9 Special functions (additional menu) + Input range Factory setting Disinfection day Mo, Tu, We, Th, Fr, Sa, Su, Mo–Su Tu Disinfection time 00:00 – 23:00 1:00 Hold down "Display" and turn the dial until the required value appears. Release "Display" to store the value. USER NOTE If possible, choose a time for thermal disinfection at which nobody will be drawing off DHW (e.g. during the night). 9.
Special functions (additional menu) 9.9 9 Switching on the button lock You can switch on a button lock (child lock). The button lock prevents your heating system settings from being changed accidentally. z Open the additional menu (see Chapter 9.1 "Opening and using the additional menu", page 57). Using the dial select "ADD MENU KEY LOCK". Press the "Display" button. You are now in the "KEY LOCK" menu. Hold down the "Display" button and select the setting "On" with the dial.
9 Special functions (additional menu) 9.10 Setting summer/winter changeover If your heating system is in automatic mode (LED next to the "AUT" button illuminated), the RC30 performs the summer/winter changeover automatically. In summer mode the heating is switched off and only DHW is heated. In winter mode the heating and DHW are activitated.
Special functions (additional menu) 9 USER NOTE For summer/winter changeover, your installer must have set up outside temperature dependent control (see "Outside temperature dependent control", page 6). Summer/winter changeover does not apply to room temperature control. Summer mode A changeover threshold for summer/winter changeover is entered in the RC30 (factory setting 17 °C).
9 Special functions (additional menu) Setting the changeover threshold z Open the additional menu (see Chapter 9.1 "Opening and using the additional menu", page 57). Using the dial select "ADD MENU SU/WI CHANGE". Press the "Display" button. You are now in the "SU/WI CHANGE" menu. Hold down the "Display" button and select the required heating circuit with the dial. + Release the "Display" button. You can now enter the changeover threshold.
Special functions (additional menu) 9 9.11 Automatic summer and winter time adjustment The RC30 switches automatically between summer and winter time. The date is determined by the European agreement: – Changeover to winter time: On the last Sunday in October the time changes from 03:00 to 02:00 (–1 h). – Changeover to summer time: On the last Sunday in March the time changes from 02:00 to 03:00 (+1 h). z Open the additional menu (see Chapter 9.1 "Opening and using the additional menu", page 57).
9 Special functions (additional menu) USER NOTE Should the statutory dates change, set summer/winter time changeover to "NO". Then change the time manually (see Chapter 8.5 "Setting the time", page 34). 9.12 Setting the preheat phase for a gas-operated heat pump (not in the UK) If a gas-operated heat pump (Loganova GWP) is installed in your heating system, we recommend that you set a preheat phase. This setting has no effect on other devices.
Special functions (additional menu) + HEAT PUMP PREHEAT PHS 02:00 9 Hold down the "Display" button and select the required length of the preheat phase with the dial. You can set a value in hours and minutes (up to max. 16:30 h:min). In the factory setting preheating is switched off. The maximum efficiency is obtained when the heat pump runs constantly. To achieve this, set the length of the preheat phase so that it is longer than the night mode period in the chosen heating program.
10 Troubleshooting 10 Troubleshooting This chapter details frequently asked questions about your heating system and their respective answers. This will, in many cases, enable you to troubleshoot perceived faults. At the end of the chapter, faults and their remedies are listed in a table. 10.1 Frequently asked questions Why do I set a room temperature, even though it is not measured? When you set the room temperature, even though the room temperature is not measured, you change the heating curve.
Troubleshooting Why do the radiators get (too) hot when the outside temperature is relatively high? 10 If you have a heating system with a heating circuit and no mixer valve, this is normal (see "What are heating circuits?", page 9). The circulation pump only starts up when the boiler reaches a predefined flow temperature. If the flow temperature is higher than the temperature required on the basis of the outside temperature, the radiators may get hotter for a short time.
10 Troubleshooting The actual room temperature is higher than the set room temperature. Why is the boiler still running? The boiler may heat up in order to heat DHW. Your heating system can be set to three possible control modes (see "How does the RC30 work?", page 5): – Room temperature control: The boiler switches off when the set room temperature is reached. – Outside temperature dependent control: The heating system runs according to the outside temperature.
Troubleshooting 10 10.2 Fault table Please notify your installer if a fault occurs that is not listed in the table, or if you cannot rectify the fault yourself. Code Display Cause Remedy No display Your heating system has been switched OFF. Switch ON the heating system. The power supply from the heating system has been cut off. Check whether the RC30 sits correctly in its wall mounting base. Check whether two leads are connected to the RC30 wall mounting base.
10 Troubleshooting Code Maintenance messages are identified by one three-digit code, faults by two three-digit codes. These give the installer information about the cause. The first three-digit code is displayed directly. Press the "Display" button to display the second code. Resetting faults (Reset) Some faults can be rectified by resetting the system. z Press the "Reset" button on the control panel to reset faults. The display shows "rE" whilst the reset is implemented.
Index 11 11 Index Symbols Display "OFF" display . . . . . . . . . . . . . . 25 "SET DHW TEMP - BLOCK" display . . 27 "WEEKDAY + TIME KEY" display . . . 71 E Emergency stop switch – heating system . . . . . . . . . . . . . 13 Extended functions . . . . . . . . . . . 30 A Additional menu . . . . . . . . . . . . . Adjusted outside temperature . . . . . Automatic mode . . . . . . . . . . . . DHW . . . . . . . . . . . . . . . . . . . . . . . . . DHW circulation . . . . . . . . . . . . . . . .
11 Index K Key lock . . . . . . . . . . . . . . . . . 71 L Language selection . . . . . . . . . . . 19 LED . . . . . . . . . . . . . . . . . . . 16 Low loss header module WM10 . . . 4, 10 M Manual mode . . . . . . . . . . . . . . 23 Mixer module MM10 . . . . . . . . . 4, 10 N Night mode . . . . . . . . . . . . .16, 21 O Operating level basic functions . . . . . . . . . . . . . . . . . 20 extended functions . . . . . . . . . . . . . . 30 special functions . . . . . . . . . . . . . . . .
Notes We reserve the right to make any changes due to technical modifications.
Notes We reserve the right to make any changes due to technical modifications.
Notes We reserve the right to make any changes due to technical modifications.
Your installer: Buderus Cotswold Way, Warndon, Worcester WR4 9SW Tel.: 01905 752794, Fax: 01905 753130 www.buderus-commercial.co.uk In the UK, Buderus is a trading name of BBT Thermotechnology Ltd. BBT Thermotechnik GmbH D-35573 Wetzlar www.heiztechnik.buderus.de info@heiztechnik.buderus.