
User's Manual
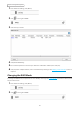
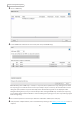
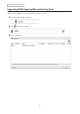
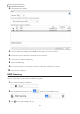
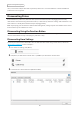
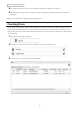
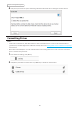
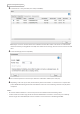
Table Of Contents
- User Manual
- Chapter 1 Getting Started
- Chapter 2 Configuration
- Chapter 3 File Sharing
- Chapter 4 Storage Management
- Chapter 5 Remote Access
- Chapter 6 Backup
- Chapter 7 Multimedia
- Chapter 8 Advanced Features
- Chapter 9 Configuring from Mobile Devices
- Chapter 10 Utilities
- Chapter 11 Appendix
- Chapter 12 Regulatory Compliance Information

49
Chapter 4 Storage Management
3 Select the drive or array to format, then click [Format Disk].
Note: If you connect an external drive to the LinkStation and the drive status is still shown as “Unformatted”,
refresh the status by clicking [Rediscover Disk]. If the status doesn’t change, disconnect and reconnect the USB
drive.
4 Select a format type, then click [Format].
5 The “Confirm Operation” screen will open. Enter the confirmation number, then click [OK].
6 Depending on the size of your drive, the format may take several minutes or several hours to complete. The
power LED will flash during the format. Shared folders cannot be accessed during a format. Click [OK] when
completed.
Notes:
• Do not turn off the LinkStation or disconnect power to the LinkStation while formatting a drive.
• For drives that are 2.2 TB or larger, make sure that the “GPT Partition” checkbox is selected. If you accidentally
format a larger drive without GPT, disconnect and then reconnect it before reformatting with GPT.