
Manual

SECTION 3 - LUBRICATION AND MAINTENANCE
3-56
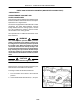
EVERY 2400 HOURS OR 24 MONTHS (WHICHEVER OCCURS FIRST)
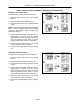
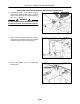
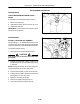
4. Remove the injector retaining bolts and washers,
1, and hold-down clamp, 2.
5. Turn the injector, 3, clockwise to loosen it, then
remove from the head.
6. Remove the copper sealing washer, 4, from the
injector. If the washer is not on the injector it has
remained in the head and must be extracted.
Discard the copper washers.
7. Remove the cork dust seal, 5, from the injector.
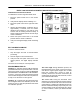
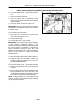
8. Install a new cork dust seal on the replacement
injector.
9. Install a new copper washer on the end of the
injector.
10. Install the injector.
11. Install the hold-down clamp.
12. Install the retaining bolts and washers. Torque
the bolts evenly to 22 N·m (17 ft.-lbs.).
13. Install the leak off line using new copper
washers, 6, on either side of the banjo fitting.
14. Torque the leak off line retaining bolt, 7, to 4.5
N·m (40 in.-lbs.).
15. Install the high pressure line and tighten the
connector to 24 N·m (18 ft.-lbs.).
16. Repeat the process on the remaining injectors.
17. Bleed the fuel system as detailed in “Operation
66” in this section.
18. Start the engine and visually inspect for leaks.
The injectors which were removed should be
serviced by an authorized dealer and retained for use
at the next service interval.
NOTE: Unauthorized modification or adjustment of
fuel injection equipment outside specification will
invalidate the warranty.
NOTE: Be sure to install the clamp with the raised
side facing up.
97