
Product Manual


Installation
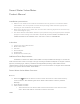
Installing the Smart Water Valve+Meter
1. Shut off the water supply line and drain the system.
2. Install the brass valve+meter in the desired water supply line using the appropriate
fittings. See “Location” section for information on selecting a suitable installation
location.
3. After installing the brass valve+meter, turn the water supply on and ensure there are no
leaks originating from the brass or connections to the brass.
4. Connect the actuator to the brass valve+meter. Line up the posts on the actuator with
the holes on the brass valve+meter and press until it snaps into place.
5. Connect the cable harness to the brass valve+meter
a. Connect the black VALVE cable to the actuator. Tighten the screw connector to
ensure a secure connection.
b. Connect the green GROUND cable to the ground cable connection on the brass
valve+meter.
c. Connect the black HIGH cable to the high flow sensor. Ensure that the tabs on the
connector are fully engaged on the high flow sensor.
d. Connect the red LOW cable to the low flow sensor. Tighten the screw connector to
ensure a secure connection.
NOTE: The blue PULSE cable is reserved for future use with pulse meters. You may safely leave
this cable disconnected.[Show connections and cable harness]
6. Use the included wall bracket and anchors (if applicable) to mount the control unit above
the brass valve+meter so the LEDs and buttons are visible and easily accessible.
7. Connect the power supply to the locking connector on the control unit. Rotate the
connector clockwise to lock the power supply in place.
1
1
1
c
b
a
d