
User guide


55
Operating and functions
8.7.2. Calibrating the flow zero point
Adjust this parameter:
• before carrying out a teach-in procedure of the K factor.
• after maintenance work.
• if the measured flow rate is not zero whereas the fluid circulation has been stopped.
Make sure there are no bubbles in the pipe.
Before calibrating the flow zero point:
• at first commissioning the device, immerse the sensor in fluid for 24 hours before calibration.
• after maintenance work, immerse the sensor in the fluid for 1 hour before calibration.
During the calibration:
• the device status LED flashes.
• the outputs are frozen to the last measured flow rate value.
• the device cannot be configured.
The flow zero point calibration can be:
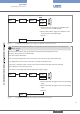
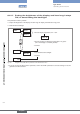
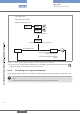
• either remotely triggered via the digital input. See chap. “8.6.12” and Fig. 56.
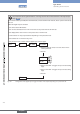
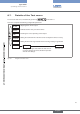
• either carried out using this parameter in the Test menu; See Fig. 57.
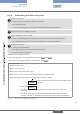
0.000 L/s
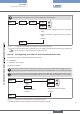
→ Charge the pipe.
→ Stop the fluid circulation.
→ Make sure the fluid is still.
→ Make sure the device status LED is green.
→ Make sure the device is in the Process level and not in the Configuration level.
→ Activate the digital input configured to trigger the flow zeo point calibration.
mEAsURE /
The device calibrates the flow zero point during approximately
30 seconds.
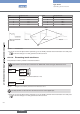
• if the device status LED remains green, the calibration of the flow zero point has
succeeded.
• if the device status LED is orange, the calibration of the flow zero point failed: the
message "CAL. FAIL" is displayed in the warning message list. Restart the calibration.
Process level
Fig. 56: Flow zero point calibration via digital input
English
Type 8045