78-8970 70mm refractor With RealVoice™ outpuT Instruction Manual manuel d’instructions 78-8930 76mm RefLEctor Manual De Instrucciones Bedienungsanleitung Manuale di istruzioni Manual de instruções 78-8945 114mm Reflector Lit.
PAGE GUIDE English ............... Catalog Index........... Français.............. Español ............... Deutsch............... Italiano............... Português...........
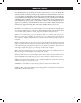
ENGLISH Congratulations on the purchase of your Bushnell Discoverer Telescope with Real Voice Output! This is one of the first telescopes ever created that actually speaks to you to educate you about the night sky. Consider this feature as your personal astronomy assistant.
Where DO I START? Your Bushnell telescope can bring the wonders of the universe to your eye. While this manual is intended to assist you in the set-up and basic use of this instrument, it does not cover everything you might like to know about astronomy. Although Discoverer will give a respectable tour of the night sky, it is recommended you get a very simple star chart and a flashlight with a red bulb or red cellophane over the end.
Parts Diagrams 1. 2. 1. 7. 7. 3. 6. 2. 6. 3. 5. 5. 4. 4. 8. 8. 78-8970 78-8930 / 78-8945 Telescope Parts Diagram 1. Red Dot Finderscope 2. 1.25" Format Eyepiece 3. Rack and Pinion Focusing Mechanism 4. Accessory Tray Brace 5. Quick-Release Accessory Tray 6. Remote Computer Controller 7. Main Telescope Tube 8.
Quick Assembly Diagram 78-8970 / 78-8930 / 78-8945 Push attachment bolts on telescope tube through holes in tube bracket (remove thumb nuts first), then attach and tighten thumb nuts to hold tube securely in place. 78-8970 / 78-8930 / 78-8945 Push quick-release accessory tray lightly onto hub at center of accessory tray brace.
Detailed Assembly No tools are required for assembly of your telescope. Remove all components from the carton and identify all components. It is a good idea to lay all the parts out in front of you before assembly. Since your telescope is a precision optical system the parts require careful handling—particularly the onboard computer, telescope, eyepieces, and various accessory lenses. Set Up Tripod and Accessory Tray 1.
Detailed Assembly (continued) M FOCUSING TELESCOPE 1. After selecting the desired eyepiece, aim main telescope tube at a land-based target at least 200 yards away (e.g. a telephone pole or building). 2. Fully extend Focusing Tube by turning Rack and Pinion Focusing Mechanism. 3. While looking through selected eyepiece (in this case the 20 mm), slowly retract Focusing Tube by turning Rack and Pinion Focusing Mechanism until object comes into focus.
M ENJOYING YOUR NEW TELESCOPE 1. First determine your targeted object. Any bright object in the night sky is a good starting point One of the favorite starting points in astronomy is the moon. This is an object sure to please any budding astronomer or experienced veteran. When you have developed proficiency at this level, other objects become good targets. Saturn, Mars, Jupiter, and Venus are good second steps to take. 2.
M HELPFUL HINTS 1. our telescope is a very sensitive instrument. For best results and fewer vibrations set your Y telescope up on a level location on the ground rather than your concrete driveway or your wooden deck. This will provide a more stable foundation for viewing, especially if you’ve drawn a crowd with your new telescope. 2. I f possible view from a location that has relatively few lights. This will allow you to see much fainter objects.
Discoverer Computer Interface Diagram 1. 1. On/Off Button 2. Back Button 3. Enter Button 4. Scroll Up Button 5. Scroll Down Button 6. LCD Display 7. Speaker (Real Voice Output) 8. Battery Door (not shown-located on base under controller) 6. 4. 3. 2. 5. 7. 8. Button Functions ALL BUTTONS ARE ILLUMINATED FOR NIGHTTIME USE. On/Off Button: The On/Off Button will turn the Discoverer Computerized Star Locator on and off.
M MODE OVERVIEW OF PRODUCT Explore: The Explore Mode of Discoverer provides the ability to explore various astronomical objects categorized by object type. These objects would fall under one or more of the following types of objects: Deep Sky, Planets, Constellations, and Stars. Each of these subheadings would also have subcategories of objects beneath their menu structure.
M ALIGNING DISCOVERER FOR THE FIRST TIME (NOTE: Make certain that the telescope is set up on a level surface.) Step 1: Before turning the telescope on, remove the remote control handset. When you turn the telescope on, a spoken and scrolling message will occur: BUSHNELL DISCOVERER Vx.x Then the default menu will appear: SELECT MODE ALIGN STAR 56 The ALIGN STAR option is flashing. Press ENTER to choose ALIGN STAR option. NOTE: ANY FLASHING ITEM ON THE DISPLAY IS A MENU CHOICE.
M USING DISCOVERER FOR THE FIRST TIME (Continued) NOTE: IF AN OBJECT IS BELOW THE HORIZON, THE DISPLAY WILL PERIODICALLY DISPLAY THE WORD “HORIZON.” SCROLL UP or SCROLL DOWN to see other PLANETS in the list. Notice the display shows you directions to each object. But what if you are a first time user wanting to find out more about the object? Wouldn’t it be nice to know what the object is before moving the telescope? PRESS ENTER when: PLANET 3120 552 JUPITER any other PLANET item is displayed.
M USING DISCOVERER FOR THE FIRST TIME (Continued) To select the final mode press ENTER at the display: SELECT MODE TELESCOPE 56 The display reads something like: RA18:53 DEC+38.7 AZ280 ALT+62 LYR The TELESCOPE mode gives you dynamic real-time information on your telescope’s current position in terms of astronomical coordinates. Play around with this mode by moving the telescope around. Notice the three letter abbreviation in the lower right portion of the display.
SUMMER FALL 17
Catalog Index Catalog Index The following appendix information is more thorough information than that listed in the main instruction manual. However, we have included the entire star list and the entire Messier object lists for your information. In addition, the constellation abbreviations are defined that are found in the Discoverer system.
Catalog Index Catalog Index NAME - NAME RA - RIGHT ASCENSION (hours min.
M057 Ring M058 M059 M060 M061 M062 M063 Sunflower M064 Black eye M065 Leo triplet M066 Leo triplet M067 M068 M069 M070 M071 M072 M073 M074 M075 M076 little dumbell M077 M078 M079 M080 M081 Bodes nebula M082 M083 M084 M085 M086 M087 M088 M089 M090 M091 M092 M093 M094 M095 M096 M097 Owl M098 M099 M100 M101 M102 M103 M104 sombrero M105 M106 M107 M108 M109 M110 NGC 6720 NGC 4579 NGC 4621 NGC 4649 NGC 4303 NGC 6266 NGC 505
∑13 Struve 13 ST ST CAS Groombridge34 Groombridge 34 ∑24 Iota Iota CET VX VX AND R ∑30 AQ AQ AND Beta Beta TUC ∑36 Struve 36 Zeta Zeta CAS Delta Delta AND 55 Schedar Alpha CAS O∑18 ADS 588 HN HN 122 Delta Delta PSC Eta 65 65 PSC Do13 Dolidze 13 Lambda1 Lambda1 TUC 36 36 AND Navi Gamma CAS ∑80 ∑79 U Psi-1 ∑88, 74 Psc 77 ∑90 Zeta Zeta PHE Eta Eta CET Lux Lydiae Lux Lydiae Mirach Beta AND Zeta Zeta PSC Kappa Kappa TUC Z Z PSC 42 ∑113 Psi Psi CAS R R SCL Gamma Gamma PHE Achernar Alpha Eri 51 51
ST090 ST091 ST092 ST093 ST094 ST095 ST096 ST097 ST098 ST099 ST100 ST101 ST102 ST103 ST104 ST105 ST106 ST107 ST108 ST109 ST110 ST111 ST112 ST113 ST114 ST115 ST116 ST117 ST118 ST119 ST120 ST121 ST122 ST123 ST124 ST125 ST126 ST127 ST128 ST129 ST130 ST131 ST132 ST133 ST134 ST135 ST136 ST137 ST138 ST139 ST140 ST141 ST142 ST143 ST144 ST145 ST146 ST147 ST148 ST149 ST150 ST151 ST152 ST153 ST154 ST155 ST156 ST157 ST158 ST159 ST160 ST161 ST162 ST163 ST164 22 R R TRI Gamma Gamma CET ∑305 RZ pi Eta ∑307 R R HOR
Iota Iota AUR Pi6 Pi6 ORI Omega Omega AUR Hinds Crimson Star R LEP ∑627 ∑631 Struve 631 ∑630 Struve 630 Epsilon Zeta Zeta AUR W W ORI Epsilon Epsilon LEP Eta Eta AUR 14 O∑98 TX TX AUR SY SY ERI ∑644 Iota Iota LEP Rho Rigel Beta ORI ∑653 Struve 653 Capella Alpha Aur S 476 h3750 UV UV AUR ADS3954 ADS 3954 ∑696 Struve 696 ∑701 Struve 701 Eta Sigma Sigma AUR Theta Theta PIC Bellatrix Gamma ORI ∑698 Struve 698 118 ∑716 31 31 ORI TL9 TL 9 Delta Delta ORI 119 119 TAU ∑718 RT RT ORI ∑747 Struve 747
ST240 ST241 ST242 ST243 ST244 ST245 ST246 ST247 ST248 ST249 ST250 ST251 ST252 ST253 ST254 ST255 ST256 ST257 ST258 ST259 ST260 ST261 ST262 ST263 ST264 ST265 ST266 ST267 ST268 ST269 ST270 ST271 ST272 ST273 ST274 ST275 ST276 ST277 ST278 ST279 ST280 ST281 ST282 ST283 ST284 ST285 ST286 ST287 ST288 ST289 ST290 ST291 ST292 ST293 ST294 ST295 ST296 ST297 ST298 ST299 ST300 ST301 ST302 ST303 ST304 ST305 ST306 ST307 ST308 ST309 ST310 ST311 ST312 ST313 ST314 24 Mu Mu GEM 8 Canopus Alpha Car BL BL ORI 15 Beta ADS
RT RT PUP RU RU PUP Epsilon Epsilon VOL Gamma Gamma VEL Zeta c c CAR Beta Beta CNC R R CNC Kappa Kappa VOL AC AC PUP 31 31 LYN Beta Beta VOL h4903 h4903 24 ∑1224 Phi ∑1223 h4104 h4104 ∆70 h4107 ∑1245 Sigma Sigma HYA h4128 h4128 ∑1254 Alpha Alpha PYX Delta Delta VEL ∑1270 ADS 6977 Iota ∑1268 Epsilon ∑1282 X X CNC 66 ∑1298 Rho Rho UMA ∑1311 Suhail Lambda Vel Sigma2 a a CAR h4188 h4188 h4191 ∑1321 g g CAR RT RT UMA 38 ∑1334 ∑1338 Alpha Alpha LYN Kappa Kappa VEL ∑1347 Kappa Kappa LEO ∑
ST390 ST391 ST392 ST393 ST394 ST395 ST396 ST397 ST398 ST399 ST400 ST401 ST402 ST403 ST404 ST405 ST406 ST407 ST408 ST409 ST410 ST411 ST412 ST413 ST414 ST415 ST416 ST417 ST418 ST419 ST420 ST421 ST422 ST423 ST424 ST425 ST426 ST427 ST428 ST429 ST430 ST431 ST432 ST433 ST434 ST435 ST436 ST437 ST438 ST439 ST440 ST441 ST442 ST443 ST444 ST445 ST446 ST447 ST448 ST449 ST450 ST451 ST452 ST453 ST454 ST455 ST456 ST457 ST458 ST459 ST460 ST461 ST462 ST463 ST464 26 Delta HN 50 p p CAR Rho Rho LEO 49 U U ANT Gamma Gamma
Theta Theta MUS Theta 51 Vir, ∑1724 Alpha 54 J J CEN Zeta Mizar Spica Alpha VIR O∑∑123 R ∑1755 Struve 1755 S S VIR 25 25 CVN ∑1763 Struve 1763 Epsilon Epsilon CEN 1 ∑1772 Dunlop141 Dunlop 141 T T CEN Alkaid Eta UMA ∑1785 Struve 1785 2 2 CEN Upsilon Upsilon BOO 3 3 CEN Zeta Zeta CEN Beta Beta CEN Pi Pi HYA Kappa Kappa VIR Kappa ∑1819 Arcturus Alpha Boo Iota Iota BOO R R CEN ∑1834 Struve 1834 ∑1833 Dunlop159 Dunlop 159 ∑1835 SHJ 179 5 5 UMI Proxima Proxima CEN Rho Rho BOO h4690 Alpha Rigil
ST540 ST541 ST542 ST543 ST544 ST545 ST546 ST547 ST548 ST549 ST550 ST551 ST552 ST553 ST554 ST555 ST556 ST557 ST558 ST559 ST560 ST561 ST562 ST563 ST564 ST565 ST566 ST567 ST568 ST569 ST570 ST571 ST572 ST573 ST574 ST575 ST576 ST577 ST578 ST579 ST580 ST581 ST582 ST583 ST584 ST585 ST586 ST587 ST588 ST589 ST590 ST591 ST592 ST593 ST594 ST595 ST596 ST597 ST598 ST599 ST600 ST601 ST602 ST603 ST604 ST605 ST606 ST607 ST608 ST609 ST610 ST611 ST612 ST613 ST614 28 Edasich Iota DRA Pi ∑1972 Lal123 Delta Delta SER Gamma
Psi ∑2241 17 41.9 Kappa Kappa SCO 17 42.5 V V PAV 17 43.3 Beta Beta OPH 17 43.5 61 ∑2202 17 44.6 SZ SZ SGR 17 45.0 SX SX SCO 17 47.5 G G SCO 17 49.9 Y Y OPH 17 52.6 Xi Xi DRA 17 53.5 Gamma Gamma DRA 17 56.6 Barnards Star 17 57.8 h5003 17 59.1 ∑2038 Struve 2038 18 00.0 95 18 01.5 Tau Tau OPH 18 03.1 70 ∑2276 18 05.5 Theta Theta ARA 18 06.6 100 ∑2280 18 07.8 W W LYR 18 14.9 Eta Eta SGR 18 17.6 Kappa Kappa LYR 18 19.9 Delta Delta SGR 18 21.0 ∑2306 18 22.2 Xi Xi PAV 18 23.2 39 ∑2323 18 24.
ST690 ST691 ST692 ST693 ST694 ST695 ST696 ST697 ST698 ST699 ST700 ST701 ST702 ST703 ST704 ST705 ST706 ST707 ST708 ST709 ST710 ST711 ST712 ST713 ST714 ST715 ST716 ST717 ST718 ST719 ST720 ST721 ST722 ST723 ST724 ST725 ST726 ST727 ST728 ST729 ST730 ST731 ST732 ST733 ST734 ST735 ST736 ST737 ST738 ST739 ST740 ST741 ST742 ST743 ST744 ST745 ST746 ST747 ST748 ST749 ST750 ST751 ST752 ST753 ST754 ST755 ST756 ST757 ST758 ST759 ST760 ST761 ST762 ST763 ST764 30 RR ∑2525 Struve 2525 h5114 h5114 Alpha Alpha VUL Albire
21 14.5 21 19.9 21 20.3 21 24.3 21 28.7 21 35.2 21 39.0 21 42.0 21 42.7 21 43.3 21 43.5 21 44.2 21 50.9 21 51.0 21 52.0 21 54.3 21 56.4 21 58.4 22 00.8 22 02.5 +10 00 -53.5 -10.8 -69.7 +70 33 +78 37 +57 29 +35.5 +43 35 +38.0 +58 47 +09 52 -82.7 +12.6 +55 47 +19.7 +22.9 +82 51 -28 27 -16 58 4.6 4.5 8 8.6 3.3 7.4 5.6 5.6 8.2 7.1 3.4 2.5 5.4 6 5.5 6.4 8 7.1 5.8 7.2 48" 6" * * 13" Stellar 12" * Stellar * Stellar 83" 3" * 18" 22" * 14" 1.
NOTES
WARRANTY / REPAIR WARRANTY / REPAIR Telescope LIFETIME LIMITED WARRANTY Your Bushnell® telescope is warranted to be free of defects in materials and workmanship for the lifetime of the original owner. The Lifetime Limited Warranty is an expression of our confidence in the materials and mechanical workmanship of our products and is your assurance of a lifetime of dependable service.
FRaNçais Merci d’avoir acheté le télescope Discoverer avec sortie Real Voice de Bushnell ! Ceci est l'un des premiers télescopes jamais créés capable de vous parler pour vous enseigner le ciel nocturne. Cette fonction peut être considérée comme votre assistant personnel en astronomie.
PAR QUOI COMMENCER? Votre télescope de Bushnell peut révéler à vos yeux les merveilles de l’univers. Bien que ce manuel soit conçu pour vous aider à installer et à utiliser cet instrument simplement, il ne couvre pas tout ce que vous aimeriez savoir sur l’astronomie. Même si Discoverer donne une bonne vue d’ensemble du ciel nocturne, il est recommandé de se procurer une carte très simple des étoiles et une lampe de poche avec une ampoule rouge ou recouverte de cellophane rouge à l’extrémité.
SCHÉMA DES PIÈCES 1. 2. 1. 7. 7. 3. 6. 2. 6. 3. 5. 5. 4. 4. 8. 8. 78-8970 78-8930 / 78-8945 Schéma des pièces du télescope 1. Chercheur à point rouge 2. Oculaire format 31,75 mm (1,25 po) 3. Mécanisme de mise au point à crémaillère et pignon 4. Renfort de plateau d’accessoire 36 5. Plateau d’accessoire à ouverture rapide 6. Contrôleur d’ordinateur à distance 7. Tube principal du télescope 8.
GUIDE D’ASSEMBLAGE RAPIDE 78-8970 / 78-8930 / 78-8945 Enfoncez les boulons de fixation du tube de télescope à travers les trous du support de tube (enlevez d'abord les écrous à main), puis posez et serrez les écrous pour maintenir le tube solidement en place. 78-8970 / 78-8930 / 78-8945 Appuyez légèrement le plateau à accessoires à fixation rapide sur l'embase au centre du support de plateau.
Assemblage détaillé Aucun outil n’est nécessaire pour l’assemblage du télescope. Sortez toutes les pièces du carton et identifiez-les. Avant de faire l’assemblage, il est conseillé de poser toutes les pièces devant soi. Le télescope étant un système optique de précision, veuillez manipuler les pièces avec précaution : en particulier l’ordinateur intégré, le télescope, les oculaires et les diverses lentilles accessoires. MISE EN PLACE DU TRÉPIED ET DU PLATEAU D’ACCESSOIRE 1.
Assemblage détaillé (SUITE) M MISE AU POINT DU TÉLESCOPE 1. Après avoir mis en place l’oculaire choisi, dirigez le tube principal du télescope sur une cible terrestre située à une distance d’au moins 200 mètres (poteau téléphonique ou bâtiment, par exemple). 2. Tournez le mécanisme de mise au point à crémaillère et pignon pour allonger entièrement le tube de mise au point. 3.
M PROFITEZ DE VOTRE NOUVEAU TÉLESCOPE. 1. Déterminez d’abord l’objet à observer. N’importe quel objet brillant du ciel nocturne est un bon point de départ. L’un des points de départ préférés en astronomie est la Lune. C’est un objet intéressant pour l’astronome débutant aussi bien que pour les astronomes expérimentés. Lorsque vous vous êtes exercés à ce niveau, d’autres objets deviennent de bonnes cibles. Saturne, Mars, Jupiter et Vénus sont intéressantes en seconde étape. 2.
M CONSEILS UTILES 1. Le télescope est un instrument très sensible. Pour obtenir les meilleurs résultats et le moins de vibrations, installez le télescope sur un endroit plat, sur le sol plutôt que sur une surface en béton ou une plate-forme en bois. Cela fournira une base plus stable pour l’observation, surtout si votre nouveau télescope a attiré une foule. 2. Si possible, observez à partir d’un endroit comportant relativement peu de lumière.
ORDINATEUR DISCOVERER SCHÉMA D’INTERFACE 1. Bouton marche/arrêt 2. Bouton de retour arrière 3. Bouton d’entrée 4. Bouton de défilement vers le haut 5. Bouton de défilement vers le bas 6. Écran LCD 7. Haut parleur (Real Voice Output) 1. 6. 4. 3. 2. 8. Couvercle de piles (non représenté-situé sur le socle sous le boîtier de commande) 5. 7. 8. FONCTIONS À BOUTONS TOUS LES BOUTONS SONT LUMINEUX POUR L’UTILISATION NOCTURNE.
GÉNÉRALITÉS SUR LES MODES DE L’INSTRUMENT Exploration: Le mode Exploration de Discoverer permet d’explorer les divers objets astronomiques classés par type d’objet. Ces objets se trouvent dans un ou plusieurs des types d’objets suivants: ciel lointain, planètes, constellations et étoiles. Chacun de ces sous-titres comporte aussi des sous-catégories d’objets sous la structure du menu. (Reportezvous à l’arbre des menus pour obtenir la liste complète des fonctions et options de menus).
MM ALIGNEMENT DE DISCOVERER POUR LA PREMIÈRE FOIS (REMARQUE : Assurez-vous de placer le télescope sur une surface horizontale). ÉTAPE 1 : Avant d’activer le télescope, retirez la télécommande. Lorsque vous activez le télescope, un message vocal et un texte déroulant apparaissent: BUSHNELL DISCOVERER Vx.x Puis le menu par défaut apparaît: SELECT MODE ALIGN STAR 56 L’option ALIGNEMENT l'étoile (ALIGN STAR) clignote. Appuyez sur ENTRÉE (ENTER) pour choisir l’option d’ALIGNEMENT l'étoile.
M UTILISATION DE Discoverer POUR LA PREMIÈRE FOIS (SUITE) PLANET 3120 552 JUPITER REMARQUE: SI UN OBJET SE TROUVE SOUS L’HORIZON, L’AFFICHAGE FAIT APPARAÎTRE PÉRIODIQUEMENT LE MOT “HORIZON.” Utilisez les boutons de DÉFILEMENT VERS LE HAUT ou VERS LE BAS pour voir les autres PLANÈTES de la liste. Notez que l’affichage indique la direction de chaque objet.
M UTILISATION DE Discoverer POUR LA PREMIÈRE FOIS (SUITE) Ce mode passe par défaut au niveau IDENTIFY ANY Le choix de cette option à l’aide de la touche ENTRÉE permet d’IDENTIFIER l’objet en cours d’observation OU l’objet le plus proche de l’endroit où le télescope est dirigé. Il existe aussi des options pour choisir d’autres types de menus IDENTIFY (IDENTIFICATION). Ceux-ci permettent d’IDENTIFIER les AMAS D’ÉTOILES, NÉBULEUSES, etc. les plus proches de la position en cours du télescope.
éTé AUTOMNE 47
NOTES
GARANTIE/RÉPARATION GARANTIE/RÉPARATION GARANTIE À VIE LIMITÉE du télescope Votre télescope Bushnell® est garanti exempt de défauts de matériaux et de fabrication pendant la durée de vie de son premier propriétaire. La garantie à vie limitée traduit notre confiance dans les matériaux et l’exécution mécanique de nos produits et représente pour vous l’assurance de toute une vie de service fiable.
Español Felicidades por haber comprado un telescopio Bushnell Discoverer con Real Voice Output (Salida de voz real). Éste es uno de los primeros telescopios producidos que le habla para educarle sobre el cielo nocturno. Considere esta función como su asistente personal en astronomía.
¿POR DÓNDE EMPIEZO? Su telescopio Bushnell puede poner las maravillas del universo delante de sus ojos. Si bien este manual trata de asistirle en el montaje y el uso básico de este instrumento, no cubre todo lo que le gustaría saber sobre astronomía. Aunque Discoverer le proporcionará un viaje respetable por el cielo nocturno, le recomendamos que consiga una carta celeste básica y una linterna con bombilla roja o cubierta con papel de celofán rojo.
DIAGRAMA DE PIEZAS 1. 2. 1. 7. 7. 3. 6. 2. 6. 3. 5. 5. 4. 4. 8. 8. 78-8970 78-8930 / 78-8945 Diagrama de piezas del telescopio 1. Visor de localización de Red Dot (Punto Rojo) 2. Ocular de formato 1.25” 3. Mecanismo de enfoque de cremallera 4. Tirante de la bandeja para accesorios 52 5. Bandeja para accesorios de desconexión rápida 6. Controlador remoto del ordenador 7. Tubo del telescopio principal 8.
GUÍA DE MONTAJE RÁPIDO 78-8970 / 78-8930 / 78-8945 Empuje los pernos de sujeción del tubo del telescopio por los agujeros del soporte del tubo (quite primero las tuercas de mariposa), y después sujete y apriete las tuercas de mariposa para sujetar el tubo firmemente. 78-8970 / 78-8930 / 78-8945 Empuje ligeramente la bandeja de accesorios de desconexión rápida en el cubo, en el centro del tirante de la bandeja de accesorios.
Montaje detallado No se requieren herramientas para el montaje del telescopio. Saque todos los componentes de la caja e identifíquelos. Es una buena idea extender todas las piezas delante de usted antes de empezar el montaje. Como quiera que el telescopio es un sistema óptico de precisión, es necesario manejar las piezas con cuidado— particularmente el ordenador de a bordo, el telescopio, los oculares y las diferentes lentes accesorias. MONTE EL TRÍPODE Y LA BANDEJA PARA ACCESORIOS 1.
Montaje detallado (Continúacion) M CÓMO SE ENFOCA EL TELESCOPIO 1. Después de seleccionar el ocular deseado, apunte el tubo del telescopio principal a un blanco basado en tierra situado a una distancia mínima de 200 yardas (p. ej.: un poste de teléfono o un edificio). 2. Extienda completamente el tubo de enfoque girando el mecanismo de enfoque de cremallera. 3.
M CÓMO DISFRUTAR DE SU NUEVO TELESCOPIO 1. Primero determine el objeto que quiere ver. Cualquier objeto brillante del cielo nocturno es un buen punto de partida. Uno de los puntos de partida favoritos en astronomía es la Luna. Es un objeto celeste que con toda seguridad agradará tanto a cualquier astrónomo en ciernes como a los veteranos con mucha experiencia. Cuando llegue a dominar este nivel, hay otros objetos que pueden convertirse en buenos blancos.
M CONSEJOS ÚTILES 1. Su telescopio es un instrumento muy sensible. Para obtener mejores resultados y menos vibraciones coloque el telescopio sobre una superficie nivelada en lugar de ponerlo sobre un camino de hormigón de acceso a la casa o en una terraza de madera. De esta forma tendrá una superficie más estable para hacer sus observaciones, especialmente si ha atraído a una muchedumbre con su nuevo telescopio. 2.
DIAGRAMA DEL INTERFAZ DEL ORDENADOR DE DISCOVERER 1. Botón de On/Off - encendido/apagado 2. Botón “Back” (Regreso) 3. Botón “Enter” (Introducción) 4. otón Scroll Up B (Desplazamiento en pantalla hacia arriba) 5. Botón Scroll Down (Desplazamiento en pantalla hacia abajo) 6. Pantalla LCD 7. Altavoz (Real Voice Output) 8. Puerta de la pila (no se muestra, ubicada en la base debajo del controlador) 1. 6. 4. 3. 2. 5. 7. 8.
M MODALIDAD DE VISIÓN GENERAL DEL PRODUCTO Explorar: La modalidad Explore (Explorar) de Discoverer ofrece la capacidad de explorar varios objetos astronómicos categorizados por tipo de objeto. Estos objetos entran dentro de uno, o más, de los siguientes tipos de objetos: Espacio interplanetario, Planetas, Constelaciones y Estrellas. Cada unos de estos subencabezamientos tendrá también subcategorías de objetos dentro de su estructura de menú.
M CÓMO SE HACE EL ALINEAMIENTO DEL DISCOVERER POR PRIMERA VEZ (NOTA: Asegúrese de que el telescopio esté sobre una superficie horizontal). PASO 1: Antes de encender el telescopio, quite el aparato de control remoto. Cuando se enciende el telescopio, aparecerá un mensaje hablado y en texto: BUSHNELL DISCOVERER Vx.x Después de este mensaje, el telescopio ejecutará una comprobación de diagnóstico y nivelará el tubo del telescopio en relación con la montura del telescopio.
M USING DISCOVERER FOR THE FIRST TIME (Continued) NOTA: SI UN OBJETO SE ENCUENTRA POR DEBAJO DEL HORIZONTE, LA PANTALLA VISUALIZARÁ PERIÓDICAMENTE LA PALABRA “HORIZON” (HORIZONTE). Use los botones SCROLL UP o SCROLL DOWN para ver otros PLANETAS de la lista. Observe que la pantalla muestra la dirección hasta cada objeto.
M USING DISCOVERER FOR THE FIRST TIME (Continued) Para seleccionar la modalidad final, pulse ENTER cuando aparezca el pantalla: SELECT MODE TELESCOPE 56 La pantalla presentará algo parecido a: RA18:53 DEC+38.7 AZ280 ALT+62 LYR La modalidad de TELESCOPIO ofrece una información dinámica en tiempo real de la posición actual de su telescopio en términos de coordenadas astronómicas. Juegue con esta modalidad moviendo el telescopio a voluntad.
VERANO OTOñO 63
NOTAS
GARANTÍA / REPARACIÓN GARANTÍA / REPARACIÓN GARANTÍA LIMITADA PARA TODA LA VIDA del Telescopio Su telescopio Bushnell® está garantizado contra defectos de material y fabricación durante toda la vida del propietario original. La Garantía Limitada para Toda la Vida* es una expresión de la confianza que tenemos en nuestros materiales y en la fabricación mecánica de nuestros productos, que le garantiza un servicio fiable durante toda la vida.
Deutsch Herzlichen Glückwunsch zum Kauf Ihres Bushnell Discoverer Teleskops mit Sprachausgabe! Dies ist eines der ersten Teleskope überhaupt, bei dem Sie Wissenswertes über den Nachthimmel anhören können.Sie haben mit dieser Eigenschaft jederzeit Ihren persönlichen Astronomieassistenten zur Hand.
WO SOLL ICH ANFANGEN? Ihr Bushnell Teleskop zeigt Ihnen die Wunder des Universums. Dieses Handbuch wurde dazu geschaffen, Ihnen beim Einstellen und beim Grundgebrauch dieses Instrumentes zu helfen, es kann jedoch nicht alles schildern, was Sie über Astronomie wissen möchten.
TEILE DIAGRAMM 1. 2. 1. 7. 7. 3. 6. 2. 6. 3. 5. 5. 4. 4. 8. 8. 78-8970 78-8930 / 78-8945 Teleskop-Teile-Diagramm 1. Rotpunkt Suchfernrohr 68 6. Schnelleinstell-Ablageplatte 2. 1,25” Okular 3. Zahngetriebe Fokussier-Mechanismus 7. Computer Fernsteuerung 8. Teleskop Hauptrohr 4. Zusatzgeräte Ablageplattenstrebe 9.
SCHNELLZUSAMMENBAU 78-8970 / 78-8930 / 78-8945 Die Befestigungsschrauben am Teleskoprohr durch die Bohrungen in der Rohrhalterung drücken (zuerst die gerändelten Muttern abnehmen); anschließend die gerändelten Muttern anbringen und festziehen, um das Rohr zu befestigen. 78-8970 / 78-8930 / 78-8945 Die schnell lösbare Zubehörablage leicht auf die Nabe im Mittelpunkt der Ablagenhalterung drücken.
Zusammenbauanleitung Zum Zusammenbau Ihres Teleskops werden keinerlei Werkzeuge benötigt. Nehmen Sie alle Bestandteile aus dem Karton und identifizieren Sie sie. Es ist eine gute Idee, vor dem Zusammenbau alle Teile vor Ihnen auszulegen. Ihr Teleskop ist ein optisches Präzisionsgerät, d.h. Sie müssen seine Teile vorsichtig behandeln; insbesondere den integrierten Computer, das Teleskop, die Okulare und die verschiedenen Zusatzlinsen. MONTIERUNG VON STATIV- UND ABLAGEPLATTE 1.
Zusammenbauanleitung Fortsetzung M SCHARFEINSTELLUNG DES TELESKOPS 1. Nach dem Einbau des Okulars mit der größten Brennweite (also 20 mm), richten Sie das Hauptteleskop bei Tageslicht auf ein mindestens 200m entferntes Objekt auf der Erdoberfläche (z.B. auf einen Telefon- oder Stromnetzmasten oder auf ein Gebäude). 2. Fahren Sie nun den Zahnradgetriebe-Fokussiermechanismus komplett aus. 3.
M GENIESSEN SIE IHR NEUES TELELSKOP 1. Bestimmen Sie zuerst Ihr Zielobjekt. Jeder helle Gegenstand im Nachthimmel ist ein guter Ausgangspunkt. Aber einer der Lieblingsausgangspunkte der Astronomie ist der Mond. Er ist ein Objekt, das jedem angehenden Astronomen und jedem erfahrenen Veteran immer wieder Freude bereitet. Wenn Sie mit Ihrem Teleskop etwas vertrauter sind, gibt es noch viele andere Objekte als interessante Ziele.
M NÜTZLICHE HINWEISE 1. Ihr Teleskop ist ein sehr empfindliches Instrument. Für beste Ergebnisse und weniger Vibrationen sollten Sie Ihr Teleskop auf einer horizontalen Erdbodenoberfläche und nicht auf einer Betonfahrbahn oder einer Holzplattform aufstellen. Dadurch erhalten Sie einen stabileren Untergrund für Ihre Himmelsbetrachtungen, insbesondere wenn sich eine Menschenmenge um Ihr neues Teleskop herum versammelt hat. 2.
Discoverer Computer SCHNITTSTELLENDIAGRAMM 1. Ein / Aus Taste 2. Rückwärts Taste 3. Enter Taste 4. Aufwärts Scroll Taste 5. Abwärts Scroll Taste 6. LCD Display 1. 6. 4. 3. 2. 7. Lautsprecher (Real Voice Output Stimmwiedergabe) 5. 7. 8. Batteriedeckel (nicht abgebildet - befindet sich auf dem Sockel unter der Steuereinheit) 8. TASTENFUNKTIONEN Zur besseren Erkennbarkeit in der Dunkelheit sind alle Tasten beleuchtet.
M MODUS ÜBERBLICK DES INSTRUMENTS Explorieren: Mit dem Discoverer Explorier-Modus können verschiedenartige, astronomische, als Objekt-Typen kategorisierte Objekte erforscht werden. Diese Objekte fallen unter eine oder mehrere der folgenden Objekt-Typen: Deep Sky (Universum außerhalb unseres Planetensystems), Planeten, Konstellationen und Sterne. Jeder dieser Untertitel hat in seiner Menüstruktur weitere Objekt-Unterkategorien.
M ERSTMALIGE DISCOVERER AUSRICHTUNG (HINWEIS: Vergewissern Sie sich, dass das Teleskop auf einer ebenen Fläche steht.) SCHRITT 1: Entfernen Sie die Fernsteuerung vor dem Einschalten des Teleskops. Wenn Sie das Teleskop einschalten, hören Sie eine gesprochene Nachricht, während die Textanzeige am Display abläuft: BUSHNELL DISCOVERER Vx.x Dann erscheinet das Hauptmenü: SELECT MODE ALIGN STAR 56 Die ALIGN STAR Option blinkt. ENTER drücken, um ALIGN STAR zu wählen.
M ERSTE BEOBACHTUNGEN MIT DEM DISCOVERER FORTSETZUNG Aufwärts- oder abwärts- scrollen, um andere PLANETEN in der Liste zu sehen. Die Anzeige zeigt Ihnen die Richtungen zu jedem Objekt. Was aber, wenn Sie ein Erstbenutzer sind, der mehr über das Objekt wissen will ? Wäre es nicht besser, mehr über das Objekt zu erfahren, bevor das Teleskop es ins Sehfeld bringt? Wenn Sie in der Planeten-Anzeige sind, drücken Sie ENTER: PLANET 3120 552 JUPITER (genauso bei jedem anderen PLANETEN).
M ERSTE BEOBACHTUNGEN MIT DEM DISCOVERER FORTSETZUNG Damit kommen wir zum letzten Modus. Drücken Sie ENTER, wenn das Display anzeigt: SELECT MODE TELESCOPE 56 Nun erscheinen auf dem Display die folgenden Angaben: RA18:53 DEC+38.7 AZ280 ALT+62 LYR Der Teleskop-Modus gibt Ihnen dynamische Echtzeitinformationen über die gegenwärtige Position Ihres Teleskops in Form von astronomischen Koordinaten. Amüsieren Sie sich mit diesem Modus in dem Sie das Teleskop bewegen.
SOMMER HERBST 79
HINWEISE
GARANTIE/REPARATUR GARANTIE/REPARATUR BESCHRÄNKTE LEBENSLANGE GARANTIE auf Teleskope Sie erhalten für Ihr Bushnell®-Teleskop eine lebenslange Garantie. Die Garantie gilt für den Erstbesitzer und erstreckt sich auf Material- und Herstellungsfehler. Die beschränkte lebenslange Garantie ist Ausdruck unseres Vertrauens in die Materialien und die mechanische Ausführung unserer Produkte und gewährleistet Ihnen einen lebenslangen zuverlässigen Kundendienst.
Italiano Complimenti per l’acquisto del telescopio Bushnell Discoverer con messaggi vocali reali (Real Voice Output)!! Questo è uno dei primi telescopi creati che veramente vi parla per fornirvi informazioni sul cielo stellato. È come avere il proprio assistente astronomico personale. Dopo aver letto il manuale ed essersi preparati alla seduta di osservazione come illustrato in queste pagine, sarà possibile iniziare a far uso della funzione vocale nel modo illustrato qui di seguito.
DOVE INIZIARE? Il vostro telescopio Bushnell è in grado di portare l’universo proprio davanti ai vostri occhi. Se da un lato questo manuale ha lo scopo di assistere l’utente nell’impostazione e nell’utilizzo di base dello strumento, esso non tratta tutto ciò che desiderate apprendere sull’astronomia.
SCHEMA DELLE PARTI 1. 2. 1. 7. 7. 3. 6. 2. 6. 3. 5. 5. 4. 4. 8. 8. 78-8970 78-8930 / 78-8945 Schema delle diverse parti del telescopio 1. Cercatore a punto rosso 2. Oculare formato 1,25” 3. Dispositivo di messa a cuoco a cremagliera 4. Staffa per vassoio accessorio 84 5. 6. 7. Vassoio per accessori a sgancio rapido Telecomando computerizzato Tubo principale del telescopio 8.
GUIDA AL MONTAGGIO RAPIDO 78-8970 / 78-8930 / 78-8945 Spingere i bulloni d’attacco sul tubo del telescopio attraverso i fori sulla staffa del tubo (rimuovere prima i dadi ad alette), quindi montare e serrare i dadi ad alette per tenere saldamente a posto il tubo.
Montaggio dettagliato Per il montaggio del telescopio non occorrono utensili. Togliere tutti i componenti dalla confezione e identificarli stendendoli magari di fronte a sé prima del montaggio. Dato che il telescopio è un dispositivo ottico di precisione, è necessario maneggiare i pezzi con la massima cautela, in particolare il computer integrato, il telescopio, gli oculari e le varie lenti accessorie. APPRONTARE IL TREPPIEDE E IL PIATTO PER GLI ACCESSORI 1.
Montaggio dettagliato Continuazione M FMESSA A FUOCO DEL TELESCOPIO 1. Dopo aver scelto l’oculare desiderato, puntare il tubo principale del telescopio su un oggetto terrestre situato a una distanza di almeno 200 metri (ad es., il palo del telefono o un palazzo). 2. Estendere completamente il tubo di messa a fuoco girando il dispositivo di messa a fuoco a cremagliera. 3.
M COME MEGLIO APPREZZARE IL TELESCOPIO NUOVO 1. Per prima cosa, stabilire l’oggetto da osservare. Qualsiasi oggetto luminoso nel cielo notturno rappresenta un buon punto d’inizio. Uno dei punti d’inizio preferiti in astronomia è la Luna. Questo è un oggetto che certamente non mancherà mai di soddisfare gli astronomi in erba o i più esperti. Una volta sviluppata una certa esperienza a questo livello, ci si potrà dedicare ad altri oggetti.
M CONSIGLI UTILI 1. Questo telescopio è uno strumento molto sensibile. Per avere i migliori risultati, e ridurre al minimo le vibrazioni, si consiglia di allestirlo in un punto piano del terreno, piuttosto che sul cortile o sul marciapiede in cemento o sul terrazzo in legno. In questo modo si realizza una base ben salda d’osservazione, specialmente in quei casi in cui si è circondati da un gruppo di curiosi. 2.
SCHEMA INTERFACCIA COMPUTER DISCOVERER 1. 1. Tasto On/Off 2. Tasto Indietro 3. Tasto di invio 4. Tasto di scorrimento verso l’alto 5. Tasto di scorrimento verso il basso 6. Schermo a cristalli liquidi 7. Altoparlante (uscita voce reale) 8. Sportello delle pile (non in figura; si trova sul supporto, sotto il regolatore) 6. 4. 3. 2. 5. 7. 8. FUNZIONI DEI TASTI TUTTI I TASTI SONO ILLUMINATI PER L’USO NOTTURNO.
M PANORAMICA DELLE MODALITÀ DEL PRODOTTO Explore: La modalità “Explore” (Esplora) di Discoverer permette di esplorare vari oggetti astronomici categorizzati per tipologia. Tali oggetti appartengono a una o più delle seguenti tipologie: Spazio profondo, Pianeti, Costellazioni e Stelle. Ciascuna di queste categorie presenta sottocategorie di oggetti nel relativo menu (l’elenco completo delle funzioni e delle opzioni di menu è riportato nel paragrafo Albero dei menu).
M PRIMO ALLINEAMENTO DI Discoverer (NOTA: Accertarsi che il telescopio sia posizionato su una superficie piana). 1: Prima di accendere il telescopio, rimuovere il telecomando. All’accensione del telescopio, il sistema emette un messaggio in forma vocale e scritta: BUSHNELL DISCOVERER Vx.x “Sullo schermo appare quindi il menu predefinito: SELECT MODE ALIGN STAR 56 L’opzione ALIGN STAR lampeggia. Premere ENTER (INVIO) per scegliere l’opzione ALIGN STAR (Allinea Stella).
M PRIMO UTILIZZO DI Discoverer Continuazione NOTA: SE UN OGGETTO SI TROVA SOTTO L’ORIZZONTE, LO SCHERMO VISUALIZZA PERIODICAMENTE LA PAROLA “HORIZON.” Usare i tasti di scorrimento verso l’alto (SCROLL UP) e verso il basso (SCROLL DOWN) per vedere gli altri pianeti dell’elenco. Si noti che sulla schermata sono visualizzate le indicazioni per giungere a ciascun oggetto.
M PRIMO UTILIZZO DI Discoverer Continuazione Se si seleziona questa opzione col tasto INVIA, il sistema identifica l’oggetto che si sta osservando OPPURE quello più vicino su cui è puntato il telescopio. L’utente può scegliere altri tipi di menu IDENTIFY (Identifica). Essi permettono di identificare gli agglomerati (CLUSTERS), le nebulose (NEBULAS), ecc. più vicini alla posizione attuale del telescopio.
ESTATE AUTUNNO 95
NOTES
WARRANTY / REPAIR WARRANTY / REPAIR TWO Year LIMITED WARRANTY Your Bushnell® telescope with electronic components is warranted to be free of defects in materials and workmanship for two years after the date of purchase. In the event of a defect under this warranty, we will, at our option, repair or replace the product, provided that you return the product postage prepaid.
Português Parabéns pela aquisição do telescópio Bushnell Discoverer com saída Real Voice (Voz Real)! Este é um dos primeiros telescópios criados com narrações para educar você sobre o céu noturno. Pense neste recurso como seu assistente pessoal de astronomia.
POR ONDE DEVO COMEÇAR? Seu telescópio Bushnell pode trazer as maravilhas do universo aos seus olhos. Embora este manual pretenda auxiliar na configuração e uso básico deste instrumento, ele não abrange tudo aquilo que talvez você gostaria de saber sobre astronomia. Apesar do Discoverer oferecer um belo tour pelo céu noturno, recomenda-se comprar um mapa de estrelas e uma lanterna com luz vermelha ou papel celofane vermelho sobre a sua extremidade.
DIAGRAMA DE PEÇAS 1. 2. 1. 7. 7. 3. 6. 2. 6. 3. 5. 5. 4. 4. 8. 8. 78-8970 78-8930 / 78-8945 Diagrama de peças do telescópio 1. Buscadora de ponto vermelho 2. Ocular com formato de 1,25” 3. Mecanismo de foco de cremalheira e pinhão 4. Suporte de bandeja para acessórios 100 5. Bandeja de acessórios com desengate rápido 6. Controlador remoto de computador 7. Tubo do telescópio principal 8.
GUIA DE MONTAGEM RÁPIDA 78-8970 / 78-8930 / 78-8945 Empurre os parafusos de fixação no tubo do telescópio pelos furos no suporte do tubo (retire antes as porcas de aperto manual). A seguir, conecte e aperte as porcas para manter o tubo com segurança no lugar. 78-8970 / 78-8930 / 78-8945 Empurre levemente a bandeja de acessórios de destravamento rápido no cubo, no centro do suporte da bandeja.
Montagem detalhada Nenhuma ferramenta é necessária para a montagem do telescópio. Retire todos os componentes da caixa e identifique-os. É uma boa idéia dispor todas as peças na sua frente antes de iniciar a montagem. Como o telescópio é um sistema óptico de precisão, as peças devem ser manuseadas com cuidado, principalmente o computador integrado, telescópio, oculares e as diversas lentes acessórias. CONFIGURAÇÃO DO TRIPÉ E BANDEJA PARA ACESSÓRIOS 1.
Montagem detalhada Continuação M COMO FOCALIZAR O TELESCÓPIO 1. Após selecionar a ocular desejada, mire o tubo do telescópio principal em um alvo terrestre que esteja no mínimo a 180 metros de distância (como um poste telefônico ou prédio). 2. Estenda totalmente o tubo de focalização girando o mecanismo de focalização de cremalheira e pinhão. 3.
M DESFRUTANDO SEU NOVO TELESCÓPIO 1. Em primeiro lugar, estabeleça o objeto alvo. Qualquer objeto brilhante no céu noturno é um bom ponto de partida. Um dos favoritos na astronomia é a Lua. Ela seguramente agradará a todo astrônomo principiante ou mesmo um veterano experiente. Quando você se tornar proficiente neste nível, outros objetos se tornarão bons alvos. Saturno, Marte, Júpiter e Vênus são outras boas opções em uma segunda etapa. 2.
M DICAS ÚTEIS 1. Seu telescópio é um instrumento extremamente sensível. Para melhores resultados e menos vibrações, coloque o telescópio em um local nivelado sobre o solo, em vez de deixá-lo na entrada da garagem de concreto ou sobre deques de madeira. Isso fornecerá uma base mais estável para a observação, principalmente quando ele chamar a atenção de outras pessoas. 2. Se possível, faça a observação a partir de um local que, relativamente, possua poucas lâmpadas.
COMPUTADOR DISCOVERER DIAGRAMA DE INTERFACE 1. Botão liga/desliga 2. Botão Back (voltar) 3. Botão Enter 4. Botão Scroll Up (Rolagem para cima) 5. Botão Scroll Down (Rolagem para baixo) 6. Tela LCD 7. Alto-falante (saída de voz real) 8. Tampa do compartimento de pilhas (não indicada – localizada na base abaixo do controlador) 1. 6. 4. 3. 2. 5. 7. 8. FUNÇÕES DOS BOTÕES TODOS OS BOTÕES SE ILUMINAM PARA QUE POSSAM SER USADOS À NOITE.
M VISÃO GERAL DOS MODOS DO PRODUTO Explore (Explorar): o modo Explore do Discoverer oferece a capacidade de explorar diversos objetos astronômicos categorizados por tipo. Esses objetos se enquadrariam em uma ou mais das seguintes classificações: deep sky, planetas, constelações e estrelas. Cada uma dessas subclassificações também incluiriam subcategorias de objetos sob sua estrutura do menu. (Consulte o menu em árvore para uma lista completa das funções e opções de menu.
M COMO ALINHAR O DISCOVERER PELA PRIMEIRA VEZ (NOTA: certifique-se de que o telescópio esteja assentado sobre uma superfície nivelada.) ETAPA 1: Retire o aparelho de controle remoto manual antes de ligar o telescópio. Quando o telescópio for ligado, uma mensagem será narrada e exibida na tela : BUSHNELL DISCOVERER Vx.x Em seguida aparecerá o menu padrão: SELECT MODE ALIGN STAR 56 A opção ALIGN STAR está piscando. Pressione ENTER para selecionar a opção ALIGN STAR (ALINHAR estrela).
M COMO USAR O DISCOVERER PELA PRIMEIRA VEZ (Continuação) NOTA: SE O OBJETO SE ENCONTRAR ABAIXO DO HORIZONTE, A TELA EXIBIRÁ PERIODICAMENTE A PALAVRA “HORIZON” (HORIZONTE). Mova a tela PARA CIMA ou PARA BAIXO a fim de ver outros PLANETAS relacionados na lista. Observe que a tela fornece orientações para cada objeto.
M MCOMO ALINHAR O Discoverer PELA PRIMEIRA VEZ (ContinuaçIão) Para selecionar o modo final, pressione ENTER quando aparecer: SELECT MODE TELESCOPE 56 A tela exibirá algo semelhante a: RA18:53 DEC+38.7 AZ280 ALT+62 LYR O modo TELESCOPE (TELESCÓPIO) fornece informações dinâmicas em tempo real sobre a posição atual do telescópio em termos de coordenadas astronômicas. Divirta-se com este modo movimentando o telescópio em diversas direções.
VERãO OUTONO 111
NOTES
GARANTIA/CONSERTO GARANTIA/CONSERTO GARANTIA VITALÍCIA LIMITADA para Telescópios Garantimos que durante a vida do proprietário original, o seu telescópio Bushnell® estará isento de defeitos materiais e de fabricação. A Garantia Vitalícia Limitada é uma expressão da nossa confiança nos materiais e na fabricação mecânica dos nossos produtos e é a sua garantia de um funcionamento seguro para toda a sua vida.
NOTES
INNOVATION THAT THRIVES OUTSIDE For further questions or additional information please contact: Bushnell Outdoor Products 9200 Cody, Overland Park, Kansas 66214 (800) 423-3537 • www.bushnell.