
GPS Navigator Quick Start Guide


20
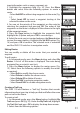
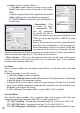
available. Create a route as follows:
i. Click New under Route to create a new route.
Modify the route name if desired in the Name
led.
ii. Select a waypoint from the waypoint list and click
Add to add it to the route. Repeat as required.
iii. Click Set Navi to create the route and display it
on the map.
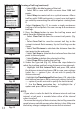
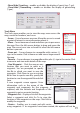
Geocaching – Click
to create or open
a geocaching le.
You are prompted
to specify the le in
which you want to save the geocaching le. Click
OPEN to use an existing le or CREATE to open
a new le.
Specify the location to save the geocaching le
and click Save. A dialog for a new box pops up.
Enter information such as the name of the box
and comments for the box. If required, edit the
latitude and longitude of the box to get an accurate location. You can also establish
a new box point by importing a (*.loc) le from the Internet.
Metric System – Click to set the measurement units on the map to the metric
system. Distances are shown in meters (m) or kilometers (km). If not enabled,
distances are shown in miles (mi).
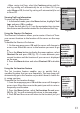
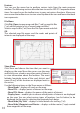
List Menu
The List menu enables you to merge map card les (*.ard) and create a list map
le (*.arl).
Follow these steps to use this menu:
1. Click File | Open to open a map le.
2. Click List | Add An Item to add the le to the list. The selected item is displayed
in the left pane of the program window.
3. Repeat the rst two steps to add the required maps. The le list in the left
pane shows all the component map card les and their size. The total le size is
displayed in the lower left corner.
4. After adding all the required les, a map list le (*.arl) is created.
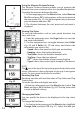
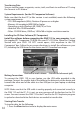
Transfer Menu
The transfer menu enables you to transfer data such as maps, trail logs, and
waypoints and routes between the ONIX 110 and your host PC.
PC->GPS | My Map – downloads expanded map les (*.are) to the ONIX 110.
PC->GPS | My Trails – downloads trail logs (*.trl) to the ONIX 110.
PC->GPS | Waypoints and Routes – downloads waypoint and route les (*.wpr)