
Installation Manual


TOOLS FOR EASY INSTALLATION
• Utility Knife
• #2 Phillips Drive bit
• ¾” Socket
• Socket Wrench
• T25 Torx Bit
• T30 Torx Bit
• 8mm Socket
•
Marker
STEP 1.
Prior to Installation:
A) Bushwacker only approves installing the flares according to
these written instructions with the hardware provided.
WARNING: Failure to install according to these instructions will
invalidate the warranty. This includes, but is not limited to using
alternative installation methods, hardware, or materials. DO NOT
USE: Loctite, SuperGlue, or similar products on the hardware or
the flares.
B)
Fit: Verify you have ordered the correct Body Cladding for your
vehicle make and model and check their fit.
C)
Painting : (Optional) if paint is desired it must be done prior to
installing flares on the vehicle clean outer surface with a good
grade degreaser. DO NOT USE LACQUER THINNER OR
ENAMEL REDUCER AS A DEGREASER. Wipe outer surface
thoroughly with a tack rag prior to paint.
Paint flares using a high quality enamel, or polyurethane
automotive paint. (Application of a primer coat is optional)
Kit Supplied Hardware:
INSTALLATION PROCEDURES
IMPORTANT NOTE: Ambient Temperature – During installation: the vehicle, the parts, and the tape
need to be between 60° and 110°F for proper adhesion. Vehicle surface must also be wiped with alcohol
to remove dirt and grease, which may also affect adhesion. Failure to maintain proper installation
temperature and surface preparation may result in the part not functioning correctly.
Jeep TJ Trail Armor Rear
Corners
for use with Factory Flares
Set Part # 14004
Rev 1 01/08/10
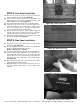
Square Plastic
Grommet
(4 per)
10mm Hex
Screw
(4 per)