U S ER GU IDE SB6120 SURFboard® DOCSIS® 3.
SAFETY AND REGULATORY INFORMATION IMPORTANT SAFETY INSTRUCTIONS — when using your equipment, basic safety precautions should always be followed to reduce the risk of fire, electric shock, and injury to persons, including the following: • Read all of the instructions listed here and/or in the user manual before you operate this device. Give particular attention to all safety precautions. Retain the instructions for future reference.
• Wipe the device with a clean, dry cloth. Never use cleaning fluid or similar chemicals. Do not spray cleaners directly on the device or use forced air to remove dust. • Do not use this product near water; for example, near a bathtub, washbowl, kitchen sink or laundry tub, in a wet basement, or near a swimming pool. • Upon completion of any service or repairs to this device, ask the service technician to perform safety checks to determine that the device is in safe operating condition.
INTERNATIONAL DECLARATION OF CONFORMITY We, Motorola, Inc. 101 Tournament Drive Horsham, PA, U.S.A. Declare under our sole responsibility that the SB6120 SURFboard DOCSIS 3.
SOFTWARE LICENSE SB6120 SURFboard DOCSIS 3.0 Cable Modem Motorola, Inc. Home and Networks Mobility Business (“Motorola”) 101 Tournament Drive, Horsham, PA 19044 IMPORTANT: PLEASE READ THIS SOFTWARE LICENSE (“LICENSE”) CAREFULLY BEFORE YOU INSTALL, DOWNLOAD, OR USE ANY APPLICATION SOFTWARE, USB DRIVER SOFTWARE, FIRMWARE, AND RELATED DOCUMENTATION (“SOFTWARE”) PROVIDED WITH MOTOROLA’S CABLE DATA PRODUCT (THE “CABLE DATA PRODUCT”).
Motorola retains all rights not expressly licensed under this License. The Software, including any images, graphics, photographs, animation, video, audio, music, and text incorporated therein, is owned by Motorola or its 3rd party licensors and is protected by United States copyright laws and international treaty provisions.
CONTENTS 1 Overview ................................................................................................................................................................ 1 Front Panel......................................................................................................................................................... 2 Rear Panel .......................................................................................................................................................
1 OVERVIEW Congratulations, you have a new Motorola SB6120 SURFboard® DOCSIS® 3.0 Cable Modem! It provides high-speed access to the Internet and other online services. Unlike a dial-up modem, your cable modem is always online. Just open your browser and surf! You can use your high-speed cable modem to directly connect one computer in your home or business to the Internet. Connect a single computer equipped with an Ethernet adapter directly to the Ethernet port on the SB6120 SURFboard DOCSIS 3.0 Cable Modem.
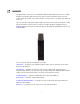
1 OVERVIEW Front Panel The SB6120 front panel lights provide information about power, communications, and errors.
1 OVERVIEW Optional LED operation available in some locations: RECEIVE and SEND lights are blue when the downstream and upstream channels are connected with bonded channels. LINK light is blue for high-speed Ethernet connection (Gigabit) from the SB6120 to your computer. Rear Panel The rear panel contains cabling connectors and the power receptacle.
1 OVERVIEW Bottom Label on the SB6120 The label on the bottom of the SB6120 contains the Media Access Control (MAC) address, a unique, 48-bit value permanently saved in ROM at the factory to identify the cable modem on the network. To receive data service, you will need to provide the MAC address marked HFC MAC ID to your Internet Service Provider.
2 INSTALLATION The following topics provide information about installing the SB6120 hardware: • Before You Begin • Precautions • Signing Up for Service • Computer System Requirements • Cabling and Startup for the SB6120 • Wall Mounting Your SB6120 • Configuring TCP/IP Before You Begin Before you begin the installation, check that you received the following items with your SB6120 SURFboard DOCSIS 3.0 Cable Modem.
2 INSTALLATION Precautions Postpone SB6120 cable modem installation until there is no risk of a thunderstorm or lightning activity in the area. To avoid damaging the cable modem with static electricity: • Always connect the coaxial cable to the grounded cable TV wall outlet first. • Before you connect or disconnect the Ethernet cable from your cable modem or PC, always touch the coaxial cable connector on the cable modem to release any static charges.
2 INSTALLATION Signing Up for Service You must sign up with an Internet Service Provider to access the Internet and other online services. To activate your service, call your local Internet Service Provider. To receive data service, you need to provide the MAC address printed on the bar code label marked HFC MAC ID on the bottom of the cable modem.
2 INSTALLATION • Minimum 256 MB RAM recommended • 10 MB available hard disk space There are no web browser restrictions for the SB6120. Cabling and Startup for the SB6120 Be sure your computer is on and the cable modem is unplugged. 1. Connect one end of the coaxial cable to the cable outlet or splitter. 2. Connect the other end of the coaxial cable to the CABLE connector on the cable modem. Hand-tighten the connectors to avoid damaging them. 3.
2 INSTALLATION POWER Turns on when AC power is connected to the SB6120. RECEIVE Flashes while scanning for the downstream receive channel. Changes to solid green when the receive channel is locked. SEND Flashes while scanning for the upstream send channel. Changes to solid green when the send channel is locked. ONLINE Flashes during SB6120 registration and configuration. Changes to solid green when the SB6120 is registered.
2 INSTALLATION You can mount the SB6120 horizontally or vertically. Do the following to mount your SB6120 on the wall: 1. See the Wall Mounting Template to print a copy of the template. 2. Click Print or choose Print from the File menu to display the Print dialog box. The sample Print dialogue window shown below may vary slightly on your computer, depending upon your operating system. To print the template only, select Current page as the Print Range. Be sure you print the template at 100% scale.
2 INSTALLATION 6.0 mm (.24 inches) maximum 9.0 mm (.35 inches) maximum 2.5 mm (.10 inches). There must be .10 inches (2.5 mm) between the wall and the underside of the screw head. 9. Place the SB6120 so the keyholes on the back of the unit are aligned above the mounting screws. 10. Slide the SB6120 down until it stops against the top of the keyhole opening. After mounting, reconnect the coaxial cable input and Ethernet connection.
2 INSTALLATION Configuring TCP/IP Make sure all client computers are configured for TCP/IP, which is a protocol for communication between computers. Perform one of the following for the operating system you are running: • Configuring TCP/IP in Windows 2000 • Configuring TCP/IP in Windows XP • Configuring TCP/IP in Windows Vista • For Macintosh or UNIX systems, follow the instructions in the applicable Macintosh or UNIX user documentation.
2 INSTALLATION • Verifying the IP Address in Windows Vista • For Macintosh or UNIX systems, follow the instructions in the applicable Macintosh or UNIX user documentation. Configuring TCP/IP in Windows 2000 1. Select Control Panel from either the Windows Start menu or Windows Desktop to display the Control Panel window. 2. Double-click Network and Dial-up Connections to display the Network and Dial-up Connections window.
2 INSTALLATION 4. Click Properties to display the Local Area Connection number Properties window. Information similar to the following is displayed. 5. If Internet Protocol (TCP/IP) is in the list of components, TCP/IP is installed. You can skip to step 8.
2 INSTALLATION 6. If Internet Protocol (TCP/IP) is not in the list of components, click Install. The Select Network Component Type window is displayed. 7. Click Protocol and then click Add. The Select Network Protocol window is displayed. 8. Click Internet Protocol (TCP/IP), and then click OK. The Local Area Connection number Properties window is redisplayed.
2 INSTALLATION 9. Click Internet Protocol (TCP/IP), and then click Properties to display the Internet Protocol (TCP/IP) Properties window. 10. Be sure Obtain an IP address automatically and Obtain DNS server address automatically are selected. 11. Click OK to save the TCP/IP settings and exit the TCP/IP Properties window. 12. Click OK to exit the Local Area Connection Properties window. 13. Click OK when prompted to restart the computer and click OK again. 14.
2 INSTALLATION 3. Click Network and Internet Connections to display the Network and Internet Connections window. 4. Click Network Connections to display the LAN or High-Speed connections. You can skip to step 7. 5. Right-click the network connection. If more than one connection is displayed, be sure to select the one for your network interface. 6. Select Properties from the drop-down menu to display the Local Area Connection Properties window. Be sure Internet Protocol (TCP/IP) is checked.
2 INSTALLATION 7. Select Internet Protocol (TCP/IP) and click Properties to display the Internet Protocol (TCP/IP) Properties window. 8. Make sure Obtain an IP address automatically and Obtain DNS server address automatically are selected. 9. Click OK to save the TCP/IP settings and exit the TCP/IP Properties window. 10. Click OK to exit the Local Area Connection Properties window. When you complete the TCP/IP configuration, go to Verifying the IP Address in Windows 2000 or Windows XP.
2 INSTALLATION Configuring TCP/IP in Windows Vista 1. On the Windows desktop, click Start to display the Start window. 2. Click Control Panel. 3. Double-click Network and Internet. 4. Double-click Network and Sharing Center.
2 INSTALLATION 5. Click Manage network connections. 6. Right-click the network connection and select Properties. 7. If more than one connection is displayed, make sure to select the one for your network interface. Vista may prompt you to allow access to the Network Properties Options. If you see the prompt, User Account Control -- Windows needs your permission to continue, click Continue.
2 INSTALLATION 8. Select Internet Protocol Version4 (TCP/IPv4) and click Properties to display the Internet Protocol Version 4 (TCP/IPv4) Properties window. 9. Make sure Obtain an IP address automatically and Obtain DNS server address automatically are selected. 10. Click OK to save the TCP/IP settings and close the Internet Protocol Version 4 (TCP/IPv4) Properties window. 11. Click OK to close the Local Area Connection Properties window. 12. Close the Network Connections window. 13.
2 INSTALLATION Verifying the IP Address in Windows 2000 or Windows XP Do the following to check the IP address: 1. On the Windows Desktop, click Start. 2. Select Run. 3. Type cmd and click OK to display a command prompt window. 4. Type ipconfig and press Enter to display the IP configuration information. A display similar to the following indicates a normal configuration. 5.
2 INSTALLATION Verifying the IP Address in Windows Vista Do the following to verify the IP address: 1. On the Windows Vista desktop, click Start. 2. Click All Programs. 3. Click Accessories.
2 INSTALLATION 4. Click Run. 5. Type cmd and click OK to open a command prompt window. 6. Type ipconfig and press Enter. A display similar to the following indicates a normal configuration.
2 INSTALLATION 7. If an Autoconfiguration IP Address is displayed, there is an incorrect connection between the PC and the SB6120, or there are broadband network problems. Do the following to renew the IP address: At the command prompt, type ipconfig /renew and press Enter. If a valid IP address is displayed as shown, Internet access should be available. 8. Type exit and press Enter to return to Windows.
3 TROUBLESHOOTING If the solutions listed here do not solve your problem, contact Motorola Technical Support at: http://broadband.motorola.com/consumers/support or 1-877-466-8646 Before calling Motorola, power recycle your SB6120 as explained below. This may fix your problem. Resetting the SB6120 may take 5 to 30 minutes. The Motorola representative may ask for the status of the lights as described in Front-Panel Lights and Error Conditions.
3 TROUBLESHOOTING Front-Panel Lights and Error Conditions Light Turns Off During Startup If: Turns Off During Normal Operation If: DS The downstream receive channel cannot be acquired The downstream channel is lost US The upstream send channel cannot be acquired The upstream channel is lost ONLINE IP registration is unsuccessful The IP registration is lost POWER The SB6120 is not properly plugged into the power outlet The SB6120 is unplugged 27
4 CONTACT US If you need assistance while working with the SB6120, contact Motorola Technical Support at: http://broadband.motorola.com/consumers/support or 1-877-466-8646 For information about customer service, technical support, or warranty claims, see the Motorola Regulatory, Safety, Software License, and Warranty Information card provided with the SB6120. For answers to typical questions, see Frequently Asked Questions.
5 FREQUENTLY ASKED QUESTIONS Here are answers to questions our customers frequently ask: Q What is high-speed cable Internet access? A Cable Internet access uses cable television wires instead of telephone lines to connect to the Internet. It is extremely fast and affordable and does not tie up telephone lines for incoming or outgoing calls and faxes. Q How fast is a cable modem connection? A A DOCSIS 3.
5 FREQUENTLY ASKED QUESTIONS Q If I have a cable modem, can I still use my old 28.8 Kbps or 56 Kbps modem? A Yes! Although once you’ve experienced the speed of cable Internet access, you’ll never again want to wait for traditional dial-up services. Q Do I need to change my Internet Service Provider (ISP)? A Currently, most Internet Service Providers do not provide cable Internet access. Contact your cable company for your specific information.
6 GLOSSARY This glossary defines terms and lists acronyms used with the SB6120. TERM DEFINITION broadband High bandwidth network technology that multiplexes multiple, independent carriers to carry voice, video, data, and other interactive services over a single cable. A communications medium that can transmit a relatively large amount of data in a given time period. A frequently used synonym for cable TV that can describe any technology capable of delivering multiple channels and services.
6 GLOSSARY TERM DEFINITION expansion slot An opening in a computer where a circuit board can be inserted to add new capabilities. F-type connector A type of connector used to connect coaxial cable to equipment such as the SB6120. IP address An Internet Protocol address is an identifier for a computer or device on a TCP/IP network. Networks using the TCP/IP protocol route messages based on the destination IP address.
Motorola, Inc. 101 Tournament Drive Horsham, PA 19044 U.S.A. http://www.motorola.