
User`s guide


Installing and Connecting to the Network
2-9
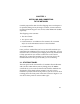
Figure 2-4. Chassis With Power Supply A Positioning Tabs And Supporting
Shelf Indicated
To replace the power supply in slot A (the top slot)
1. Turn power switch on Power Supply A (PSA) off.
2. Remove the two thumb screws holding the power supply in
place.
3. Pull the power supply straight out.
4. Slide the new power supply straight into the chassis under the
tabs shown in Figure 2-4.
The power supply should be placed as shown by the dotted
line rectangle in Figure 2-5.
5. Tighten the two screws that hold the power supply into the
chassis.
6. Turn the PSA power switch on.
PSA
PSB
Power supply must be under these tabs
Power supply must rest on this support shelf