SmartSwitch 9000 9G421-02/9G429-02 Gigabit Ethernet Interface Module User’s Guide 9032344-02
Notice Notice Cabletron Systems reserves the right to make changes in speciÞcations and other information contained in this document without prior notice. The reader should in all cases consult Cabletron Systems to determine whether any such changes have been made. The hardware, Þrmware, or software described in this manual is subject to change without notice.
Notice FCC Notice This device complies with Part 15 of the FCC rules. Operation is subject to the following two conditions: (1) this device may not cause harmful interference, and (2) this device must accept any interference received, including interference that may cause undesired operation. NOTE: This equipment has been tested and found to comply with the limits for a Class A digital device, pursuant to Part 15 of the FCC rules.
Notice Safety Information CLASS 1 LASER TRANSCEIVERS The 9G429-02 is a Class 1 Laser Product The 9G429-02 uses a Class 1 Laser transceiver. Read the following safety information before installing or operating these adapters. The Class 1 laser transceivers use an optical feedback loop to maintain Class 1 operation limits. This control loop eliminates the need for maintenance checks or adjustments. The output is factory set, and does not allow any user adjustment.
Notice Declaration of Conformity Addendum Application of Council Directive(s): ManufacturerÕs Name: ManufacturerÕs Address: European Representative Name: European Representative Address: Conformance to Directive(s)/Product Standards: Equipment Type/Environment: 89/336/EEC 73/23/EEC Cabletron Systems, Inc. 35 Industrial Way PO Box 5005 Rochester, NH 03867 Mr. J.
Contents Contents Chapter 1 Introduction Features........................................................................................................................... 1-3 Related Manuals............................................................................................................ 1-4 Getting Help .................................................................................................................. 1-5 Chapter 2 Installation Tools Needed ....................................
Contents Chapter 4 LANVIEW LEDs Appendix A Specifications Technical SpeciÞcations ...............................................................................................A-1 CPU .........................................................................................................................A-1 Memory ..................................................................................................................A-1 Network Interfaces .......................................................
Chapter 1 Introduction The 9G421-02/9G429-02 (Figure 1-1) is a Gigabit Ethernet interface module, occupying a single slot in the SmartSwitch 9000 chassis. Gigabit Ethernet networks are connected to the 9G421-02/9G429-02 through front panel ports. These ports interface with the switch through Gigabit Network Interface Blocks (GNIB) and are based upon an ASIC architecture.
Introduction SMB CPU INB E N E T 1 E N E T 2 Figure 1-1.
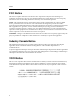
Introduction Features Processor The 9G421-02/9G429-02 is equipped with an advanced Intel i960 microprocessor. This microprocessor provides a platform for all management functions, such as Spanning Tree, RMON, and MIB support within a scalable RISC-Based architecture. Fast Packet Switching The 9G421-02/9G429-02 incorporates a hardware-based switch design referred to as the SmartSwitch ASIC, a collection of custom ASICs designed speciÞcally for high-speed switching.
Introduction Management Information Base (MIB) Support The 9G421-02/9G429-02 provides MIB support including ¥ ¥ ¥ RMON (RFC 1271) IETF MIB II (RFC 1213) IETF Bridge MIB (RFC 1493) and a host of other Cabletron Enterprise MIBs. NOTE For a complete list of supported MIBs, refer to the release notes provided in the 9G421-02/9G429-02 package. LANVIEW LEDs The 9G421-02/9G429-02 uses LANVIEW¨, the Cabletron Systems built-in visual diagnostic and status monitoring system.
Introduction Getting Help For additional support related to this device or document, contact Cabletron Systems using one of the following methods: World Wide Web http://www.cabletron.com/ Phone (603) 332-9400 Internet mail support@cabletron.com FTP ftp://ftp.cabletron.com/ anonymous your email address Login Password To send comments or suggestions concerning this document, contact the Cabletron Systems Technical Writing Department via the following email address: TechWriting@cabletron.
Introduction 1-6
Chapter 2 Installation This chapter describes the physical layout of the 9G421-02/9G429-02 module and explains preparation and installation procedures for use in a SmartSwitch 9000 chassis. The 9G421-02/9G429-02 occupies a single slot in the SmartSwitch 9000 chassis. Install the 9G421-02/9G429-02 by following the steps in Unpacking the Module below. Only qualiÞed personnel should perform installation procedures. ! CAUTION Never expose the moduleÕs components to Electrostatic Discharge.
Installation Physical Layout The 9G421-02/9G429-02 has two major circuit boards on which components are attached (see Figure 2-1). The base-level circuit board is known as the motherboard and the second-level circuit board is known as the daughterboard. The removable daughterboard attaches to the motherboard with connectors and standoffs. Both the motherboard and the daughterboard contain components accessible to the user. Motherboard Daughterboard Figure 2-1.
Installation User Accessible Daughterboard Components The user accessible components are located on the underside of the daughterboard. These components include an eight-position DIP switch, a replaceable SMB-1 PROM, a replaceable BOOT PROM, and sockets for DRAM and FLASH memory. You can access the DIP switch without removing the daughterboard. However, to access the other components on the daughterboard, you must remove the daughterboard from the motherboard.
Installation Table 2-1. Function of DIP Switch Switch Function 8 Clear Password 1 When toggled, this switch clears user-entered passwords stored in NVRAM, and restores the default passwords. Once the passwords are reset, you can use the defaults or enter new passwords. Clear NVRAM 2 The module uses NVRAM to store user- entered parameters such as IP addresses, device name, etc. To reset these parameters to the factory defaults, toggle this switch.
Installation Removing the Daughterboard from the Motherboard Perform the following steps to remove the daughterboard: 1. Place the module (component side up) on a non-conductive, ßat surface with the front (faceplate) to the left. The daughterboard abuts the backplane connectors (see Figure 2-1). 2. Locate the nine screws as shown in Figure 2-3. Securing Screws Figure 2-3.
Installation 3. Use a Phillips screwdriver to remove the screws and set the screws aside. 4. Carefully grasp the daughterboard and lift up. 5. Turn the daughterboard over to reveal the user-accessible components illustrated in Figure 2-4. SMB-1 PROM BOOT PROM FLASH SIMM slot DRAM SIMM slot DIP Switch Figure 2-4.
Installation Daughterboard Components SMB-1 PROM The 9G421-02/9G429-02 is shipped with an SMB-1 Firmware PROM located on the underside of the daughterboard as shown in Figure 2-4. To upgrade the SMB-1 PROM, refer to the SMB-1 PROM Upgrade Kit instructions. BOOT PROM The 9G421-02/9G429-02 is shipped with a BOOT PROM located on the underside of the daughterboard as shown in Figure 2-4. To upgrade the BOOT PROM, refer to the BOOT PROM Upgrade Kit instructions.
Installation Installing the Module into the SmartSwitch 9000 Chassis NOTE To insure proper data transmission from the 9G421-02/9G429-02 module to the INB on the SmartSwitch 9000 backplane, two INB Terminator modules must be installed on the rear of the SmartSwitch 9000 chassis. If they have not previously been installed, refer to the INB Terminator Module Installation Guide for information and installation procedure.
Installation 7 FLN K 8 FLN K FLN K 10 RX FLN K INS TX 11 RX FLN K INS TX RX 12 Jack for ESD wrist strap Metal Back-Panel Circuit Card Card Guides Warning: Ensure that the circuit card is between the card guides. Lock down the top and bottom plastic tabs at the same time, applying even pressure. Figure 2-5.
Installation The Reset Switch The Reset switch is located under the top plastic tab, as shown in Figure 2-6. Use the reset switch to reset the moduleÕs processor, shutdown (power down) the module, and/or restart the module. ¥ To reset the moduleÕs i960 processor, press the reset switch twice within three seconds. ¥ To shut down the module, press and hold the reset switch for three or more seconds. ¥ To restart the module, press the reset switch momentarily.
Chapter 3 Operation The 9G421-02/9G429-02 module is a two-port Gigabit Ethernet device. Two front panel gigabit Þber optic ports provide connectivity through SC connectors. As shown in Figure 3-1, Gigabit Network Interface Blocks (GNIBs) convert data packets received from the gigabit optics port into a canonical frame format before forwarding to the SmartSwitch ASIC.
Operation System Management Buses There are two management channels within the SmartSwitch 9000 system: the SMB-1 and the SMB-10. These buses provide side-band management and intermodule management communication. SMB-1 Bus The SMB-1 is a 1 Mbps management bus located within the SmartSwitch 9000. This bus is utilized by all diagnostic controllers in the system, including connectivity modules, power supply modules and the environmental module.
Operation DC/DC Converter The DC/DC converter converts the 48 VDC on the system power bus to the necessary operating voltages for its host network services module. The diagnostic controller monitors and controls the operation of the DC/DC converter. INB Interface Each module attaches to both INB A and INB B and has two INB Network Interface BlockÕs (NIB). The INB NIBs convert canonical frames to Þxed length data blocks for transmission onto the INBs.
Operation i960 Core The i960 core supports a high-speed, software-based look-up function involved in performing Þltering/forwarding decisions on incoming data frames. In addition, the i960 core provides the SNMP protocol stacks, to support industry standard MIBs, as well as Cabletron enterprise extension MIBs for each media type. Management services, such as telnet and network address to MAC address mapping, are also provided by the i960 core.
Chapter 4 LANVIEW LEDs The front panel LANVIEW LEDs indicate the status of the module and may be used as an aid in troubleshooting. Figure 4-1 shows the 9G421-02/9G429-02 Module LANVIEW LEDs. System Status INB Receive SMB CPU INB Transmit INB E N E T 1 Port Transmit Port Receive E N E T 2 Figure 4-1.
LANVIEW LEDs Table 4-1 lists the states of the two System Status LEDs (System Management Bus (SMB) and Central Processing Unit (CPU). Table 4-1. System Status (SMB and CPU) LEDs LED Color State Description Green Functional Fully operational Yellow Testing Power up testing Yellow (Flashing) Crippled Not fully operational (i.e.
LANVIEW LEDs Table 4-4 lists the states of the Port Receive LED. Table 4-4. Port Receive LED LED Color Green State Link, no activity, port enabled Green (Blinking) Link, port disabled Yellow (Flashing) Link, activity, port enabled Red Fault - Diagnostic (Hardware) Failure Off No link (port disabled or enabled) Table 4-5 lists the states of the Port Transmit LED. Table 4-5.
LANVIEW LEDs 4-4
Appendix A Specifications Technical Specifications CPU Intel i960 RISC based microprocessor Memory 4 MB Flash Memory (expandable to 16 MB) 2 MB Packet RAM 16 MB DRAM (expandable to 48 MB) Network Interfaces 9G421-02: MMF SC Connectors 9G429-02: SMF or MMF cable to SC connectors A-1
Specifications Regulatory Compliance ! CAUTION It is the responsibility of the person who sells the system to which the module will be a part to ensure that the total system meets allowed limits of conducted and radiated emissions. This equipment meets the Safety requirements of: ¥ ¥ ¥ ¥ UL 1950 CSA C22.2 No.
Physical Physical Dimensions 35.0 D x 44.0 H x 3.0 W centimeters (13.8 D x 17.4 H x 1.2 W inches) Weight Unit: 1.36 kg (3 lb.) Shipping: 1.82 kg (4 lb.
Specifications A-4