
User guide


Chapter 3: Configuring the FN100
Page 3-6 Fast Network 100 User Guide
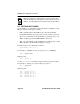
FN100 > bridge
LCM responds with a list of all ports and the bridging function that is
enabled.
Port 1 Sw1 bridging: Transparent Bridging
Port 2 Sw1 bridging: Transparent Bridging
Port 3 Sw1 bridging: Transparent Bridging
Port 4 Sw1 bridging: Transparent Bridging
Port 5 Sw1 bridging: Transparent Bridging
Port 6 Sw1 bridging: Transparent Bridging
Port 7 Sw1 bridging: Transparent Bridging
Port 8 Sw1 bridging: Transparent Bridging
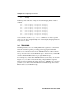
You could also use the bridge <PORTS> command to look at a specific
range of ports. For example
bridge 2-4 would display bridging functions
for ports 2, 3, and 4.
3.6 TRUNKING
Trunking enables you to use multiple Ethernet segments to connect Fast
Network switches together, providing greater aggregate bandwidth.
Each set of connections between two FN100 switches is called a Trunk
Group. You can create several Trunk Groups to interconnect your FN100
switches. Each FN100 can have up to eight Trunk Groups.
For example, if you have three FN100 switches (A, B, and C), as shown in
Figure 3-1, you could connect them using a single Ethernet segment.
However, that would limit the interconnection to 100 Mbps. To solve this
problem, you could connect A to B with one Trunk Group, and connect
B to C with a second Trunk Group.