Title Page Bridge/Router Interface (BRIM) User’s Guide
Notice Cabletron Systems reserves the right to make changes in speciÞcations and other information contained in this document without prior notice. The reader should in all cases consult Cabletron Systems to determine whether any such changes have been made. The hardware, Þrmware, or software described in this manual is subject to change without notice.
Restricted Rights Notice (Applicable to licenses to the United States Government only.) 1. Use, duplication, or disclosure by the Government is subject to restrictions as set forth in subparagraph (c) (1) (ii) of the Rights in Technical Data and Computer Software clause at DFARS 252.227-7013. Cabletron Systems, Inc., 35 Industrial Way, Rochester, New Hampshire 03867-0505. 2. (a) This computer software is submitted with restricted rights.
Contents Chapter 1 Introduction Using the BRIM UserÕs Guide..................................................................................... 1-2 Related Manuals............................................................................................................ 1-3 BRIM Management Applications ............................................................................... 1-3 Software Conventions ..................................................................................................
Contents Changing Bridge Priority ............................................................................ 2-39 Changing the Spanning Tree Algorithm Protocol Type .......................... 2-39 Changing Hello Time ................................................................................... 2-40 Changing Max Age Time ............................................................................. 2-40 Changing Forwarding Delay Time.............................................................
Contents ConÞguring SNAP Translation................................................................... 2-96 Using the Novell Translation Window .................................................................... 2-97 Using the Physical View Windows for the ETWMIM ........................................... 2-99 Ethernet Port Physical View............................................................................... 2-99 Token Ring Port Physical View.......................................................
Contents vi
Chapter 1 Introduction Using this guide; related manuals; management applications available for BRIMs; software conventions; getting help; contacting Cabletron Systems Global Call Center Welcome to the Cabletron SystemsÕ SPECTRUM¨ Element Manager Bridge/Router Interface (BRIM) UserÕs Guide. We have designed this guide to serve as a reference for using SPECTRUM Element Manager for all types of BRIMs.
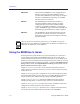
Introduction NOTE BRIM-E100 The Fast Ethernet BRIM has a user-conÞgurable Fast Ethernet Port Interface Module (FEPIM) port that provides either 100BASE-TX connectivity (via an RJ-45 interface) or 100BASE-FX connectivity (via an MMF interface with an SC connector). BRIM-F6 The FDDI Bridge/Router Interface Module is a translational FDDI to Ethernet bridge, via media conÞgurable Fiber Port Interface Module (FPIM) connectors using MMF or SMF Þber, or UTP or STP copper.
Introduction We assume that you have a general working knowledge of Ethernet IEEE 802.3, FDDI, WAN, and ATM type data communications networks and their physical layer components, and that you are familiar with general bridging concepts. Related Manuals The BRIM UserÕs Guide is only part of a complete document set designed to provide comprehensive information about the features available to you through SPECTRUM Element Manager.
Introduction TIP ¥ FDDI menu will be available on devices that have an FDDI BRIM installed and enabled; see Chapter 3, FDDI Applications, for details. ¥ WAN Status will be available from the Device menu for devices that have a WAN BRIM installed and enabled; see Chapter 4, WAN Applications, for details. ¥ ATM Connections will be available from the Device menu for devices that have an ATM BRIM installed and enabled; see Chapter 5, ATM ConÞguration, for details.
Introduction Left Mouse Button Right Mouse Button Figure 1-1. Mouse Buttons For many mouse operations, this document assumes that the left (primary) mouse button is to be used, and references to activating a menu or button will not include instructions about which mouse button to use. However, in instances in which right (secondary) mouse button functionality is available, instructions will explicitly refer to right mouse button usage.
Introduction Common Device Window Fields Similar descriptive information is displayed in boxes at the top of most device-speciÞc windows in SPECTRUM Element Manager, as shown in Figure 1-2. Device Name IP Address Location MAC Address Figure 1-2. Sample Window Showing Group Boxes Device Name Displays the user-deÞned name of the device. The device name can be changed via the System Group window; see the Generic SNMP UserÕs Guide for details.
Introduction MAC Address The physical layer address assigned to the interface associated with the IP address used to deÞne the device icon when it was added to SPECTRUM Element Manager. MAC addresses are hard-coded in the device, and are not conÞgurable. Informational Þelds describing the boards and/or ports being modeled are also displayed in most windows: Board Number Displays the number indicating the position of the monitored board in the chassis. Port Number Displays the number of the monitored port.
Introduction Getting Help This section describes different methods of getting help for questions or concerns you may have while using SPECTRUM Element Manager. Using On-line Help You can use the BRIM window Help buttons to obtain information speciÞc to the device. When you click on a Help button, a window will appear which contains context-sensitive on-screen documentation that will assist you in the use of the window and its associated command and menu options.
Introduction Getting Help from the Cabletron Systems Global Call Center If you need technical support related to SPECTRUM Element Manager, or if you have any questions, comments, or suggestions related to this manual or any of our products, please feel free to contact the Cabletron Systems Global Call Center via one of the following methods: By phone: (603) 332-9400 24 hours a day, 365 days a year By mail: Cabletron Systems, Inc. PO Box 5005 Rochester, NH 03866-5005 By Internet mail: support@ctron.
Introduction 1-10 Getting Help
Chapter 2 Bridging About bridging methods; viewing and managing bridging interfaces; using the Bridge Status window; viewing bridge statistics; using Spanning Tree; using the Filtering Database; configuring duplex modes; using the Interface Configuration window; and setting Bridge Translation Bridging Basics Bridges are used in local area networks to connect two or more network segments and to control the ßow of packets between the segments.
Bridging Þlters a packet if it determines that the packetÕs destination address exists on the same side of the bridge as the source address. If two or more bridges are connected to the same Ethernet LAN segmentÑplaced in parallelÑonly a single bridge must be allowed to forward data frames onto that segment. If two or more bridges were forwarding data frames onto the same Ethernet segment, the network would soon be ßooded.
Bridging possible bridge path to the end station. The original APE frame contains no routing information (e.g., bridge numbers and ring numbers). As the frame is propagated along all available paths to the destination station, each bridge along the way adds its own bridge and ring numbers to the packetÕs RIF before forwarding it, thereby providing route information. In response to each received APE packet, the destination station directs a reply to the sending station.
Bridging Not all end stations in a Token Ring environment have network drivers which support Source RoutingÑwhether the drivers are improperly conÞgured via management or they simply are not source-route capable. In a network with a mix of Source Route and Transparent end stations, data frames from both station types must be bridged correctly.
Bridging cache, append the proper Routing Information onto the packet, and then forward the data to the Token Ring segment. The RIF cache is a software table that can store up to 8192 entries.
Bridging 2-6 ¥ The Spanning Tree window shows bridge port information and protocol parameters relating to the Spanning Tree AlgorithmÑthe method of determining the controlling bridge when a series of bridges are placed in parallel; see Spanning Tree, page 2-34, for details. ¥ With the Filtering Database window, you can see the contents of the Static and Learned databasesÑthe two address databases which construct the IEEE 802.1 Source Address Table.
Bridging NOTE ¥ The SmartTrunk option invokes the SmartTrunk ConÞguration and Status window, which enables you to group interfaces logically to achieve greater bandwidth between devices that support this feature. There is no limit to the number of ports that can be included in a single trunk, nor is there a limit to the number of trunked instances that can be supported. See ConÞguring SmartTrunking, page 2-85, for details.
Bridging Figure 2-1. The Bridge Status Window NOTE When you Þrst open the Bridge Status window the Prev and Next buttons will be grayed out, and a message will appear stating that the application is initializing and processing each interface. You will not be able to scroll the display until after all the bridging interfaces have been processed. The Prev and Next buttons are activated when a device supports over four bridge interfaces, so that you can scroll the display to show all interfaces.
Bridging Bridge State on Interface Indicates the state of bridging over the port interface. Possible bridge states and their corresponding colors are: ¥ Forwarding (green)ÑThe port is on-line and forwarding packets across the bridge from one network segment to another. ¥ Disabled (blue)ÑBridging at the port has been disabled by management; no trafÞc can be received or forwarded on this port, including conÞguration information for the bridged topology.
Bridging 2-10 ¥ The Spanning Tree window allows you to set the Spanning Tree Algorithm parameters for bridging on your device; see Spanning Tree, page 2-34, for details. ¥ The SmartTrunk option invokes the SmartTrunk ConÞguration and Status window, which enables you to group interfaces logically to achieve greater bandwidth between devices, if both devices support the SmartTrunk feature.
Bridging ¥ Enable Bridge and Disable Bridge options allow you to administratively activate or deactivate bridging at the device level; see (Enabling and Disabling Bridging, page 2-14, for details. ¥ The Bridge ConÞguration option opens a window that allows you to set address and routing information for all interfaces on a Token Ring bridging device, including the Bridge Number and the Virtual Ring Number. It also allows you to set source route bridging parameters at the device level.
Bridging 2-12 ¥ The Port ConÞguration option opens a window that allows you to view the address and routing information for an individual Token Ring bridging interface. This window displays information that is set at the device level via the Bridge ConÞguration window, such as the Bridge Number and the Virtual Ring Number. It also allows you to set source route bridging parameters for that port. See Using the Token Ring Bridge and Port ConÞguration Windows, page 2-65, for details.
Bridging information about this window, refer to the RMON Alarms and Events chapter in the RMON UserÕs Guide, and/or the appropriate device-speciÞc UserÕs Guide. ¥ The Statistics option appears as a menu choice for Ethernet devices which support RMON, and it opens the Ethernet Statistics window, which enables you to view a statistical breakdown of trafÞc at the monitored Ethernet network segment.
Bridging Enabling and Disabling Bridging When you disable a bridge port, you disconnect that portÕs network from the bridge entirely. The port does not forward any packets, nor does it participate in Spanning Tree operations. Nodes connected to the network can still communicate with each other, but they canÕt communicate with the bridge and other networks connected to the bridge.
Bridging Bridge Statistics The following sections describe Statistics windows that are available for the bridge that is being monitored via SPECTRUM Element Manager, both at the device and port levels. Performance Graphs You use Bridge Performance Graphs to view a color-coded strip chart that shows you the trafÞc being bridged through all networks or an individual network supported by your device.
Bridging To access the port-level Bridge Performance Graph window from the Bridge Status window: 1. Click on the desired Port button ( ) to display the Port menu. 2. Click on Performance Graph. The Bridge Performance Graph window will appear. To access the port-level Bridge Performance Graph window from the Chassis View window: 1. Click on the appropriate port index to access the Port menu. 2. Click on Performance Graph. The Bridge Performance Graph window will appear.
Bridging Peak statistics are based on the peak level of activity returned from a single poll since the Performance Graph window was invoked. A date and time is provided for peak levels. The Average statistics are updated every two seconds as averaged over the previous four poll intervals (i.e., averaged over a sliding eight-second time window). Frames Forwarded (Green) Forwarded The number of frames forwarded by an individual port or the device as a whole.
Bridging 4. Click on Xmitted (with blue statistics to the right). The Xmitted menu will appear. Click on the desired mode. Once you have selected a new mode, it will appear in its respective button, and after the next poll the Performance Graph will refresh and begin to measure using the new mode.
Bridging network segment has a corresponding color for its statistics or pie chart segments. Depending on your particular bridge and its conÞguration, the segments are color-coded as follows: ¥ ¥ ¥ ¥ ¥ ¥ ¥ ¥ ¥ ¥ ¥ ¥ ¥ LAN 1 = light red LAN 2 = light green LAN 3 = yellow LAN 4 = light gray LAN 5 = light cyan LAN 6 = light blue LAN 7 = green LAN 8 = red LAN 9 = hot pink = LAN 10 = light magenta LAN 11 = blue LAN 12 = cyan LAN 13 = black The values given in these Þelds are cumulative totals.
Bridging Figure 2-4. The Bridge Port Detail Breakdown Window The following information is available for each bridge interface on the device. The information is expressed both numerically and in pie charts. The colors corresponding to the forwarding interfaces will vary, depending on which interface is selected. Forwarded to The number of frames forwarded by the selected bridge interface to each other interface on the bridge, as read from the device after each poll interval.
Bridging To access the Statistics window from the Chassis View window: 1. Click on the appropriate port index to access the Port menu. 2. Click on I/F Statistics. The port I/F Statistics window will appear. Figure 2-5. I/F Statistics Window The following three informational Þelds appear in the upper portion of the window: Description Displays the interface description for the currently selected port. Address Displays the MAC (physical) address of the selected port.
Bridging The following transmit and receive statistics Þelds are displayed in the lower portion of the window. The Þrst four statistics are also graphically displayed in a pie chart. The statistics are read directly from the device, and are updated with each poll from SPECTRUM Element Manager to the device. Unicast Displays the number of packets transmitted to, or received from, this interface that had a single, unique source or destination address.
Bridging CSMACD Statistics The CSCMACD Statistics menu option is available for some Ethernet bridging interfaces. Receive errors, transmission errors, and collision errors are the statistics displayed in this window. Three color-coded pie charts allow you to graphically view the breakdowns of each statistics group. To access the CSMACD Statistics window from the Bridge Status window: 1. Click on the desired Port button ( ) to display the Port menu. 2. Click on CSMACD Stats.
Bridging ¥ AlignmentÑThe number of frames received on a particular interface that contain a nonintegral number of bytes (color-coded green). Misaligned packets can result from a MAC layer packet formation problem, or from a cabling problem that is corrupting or losing data. ¥ FCSÑThe number of frames received on a particular interface that are an integral number of bytes in length, but do not pass the FCS (Frame Check Sequence) check.
Bridging ¥ Internal MACÑThe number of frames for which transmission fails due to an internal MAC sublayer transmit error. This error is only counted in this window if there have not been corresponding Late Collisions, Excessive Collisions, or Carrier Sense Errors. ¥ Transmit ErrorsÑThe total number of transmission errors of all types that occurred while the selected interface was attempting to transmit frames.
Bridging Figure 2-7. PPP Link Statistics Window Each of the errors and statistics related to the PPP Link at the selected bridging interface is described in detail below. Errors Indicates the errors that occurred which relate to the PPP Link at the selected bridging interface. Possible error types are: 2-26 ¥ Bad AddressesÑThe Bad Addresses Þeld displays the number of packets received with an incorrect Address Þeld.
Bridging ¥ Total ErrorsÑThe Total Errors Þeld displays the total number of errors of all types: Bad Addresses, Bad Controls, Packets Too Long, and Bad FCSs. Statistics Lists statistics Þelds which are related to the PPP Link at the selected bridging interface. Possible statistics Þelds are: Bridge Statistics ¥ Local MRUÑThe Local MRU Þeld displays the current value of the MRU (Maximum Receive Unit) for the local PPP entity.
Bridging ¥ Remote to Local AC CompressionÑThe Remote to Local AC Compression Þeld determines whether or not the remote PPP entity uses Address and Control (AC) Compression when transmitting packets to the local PPP entity. ¥ Transmit FCS SizeÑThe Transmit FCS Size Þeld displays the size of the Frame Check Sequence (FCS), in bits, that the local node generates when sending packets to the remote node.
Bridging Figure 2-8. Dot5 Errors Statistics Window Each type of IEEE 802.5 error detected by the selected station port is described in detail below. Line Errors The Line Errors Þeld displays the number of the line errors detected by the selected port. This error indicates the presence of a non-data bit between the starting and ending delimiters of data or a frame check sequence (FCS) error. Burst Errors The Burst Errors Þeld displays the number of burst errors detected by the selected port.
Bridging Abort Sequences The Abort Sequences Þeld displays the number of abort sequences transmitted by the selected port. These occur when an adapter has frames to transmit and receives a token, but does not detect an ending delimiter on the token after its access control Þeld. This indicates that the token is corrupted. The station transmits abort delimiters to halt frame transmission before its expected end-frame sequence, re-queues the frame(s) for transmission, but does not release the corrupt token.
Bridging Signal Loss The Signal Loss Þeld displays the number of times that the selected port has detected the loss of a signal condition from the ring. Transmit Beacons The Transmit Beacons Þeld displays the number of beacon frames transmitted by the selected station. Recoveries The Recoveries Þeld displays the number of claim token frames the monitored station has received or transmitted after a ring purge frame.
Bridging To access the Bridge Source Routing window from the Chassis View window: 1. Click on the appropriate port index to access the Port menu. 2. Click on Source Route Statistics. The Bridge Source Routing window, Figure 2-9, will appear. Figure 2-9. The Bridge Source Routing Window The Bridge Source Routing window provides basic statistics for source routed trafÞc passing between the bridging ports. Pie charts graphically break down the statistical information.
Bridging the destination station, which then directs a reply back to the source. The Þrst reply received by the original sending station is considered the most efÞcient route and is used in subsequent transmissions. ¥ Span. Tree Expl.ÑDisplays the total number of Spanning Tree Explorer (STE) frames received by the indicated port from its attached segment. STE frames, also known as Single Route Broadcast frames, follow the topology established by the Spanning Tree Algorithm.
Bridging Spanning Tree The Bridge Spanning Tree window allows you to display and modify the deviceÕs bridge port information and protocol parameters relating to the Spanning Tree Algorithm. In a network design with multiple bridges placed in parallel (i.e, attached to the same LAN), data loops must be prevented. The Spanning Tree Algorithm (STA) is the method that bridges use to communicate with each other to ensure that only a single data route exists between any two end stations.
Bridging Figure 2-10. Bridge Spanning Tree Window The Bridge Spanning Tree window displays STA parameters and allows you to alter parameters for the device bridge as a whole, and for each individual bridging interface. The values displayed apply to the currently-selected bridging interface, highlighted in the lower right quadrant of the window. To view or alter the parameters of another interface, click on the appropriate Port X name listed in the quadrant.
Bridging TIP Part of a bridgeÕs IdentiÞer is based on its MAC address. In most network installations, performance differences between bridges may be negligible. You may, however, Þnd your data bottle-necked in installations where both a low-performance bridge and a high-performance bridge are attached to the same LAN segment and the two (or more) bridges have the same Priority component set (e.g., at the default 8000 Hex).
Bridging Hello Time This parameter indicates, in seconds, the length of time the Root Bridge (or bridge attempting to become the Root) waits before resending ConÞguration BPDUs. The range for this Þeld is 1 to 10 seconds, with a default value of 2 seconds. The Root Bridge sets the Hello Time. Max Age This parameter displays the bridgeÕs BPDU aging timer. This controls the maximum time a BPDU can be retained by the bridge before it is discarded.
Bridging A lower assigned value gives the port a higher Priority when BPDUs are compared. The allowable range is 0ÑFF hexadecimal (0Ñ255 decimal); the default is 80 hexadecimal. Path Cost Displays the cost that this port will contribute to the calculation of the overall Root path cost in a ConÞguration BPDU transmitted by this bridge port.
Bridging Configuring Spanning Tree The Bridge Spanning Tree window allows you to update the following parameters for your device bridge. When you have Þnished making changes to the following individual parameters, you must click on Set at the bottom of the Spanning Tree window to write the changes to the device. NOTE Any values you set at the bridge will cause a Topology Change ßag to be issued in the next ConÞguration BPDUs it transmits.
Bridging Changing Hello Time If the bridge is the Root Bridge, or is attempting to become the Root, and you want to change the length of time the bridge waits between sending conÞguration BPDUs: 1. Highlight the Hello Time field, and type in a new value. 2. Click on Set. The IEEE 802.1d speciÞcation recommends that Hello Time = 2 seconds, with an allowable range of 1 to 10 seconds.
Bridging Changing Port Priority To change the part of the Port Priority used in priority comparisons: 1. If necessary, select the desired port by clicking the mouse to highlight the port in the lower right quadrant of the window. The lower left quadrant of the window will now allow you to edit parameters for the selected port. 2. Highlight the port Priority field, and enter the new priority identifier. Only valid hexadecimal numbers (0 to FF) are allowed in this field. The default is 80 hexadecimal. 3.
Bridging The Filtering Database consists of two separate databases: the Static and the Learned Databases. The Static Database contains addresses that are entered by a network administrator. You add these addresses directly to the database while the bridge is powered up, or to the deviceÕs battery-backed RAM so that they are stored on shutdown until the next power-up. The Learned Database consists of addresses that accumulate as part of the bridgeÕs learning process as it is up and running.
Bridging A scrollable Address Entry panel allows you to: ¥ View the address entries in the Filtering Database. ¥ Alter an entryÕs type (e.g., from Learned to Permanent, Dynamic, or Static). ¥ View and conÞgure the bridging action taking place on the packets entering each of the bridging ports. In addition, you can use buttons to add individual addresses to, or delete them from, these databases, or clear all Permanent, Static, or Dynamic entries in the database.
Bridging The following Þelds are listed in the top portion of the Filtering Database window. List The List checkboxes indicate whether the associated entry type (Permanent, Static, Dynamic, or Learned) will be displayed in the scrollable table of address entries. A check next to the entry type indicates that it will be displayed. Type Indicates the type of entry in the database. Number Displays the current number of Permanent, Static, Dynamic, and Learned Address entries.
Bridging Port Filtering Indicates the action that will take place at each bridge port when it receives frames from the selected address entry. A green arrow indicates that the frames received from the address will be forwarded to the portÕs associated segment ( ). A red circle indicates that frames will be Þltered (blocked) from the portÕs associated segment ( ). You can change the Port Filtering action, as described in the next section.
Bridging NOTE Note that the Filtering Database Aging Time is the same as the Aging Time displayed (and conÞgured) via the Source Addresses window. Setting the Aging Time in the Filtering Database window also changes the time in the Source Addresses window, and vice versa. Changing the Type of Entry You can change any entry type from its current type (Learned, Self, Permanent, Static, or Dynamic) to either a Permanent, Static, or Dynamic entry. To do so: 1. Click on the shadowed Type button.
Bridging 3. In the Receive Port field, type in the port at which the address must be detected for bridging to take place. If you enter a value of 0 in this field, the Receive Port is considered promiscuous (i.e., any port), and will be designated by an “*” in the Address Entry panel. 4. Click on OK. 5. Specify the Port Filtering action on the address entry as described in the previous section. To delete an address: 1.
Bridging Looking at each enabled Þlter, starting with the lowest numbered Þlter, the bridge compares the following Þelds to the corresponding Þelds in the received packet: ¥ ¥ ¥ ¥ Destination address Source address Ethernet or Token Ring data type Up to 16 hex integers (64 bytes) of the data Þeld In addition, a Þlter can also specify at which port or ports the packet must be received for the Þlter to be applicable.
Bridging Figure 2-13. Ethernet and Token Ring Special Filter Database Windows Special Filter Database Window The following Þelds are available in the Special Filter Database window: File An X in this checkbox indicates that the Þlter is associated with the Þle name shown in the title bar of the window. If a Þle has not yet been saved, the title bar will display the Þlter name Òuntitled. ßtÓ.
Bridging Destination Address Displays a six-byte hexadecimal Þeld for the Þlter which can be used to Þlter on Destination Addresses, in whole or in part. Source Address Displays a six-byte hexadecimal Þeld for the Þlter which can be used to Þlter on Source Addresses, in whole or in part. Data Type Displays the hexadecimal two-byte Þeld for the Þlter which can be used to mask out a speciÞed protocol type Þeld.
Bridging Defining and Editing Filters in the Special Database You can edit an existing Þlter or deÞne a new Þlter using the following steps: 1. Click to select the filter you wish to edit. The filter is selected when it is highlighted. When the bridge uses the Special Database, it starts with the lowest numbered enabled filter. 2. Click Edit.
Bridging NOTE If you do not wish to save what you have entered in the Special Database Filter Window, click on the Cancel button. This will cancel what you have entered into this window and return you to the Special Filter Database window. 6. Click on OK to save the changes you have made and exit the Special Database Filter window. Changing the Receive Ports You can set the receive ports in the Special Filter Database window either before or after you deÞne a Þlter.
Bridging You can set the port Þltering action for the bridging port on each port of the device, as well any BRIM ports. Clearing the Port Filtering Action When you clear the port Þltering action of a Þlter, all ports that were conÞgured to forwarding or blocking will be reset to no action. Note that when you clear port Þltering for a Þlter, the Þltering or blocking action will be simultaneously cleared at all of its receive ports. In order to clear the port Þltering action, use the following steps. 1.
Bridging To update the file while it is still open, click on the Save selection from the Filters pull-down menu. To open an existing Þle containing a Þlter set: 1. Click on Filters. A menu will appear. 2. Click on Open. A standard Microsoft Windows Open File window will appear. 3. To specify the file: In the File name field, specify the file to open by path and name or Use the Look in drop-down list box and associated file list to select the desired file, and click to highlight it. 4. Click on Open.
Bridging Figure 2-15. Interface ConÞguration Window Bridge Methods The options available in the Bridge Method Þeld are as follows: Transparent When the bridge is set to Transparent mode, the bridge will only transmit transparent frames from the Token Ring connection. If a source route frame is received by the bridge, the Source Route information in the frame will be dropped from the packet. (A transparent frame is the same as a source route frame without a RIFÑRouting Information Field.
Bridging Source Route Transparent When the bridge is set to Source Route Transparent, the bridge will transmit both transparent and source route frames. The frames received which have source route information will be transmitted as source route, while frames received that are transparent will be transmitted as transparent. Setting the Bridge Method 1.
Bridging To select the transmission method for TCP/IP, IPX, SNA, NetBIOS or Other protocols: 1. Click on the option button next to the transmission method you would like your Token Ring bridge port to use: Transparent, Source Route, or Auto. 2. Click on Set to apply the desired mode. Source Route Configuration With the Source Route ConÞguration window, you can view address and routing information, and set source route bridging parameters for bridging interfaces.
Bridging Source Routing Information Source Routing is a bridging technique developed by IBM and the 802.5 standards committee in which a bridge routes frames based on the contents of their media access control frame header, rather than by maintaining a Þltering database to determine whether a packet should be forwarded or Þltered.
Bridging NOTE It is recommended that the device be restarted when changes are made that affect source route bridging in order to clear the buffers, but you do not need to restart for the changes to take effect. The following Þelds are available in the Source Route ConÞguration Window: IP Address This Þeld displays the Internet Protocol (IP) address, which acts as a logical identiÞer on the network, currently assigned to each port on the device. This is needed for SNMP network management capability.
Bridging The following Þelds apply to the Source Route ConÞguration window: Local Segment This Þeld displays the unique segment number that identiÞes the segment attached to the selected interface (either of the Token Ring or FDDI interfaces). The bridge adds the Local Segment number to the routing information Þeld of source route discovery frames. Valid values range from 0 to 4095.
Bridging Bridge Number The Bridge Number uniquely identiÞes a bridge port when more than one bridge is used to span the same two segments. The Bridge Number should be in the range of 0 to 15. You can use the Set button at the bottom of the window to change the bridge number of the port, as explained in Making and Setting Changes, page 2-62. Current source routing protocols allow a range of 0 to 15 (0ÐF hexadecimal) for the bridge number identiÞer.
Bridging ¥ Disabled (not participating in the bridging process or in operation of the Spanning Tree Algorithm and protocol). If the Spanning Tree Mode is set to Disabled, the bridge port will not send or accept any STE frames. Any STE frame received will be discarded. The Spanning Tree Expl Þeld at the ConÞguration window, and the STE Frames Þeld at the Status window will both read ÒDisabled.
Bridging Figure 2-17. Find Source Address Window 3. In the text field in the middle of the window, enter a valid MAC address in hexadecimal format and then click OK. If the address is found in the 802.1d Bridge Filtering Database, the port through which the address is communicating will ßash in the front panel Chassis View display. If the address is not found in the Filtering Database, a separate window will appear with a ÒCanÕt Find Source AddressÓ message.
Bridging Figure 2-18. Port Source Addresses Window The Port Source Addresses window displays the MAC addresses of all devices that have transmitted packets that have been forwarded through the selected bridging interface during the last cycle of the Filtering DatabaseÕs deÞned aging timer (learned addresses that have not transmitted a packet during one complete cycle of the aging timer are purged from the Source Address Table). For more information, see Filtering Database, page 2-41.
Bridging Figure 2-19. Device Aging Time Window 2. Type in the new Aging Time, in seconds, then click on OK. The allowable range is 10 to 1000000 seconds; the default is 300 seconds.
Bridging To access the Bridge ConÞguration window from the Chassis View window: 1. Click on the Board Index of the device of interest; the Board menu will appear. 2. Click on Bridge Configuration. The Bridge Configuration window, Figure 2-20, will appear. Figure 2-20. Bridge ConÞguration Window To access the Port ConÞguration window from the Bridge Status window: 1. Click on the desired Port button ( ) to display the port menu. 2. Click on Port Configuration.
Bridging Figure 2-21. Port ConÞguration Window The Bridge ConÞguration and Port ConÞguration window Þelds are deÞned as follows: Bridge Number Displays and allows you to set the number assigned to Token Ring bridge. This value is limited to the hexadecimal range of 0 through F. This Þeld is settable in the Bridge ConÞguration window and read-only in the Port ConÞguration window. Virtual Ring Number Displays and allows you to set the number of the target segment connected to the selected bridge.
Bridging Port Mode Displays the three port mode options that are deÞned as follows: ¥ LobeÑallows direct-attach station connections (acting as a concentrator port). ¥ StationÑprovides station emulation. ¥ TPIM RI/ROÑallows attachment to Þber TPIMs on standard workgroup hubs or direct-attachment to devices, such as servers, via Þber adapter cards. If the device does not support this mode of operation, this option will be grayed out.
Bridging packets are sent to the destination station if the sending station does not receive a response to a test packet. WARNING Source Route/STE Indicates that the bridge forwards packets so they do not know the route or the devices they pass through to reach their destination. STE (Spanning Tree Explorer) packets are sent to the destination station if the sending station does not receive a response to a test packet.
Bridging To select the Bridge Mode/Explorer Type globally for all bridge interfaces on a device in the Bridge ConÞguration window or for an individual interface in the Port ConÞguration window: 1. Click in the Bridge Mode/Explorer Type pull-down list box. Select one of the available choices: Source Route Transparent/Transparent, Source Route Transparent/ARE, Source Route Transparent/STE, Source Route/ARE, Source Route/STE, and Transparent/Transparent. The default selection is Transparent/Transparent. 2.
Bridging The Duplex Modes Window The bridge-level Duplex Modes window allows you to enable and disable full duplex mode capability for each bridging interface on your device. The window lists each interface on the device and whether full duplex is ÒONÓ or ÒOFFÓ for each interface. To access the Duplex Modes window from the Bridge Status window: 1. Click on Bridge to display the Bridge menu. 2. Click on Duplex Modes. The Duplex Modes window, Figure 2-22, will appear.
Bridging ON Indicates that full duplex mode is being used on this interface. OFF Indicates that full duplex mode is not being used on this interface. N/A Indicates that full duplex mode is not available on this interface. Setting the Duplex Mode You set an interface to use or not use Full Duplex Switched Ethernet by turning the full duplex capability ON or OFF from this window. To turn the full duplex mode ON or OFF: 1. In the Duplex Modes window, highlight the interface you want to change. 2.
Bridging Figure 2-23. Port ConÞguration Window This window will indicate which mode is being used on the interface, standard mode or full duplex mode. Standard Mode Standard mode is being used on this interface. In standard mode, the interface can transmit or receive packets. The interface has to wait for one activity to be completed before switching to the next activity (receive or transmit). Full Duplex Full duplex mode is being used on this interface.
Bridging From this window you can manually set the operational mode of the port, determining the speed of the port (10 Mbps or 100 Mbps), and whether it uses full duplex or standard mode bridging. You can also set a 100Base-TX port to auto-negotiation so that the appropriate operational mode can be determined automatically (using the Advertised Abilities of the local interface that you determine, and the Remote Capabilities of the Remote Link).
Bridging determine the speed of the port and whether it uses full duplex or standard mode bridging. The following information about the selected Fast Ethernet port is displayed: Port Type Displays the type of Fast Ethernet port for example, FE-100TX or FE-100FX. Link State Displays the connection status of the selected port: Link or No Link. Current Operational Mode Displays the mode that the port is operating in at the present time.
Bridging NOTE Auto-negotiation is not available on the FE-100FX; therefore, the Advertised Abilities and Remote Capabilities section of the Fast Ethernet ConÞguration window will be grayed out when you are viewing the port conÞguration of an FE-100FX. ! If you choose to select a speciÞc mode of operation (rather than auto-negotiation), you should be sure that the link partner supports the same mode. Otherwise, no link will be achieved.
Bridging When an active link is established, the operational mode will be dynamically set based on the modes selected in the Advertised Abilities field and the speeds and modes supported by the attached device; see the definition for Advertised Abilities on page 2-75. Setting the Operational Mode for the FE-100FX You can manually set the FE-100FX to use either of two operational modes: 1.
Bridging The ITU, or International Telecommunications Union (formerly known as the CCITTÑthe Consultative Committee on International Telegraph and Telephone) incorporated the SONET standard into its Synchronous Digital Hierarchy (SDH) recommendations, which address differences between the European and North American transmission standards. The ITU sets standards for international communications (except for nations adhering to ANSI standards).
Bridging Figure 2-25. SONET/SDH ConÞguration Window To set the operational mode of the SONET port via the SONET/SDH ConÞguration window: 1. Click on the option button adjacent to the appropriate selection, SONET or SDH, to choose the data transmission standard to be used by the interface. 2. Click on Apply to set your change at the interface, or Cancel to exit the SONET/SDH Configuration window without applying any changes.
Bridging With a SONET link, there are three levels of error conditionsÑanomalies, defects, and failures. ¥ Anomalies are small discrepancies between a desired and actual characteristic of an item, which when occurring singly will not interrupt the ability of the SONET network elements to perform their required functions. ¥ Defects indicate that anomalies have reached a level where the ability of the SONET network elements to perform their required functions has been interrupted.
Bridging The statistics and errors indicators provided in the SONET/SDH statistics window are taken from both the end-to-end Path layer, and from the Section layer between the FE100-Sx or APIM-2x and the Add/Drop Multiplexer to which it is connected. They reßect errors that may be occurring on your customer premises equipment, as well as errors that may be occurring at the Line or Section layers within the SONET MAN/WAN ring itself.
Bridging Errors The Errors indicators at the bottom of the SONET/SDH Statistics window show the status of the SONET link as reported by the monitored interface, by indicating whether the link has experienced Loss of Pointer, Loss of Signal, or Loss of Frame defects or failures during the current 15-minute interval.
Bridging A state of no transitions that lasts between 2.3 µs and 100 µs is declared an LOS defect. The LOS defect is cleared after a 125 µs interval (the time required to transmit one frame on a SONET network) during which no LOS defect is detected. If the LOS defect persists for a period of 2 to 3 seconds, an LOS failure will be declared, an alarm indicator will be set, and an alarm message will be sent to an Operations Systems application (responsible for overseeing the entire network).
Bridging ¥ Errored SecondsÑThe counter associated with the number of Errored Seconds, or Far-End Errored Seconds, encountered by a SONET/SDH Path in the speciÞed interval. An Errored Second (ES) is a second with one or more coding violations (bit parity errors) at the associated layer reported at the Section, Line, or Path layer of the SONET link, or a second during which at least one or more incoming defects (e.g., Loss of Signal, Loss of Pointer, or Loss of Frame) has occurred at that layer.
Bridging Configuring SmartTrunking The SmartTrunk menu option invokes the SmartTrunk ConÞguration and Status window, which allows you to group interfaces logically to achieve greater bandwidth between devices when both devices support this feature. There is no limit to the number of ports that can be included in a single Òtrunk.Ó NOTE SmartTrunking is designed to work in the traditional bridging mode only, and is not available if a switch is in the SecureFast VLAN mode.
Bridging The SmartTrunk ConÞguration and Status window displays all of the ports on the selected device. The following information is given for each port: Port Displays each port on the selected module. Use the scroll bar to the right of the list box to view information for all available ports. Name Displays the interface description of the selected port. Mode Displays the connection type for each port, either User or Network. User connections do not participate in SmartTrunking; Network connections do.
Bridging To enable or disable SmartTrunking at the device level: 1. Click on the option button adjacent to the value you wish to set in the Device Level SmartTrunk field: Enable or Disable. When the option button is filled, the following confirmation window (Figure 2-28) will appear: Figure 2-28. Device Level SmartTrunking ConÞrmation Window 2. Click on Yes to apply your selection, or No to exit the confirmation window without applying the change. 3. Click on Refresh to ensure that changes are applied.
Bridging NOTE When you Þrst open the SmartTrunk ConÞguration and Status Screen, the Enable and Disable Port # X Þeld will be labeled SmartTrunk State Port #. After you click on a port number in the list box, the Þeld title will change to Enable and Disable Port # X. Configuring Broadcast Suppression Excessive broadcasts to all ports, or broadcast storms, can result in severe network performance problems, and possibly cause the network to crash.
Bridging You can also deÞne what level of broadcasts the device will recognize as a broadcast storm by specifying the number of broadcast packets that can be transmitted within a given time period. To conÞgure a port for broadcast storm protection: 1. Click to highlight the entry for the port you wish to configure for automatic broadcast storm protection. 2. In the Time on Selected Ports field, enter the desired time period in seconds. Note that a value of 0 will disable the threshold alarm. 3.
Bridging Figure 2-31. Token Ring Bridge Mode Window The following options are available in the Token Ring Bridge Mode Window: Transparent When the bridge is set to Transparent mode, the bridge will only transmit transparent frames from the Token Ring connection. If a source route frame is received by the bridge, the Source Route information in the frame will be dropped from the packet. (A transparent frame is the same as a source route frame without a RIFÑRouting Information Field.
Bridging Setting Bridge Translation When bridging between Ethernet and Token Ring networks, it is necessary to alter the MAC (Media Access Control) layer information. The Bridge Translation window controls the default frame translation that will occur for Token Ring frames that are bridged to Ethernet.
Bridging Figure 2-32. Bridge Translation Window Enabling and Disabling Auto and Dual Translate Modes When Auto Translate mode is enabled, the bridge will learn, from its Ethernet ports, which frame format each source address is using. When the bridge forwards a Token Ring packet to one of these learned source addresses, it will automatically translate the packet to the correct frame format.
Bridging Configuring Token Ring Packet Translation The middle section of the Bridge Translation window allows you to select the Ethernet frame format the bridge will use to translate various packet types that have been transported across Token Ring media. Figure 2-33.
Bridging There are two bit-order options: ¥ LSBÑLeast SigniÞcant Bit ¥ MSBÑMost SigniÞcant Bit To set the bit order: 1. Click on the empty LSB or MSB option button. When the option button is filled ( ), the selected bit order is enabled. NOTE Novell recommends setting the bit order to LSB (Least SigniÞcant Bit) when bridging between Token Ring and Ethernet. When the bridge is set to operate in LSB mode, all the NIC cards on the Token Ring network should also be conÞgured to operate in LSB mode.
Bridging The table contains the following information Þelds: Index Displays the index of an entry in the Token Ring-to-Ethernet Translation table for IBM protocols. This number can be from 1 to 20. SAP Displays the SAP (Service Access Point) value of an IBM protocol. The bridge will translate all Token Ring 802.5 packets without a SNAP header and with this SAP value to Ethernet packets with Ethernet type set to 80D5.
Bridging The SNAP Translation Table The SNAP format table contains Ethernet type Þeld entries that the bridge uses to determine how to translate a Token Ring (802.5 with SNAP) packet to an Ethernet packet. If a Token Ring packet is received that matches the Ethernet type Þeld of an enabled entry, the bridge will translate the Token Ring packet to the frame format speciÞed by the button above the table. Otherwise, it will translate the packet to the opposite frame format. Figure 2-37.
Bridging 3. Click on the entry you want to change. The SNAP Translation table, Figure 2-38, will appear. Figure 2-38. SNAP Translation Table The Table Entry Þeld will display the index of the entry you are viewing and conÞguring. 1. To change the SNAP Value (the type field) of this entry, highlight the current value and type a new one. The SNAP value must be two octets. 2.
Bridging To access the Novell Translation window from the Bridge Status window: 1. Click on Bridge to display the Bridge menu. 2. Click on Novell Translation. The Novell Translation window, Figure 2-39, will appear. To access the Novell Translation window from the Chassis View window: 1. Click on the Board Index of the bridge module of interest; the Board menu will appear. 2. Click on select Novell Translation. The Novell Translation window, Figure 2-39, will appear. Figure 2-39.
Bridging If LLC Layer Translation is selected, translation is performed within the logical link control layer for Novell packets. This translation provides most signiÞcant bit to least signiÞcant bit conversion on the source/destination MAC addresses located in the IPX header. The default choice is LLC Layer Translation. Devices that support LLC translation include: 9T122-08 9T122-24 9T425-16 3T0x-04 If None is selected, no translation is performed.
Bridging Figure 2-40. Ethernet Port Physical View The following status Þelds are available in the Ethernet Port Physical View window: Active Port This Þeld will have an enabled check box next to the active port conÞguration option you have selected for your ETWMIM Ethernet port. ¥ If you have conÞgured the ETWMIM for use with the Ethernet backplane connection, the X will appear in the BackPlane checkbox.
Bridging ¥ UnknownÑindicates the status of the EPIM link is unknown, or not valid for the type of EPIM installed. ¥ N/AÑindicates that the backplane connection is being used. Token Ring Port Physical View The Physical View option allows you to view and conÞgure the physical set up of the Token Ring port when you are monitoring an ETWMIM via SPECTRUM Element Manager. To use the Physical View option from the Bridge Status window: 1. Click on the Token Ring bridge port (Port 2).
Bridging The following Status Fields are available in the Token Ring Port Physical View window: Ring Speed Displays the current ring speed conÞgured for your Token Ring port. You can change the ring speed from this window by clicking on the option button next to the desired ring speed: 4 Megabits/second or 16 Megabits/second. When you reconÞgure the ring speed, the new speed will appear in the text box in this Þeld. Ring State Displays the state of the ETWMIMÕs Token Ring MAU with respect to the ring.
Bridging The left-hand side of the window indicates the results of the current FNB conÞguration, with an X next to the appropriate state of the FNB connection: Connected Left, Connected Right, Bypassed, Right Connection Fault, or Left Connection Fault. For example, if you choose Connect Right and Disconnect Left, then click OK, the Connected Right and Left Connect Fault Þelds will appear with an X next to them.
Bridging 2-104 Using the Physical View Windows for the ETWMIM
Chapter 3 FDDI Applications Concentrator Configuration window; Connection Policy window; Station List window; Concentrator Performance window The FDDI menu, available on devices with an installed and enabled FDDI BRIM, lets you access windows to view information about the Station Management (SMT) entity supported by your FDDI BRIM. The SMT entity provides the system management services for the FDDI protocols, including connection management, node conÞguration, management statistics, and ring recovery.
FDDI Applications Accessing the FDDI Menu 1. Click on the FDDI menu in your device Chassis View window and click again to select the appropriate Station Management (SMT) entity to reveal the following FDDI menu (Figure 3-1). Figure 3-1. The FDDI Menu 2. Click on the desired selection. When you select one of these options, the associated FDDI window will appear. TIP The title bar of the selected FDDI submenu windows will display the index number of the SMT entity for which information is being displayed.
FDDI Applications The FDDI ConÞguration window displays the following Þelds: MAC State This Þeld indicates the current state of the MAC on the FDDI ring associated with the selected SMT entity. The RMT component of SMT monitors MAC operation and takes actions necessary to aid in achieving an operational ring. RMT occurs on a per-MAC basis and aids in the detection and resolution of failures, such as stuck beaconing and the presence of duplicate addresses.
FDDI Applications SMT Version Displays the version number of the Station Management (SMT) entity. SMT frames have a version ID Þeld that identiÞes the structure of the SMT frame Info Þeld. The version number is included in the SMT frame so that a receiving station can determine whether or not its SMT version is able to communicate with the SMT version of another station. Knowing the version number allows the station to handle version mismatches. Each station supports a range of SMT versions.
FDDI Applications Concentrator Non-M Ports This Þeld display the number of non-Master ports (A, B, or S ports) on the modular FDDI BRIM concentrator. Number of MACs The number of Media Access Control entities present in the FDDI BRIM, indicating the number of ring port pairs. For the FDDI BRIM, this number will be 1. MAC Path This Þeld displays the conÞguration of the MAC with respect to the logical ring, as determined by the Connection Management (CMT) portion of SMT.
FDDI Applications The following table summarizes the FDDI connection rules: Table 3-1. FDDI Connection Rules A B S M A V, U V V, U V, P B V V, U V, U V, P S V, U V, U V V M V V V X V – valid connection X – illegal connection U – undesirable (but legal) connection P – valid, but when both A and B are connected to M ports (a dual-homing configuration), only the B connection is used.
FDDI Applications TIP You can use any SNMP Set Request or MIB tool to edit the Connection Policy for your device by setting the fddimibSMTConnectionPolicy MIB OID (part of the MIBII FDDI Transmission MIB (RFC1512). fddimibSMTConnectionPolicy is simply a 16-bit integer value (ranging from 32768 to 65535) that corresponds to the connection policy (in the ÒReject X-YÓ format, where X represents a port on the FDDI Switch Module, and Y represents the attaching node).
FDDI Applications Station List Window The Station List displays the conÞguration of the FDDI BRIM managed ring, including the number of nodes on the ring, node addresses (both Canonical and MAC), node class, and ring topology. Figure 3-4. The Station List Window The upper section of the Station List window displays information about the FDDI BRIM managed ring. Number of Nodes The number of stations inserted into the FDDI ring to which the FDDI BRIM MAC is connected.
FDDI Applications The Stations Panel section displays a list of the stations on the ring to which the selected SMT is connected, in ring sequence beginning with the MAC, along with each stationÕs node class and current topology. # An index number assigned to each station that indicates its position on the ring in relation to the FDDI BRIM. The monitored FDDI BRIM is always 1. MAC Address Displays the manufacturer-set MAC address of the node inserted into the ring.
FDDI Applications FDDI Performance Window The FDDI Performance window, Figure 3-5, provides graphical and numeric performance statistics for the FDDI BRIM, including transmit frames, receive frames, frame errors, lost frames, and ring ops. Figure 3-5. The FDDI Performance Window The FDDI Performance window displays performance data in three formats: ¥ Count the number detected of each performance type for the selected interval.
FDDI Applications Frame Errors The number of error frames detected by the FDDI BRIMÕs MAC during the selected interval that had not been detected previously by other stations. Error frames may include frames with an invalid Frame Check Sequence (FCS), with data length errors, or with internal errors that prevent the MAC from transferring the frame to the Logical Link Control (LLC) layer.
FDDI Applications 3-12 FDDI Performance Window
Chapter 4 WAN Applications Viewing WAN Interface Status; configuring the synchronous and T1 connection; displaying the WAN logical settings; Viewing the Wan Port AdminStatus; enabling and disabling WAN interfaces; displaying Synchronous port statistics This chapter describes the options available from the WAN Status menu when a WAN BRIM is installed in a device. This option allows you to set up and view the connections for a WAN BRIM, and view protocol and synchronous port statistics.
WAN Applications Viewing WAN Interface Status The WAN Interface Status window displays the conÞguration of the synchronous and/or T1 ports on a BRIM-W6 or BRIM-WT1. This window has two port conÞguration sections Ð one for each WAN port on the device, whether it is synchronous or T1. You can use this window to determine which WAN port is the active port and set a port to be the primary port. You can also use the ConÞgure button to access the T-1 Port and Synchronous Port ConÞguration windows.
WAN Applications Desired Primary Allows you to assign a port to be your primary port by clicking on the option button under the desired port. NOTE In future releases, you will be able to conÞgure redundancy for the device. At this time, by choosing the Desired Primary, you are actually choosing the Current Active. Configuring the Synchronous Connection The Sync Port ConÞguration window displays the current conÞguration of your synchronous WAN connection.
WAN Applications The Sync Port ConÞguration window contains the following Þelds: Type Displays the type of connection used at the port. Click the associated button to select RS422, RS232, V.35, and Other. You can change the type of connection displayed in this window to match the conÞguration of your physical synchronous port. Inspeed Displays the speed of input communications of the synchronous port. Click the associated button to select 2.048 Mbps, 1.54 Mbps, 256 Kbps, 128 Kbps, 64 Kbps, 56 Kbps, 38.
WAN Applications Configuring T-1 Ports The T-1 Port ConÞguration window displays the conÞguration of your WAN T1 connection. The drop-down menus in this window allow you to change the conÞguration of the T1 connection without accessing Local Management. You can use the FracTable button to access the WAN FracTable ConÞguration window, which allows you to conÞgure your timeslots. To access the T-1 Port ConÞguration window from the WAN Interface Status window: 1.
WAN Applications ! CAUTION If AMI is chosen, the line code selection on the individual interfaces should not be set to None; for more information on setting the interface line coding refer to ConÞguring the Fractional Table, page 4-8. Circuit ID Allows you to enter a character string speciÞed by the circuit vendor as a circuit identiÞer. This is used for a reference during troubleshooting processes. Loopback Mode Displays the loopback conÞguration of the DS1 interface.
WAN Applications Using the T1 FracTable Configuration Window The FracTable ConÞguration window allows you to assign your interfaces to the 24 channels on the T1 line according to the mapping provided by your WAN carrier. To open the T1 FracTable ConÞguration window from the T1 Port ConÞguration window: 1. Click on the FracTable button. The T1 FracTable Configuration window, Figure 4-4, will appear.
WAN Applications The range of interface indices for a BRIMÕs interfaces will start after the indexing of interfaces on the host device, and end at the last interface supported by the WAN port. For example, for an ETWMIM that has a BRIM-W6 with a single 24-channel WPIM-T1 installed in the Þrst BRIM port, the BRIM interfaces will be indexed from 3 (since ifIndex 1 and 2 are the ETWMIM Ethernet and Token Ring interfaces) to 26 (since the WPIMs supports 24 interfaces).
WAN Applications 5. If a channel is not being used by an interface you should disable it by selecting Delete (0) in the interface scroll box and then clicking on the selected channel. In the preceding window, channels 9-12 are not assigned and are disabled. 6. When you are done making your changes click on the Save button. The “scratchpad” will then be copied to the current fractional table being used by the device.
WAN Applications Displaying the WAN Logical View The WAN Logical View window displays information about the logical interfaces that comprise your physical WAN port. Although the WAN Logical View window has identical Þelds for the T1 and the Synchronous ports, the number of interface entries depends on the type of port. The Synchronous port will have a single interface entry; the T1 port will have 24 interface entries. To open the WAN Logical View window: 1.
WAN Applications MTU Displays the MTU (Maximum Transfer Unit) for this interface. The MTU is the largest packet size that can be transmitted on the selected interface. Line Coding Displays the line coding set for this interface: INV-HDLC, JBZS, or None. None (the default value) is displayed when the line coding being used on the interface is B8ZS. CRC Length Displays the length of the CRC (Cyclical Redundancy Check) for this interface.
WAN Applications Viewing the WAN Port Admin/Status The Admin/Status window displays status information for your WAN port. Depending on the type of port that is active, the Admin/Status window for the Synchronous Port (Figure 4-7) or the T1 interfaces will display (Figure 4-8). To access the Admin/Status window: 1. Click on Device on the Chassis View menu bar to access the Device menu. 2. Click on WAN Status and Admin/Status.
WAN Applications Admin Status The Admin Status toggle button lets you administratively Enable or Disable the port. The Operational Status indicator will reßect the results of the administrative action. T1 Admin/Status The T1 Admin/Status window (Figure 4-8) displays the administrative status or operational status of your T1 interfaces, and also allows you to enable or disable any of the 24 possible T1 interfaces. Figure 4-8.
WAN Applications Enabling and Disabling WAN T1 Interfaces From the Interface drop-down menus, you can administratively enable or disable any of the 24 possible T1 interfaces. 1. From the WAN AdminStatus T1 Interfaces window, click on the desired Interface button. 2. Click on Enable to enable the interface, or Disable to disable the interface. Note that the interface display may take a few moments to update your selections.
WAN Applications Xmit UnderRuns The number of frames that failed to be transmitted on the port because data was not available to the transmitter in time. Xmit UnderRuns are color-coded Blue. Receive OverRuns The number of frames that failed to be received on the port because the receiver did not accept the data in time. Receive OverRuns are color-coded Cyan. Interrupted Frames The number of frames that failed to be received or transmitted on the port due to loss of modem signals since port state was ÒupÓ.
WAN Applications 4-16 Displaying Synchronous Port Statistics
Chapter 5 ATM Configuration Viewing connection data; configuring Permanent Virtual Circuits (PVCs); adding and deleting connection entries The ATM Connections option will be available when you have an ATM BRIM installed and enabled in your device. The ATM interfaces provided by an ATM BRIM provide the connectivity that allows you to merge ATM network segments with traditional LAN technologies.
ATM Configuration Figure 5-1. The Current ATM Connections Window The Current ATM Connections window provides the following information: Connection Data The Connection Data Þelds provide the following information about each ATM interface available on the device: I/F Displays the index number assigned to each ATM interface present on the selected BRIM device. Maximum Connections Displays the maximum number of connections allowed by current device Þrmware.
ATM Configuration VPI Displays the Virtual Path IdentiÞer assigned to the connection. Virtual Path IdentiÞers are used to group virtual connections, allowing for channel trunking between ATM switches. Each VPI can be conÞgured to carry many different channels (designated by VCIs) between two points. VCI Displays the Virtual Channel IdentiÞer assigned to the connection; allowable values are 0 - 1023 for each VPI.
ATM Configuration Delete Deletes the selected connection; a conÞrmation window requires that you conÞrm the deletion. Refresh Refreshes the connection information displayed in the window. Adding a New Connection To conÞgure new Permanent Virtual Circuits (PVCs), enter the following information in the text Þelds which appear just below the connections list box: 1. In the I/F menu, select the interface for which you wish to configure a connection. All available ATM interfaces will be listed in this menu.
ATM Configuration 5. Click the Add button to add the new permanent circuit to the ATM interface. The circuit is automatically enabled, and will remain in place until it is manually removed. NOTES Note that for the BRIM-A6DP which supports a redundant APIM, any PVCs that you conÞgure will automatically be created on both APIMs. Deleting a Connection To delete an existing PVC: 1. In the connections list box, click to select the connection you wish to delete. 2. Click on the Delete button.
ATM Configuration 5-6 Configuring Connections
Index A Aborted Frames 4-15 Absolute 3-11 Accessing Other Management Options Duplex Modes window 2-10 Ethernet Special Filter Database 2-10 Filtering Database window 2-10 Module Type window 2-9 Performance Graph 2-9 Spanning Tree window 2-10 Active Monitor 2-103 Active Port 2-100 Active Users 1-7 Address 2-21, 2-44 Address Mode 3-8 Address Mode button 3-8 AdminStatus 4-13 AdminStatus button 4-13 AdminStatus window 4-12 Synchronous 4-12 T1 4-13 Aging Time 2-44 Alarm ConÞguration window 2-12 All Paths Explor
Index Concentrator M Ports 3-4 Concentrator Non-M Ports 3-5 ConÞguration 3-1 ConÞguration window 2-12 ConÞgure button 4-3, 4-5 Connect A 2-71 Connection Management 3-5 Connection Policy 3-1 window 3-6 Connection rules 3-6 Connection Type window 2-11 CRC Length 4-11 CSMACD Statistics window 2-5 CSMACD Stats window 2-13 Cumulative 3-11 Current Active 4-2 Current button 4-8 Current Primary 4-2 D Data Mask 2-50, 2-51 Data Offset 2-50, 2-51 Data Type 2-50, 2-51 Delta 3-11 Description 2-21 Description window 2-
Index Frame Check 4-14 Frame Errors 3-11 Frame Relay 4-11 Frames Forwarded 2-17, 2-19 Full Duplex 2-71 G Getting Help 1-8 Global Call Center 1-9 Grouping of virtual connections 5-3 H Hello Time 2-37 Changing 2-40 Help button 1-7, 1-8 Hold Time 2-37 I I/F ConÞguration window 2-6, 2-11 I/F Statistics window 2-12 IBM Translation Table 2-94 IF 4-10 Index 2-95, 2-96 Individual Entries Adding or Deleting 2-46 Inspeed 4-4 Instance 2-86 Interface 2-54, 2-71, 4-7 Interface button 4-14 Interface Line Coding 4-7 C
Index P Packets Received 2-22 Packets Transmitted 2-22 Path Cost 2-38 Changing 2-41 Performance 3-1 Performance Graph window 2-5, 2-11 Permanent entries 2-42 Permanent Virtual Circuits (PVCs) 5-1 Physical View 2-99, 2-101, 4-2 Physical View window 2-13 Port # 2-86 Port ConÞguration window 2-6, 2-12, 2-65 Port Filtering 2-45, 2-50 Port Filtering Action Changing 2-46, 2-52 Clearing 2-53 Setting 2-52 Port Number 1-7 Port Priority Changing 2-41 PPP 4-11 PPP Link Statistics window 2-5 PPP Link Status window 2-1
Index SONET/SDH transmission hierarchy 2-78 Source 2-51 Source Address 2-50, 2-51 Source Address Table 2-6, 2-41 Source Addressing window 2-11 Source Port 2-44 Source Route ConÞguration window 2-6, 2-11 Source Route Statistics window 2-5, 2-11 Source Route Transparent mode 2-56, 2-90 Source Routing 2-2 Source Routing mode 2-56, 2-90 Spanning Tree Algorithm (STA) 2-2 Spanning Tree Algorithm Protocol Type Changing 2-39 Spanning Tree Explorer (STE) packet 2-2 Spanning Tree window 2-6 Special Filter Database D
Index Index-6