
Operating Instructions and Installation Instructions

21
VEGA - SIRE
3
PLUS - DOGE
3
PLUS - SFERA
3
- SFERA
3
PLUS - PRINCE
3
- PRINCE
3
PLUS - GLOBE - TREND - ELISE
3
PLUS
EN
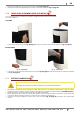
• Place the frontal panel in the correct position (see Fig. 36 page 20).
• Fix the frontal panel by tightening two screws in the lower part (see Fig. 37 page 20).
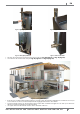
11.8 FRONT PANEL ADJUSTMENTS (ELISE
3
PLUS MODEL)
You can adjust the top and bottom panels to bring them ush with the side panels
Proceed as follows:
TOP PANEL
Fig. 38 - Adjustment 1 Fig. 39 - Adjustment 2
• Loosen the bottom screw (see Fig. 38 page 21) and the top screw with a screwdriver (see Fig. 39 page 21).
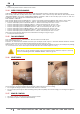
BOTTOM PANEL
Fig. 40 - Adjustment 1 Fig. 41 - Adjustment 2
• Loosen the screw below the base with CH 7 key (see Fig. 40 page 21) and the screw above with a screwdriver
(see Fig. 41 page 21).
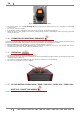
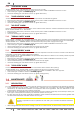
11.9 ELECTRIC CONNECTION
Warning: the appliance must be installed by an authorized technician!
• The electric connection occurs through a cable with plug put in an electric socket which is able to support
charge and tension specic of every model, as described in the technical datas table (see FEATURES page 43).
• The plug must be easily accessible when the appliance is installed.
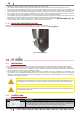
• Please further assure you that your network is endowed with an efcient earth connection: if it does not exist
or if it is not efcient, please endow you with one in compliance with the law.
• Connect the supply cable rst on the back of the stove (see Fig. 42 page 22) and then at a wall electric
socket.