STG-832 InfantTAG User Manual
WARNINGS For customer in the U.S.A and Canada Federal Communications Commission (FCC) Statement 15.21 You are cautioned that changes or modifications not expressly approved by the part responsible for compliance could void the user’s authority to operate the equipment. 15.105(b) This equipment has been tested and found to comply with the limits for a Class B digital device, pursuant to part 15 of the FCC rules.
• The manufacturer of this product is CADI Scientific Pte Ltd, 31 Ubi Road 1, #03-00 Aztech Building, Singapore 408694. Cadi Scientific Pte Ltd 31, UBI ROAD 1 #03-00 AZTECH BUILDING Singapore 408694 http://www.cadi.com.sg PRECAUTIONS • Keep batteries away from children. • Do not swallow batteries. • Do not throw batteries into water. • Do not throw batteries into fire. • Do not short-circuit batteries. • Do not recharge batteries.
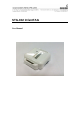
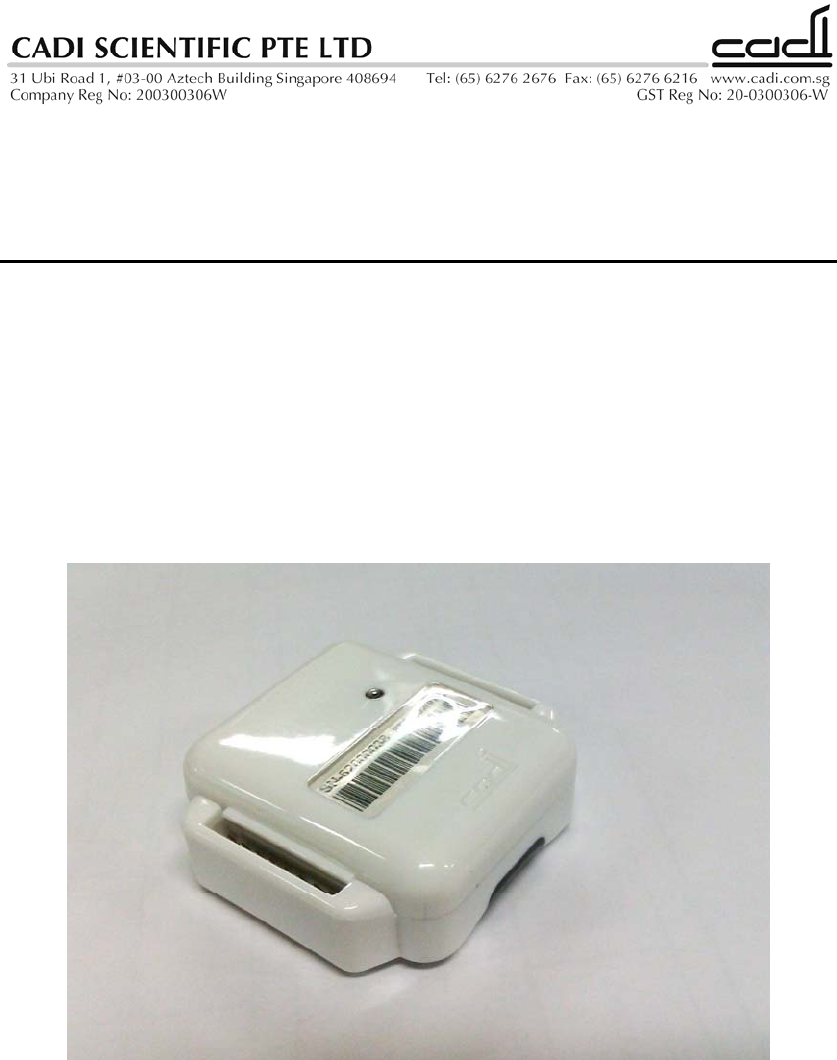
Description The STG-832 InfantTAG is a battery replacement tag that can be worn on an infant to track its location. When used in conjunction with the STG-852 Patient/Mother-Tag, the InfantTAG can be matched to a Mother-Tag. When matched to an InfantTAG, the Mother-Tag can provide indication of an incorrect match when a wrong Infant is brought near the mother. The STG-832 will periodically transmit RF signal or LF signal (optional). The RF and LF data packets consist of its unique tag ID and status.
Product Specification The STG-832 Infant Tag has the following requirements: General Specification Operating Ambient Temperature Range Storage Ambient Temperature Range Device ID • 20.0 deg C to 50.0 deg C • 20.0 deg C to 50.0 degC • 16 Bits • 3V Coin-cell CR2050 • (39.5) x (36.5) x (15.0) mm • None • 1x Green LED Operating Indicator • • 3V d.
Operating Frequency • 125kHz • UHF: 868.4MHz, 919.
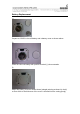
Battery Replacement 1) Prepare a CR2050 coin cell battery and a battery cover as shown above 2) Place the coin-cell battery with positive terminal (+) face outwards. 3) Adjust the battery cover as shown above (triangle pointing at about 1’o clock) so that >90% of the thickness of the cover is inserted into the casing (body).
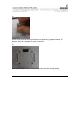
4) Press a little bit and turning clockwise for tightening. (Approximately 10 degree, there is a stopper so won’t overturn). 5) After tighten up the cover, it should be flush with the casing (body).