
Use and Care / Installation Manual

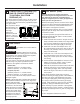


Table Of Contents

31-2000814 Rev. 1 13
Installation
10
CHECK BURNERS
WARNING
FireorExplosionHazard:Donot
operatetheburnerwithoutallburnerpartsinplace.
A. Burners - Place surface burners into corresponding
positions on cooktop.
B. Caps - Place caps on proper size burner.
C. Grates - The left and right grates are
interchangeable. Place the grates on the cooktop.
FINALIZE INSTALLATION
Place the burner grates over the burners. The grates
should be seated and should not rock.
WHEN ALL HOOKUPS ARE
COMPLETED
Make sure all controls are left in the off position. Make
suretheflowofcombustionandventilationairtothe
range is unobstructed.
Check that all packing materials and tape have been
removed.Thiswillincludetapeonmetalpanelunder
controlknobs(ifapplicable),adhesivetape,wire
ties,cardboard,andprotectiveplastic.Failureto
remove these materials could result in damage to the
appliance once the appliance has been turned on and
surfaces have heated.
11
CHECK SURFACE BURNERS
Push and turn a knob to the LITE position. A clicking
sound indicates proper operation of the ignition
system.Whenlightinganyburner,sparkswillappear
atallburnersbutgasflowsfromonlytheoneselected.
Onceairispurgedfromthesupplyline,burnershould
lightwithin4seconds.Afterburnerlights,rotatethe
knob out of the LITE position. Try each burner in
succession until all burners have been checked.
Quality of Flames
Determine the quality of flames visually. Normal
burner flames should look like (A) or (B).
Long,brightyellowflamesarenotnormal.Normal
flamesmayshowsignsofanorangetintwhenwell
heated or signs of flickering orange due to particles in
the gas or air.
(A) Soft blue flames—
Normal for natural gas
(B) Yellow tips on
outer cones—
Normal for propane (LP) gas
Burner Cap Not Properly Seated
Burner Cap Properly Seated