2002 Owner’s Manual USA and Canada Chef Series Master Chef Series Gourmet Series Duplication without written consent is strictly prohibited. This owners manual is for BBQ Grills and Outdoor Kitchens Manufactured after April 4, 2002 Sold and Delivered in USA and Canada Due to our continuous improvement program, all models, operation, and/or specifications are subject to change without prior notice.
Welcome To The Cal Spas Family Congratulations on the purchase of your new Cal Flame BBQ. Welcome to our family. You can feel confident knowing that you have purchased on of the most technologically advanced outdoor cooking environment in the industry. Your new Cal Flame BBQ is backed by the world wide recognized name in value, reliability and customer service, Cal Spas. Customer Information: We want to learn more about you.
Table of Contents Safety: Warnings and Notices................................1 Customer Information.................................2 Model and Serial Number Location............2 Safety Instructions......................................3 Installation: Installation Location....................................7 Built-in Installation.......................................7 Cabinet Cutout Design................................8 Gas Requirements......................................9 Side Burner Attachment...
WARNINGS AND NOTICES General Safety Requirements: 1. Installation of this appliance must conform with local codes and with either the National Fuel Gas Code, ANSI Z223.1, or CAN/CGAB149.1, Natural Gas Installation Code or CAN/CGA-B149.2 Propane Installation Code. WARNING: Use of this product in any other way than described in this manual, may result in fire or explosion, causing property damage, personal injury or even death. 2.
Customer Information Locating Products Serial Number: BBQ Islands Only: Your new Cal Flame Island BBQ serial number is located on a metal plate inside the door below the grill on the floor. You will need this number to properly register you BBQ and activate warranty coverage. BBQ Grill Inserts Only: Your new Cal Flame grill serial number is located in the drip pan area on the inside left wall. You will need to pull out the drip pan to view.
SAFETY INSTRUCTIONS Please read before installing and operating your new Cal Flame Grill 1. Your new gas grill should be professional installed by a licensed contractor. Refer to the instruction in this manual to ensure proper and safe installation and operation. 2. If You Smell Gas: 4.1 Shut off gas to grill 4.2 Extinguish any open flame 4.3 Open lid 4.4 If oder persists, immediately call your gas supplier or your fire department DO NOT TRY TO FIX TH E PROBLEM YOURSELF. 3.
SAFETY INSTRUCTIONS (continued) 6. In the event a burner goes out and gas escapes, turn off burner knobs, open the grill hood fully and let it air out. Do not attempt to use the grill or any other island feature until the gas has had time to dissipate. 7. Unless specifically recommended in this manual, do not repair or replace any part of the grill. A qualified technician should perform all service. Any repairs made by a non-C.A.I. approved dealer technician will void your warranty. 8.
SAFETY INSTRUCTIONS (continued) 15. Never locate this appliance an inclosed room or under sealed overhead structure any other type of inclosed area such as a garage, shed, or breeze way. Keep clear of trees and shrubs. 16. Do not place this grill under or near windows or vent that can be opened into your home. Precautions Regarding Children 1) Never leave children unattended in the area where the grill is being used.
SAFETY INSTRUCTIONS (continued) 8) Only use dry potholders - do not use a towel or other bulky cloth in place of potholders. Moist or damp potholders used on hot surfaces could cause burns from steam. 9) Do not heat any unopened glass or metal container of food on the grill. Pressure may build up and cause the container to burst resulting in serious harm or damage to the grill. 10) Do not use charcoal in this grill or side burner.
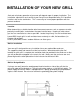
INSTALLATION OF YOUR NEW GRILL Safe and satisfactory operation of your new grill depends upon its proper installation. The installation, adjustments and service of your new grill must be performed by C.A.I qualified installers and service technicians. This is necessary to insure proper operation and also prevent accidents. Location When determining a suitable location take into account concerns such as exposure to wind, proximity to traffic paths, and windows that open into the home.
CABINET CUT OUT DIMENSIONS FOR GAS GRILL AND ACCESSORIES Side Burner 8
LP GAS REQUIREMENTS LP Gas Requirements Your new grill is designed to work with LPG (Liquid Propane Gas). Always check the rating plate (see page 5 for location) to make sure the gas supply you are hooking up to is the gas type the grill is manufactured for. IMPORTANT: Your new grill will work on LP gas. You cannot switch a LPG system to to natural gas. Please ensure your are connecting the proper gas type to your grill.
LP GAS REQUIREMENTS (CONTINUED) NOTE: 1) 2) An enclosure for an LP gas cylinder shall be vented by openings at the level of the cylinder valve and at floor level. The effectiveness of the opening(s) for purposes of ventilation shall be determined with the LP-gas supply cylinder in place. This shall be accompanied in one of the following manners: One side of the enclosure shall be completely open; or Enclosure that have four sides, complete with a top and bottom: a.
LP GAS REQUIREMENTS (CONTINUED) LPG Cylinder Specification Any LP gas supply cylinder used with this grill must be approximately 12 inches in diameter and 18 inches high. The maximum fuel capacity is 20 lbs. of propane or 5 gallons. Full cylinder weight should be approximately 38 lbs. (43.7 lbs. nominal water capacity.) Always use the cylinder dust cap on the cylinder valve outlet during transport and when the cylinder is not connected to the grill.
INSTALLATION OF YOUR NEW SIDE BURNER 1) Install side burner into an area of 171/2 long, 11 inches wide and 3 inches deep. (See page 8 for size) 2) Assemble a 3/8 pipe nipple to the 3/8 pipe tee using teflon tape or pipe sealant. Use only sealant that is approved for use on LP gas. 3) Install the pipe tee assembly to the grill intake pipe with pipe sealant. Tighten assembly and align the branch opening of the tee to the hole of the cabinet.
INSTALLATION OF YOUR NEW ACCESS DOORS Installing Access Doors 1. Provide cut out and door jamb with inside dimensions as follows: 19 3/8" X 28 3/8" for DAD-30 and 19 3/8" X 40 3/8" for DAD-48 2. Check fitting of frame against cutout. Mark location of rivet nuts. 3. Chisel material out to clear space for the rivet nuts. 4. Secure the steel frame with 16 screws of type #10 X ¾ truss head phillips S/S. 5. Attach doors to frame. 6.
INSTALLATION OF YOUR NEW 2 & 3 Drawer and LPG Door TWO AND THREE DRAWER CUT OUT DIMENSIONS: LPG TANK ACCESS DRAWER CUT OUT DIMENSIONS: 14
LEAK TESTING PROCEDURE Leak Testing Perform a leak test at least once each year whether the gas supply cylinder has been disconnected or not. In addition, anytime the gas cylinder is connected to the regulator or any part of the gas system is disconnected or replaced, conduct the leak testing. As a safety precaution, remember to always leak test your grill outdoor in a well-ventilated area. Never smoke or permit sources of ignition in the area while doing a leak test.
FEATURES OF YOUR GRILL Item: 1. 2. 3. 4. 5. 6. 7. 8. 9. 10. 11. 11. 12. 13. 13. 13. 14. 15. 15. 15. 16. 17. 18. 19. 20. 21. 22. 23. 24. 25. Part Description: C.A.I.
SPIDERS AND OTHER INSECTS WARNING... Spiders and other insects can nest in the burners of the grill and block the gas and airflow to the burner ports. This creates a dangerous condition that can result in a fire from behind the valve panel. It is good practice to inspect burners for blockage and clean them regularly; in addition, such inspection and cleaning is absolutely necessary if any of the following conditions exists: a) Smell of gas in conjunction with a yellow flame.
USING YOUR GRILL Grilling Grilling requires high heat for searing and proper browning. Most foods are cooked at the HI heat setting for the entire cooking time. However, when grilling large pieces of meat or poultry, it may be necessary to turn the heat to a lower setting after the initial browning. This cooks the food through without burning the outside. Foods cooked for a long time or basted with a sugary marinade may need to lower heat setting near the end of the cooking time.
USING YOUR GRILL (CONTINUED) Operating the Grill Make sure all burner controls are off. Do not attempt to light the burners if the smell of gas is present. For LP units, check the connection with a soap and water solution after attaching the hose. Make sure there is gas in the tank and it is sitting upright. 1. Make sure the drip tray is in place. 2. Light the grill burners using the instructions below. 3. Turn the control knob to HI and preheat the grill for 15 minutes.
Lighting The Grill Burners (continued) 7. Repeat the procedure or try "Manual Lighting procedure" below. 8. Upon successful lighting, repeat the process on the other burners you wish to light. 9. To shut off burners rotate knob and turn to OFF. It is normal to hear a popping sound when the burners are turned off. Manually Lighting The Grill Burners 1. Open the hood. 2. If you have just attempted to light the burner, allow 5 minutes for any accumulated gas to dissipate. 3.
USING YOUR ROTISSERIE The rotisserie burner is an infrared type, which provides intense searing radiant heat. Preferred by professional chefs over other methods, this intense heat is ideal for searing in the natural juices and nutrients found in quality cuts of meat. Cooking with the Rotisserie The rotisserie system is designed to cook items from the back using infrared heat.
Lighting The Infrared or Rotisserie Burner 1. Open the hood. 2. Rapidly rotate the rotisserie knob located in the center of the grill. 3. If the burner does not light on the first try, repeat immediately. 4. If the burner does not light within 5 seconds, turn the control knob to the OFF position. Wait 5 minutes until the gas clears before attempting to light it again. 5. Repeat the procedure or try "Manual Lighting procedure" as shown below. 6.
USING THE SIDE BURNER Your new grill has optional top burners equipped with rotary ignite knobs for lighting. Lighting The Side Burners 1. Remove the burner cover, if any, or any cooking utensils from the burner grate. Caution: The burner cover may be hot if the grill burners are in operation. 2. Rapidly rotate the side burner knob just past the LIGHT position (You will hear a loud click) to HIGH. 3. If the burner does not light on the first try, repeat immediately. OFF o LIGHT 4. 5. 6.
Manually Lighting The Side Burners (continued) 4. If the burner does not light after 5 seconds, turn the control knobs to the OFF position. Wait 45 seconds until the gas clear before attempting to light it again. 5. If the burner does not light after several attempts see troubleshooting guide located in the back of this manual. 6. Upon successful lighting, repeat the process on any other available burner you may wish to light.
CLEANING AND MAINTENANCE As with any piece of fine equipment, you New Grill must be kept clean and properly maintained to maximize its performance and longevity. Clean internal parts of the grill regularly as determined by the amount of use and foods cooked. The entire grill should be cleaned at least once a year. To assure safe and proper maintenance, we recommend you follow these directions carefully.
CLEANING AND MAINTENANCE (CONTINUED) Cleaning the Drip Pan: The full width drip tray will collect grease from the main grill area. The pan should be cleaned after every use to avoid the possibility of a grease fire. Be sure to allow the Drip Pan to cool prior to cleaning. You may clean the drip pane with a solution of warm soap water. Make sure to rinse thoroughly to avoid staining. Cleaning the Stainless Steel: Your Cal Flame BBQ grill is made of #304 stainless steel.
TROUBLESHOOTING GUIDE If Grill fails To Operate Properly: 1. 2. 3. Turn off gas at source, turn Control Knobs to the off position and wait five minutes before trying again. Check gas supply at connections.
TROUBLESHOOTING GUIDE (CONTINUED) Problem: Solution: Misalignment of Igniter on Burner: Check for proper position of electrode tip. THe tip of the electrode should be pointing forward towards the front of the burner and should be free of grease to allow proper sparking. The ignition wire should be connected firmly to the valve ignition device and electrode. Replace the ignition wire if it is frayed or cracked. With gas supply closed and all control knobs set to the off position.