
Installation Guide


Questions? (888) 788-2254
www.CaliFloors.com
Cali Vinyl
®
Pro with Mute Step
®
Flooring Installation Guide
Page 9
Installing the First Row:
Installation
2. Install the second piece by aligning the butt end with the
end of the first piece at a 45 degree angle. Softly push
the second piece down until the tongue and groove lock
together to secure the joint on the ends. Continue in this
manner until reaching the final board in the first row.
1. Starting from the left with the tongue-side facing the wall,
carefully place the first board in place, using spacers to
leave a 1/4” expansion gap between wall and edges of the
plank.
3. Cut the final board piece to length and install it in the same manner as the previous piece. Use the extra cut piece to start your
next row if it is longer than 8”.
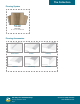
1. If the cut plank is at least 8” in length, it can be used as a
starter piece in your next row. When laying the next row
and future rows, make sure that there is at least 8” between
the plank end joints on adjacent rows. Avoid an “H” pattern
by varying the size of your starter piece. For a natural look
rows and patterns should be staggered.
2. Position the first board in place by angling it up slightly,
pushing forward and interlocking the side tongue. The
long side of the plank should fit snug with no gapping.
Slide this plank towards the butt end seam of your
starter plank until the tongue rests near the groove.
Next Steps:
8 inch minimum