HQView-325 Operating Instructions
This manual explains how to operate your HQView-325 image scaler. HQView-325 is designed to provide users with a powerful and flexible method of driving large display devices, and multiple screen applications including flexible geometry correction functions. If you have any queries relating to this or any other product supplied by Calibre please visit our web site www.calibreuk.com. For technical support please e-mail techsupport@calibreuk.
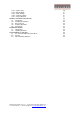
Contents SAFETY WARNING: INTRODUCTION 1.1. General Introduction 1.2. Packing List HQVIEW-5XX SYSTEM DESCRIPTION 2.1. Product Overview 2.2. Product Specification 2.2.1. Power Supply Requirement 2.2.2. Computer (SVGA) Inputs VESA formats 2.2.3. HDMI & DVI Inputs 2.2.4. Audio Output 2.2.5. Display Output HQVIEW-325 CONTROL 3.1. Menu Tree 3.2. Introduction 3.3. Main Menu 3.4. Input 3.5. Output 3.5.1. Display Type 3.5.2. Output Mode 3.5.3. Location 3.5.4. Frame Rate 3.5.5. I/O Lock 3.5.6. Native Color Temp 3.5.
3.10.3. Input Config 3.10.4. Display Mode 3.10.5. Menu Settings 3.10.6. Network Settings 3.10.7. Factory Defaults REMOTE CONTROL WEB SERVER 4.1. Introduction 4.2. Installing the Software 4.3. Discovery Tool 4.4. Software Operation 4.5. File Upload FIRMWARE UPDATE 5.1. Introduction 5.2. Updating Firmware ENVIRONMENTAL AND EMC 6.1. Recommended Operating Conditions 6.2. Storage 6.3. CE and FCC Compliance © Calibre UK Limited Issue 2.10 13 August 2012, W: www.calibreuk.
SAFETY WARNING: 1. THERE ARE NO USER SERVICEABLE PARTS WITHIN THE UNIT. REMOVAL OF THE TOP COVER WILL EXPOSE DANGEROUS VOLTAGES. DO NOT OPERATE THE UNIT WITHOUT THE TOP COVER INSTALLED. 2. ENSURE THAT ALL ELECTRICAL CONNECTIONS (INCLUDING THE MAINS PLUG AND ANY EXTENSION LEADS) ARE PROPERLY MADE AND COMPLY WITH ELECTRICAL SAFETY REGULATIONS. 3. ENSURE THAT THE INTEGRITY OF THE EQUIPMENT ISOLATION BARRIER IS MAINTAINED WHEN CONNECTING TO OTHER EQUIPMENT.
INTRODUCTION 1.1. General Introduction HQView-325 is a very flexible image scaler developed specifically for driving large screen displays and multiple screen applications from video or graphics sources. HQView-325 features state of the art digital image processor which provides market leading HD& SD per-pixel multiple Iow-angle motion-adaptive de-interlacing and automatic film pull-down correction for 3:2 and 2:2, significantly outperforming the capabilities of benchmark competitor products.
1.2. Packing List HQView-325 is supplied with the following: 1) This manual 2) 3 pin plug IEC mains cable 3) DVI-D output cable 4) CD © Calibre UK Limited Issue 2.10 13 August 2012, W: www.calibreuk.com T:+44 1274 394125 F: +44 1274 730960 E: techsupport@calibreuk..
HQVIEW-5XX SYSTEM DESCRIPTION 2.1. Product Overview HQView-325 is designed to accept the following input signals: VGA analog (computer interface) via 15HDD nd DVI (Digital Visual Interface) via DVI-I (supporting a digital and 2 analogue VGA input) HDMI via HDMI connector 2.2. Product Specification This section provides technical details for all possible inputs. Please note that not all possible input options may be applicable to certain output modes. 2.2.1.
HQVIEW-325 CONTROL 3.1. Menu Tree st 1 Level nd 2 Level rd 3 Level th 4 Level © Calibre UK Limited Issue 2.10 13 August 2012, W: www.calibreuk.com T:+44 1274 394125 F: +44 1274 730960 E: techsupport@calibreuk..
© Calibre UK Limited Issue 2.10 13 August 2012, W: www.calibreuk.com T:+44 1274 394125 F: +44 1274 730960 E: techsupport@calibreuk..
© Calibre UK Limited Issue 2.10 13 August 2012, W: www.calibreuk.com T:+44 1274 394125 F: +44 1274 730960 E: techsupport@calibreuk..
© Calibre UK Limited Issue 2.10 13 August 2012, W: www.calibreuk.com T:+44 1274 394125 F: +44 1274 730960 E: techsupport@calibreuk..
© Calibre UK Limited Issue 2.10 13 August 2012, W: www.calibreuk.com T:+44 1274 394125 F: +44 1274 730960 E: techsupport@calibreuk..
3.2. Introduction The front panel has keys for OSD menu navigation and input channel selection. OSD navigation is through two direction keys and a Menu/Enter key . 2 1 3 4 1 – Standby key: When applying power to the unit it starts up. This is indicated by the green On LED flashing. Once the unit is operational, the On LED is permanently on. By pressing the Standby Key, the unit is put into standby mode. This is indicated by the red Standby LED being permanently on.
3.3. Main Menu The main menu lists the input channel select item, 6 sub menus, and a menu item for automatic setup of VGA modes. The 6 sub menus are Output, Color, Geometry, Multiple Unit, Enhancement and System. On each menu page an Exit menu item is available to leave the menu or submenu. The menu may also be left by pressing the up/down key simultaneously.
3.5.2. Output Mode Settings: 640x480, 800x600, 1024x768, 1280x768, 1280x800, 1280x1024, 1360x768, 1366x768, 1400x1050, 1440x900, 1600x1200, 1680x1050, 1920x1200, 480i, 576i, 480p, 576p, 1080i, 720p, 1080p Set up the desired output resolution with output mode. The output mode setting should match the native resolution of the imaging device to avoid double scaling. The default output resolution as set by the factory or after a user issued factory reset is 720p. 3.5.3.
3.5.7. Output Gamma Settings: 1.0 to 3.0 in steps of 0.1 Output gamma allows to re-gamma video signals with pre-configured gamma values to match the display. Input gamma and output gamma both default to 2.2. If they are both set to the same value, there is no effect on the image. Note: If e.g. an adjustment to reduce the level of red in the image is required, select a higher number for the (input) Color Temp in the Color menu, or a lower number for the Native Color Temp in the Output menu. 3.5.8.
3.6. Colour This menu contains adjustments associated with setting up inputs to the unit. Use the Up and Down keys to scroll to the required item and press the Menu key. 3.6.1. Black-Level Offset Settings: 0 IRE, 7.5 IRE Used to select 7.5 IRE black level set-up adjustment. Should always be set to 7.5 IRE for HDMI video inputs. 3.6.2. Black-Level Settings: -50 to 50 in steps of 1 Black level controls the offset applied to the video signal. 3.6.3.
3.6.9. Input Gamma Settings: Gamma 1.0, Gamma 1.5, Gamma 2.2, Gamma 2.8 Set this value to match the native gamma of the input signal. Input gamma and output gamma both default to 2.2. If they are both set to the same value, there is no effect on the image. 3.7. Geometry This menu contains adjustments associated with setting up position, aspect ratio and scale of the input signal. Scale can be as simple as an overscan up to arbitrarily warping the image. 3.7.1.
3.7.5. Pan Tilt Zoom This menu provided settings to zoom and shrink the image, as well as panning within the image. Pan Tilt Zoom (PTZ) can be switched on or off. When switching on the latency of the system is increased by one frame. Thus, there is a difference of a PTZ setting off or on with no zoom. PTZ settings can be saved per mode or globally, i.e. the same PTZ settings are applied when switching input channels or changing the input mode. The Zoom slider allows to zoom into the image or shrink it.
3.8. Multiple Unit HQView-325 has a Multiple Unit menu to set up each unit for use in a multi screen application. Multiple screens are stitched together to provide a bigger display with higher resolution than a single display. Each display is driven by a separate HQView unit. Each HQView unit gets the same graphics or video input signal through a distribution amplifier. The HQView unit cuts out and resizes the image to display the part of the image assigned to the corresponding screen.
Note: Each HQView unit needs to be provided with the exact same value for left and right blend region. Top and bottom blend region have to be identical as well, but don´t need to have the same value as left and right. The HQView units do not communicate between each other and thus they have to make an assumption for auto zoom calculations and that is overlap of the neighbouring (and those beyond) projectors is identical. 3.8.5.
3.9. Enhancement The enhancement menu provide image enhancement functions. Note that the enhancement settings apply to video input signals only, not computer graphics signals. 3.9.1. Sharpness Settings: -50 to 50 in steps of 1 Control of the sharpening enhancement filters' levels. These are peaking filters to improve highfrequency response. Note that setting this control too high on a signal which already has good high frequency response will cause ringing or ghosting. 3.9.2.
3.10. System This selection contains functions which are more applicable to system operation than to picture adjustment. 3.10.1. User Settings: USER 1, 2, 3, 4 A predefined setting stored under a user name can be selected. Several settings of the HQView-5xx can be stored under a user name. Thus, different users can store their preferred HQView-5xx settings and recall these profiles by picking up their user name from this menu.
The switching transition of HQView can be set to Freeze, Blank, Fast Fade and Slow Fade. Freeze halts the prior channel image until the new channel image is stable. Blank switches the output to show a black screen instead of the last channel image. Fast and slow fade have the prior channel image faded out and fade into the new channel video image once it is stable. 3.10.4. Display Mode The “Display Mode” can be set to either Low Latency or Best Picture.
REMOTE CONTROL WEB SERVER 4.1. Introduction HQView-325 features a web server which connects to a PC web browser via TCP/IP. The menu system of HQView-325 is mirrored into the web browser and all menu items can be accessed and controlled through the keyboard or mouse of the PC. 4.2. Installing the Software No extra software needs to be installed on a PC. The PC web browser is used as the graphical user interface for all control items.
4.5. File Upload A page for file uploads is provided. Test patterns can be created and stored on the PC. Four such custom test patterns can be uploaded to and stored by the HQView unit. Each of the test patterns in the four slots can be deleted and replaced by another test pattern. The test patterns need to be in RGB 24bit .PNG format as e.g. supported by MS Paint®. For best detail the test patterns should be created with the output resolution HQView will be operated at.
FIRMWARE UPDATE 5.1. Introduction HQView-325 has an USB port which allows a PC connection. With the Calibre PC Updater tool new firmware can be installed on HQView-325 for feature upgrades and bug fixes. 5.2. Updating Firmware HQView-325 accepts firmware downloads in a dedicated Updater mode. The unit is put in Updater mode by pressing and keeping the Menu key pressed at power up. If the Menu key is released within 10 seconds after power up HQView-325 is in Updater mode.
ENVIRONMENTAL AND EMC 6.1. Recommended Operating Conditions Temperature 0oC to 40oC Humidity (non condensing) 5% to 95% 6.2. Storage Temperature -25oC to +85oC Humidity 6.3. CE and FCC Compliance CE: This product complies with the requirements of 89/336/EEC Electromagnetic Compatibility Directive amended by 92/31/EEC and 93/68/EEC, and 73/23/EEC Low Voltage Directive. Compliance is to EN55022 Class A.