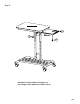
Thank you for purchasing our Studio Designs, Inc. Gracias por comprar nuestro mueble Studio Designs, Inc. Merci d’avoir acheté un meuble Studio Designs, Inc. LAPTOP CART Model #51200 Chrome / Black Glass Model #51200 Chrome / Clear Glass Product Support Line: 866.942.0492 Office: 562.942.0492 Rev. 9.20.
ASSEMBLY INSTRUCTIONS - IMPORTANT: Carefully unpack & identify each component before attempting to assemble. Refer to parts list. Please take care when assembling the unit and always set the parts on a clean, soft surface. If you require any assistance with assembly, parts, or information on other products, please visit our website: www.studiodesigns.com or call or write us. WARNING! Glass worksurface maximum weight capacity: 20 lbs/9.07 kg.
PARTS LIST / LISTA DE PARTES / LISTE DES PIÈCES DÈTACHÉES DESCRIPTION / DESCRIPCIÓN / DESCRIPTION QUANTITY / CANTIDAD / QUANTITÉ 1. Left Leg 1 2. Right Leg 1 3 Main Frame 1 4 Handle 1 5 U Tube 1 6. Top Frame 1 7. Glass Top 1 8. Mouse Pad Support 2 9. Mouse Pad 1 10. Bottom Shelf 1 11. Height Adjustment Lever 1 p.
12. Locking Caster 2 13. Non-Locking Caster 2 14. Allen Bolt 8 15. Stopper 2 16. End Cap 2 17. Glass Spacer 4 18. Phillips Screw 4 19. Allen Wrench 1 20. Hex Wrench 1 p.
Step 1 1 2 13 16 13 12 16 12 4 14 3 14 • • • • Insert End Caps (16) to Left Leg (1) and Right Leg (2). Insert Locking Casters (12) to bottom Holes of Left Leg (1) and Right Leg (2). Insert Non-Locking Casters (13) to bottom holes of Left Leg (1) and Right Leg (2). Attach Left Leg (1) and Right Leg (2) to Main Frame (3) using Allen Bolts (14). (Tip: Twist the Leg Tube a little bit to match the screw holes before screwing these parts together.
Step 2 4 11 11 3 HOOK HOOK THIRD HOLE 5 • Attach Height Adjustment Lever (11) to inside holes of Handle (4). • Attach U Tube (5) to Main Frame (3), pull up U Tube and fix the third hole on hook of Height Adjustment Lever (11) for easier assembly later of the Top Frame. p.
Step 3 17 17 17 17 6 14 5 10 1 2 • Attach Top Frame (6) to U Tube (5) using Allen Bolts (14). • Attach Bottom Shelf (10) to Legs (1 & 2). • Insert Glass Spacers (17) into holes of Top Frame (6). p.
Step 4 7 14 6 8 18 18 14 18 •Attach Mouse Pad Support (8) to Top Frame (6) using Phillips Screws (18). •Attach Glass Top (7) to Top Frame (6) using Allen Bolts (14). p.
Step 5 9 15 15 • Slide Mouse Pad (9) onto Mouse Pad Supports (8). • Screw Stoppers (15) to bottom holes of Mouse Pad (9). p.
Step 6 To Raise And Lower Desktop : • To Raise the desktop, steady the Laptop by placing your feet on the legs, then use two hands to grab the desktop and pull up to the desired position. • To lower the desktop, lightly pull the desktop up then lift up Height Adjustment Lever to allow the metal tube to slide down easily and release desktop to the desired position. p.
LIMITED WARRANTY Calico Designs (the “Company”) warrants to the original purchaser that this product will be free from defects in its workmanship and materials, under normal residential use and service conditions, as described herein.