azur 650BD Your music + our passion ENGLISH Blu-ray player User’s manual 2
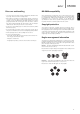
Contents Make sure you register your purchase. Visit: www.cambridge-audio.com/care By registering, you’ll be the first to know about: G Future product releases G Software upgrades G News, events and exclusive offers plus competitions! This guide is designed to make installing and using this product as easy as possible.
azur 650BD ENGLISH Introduction Thank you for purchasing this Cambridge Audio Azur Blu-ray Player. Like all Cambridge Audio products, the 650BD adheres to three core principles – stunning performance, ease of use and incredible value. The 650BD features almost universal disc compatibility and can play back CD, HDCD, DVD-Video, DVD-Audio, Super Audio CD and Blu-Ray discs.
Important safety instructions For your own safety please read the following important safety instructions carefully before attempting to connect this unit to the mains power supply. They will also enable you to get the best performance from and prolong the life of the unit: 1. Read these instructions. 2. Keep these instructions. 3. Heed all warnings. 4. Follow all instructions. 5. Do not use this apparatus near water. 6. Clean only with a dry cloth. 7. Do not block any ventilation openings.
650BD FCC regulations Cleaning NOTE: THE MANUFACTURER IS NOT RESPONSIBLE FOR ANY RADIO OR TV INTERFERENCE CAUSED BY UNAUTHORIZED MODIFICATIONS TO THIS EQUIPMENT. SUCH MODIFICATIONS COULD VOID THE USER AUTHORITY TO OPERATE THE EQUIPMENT. To clean the unit, wipe its case with a dry, lint-free cloth. Do not use any cleaning fluids containing alcohol, ammonia or abrasives. Do not spray an aerosol at or near the unit.
Limited warranty Compatible disc types Cambridge Audio warrants this product to be free from defects in materials and workmanship (subject to the terms set forth below). Cambridge Audio will repair or replace (at Cambridge Audio's option) this product or any defective parts in this product. Warranty periods may vary from country to country. If in doubt consult your dealer and ensure that you retain proof of purchase.
650BD Disc care and handling BD-ROM compatibility • To keep the disc clean from scratches or fingerprints, handle the disc by its edge. Do not touch the recording surface. Since the Blu-ray Disc specifications are new and evolving, some discs may not play properly depending on the disc type, version and encoding. It is possible that a Blu-ray disc manufactured after the player was manufactured uses certain new features of the Blu-ray Disc specifications.
Rear panel connections 2 3 1 1 4 6 7 5 Digital outputs Optical and Coaxial digital audio outputs, normally used to connect to a suitable Audio/Video Receiver for surround sound decoding (output must be set for "Bitstream" - refer to the "Audio setup" section). These outputs can also be used to connect to a separate DAC or digital recording device (output must be set for "LPCM" - refer to the "Audio setup" section). Toslink Optical - Use a high quality TOSLINK fibre optic cable.
azur 650BD ENGLISH Front panel 5 4 1 1 2 3 Standby/On Switches the unit between Standby mode (indicated by a dim power LED) and On (indicated by a bright power LED). Standby is a low power mode where the power consumption is less than 1 watt. The unit should be left in Standby mode when not in use. 2 6 7 8 9 Front panel display 1 2 3 2 4 5 6 7 8 9 USB port Port for interfacing to a flash/memory card or "Mass Storage Device". Notes: • Only USB 2.0 certified products with the USB 2.
Remote control The Azur 650BD is supplied with a remote control. Insert the 3 supplied AAA batteries to activate. For further details of the various adjustment functions available, refer to the later sections of this manual. Colour buttons Opens and closes the disc tray. A-B/Repeat Switches the unit between On and Standby mode. 0-9 Numerical buttons Used to enter numeric values such as the number of a desired chapter or track to go to. Info Show/hide On-Screen Display.
azur 650BD ENGLISH Connecting to the Internet The 650BD supports the BD-Live feature offered on some Blu-ray Disc titles. BD-Live offers extra downloadable content and additional online interactive programs. The available BD-Live content varies by discs and studios, and may include additional subtitles, commentaries, movie trailers, games, and/or online chat.
Audio connections Do not plug in the mains power lead or turn the unit on until all connections have been made. Note: It is also possible to make an HDMI audio/video connection which carries both audio and video in the same cable. See later section. Three types of audio only connection can be made between the 650BD and your stereo/AV system: However, when making an HDMI connection i.e. to an AV receiver, it is also often preferable to make an additional audio connection for CD and/or SACD/DVD-A playback.
azur 650BD The 650BD can output video in both fully digital (HDMI) and analogue (Composite, S-Video and Component) formats. If your TV set supports HDMI then this is the preferred format (see next section). If your TV set supports only analogue video the preferred connection is (in declining order of quality) Component, then S-Video and finally Composite. 2 1 Component - Connect with 75 ohm Component video cables (3RCA3RCA). 2 Composite - Connect with single 75 ohm video phono cable (RCARCA).
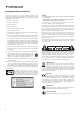
Setting up the player Accessing the Easy Setup Wizard Select the best output resolution When the player is turned on for the first time, an Easy Setup Wizard screen will appear. This is a series of guided instructions designed to configure the basic settings for the unit. For the latest generation of 1080p, "Full HD" or "True HD" TV displays, the best output resolution will naturally be 1080p. For all other digital televisions this will likely be 720p or 1080i.
Note: • In case you are not able to get a picture using the HDMI or component output, please connect the player to the TV using the composite video output, and then use the Setup Menu to adjust the player settings. • Video up-conversion over the component output is only available for unencrypted discs such as home video and consumer-created contents. Most commercially pressed DVD discs are CSS-encrypted and will be limited to 480i/480p resolution. This restriction applies to the component output only.
Operating instructions Getting started Slow Turn on the power of the 650BD, TV, amplifier/AV receiver and any other components which are connected to the 650BD. Make sure the TV and the audio receiver are set to the correct input channel. When playing a BD/DVD, press the button to pause playback and then press the or button to cycle round the various speeds of slow motion (1/16, 1/8, 1/4 and 1/2), forwards and backwards and back to normal speed. To exit playback, press the / button. 1.
650BD Audio language (soundtrack) selection DVD disc menu 1. To select the audio language, press and hold the Audio/Subtitle button on the remote control during playback. 1. Some DVD discs contain title menu or chapter menu functions. 2. Repeatedly pressing the Audio/Subtitle button cycles through all available audio soundtracks on the disc. Note: The availability of languages and audio soundtracks varies by disc.
Operating instructions continued Depending on how the studios organise their BD-Live contents, some Blu-ray discs may start downloading BD-Live content when playback starts; some have a BD-Live selection on its main menu; some may show a prompt to ask whether you would like to start downloading; and some may ask you to sign up for a membership or account. Please follow the instructions that come with the disc to enjoy BD-Live contents.
azur 650BD ENGLISH Other media playback As well as normal CD’s, SACD’s, DVD’s and BD’s the 650BD can play some music, movies and photo files either from optical datadiscs (such as CD-R, DVD-R etc.) or external memory such as USB flash-drives/thumbdrives and hard-drives. Connecting a USB Drive The 650BD is equipped with two USB 2.0 ports, one on the front panel and the other on the back. You may use either to plug in a USB drive loaded with digital music, movie and photo files.
Media playback continued The following operations are available while the "Now Playing" screen is shown: Normal playback control – / , , / , , and . Special playback mode – Repeat and Shuffle/Random (Blue colour button). Return to the Browser without stopping the music – Return Stop playback and return to the Browser – Press twice. The first step is to select the "Data Disc" or USB device that contains the photo files.
azur 650BD Setup Note: It is possible that some setup items are greyed-out and inaccessible. This can be caused by a disc still being played back or interlocking with mutually exclusive setup items. Please stop playback or eject the disc before trying to change these setup items. If you still cannot access the setup item, please check for configuration conflicts and consistency.
Setup menu continued Playback Setup 2. Auto Play Mode (on/off) The "Playback Setup" section is designed to configure playback preferences for various contents. The setup items in this section are: To select whether the player willl start playing an audio CD or SACD automatically. When auto play mode is turn on, these discs will start playing upon insertion into the player. When auto play mode is turned off, the player will wait for the user to start playback by pressing the PLAY button. Setup Menu 3.
650BD 1. Picture Adjustment 9. PBC – Play Back Control To enable/disable Play Back Control. Play Back Control is a primitive form of disc menu. The options are: On – If the disc contains Play Back Control, show the menu. This is used to adjust picture control parameters. The 650BD provides a wide array of picture controls. Please refer to the "Picture Adjustment" section of this manual for details of each control. 2. Primary Output To select the primary video output method.
Setup menu continued 5. Output Resolution 8. Screen Saver To choose the output resolution that best matches your television’s native resolution. For a detailed description on how to choose a proper output resolution, please refer to the "Select the Best Output Resolution" section of this manual. To turn on/off the screen saver function. The screen saver is designed to minimize burn-in concerns for plasma and CRT display devices. The available options are: 6.
650BD 1. Secondary Audio 4. Coaxial/Optical Output To set the Secondary Audio Program mixing option. Some Blu-ray discs contain a secondary audio and video program, such as a director’s commentary. Some Blu-ray Discs have a sound effect when you make menu choices. This Setup Menu item allows you to decide whether to mix the Secondary Audio Program and menu clicking sound into the primary audio. The options are: To set the output format for the coaxial/optical digital audio outputs.
Setup menu continued Audio signal reference chart Blu-ray Discs may contain many types of audio signal formats, some of those are of the high resolution lossless types such as Dolby TrueHD and DTS-HD Master Audio. Blu-ray Discs also have many optional audio components such as the Secondary Audio Program and the menu clicking sound. The player’s Audio Format Setup menu allows you to configure the audio output to meet your specific preference.
650BD Recommended audio format 0ptions Stereo analogue audio to Receiver Depending on your specific audio/video connection method, the audio format options of the 650BD may need to be adjusted to match your configuration. Please refer to the video and audio connection methods described previously in this guide and the following audio setup guidelines.
Setup menu continued Down Mix Mode 1. Size Down mix is the process of converting multi-channel audio to a lesser number of channels. For example, converting a 5.1ch source to stereo or converting a 7.1ch source to 5.1ch. Down mixing allows the audio output from the player to match the exact number of speakers available in your home theatre system. The speaker size parameter sets bass filtering control for the speakers. The bass crossover frequency is fixed at 80Hz.
3. Trim 1. Firmware Information The speaker trim level parameters sets the volume of each individual channel. For most accurate results, it is recommended that you use test tones from a calibration disc, such as Digital Video Essentials HD Basics, and a SPL (Sound Pressure Level) meter. The trim level can be set to +/10dB in 0.5dB increments. To display the currently installed firmware version.
Setup menu continued 5. Dimmer Control Network Setup To control the display intensity of the front panel Vacuum Fluorescent Display (VFD) information window. In case you feel that the display becomes a distraction to your enjoyment of the video, this option allows you to dim it or turn it off. The available options are: The "Network Setup" section of the Setup Menu system allows you to configure the parameters for the Internet connection of the player, test the connection and restrict BD-Live access.
650BD 5. DNS 1 Picture Adjustment The IP address of the first (primary) DNS (Domain Name System) server. DNS is the mechanism to translate human-readable addresses to numeric IP addresses. When "IP Configuration" is set to "Auto (DHCP)", the value displayed here is obtained using DHCP and cannot be changed. Picture Adjustment is a special section of the Video Setup menu. It allows you to fine tune many picture control parameters in order to achieve the optimal picture quality and visual result.
Note: These affect the Audio/Subtitle/Disc menu defaults only not the On Screen menu language.
Technical specifications Troubleshooting Disc types Blur-ray (BD), DVD-Video, DVD-Audio, AVCHD, SACD, CD, HDCD, Kodak Picture CD, CD-R/RW, DVD±R/RW, DVD±R DL, BD-R/RE There is no power BD Profile BD-ROM Version 2 Profile 2 (also compatible with Profile 1 Version 1.0 and 1.1) Check fuse in the mains plug or adaptor. Architecture Mediatek MTK8520/MTK8575 Check the disc is not loaded upside down.
Cambridge Audio is a brand of Audio Partnership Plc Registered Office: Gallery Court, Hankey Place London SE1 4BB, United Kingdom Registered in England No. 2953313 © 2010 Cambridge Audio Ltd AP26083/5-A www.cambridge-audio.