
User Manual


10 11
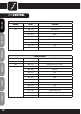
OPERATION:
AUTO MODE
Press the MODE button repeatedly until "AUTO" appears on the display.
In this operating mode, the light switches automatically between colour
change and colour blending mode. The colour change and/or colour
blending rate is determined by the settings of the respective mode.
SLAVE MODE
Press the MODE button repeatedly until "SLAV" appears on the display.
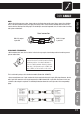
Connect the slave and the master unit with a DMX cable. Now the slave
unit follows the master unit. Confirm with ENTER.
MUSIC CONTROL
Press the MODE button repeatedly until "SUxx" appears on the display.
Now the light is controlled by the built-in microphone and follows the beat
of the music. Now press the ENTER button again (all 4 digits flash) and use
the UP and DOWN buttons to set the sensitivity of the microphone (0 - 99).
Confirm with ENTER.
DMX MODE SELECTION
Press the MODE button repeatedly until one of the four DMX modes
appears on the display (2Ch, 3Ch1, 3Ch2, 6Ch). Press ENTER (all digits
flash) and use the UP and DOWN buttons to select the desired DMX mode.
Confirm with ENTER.
SET DMX START ADDRESS
Press the MODE button repeatedly until "A" and 3 additional digits appear
on the display. Press ENTER (all digits flash) to use the UP and DOWN
buttons to select the desired DMX start address (A001 - A512). Confirm
with ENTER. NOTE: In order to be able to use the light in DMX mode, the
DMX start address mode must be set.
NOTE:
Unless one of the 4 buttons is pressed, the LED display will automatically
switch off after approx. 1 minute. As soon as one of the four buttons is
pressed, the display switches on again.
ITALIANO
POLSKI
ESPAÑOL
FRANCAIS
FRANCAIS
FRANCAIS
FRANCAIS
FRANCAIS
DEUTSCH
ENGLISHENGLISH
SETUP
SETUP
SETUP
SETUP