USER‘S MANUAL BEDIENUNGSANLEITUNG MANUEL D‘UTILISATION MANUAL DE USUARIO INSTRUKCJA OBSŁUGI MANUALE D‘USO RGBW S4 IP LED SOFTLIGHT PANEL - IP65 CLS4IP
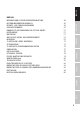
CONTENTS / INHALTSVERZEICHNIS / CONTENU / CONTENIDO / TREŚĆ / CONTENUTO ENGLISH INFORMATION ON THIS USER MANUAL INTENDED USE DEFINITIONS AND SYMBOL EXPLANATIONS SAFETY INSTRUCTIONS NOTES ON PORTABLE OUTDOOR DEVICES INCLUDED INTRODUCTION CONNECTIONS, OPERATING AND DISPLAY ELEMENTS OPERATION MOUNT TV SPIGOT ON U-BRACKET STAND MOUNTING USE TV SPIGOT FOR TRUSS MOUNTING OMEGA BRACKET DIFFUSER DISC OPTIONAL ACCESSORIES CARE, MAINTENANCE AND REPAIR DIMENSIONS (mm) TECHNICAL DATA EXPLANATION OF IP PROTECTION CLASS
ENGLISH DEUTSCH ITALIANO POLSKI ESPAÑOL FRANCAIS DEUTSCH 46 46 46 47 51 51 51 52 55 72 73 74 75 76 78 79 80 81 83 83 83 84 85 DMX INFORMATIONEN ZU DIESER BEDIENUNGSANLEITUNG BESTIMMUNGSGEMÄSSER GEBRAUCH BEGRIFFS- UND SYMBOLERKLÄRUNGEN SICHERHEITSHINWEISE HINWEISE FÜR ORTSVERÄNDERLICHE OUTDOOR-GERÄTE LIEFERUMFANG EINFÜHRUNG ANSCHLÜSSE, BEDIEN- UND ANZEIGEELEMENTE BEDIENUNG TV-ZAPFEN AM U-BÜGEL MONTIEREN STATIVMONTAGE TV-ZAPFEN FÜR TRAVERSENMONTAGE NUTZEN OMEGA-BÜGEL DIFFUSORSCHEIBE OPTIONALES ZUBEHÖR
ENGLISH FRANÇAIS DEUTSCH FRANCAIS ESPAÑOL POLSKI INFORMATIONS CONCERNANT CE MANUEL D’UTILISATION 86 UTILISATION CONFORME 86 EXPLICATIONS DES TERMES ET DES SYMBOLES 86 CONSIGNES DE SÉCURITÉ 87 REMARQUES CONCERNANT LES APPAREILS D’EXTÉRIEUR MOBILES 91 CONTENU DE LA LIVRAISON 91 INTRODUCTION 91 RACCORDEMENTS, ÉLÉMENTS DE COMMANDE ET D’AFFICHAGE 93 UTILISATION 96 INSTALLATION DU GOUJON ADAPTATEUR TV SUR L’ÉTRIER EN U 113 MONTAGE SUR TRÉPIED 114 UTILISER UN GOUJON ADAPTATEUR TV POUR MONTAGE SUR TRAVERSE 115 ÉT
ENGLISH ITALIANO POLSKI ESPAÑOL FRANCAIS DEUTSCH 127 127 127 128 132 132 132 134 137 153 154 155 156 157 159 160 161 162 164 164 164 165 166 DMX ESPAÑOL INFORMACIÓN SOBRE ESTE MANUAL DE INSTRUCCIONES USO PREVISTO TÉRMINOS Y SÍMBOLOS INSTRUCCIONES DE SEGURIDAD INDICACIONES PARA EQUIPOS PORTÁTILES DE EXTERIOR VOLUMEN DE SUMINISTRO INTRODUCCIÓN CONEXIONES, ELEMENTOS DE MANEJO Y ELEMENTOS DE VISUALIZACIÓN FUNCIONAMIENTO MONTAJE DEL ADAPTADOR DE ESPIGA EN LA ABRAZADERA EN U MONTAJE DEL TRÍPODE USAR ADAPTA
ENGLISH POLSKI DEUTSCH FRANCAIS ESPAÑOL POLSKI INFORMACJE DOTYCZĄCE NINIEJSZEJ INSTRUKCJI OBSŁUGI UŻYTKOWANIE ZGODNE Z PRZEZNACZENIEM OBJAŚNIENIA TERMINOLOGII I SYMBOLI ZASADY BEZPIECZEŃSTWA UWAGI DOTYCZĄCE PRZENOŚNEGO SPRZĘTU ZEWNĘTRZNEGO ZAKRES DOSTAWY WPROWADZENIE PRZYŁĄCZA, ELEMENTY OBSŁUGI I WSKAŹNIKI OBSŁUGA MONTAŻ ADAPTERA GWINTOWEGO NA UCHWYCIE U MONTAŻ NA STATYWIE KORZYSTANIE Z ADAPTERA GWINTOWEGO DO MONTAŻU NA TRAWERSIE UCHWYT OMEGA TARCZA DYFUZORA AKCESORIA DODATKOWE CZYSZCZENIE, KONSERWACJA I
ENGLISH ITALIANO ESPAÑOL FRANCAIS DEUTSCH 206 206 206 207 210 211 211 212 215 232 233 234 235 236 238 239 240 241 243 243 243 244 245 POLSKI INFORMAZIONI SUL PRESENTE MANUALE D'USO UTILIZZO CONFORME SPIEGAZIONE DI CONCETTI E SIMBOLI INDICAZIONI SULLA SICUREZZA AVVERTENZE PER DISPOSITIVI PORTATILI PER ESTERNI FORNITURA INTRODUZIONE CONNETTORI, ELEMENTI DI COMANDO E VISUALIZZAZIONE UTILIZZO INSTALLAZIONE DEL CODOLO TV SULLA STAFFA A U MONTAGGIO SU SUPPORTO UTILIZZARE CODOLI TV PER IL MONTAGGIO SU TRAVER
ENGLISH ENGLISH YOU HAVE MADE THE RIGHT CHOICE! This device has been developed and manufactured to the highest quality standards to ensure many years of problem-free operation. Please read this user manual carefully to be able to use your new Cameo product quickly and optimally. Further information about Cameo Light is available on our website CAMEOLIGHT.COM.
ENGLISH This symbol identifies hazards that can cause electric shock. This symbol identifies hazardous areas or hazardous situations. DEUTSCH This symbol indicates hazards caused by hot surfaces. This symbol indicates hazards caused by intense light sources. FRANCAIS This symbol indicates a device in which there are no user-replaceable parts. This symbol indicates additional information on the operation of the product. SAFETY INSTRUCTIONS ITALIANO POLSKI ESPAÑOL HAZARD: 1.
ENGLISH CAUTION: 1. Do not switch on the device if it has been exposed to extreme temperature fluctuations (for example, following transport). Moisture and condensation can damage the device. Switch on the device only when it has reached room temperature. 2. Ensure that the voltage and frequency of the mains supply match the values specified on the device. If the device has a voltage selector switch, do not connect the device until it has been set correctly. Use only suitable power cables. 3.
DEUTSCH ENGLISH CAUTION: 1. Moving components such as mounting brackets may become jammed. 2. In the case of devices with motor-driven components, there is a risk of injury due to the movement of the device. Sudden movement of the device can cause shock reactions. 3. The housing surface of the device can become very hot during regular operation. Ensure that accidental touching of the housing is not possible. Always allow the device to cool sufficiently before removal, maintenance work and charging etc.
ENGLISH 4. Permanently installed lamps are built into these lighting units. These may not be replaced by the user. The lamps contained in this lighting unit may only be replaced by the manufacturer, its service partner, or a similarly qualified person. NOTES ON PORTABLE OUTDOOR DEVICES DEUTSCH 1. Temporary operation! Event equipment is generally only designed for temporary operation. 2.
15 9 10 11 4 3 6 5 POLSKI 14 ITALIANO 1 13 Cameo ® is a brand of the Adam Hall Group · Adam-Hall-Str.1· 61267 Neu-Anspach · Germany · www.adamhall.com Designed and Engineered in Germany. Assembled in PRC. Adam Hall Ltd. The Seedbed Business Centre SS3 9QY Essex | United Kingdom 7 ESPAÑOL CONFORMS TO UL STD 1598 CERTIFIED TO CSA STD C22.2 N0.250 CAN ICES-003(B) / NMB-003(B) 8 Product name: SP4 IP Product key: CLS4IP Power consumption: max.
ENGLISH 1 POWER IN IP65 power input socket with rubber sealing cap (compatible with TRUE1). Operating voltage 100–240 V AC/50–60 Hz. Connection via supplied power cable (when not in use, always close with rubber sealing cap). DEUTSCH 2 POWER OUT IP65 power output socket with rubber sealing cap (compatible with TRUE1). Facilitates power supply to other CAMEO spotlights.
DEUTSCH ENGLISH 8 LC DISPLAY The LC display shows the currently activated mode (main display), the menu items in the menu and the numerical value or operational status in certain menu items. If there is no input for approx. one minute, the display automatically returns to the main display. Note regarding the main display in operating modes with external control: As soon as the control signal is interrupted, the characters in the display begin to flash.
ENGLISH 16 W-DMX Antenna for W-DMX™ control. 17 CARRY HANDLE Ergonomic carrying handle for convenient transport. DEUTSCH OPERATION FRANCAIS PLEASE NOTE When the spotlight is started, “Welcome to Cameo”, the model name and the software version are briefly shown on the display. After this process, the spotlight is operational and the previously activated operating mode is launched.
ENGLISH MAIN DISPLAY IN THE ARTNET OR SACN MODE The main display in ArtNet or sACN mode shows the DMX mode, the currently set DMX start address, the IP address and universe group and the universe (see illustration).
ENGLISH DEUTSCH SETTING DMX START ADDRESS (DMX address) Starting from the main display, press the right rotary-push encoder to enter the main menu. Rotate the left encoder (SELECT) to select the menu item DMX Address (see left arrow) and confirm by pushing the encoder (ENTER). You can now configure the DMX start address as required by rotating the left encoder (the highest value depends on the selected DMX mode).
000–255 Universe Group Setting the Universe Group 000 – 127 DMX Address Setting the DMX start address 001–512 DMX Mode Selecting the DMX mode 1CH dim ... 32CH pixel IP Address Setting the IP address: 1. Set block with middle encoder 2. Set block with right encoder Press middle encoder (Next Range) 3. Set block with middle encoder 4. Set block with right encoder Press left encoder to save (Enter) xxx.xxx.xxx.xxx Subnet Mask Setting the subnet mask: 1. Set block with middle encoder 2.
ENGLISH STANDALONE MODE 'CCT' (Correlated Colour Temperature) Starting from the main display, press the left push button rotary encoder to access the menu for selecting the mode. Rotate the left encoder (SELECT) to choose CCT (see left arrow) and confirm by pressing the left encoder (ENTER). Set the brightness (DIM), colour temperature (CCT) and colour shade (Tint) by turning the three rotary-push encoders (see illustration).
DEUTSCH ENGLISH STANDALONE MODE 'DIRECT LED' (RGBW colour mixing) Starting from the main display, press the left push button rotary encoder to access the menu for selecting the mode. Turn the left encoder (SELECT) to choose Direct LED (see left arrow) and confirm by pressing the left encoder (ENTER). Now adjust the overall brightness (DIM) and the intensity of R, G, B and W using the three rotary-push encoders (see illustration).
ENGLISH STANDALONE MODE 'GEL' Starting from the main display, press the left push button rotary encoder to access the menu for selecting the mode. Turn the left encoder (SELECT) to choose GEL (see left arrow) and confirm by pressing the left encoder (ENTER). Now set the overall brightness (DIM) using the left encoder and select one of the available Lee filters colour presets (dark magenta to rose pink) using the middle rotary-push encoder (see illustration).
FRANCAIS DEUTSCH ENGLISH STANDALONE MODE 'EDIT USER COLOURS' Starting from the main display, press the right rotary-push encoder to enter the main menu (MENU). Rotate the left encoder (SELECT) to choose the Edit User Colour menu item (as indicated by the selection arrow on the left) and confirm by pressing the left encoder (ENTER). You can now select one of the 8 user colours by turning the left encoder and confirming the selection by pressing the left encoder (ENTER).
ENGLISH DEUTSCH STANDALONE MODE 'PLAY LOOP' Starting from the main display, press the left push button rotary encoder to access the menu for selecting the mode. Rotate the left encoder (SELECT) to SELECT Play Loop (see left arrow) and confirm by pressing the left encoder (ENTER). Now select one of the 8 pre-programmed but individually editable colour sequences by turning the left encoder. Confirm your selection by pressing the left encoder (ENTER).
ENGLISH ESPAÑOL POLSKI Rotate encoder = Set fade time (t-Fade) Press encoder = Open the main menu (Menu) ITALIANO Rotate encoder = Set step duration (t-Step) Press encoder = back to colour sequence selection (Back) DMX Rotate encoder = Set brightness (DIM) Press encoder = Mode selection FRANCAIS STANDALONE MODE 'LIGHT SIMULATION' Starting from the main display, press the left push button rotary encoder to access the menu for selecting the mode.
ENGLISH DEUTSCH EZ REMOTE CONTROL VIA CAMEO UNICON (optionally available) Starting from the main display, press the left push button rotary encoder to access the menu for selecting the mode. Turn the left encoder (SELECT) to choose EZ Remote (see left arrow) and confirm by pressing the left encoder (ENTER). Now set the desired device ID (Fixture ID 1 – 8) by turning the left encoder (SELECT) and confirm by pressing the left encoder (ENTER).
Display Reverse Display Off Timer = Display Rotate display = Display lighting Receive W-DMX mode Recipient Transmit W-DMX mode Transmitters Transmitting G3 Mode G4s G3 transmission standard Link Link Pair with W-DMX devices. W-DMX must be enabled on all devices, and the pairing with a transmitter be retained (Receive Reset).
ENGLISH Dimmer Curve = Dimmer curve DEUTSCH FRANCAIS Dimmer = Dimmer Response response = Mimics the colour drift of dimming a halogen spotlight. When dimming the spotlight, the colour temperature changes automatically to increasingly warm white tones and amber (and vice versa).
= Fan control Smart Calibration Merging factory and RAW calibration On Automatic locking of the controls after approximately 1 minute of inactivity. Display shown upon attempted use: "Locked!" Unlock: Simultaneously press the centre and right encoders for approx. 5 sec.
ENGLISH Factory Reset = Reset settings DEUTSCH Reset = Reset user UC_Loops colours and loops User = Assign one of buttons the stand-alone modes (plus EZ Remote and Mode Selection) to user buttons 1 and 2 FRANCAIS ESPAÑOL Service POLSKI ITALIANO DMX 30 Reset Now? Reset to factory settings (except user colours Except User and loops): Perform reset with ENTER, cancel Colour_ with ESC Loops Reset user Reset the user colours and loops to factory colour_loops settings: Perform reset with ENTER, cancel wit
LED / Halogen Off / Dim to Warm 650 Hz / 1530 Hz / 3600 Hz / 12 kHz / 18.
MOUNT TV SPIGOT ON U-BRACKET ENGLISH There is one bolt each on the left and right next to the M10 screw thread in the TV spigot. Insert the two bolts into the holes to the left and right of the screw hole in the U-bracket and screw the TV spigot to the U-bracket using the M10 screw, Belleville spring and washer (see illustration).
ENGLISH STAND MOUNTING DEUTSCH HAZARD: Overhead mounting requires extensive experience, including the calculation of the load limit values of the installation material and regular safety inspection of all installation materials and spotlights. If you do not have these qualifications, do not attempt to perform an installation yourself. Refer instead to a qualified professional. There is a risk that devices that are incorrectly mounted and secured may come loose and fall down.
USE TV SPIGOT FOR TRUSS MOUNTING ENGLISH DEUTSCH HAZARD: Overhead mounting requires extensive experience, including the calculation of the limit values for load, the installation materials and regular safety inspection of all installation materials and spotlights. If you do not have these qualifications, do not attempt to perform an installation yourself. Refer instead to a qualified professional. There is a risk that devices that are incorrectly mounted and secured may come loose and fall down.
OMEGA BRACKET ENGLISH The Omega double bracket is included in the spotlight's scope of delivery. DEUTSCH HAZARD: Overhead mounting requires extensive experience, including the calculation of the load limit values of the installation material and regular safety inspection of all installation materials and spotlights. If you do not have these qualifications, do not attempt to perform an installation yourself. Refer instead to a qualified professional.
DIFFUSER DISC ENGLISH A standard diffuser disc is included. A locking lever for the cover rail is located on the top edge of the spotlight on the left and right (Fig. A and detailed view). Push the levers towards the centre of the housing and fold the cover rail upwards (Fig. B). DEUTSCH A B A FRANCAIS ESPAÑOL Now insert the diffuser disc into the rear, wide grooves of the installation compartment from above (Fig. C and detailed view).
DEUTSCH ENGLISH Now fold the cover rail back down to close the installation compartment (Fig. D). The two locking levers must then be pushed back towards the edge of the housing. During the process, ensure that the levers engage correctly again and that the diffuser disc is secured against falling out.
OPTIONAL ACCESSORIES ENGLISH CLS4IPBARNDOOR 4-way barndoor CLS4IPDARKFILTER Filter disc for dark front CLS4IPHDFILTER Filter disc for high diffusion DEUTSCH FRANCAIS CLS4IPHC30 Straightening grid for narrow beam angles CLS4IPHC60 Straightening grid for limited beam angle CLSCENTERYOKE 28 mm TV spigot with ball joint CLSVMOUNTAP Double V-mount adapter CLS4IPPOYOKE Pole-operated mounting bracket ESPAÑOL CLS4IPINTENSIFIER Filter disc for narrow beam angles and increased illumination intensity POLSK
CARE, MAINTENANCE AND REPAIR DEUTSCH ENGLISH In order to ensure the long-term, proper functioning of the device, it must be regularly cleaned and, if necessary, maintained. The maintenance requirement depends on the intensity of use and the environment in which it is used. We generally recommend a visual inspection each time before putting into operation.
MAINTENANCE AND REPAIR (BY QUALIFIED PERSONNEL ONLY) ENGLISH HAZARD! There are live components in the device. Even after disconnecting the mains connection, there may still be residual voltage in the device, for example, due to charged capacitors. PLEASE NOTE! There are no user-serviceable assemblies in the device. DEUTSCH FRANCAIS PLEASE NOTE! Maintenance and repair work may only be carried out by qualified specialist personnel authorised by the manufacturer. If in doubt, consult the manufacturer.
Control protocols: Standalone functions: DMX512, W-DMX™, ArtNet, sACN, RDM Direct, CCT, HSI, User Colour, GEL, xycoordinates, Light Simulation, Loop Operating controls: 3x turn-push encoder + 4x shortcut buttons Operating voltage: Max.
ENGLISH DEUTSCH FRANCAIS True 1 compatible sockets IP protection class IP65 Ambient temperature (in operation): –15°C to 45°C Minimum distance to illuminated surface 0.5 m Minimum distance to normally flammable materials 0.5 m Housing colour: Housing material: Housing cooling: Dimensions (W x H x D, including mounting bracket): Black Magnesium alloy Temperature-controlled fan 884 x 442 x 153 mm Weight (without mounting bracket and diffuser): 15.
EXPLANATION OF IP PROTECTION CLASS IP6X Protected against solid foreign bodies ≥ 12.5 mm in diameter Protected against solid foreign bodies ≥ 2.5 mm in diameter Protected against solid foreign bodies ≥ 1.0 mm in diameter Protected against dust in harmful quantities and completely protected against contact Are dust-tight and completely protected against contact DEUTSCH IP2X IP3X IP4X IP5X ENGLISH 1. An IP rating only reflects protection from solid objects and water.
DISPOSAL ENGLISH Packaging: 1. Packaging can be fed into the reusable material cycle using the usual disposal methods. 2. Please separate the packaging in accordance with the disposal laws and recycling regulations in your country. DEUTSCH FRANCAIS Device: 1. This device is subject to the European Directive on Waste Electrical and Electronic Equipment, as amended. WEEE Directive Waste Electrical and Electronic Equipment. Old appliances do not belong in household waste.
ENGLISH UKCA- DECLARATION OF CONFORMITY Products that are subject to Electrical Equipment(Safety)Regulation 2016, EMC Regulation 2016 or RoHS Regulation can be requested at info@adamhall.com. Products that are subject to the Radio Equipments Regulations 2017 (SI2017/1206) can be downloaded from www.adamhall.com/compliance/ POLSKI ESPAÑOL FRANCAIS DEUTSCH FCC STATEMENT This equipment has been tested and found to comply with the limits for a Class B digital device, pursuant to part 15 of the FCC Rules.
ENGLISH DEUTSCH SIE HABEN DIE RICHTIGE WAHL GETROFFEN! Dieses Gerät wurde unter hohen Qualitätsanforderungen entwickelt und gefertigt, um viele Jahre einen reibungslosen Betrieb zu gewährleisten. Bitte lesen Sie diese Bedienungsanleitung sorgfältig, damit Sie Ihr neues Produkt von Cameo Light schnell und optimal einsetzen können. Weitere Informationen über Cameo Light erhalten Sie auf unserer Website CAMEOLIGHT.COM.
ENGLISH Dieses Symbol kennzeichnet Gefahren, die einen elektrischen Schlag verursachen können. Dieses Symbol kennzeichnet Gefahrenstellen oder gefährliche Situationen. DEUTSCH Dieses Symbol kennzeichnet Gefahren durch heiße Oberflächen. Dieses Symbol kennzeichnet Gefahren durch intensive Lichtquellen. FRANCAIS Dieses Symbol kennzeichnet ein Gerät, in dem sich keine vom Benutzer austauschbaren Teile befinden. Dieses Symbol kennzeichnet ergänzende Informationen zur Bedienung des Produkts.
ENGLISH ACHTUNG: 1. Nehmen Sie das Gerät nicht in Betrieb, wenn es starken Temperaturschwankungen ausgesetzt war (beispielsweise nach dem Transport). Feuchtigkeit und Kondensat könnten das Gerät beschädigen. Schalten Sie das Gerät erst ein, wenn es Umgebungstemperatur erreicht hat. 2. Stellen Sie sicher, dass die Spannung und die Frequenz des Stromnetzes mit den auf dem Gerät angegebenen Werten übereinstimmen.
DEUTSCH ENGLISH WARNUNG: 1. Verwenden Sie das Gerät nur in der vorgesehenen Art und Weise. 2. Betreiben Sie das Gerät nur mit dem vom Hersteller empfohlenen und vorgesehenen Zubehör. 3. Beachten Sie bei der Installation die für Ihr Land geltenden Sicherheitsvorschriften. 4. Überprüfen Sie nach dem Anschluss des Geräts alle Kabelwege, um Schäden oder Unfälle, z. B. durch Stolperfallen zu vermeiden. 5.
ENGLISH ACHTUNG: 1. Installieren und betreiben Sie das Gerät nicht in der Nähe von Heizkörpern, Wärmespeichern, Öfen oder sonstigen Wärmequellen. Sorgen Sie dafür, dass das Gerät immer so installiert ist, dass es ausreichend gekühlt wird und nicht überhitzen kann. 2. Platzieren Sie keine Zündquellen wie z.B. brennende Kerzen in der Nähe des Geräts. 3. Lüftungsöffnungen dürfen nicht abgedeckt und Lüfter nicht blockiert werden. 4.
HINWEISE FÜR ORTSVERÄNDERLICHE OUTDOOR-GERÄTE DEUTSCH ENGLISH 1. Temporärer Betrieb! Veranstaltungsequipment ist grundsätzlich nur für den vorübergehenden Betrieb konzipiert. 2. Dauerbetrieb oder dauerhafte bauliche Anbringung, besonders im Außenbereich, kann zur Beeinträchtigung der Funktion, sowie der Oberflächen und Dichtungen und zu beschleunigter Materialermüdung führen. 3. Durch Beschädigungen der Oberflächenbeschichtung kann der Korrosionsschutz des Geräts beeinträchtigt werden.
ENGLISH EIGENSCHAFTEN: Schutzart IP65. RGB+WW Farbspektrum. 544 0,5W LEDs pro Farbe (4 x 544). DMX512. ArtNet. sACN. W-DMX™. 5-Pol DMX-Anschlüsse. RJ45 Anschlüsse. Blackout-Taster. Taster mit Direktzugriff auf die CCT-Betriebsart. 2 frei belegbare User-Taster. U-Bügel und 28 mm TV-Zapfen inklusive. Eine Standard Diffusorscheibe inklusive. Umfangreiches optionales Zubehör. DEUTSCH Der Scheinwerfer verfügt über den RDM-Standard (Remote Device Management).
ENGLISH 1 POWER IN IP65 Netzeingangsbuchse mit Gummidichtkappe (TRUE1 kompatibel). Betriebsspannung 100 240V AC / 50 - 60Hz. Anschluss mit Hilfe des mitgelieferten Netzkabels (bei Nichtgebrauch stets mit der Gummidichtkappe verschließen). DEUTSCH 2 POWER OUT IP65 Netzausgangsbuchse mit Gummidichtkappe (TRUE1 kompatibel). Dient der Netzversorgung weiterer CAMEO Scheinwerfer.
ENGLISH 8 LC-DISPLAY Das LC-Display zeigt die aktuell aktivierte Betriebsart (Hauptanzeige), die Menüpunkte im Menü und den Zahlenwert bzw. Betriebszustand in bestimmten Menüpunkten an. Erfolgt innerhalb von circa einer Minute keine Eingabe, wechselt die Anzeige im Display automatisch zur Hauptanzeige.
ENGLISH 14 USER 1 Mit einer Stand Alone Betriebsart frei belegbarer Taster 1 (siehe Menüpunkt Settings -> User Buttons). DEUTSCH 15 USER 2 Mit einer Stand Alone Betriebsart frei belegbarer Taster 2 (siehe Menüpunkt Settings -> User Buttons). 16 W-DMX Antenne für die Steuerung per W-DMX. FRANCAIS 17 TRAGEGRIFF Ergonomischer Tragegriff für komfortablen Transport.
ENGLISH DISPLAY HAUPTANZEIGE IN DER ARTNET- BZW. SACN-BETRIEBSART Die Hauptanzeige in der Artnet- bzw. sACN-Betriebsart zeigt den DMX-Modus, die aktuell eingestellte DMX-Startadresse, die IP-Adresse und Universum-Gruppe und das Universum an (siehe Abbildung).
ENGLISH DEUTSCH FRANCAIS DMX-STARTADRESSE EINSTELLEN (DMX Address) Ausgehend von der Hauptanzeige gelangen Sie durch Drücken auf den rechten Dreh-DrückEncoder in das Hauptmenü. Durch Drehen des linken Encoders (SELECT) wählen Sie nun den Menüpunkt DMX Address aus (Auswahlpfeil links beachten) und bestätigen durch Drücken auf den Encoder (ENTER). Nun können Sie die DMX-Startadresse wunschgemäß durch Drehen des linken Encoders einstellen (höchster Wert abhängig von der aktivierten DMX-Betriebsart).
ENGLISH Protocol Artnet und sACN Auswahl durch Drehen des linken Encoders, bestätigen durch Drücken, Wert bzw. Status ändern durch Drehen, bestätigen durch Drücken. Zurück mit ESC. DEUTSCH Einstellen des Universums 000 - 255 Universe Group Einstellen der Universum-Gruppe 000 - 127 DMX Address Einstellen der DMX-Startadresse 001 - 512 DMX Mode Auswählen des DMX-Modus 1CH Dim … 32CH Pixel IP Address Einstellen der IP-Adresse: 1. Block einstellen mit mittlerem Encoder 2.
DEUTSCH ENGLISH STANDALONE BETRIEBSART CCT (Correlated Colour Temperature) Ausgehend von der Hauptanzeige gelangen Sie durch Drücken auf den linken Dreh-DrückEncoder in das Menü zum Auswählen der Betriebsart (Mode). Durch Drehen des linken Encoders (SELECT) wählen Sie nun CCT aus (Auswahlpfeil links beachten) und bestätigen durch Drücken auf den linken Encoder (ENTER). Helligkeit (DIM), Farbtemperatur (CCT) und Farbton (Tint) stellen Sie nun durch Drehen der drei Dreh-Drück-Encoder ein (siehe Abbildung).
ENGLISH STANDALONE BETRIEBSART DIRECT LED (RGBW Farbmischung) Ausgehend von der Hauptanzeige gelangen Sie durch Drücken auf den linken Dreh-DrückEncoder in das Menü zum Auswählen der Betriebsart (Mode). Durch Drehen des linken Encoders (SELECT) wählen Sie nun Direct LED aus (Auswahlpfeil links beachten) und bestätigen durch Drücken auf den linken Encoder (ENTER). Die Gesamthelligkeit (DIM) und die Intensität von R, G, B und W stellen Sie nun mit Hilfe der drei Dreh-Drück-Encoder ein (siehe Abbildung).
Encoder drehen = Gesamthelligkeit einstellen (DIM) Encoder drücken = Auswahl der Betriebsart (Mode) FRANCAIS DEUTSCH ENGLISH STANDALONE BETRIEBSART FARB-PRESETS (GEL) Ausgehend von der Hauptanzeige gelangen Sie durch Drücken auf den linken Dreh-DrückEncoder in das Menü zum Auswählen der Betriebsart (Mode). Durch Drehen des linken Encoders (SELECT) wählen Sie nun GEL aus (Auswahlpfeil links beachten) und bestätigen durch Drücken auf den linken Encoder (ENTER).
ENGLISH STANDALONE BETRIEBSART BENUTZERFARBEN EDITIEREN (Edit User Colour) Ausgehend von der Hauptanzeige gelangen Sie durch Drücken auf den rechten Dreh-DrückEncoder in das Hauptmenü (Menu). Durch Drehen des linken Encoders (SELECT) wählen Sie nun den Menüpunkt Edit User Colour aus (Auswahlpfeil links beachten) und bestätigen durch Drücken auf den linken Encoder (ENTER).
FRANCAIS DEUTSCH ENGLISH STANDALONE BETRIEBSART FARBSEQUENZ (Play Loop) Ausgehend von der Hauptanzeige gelangen Sie durch Drücken auf den linken Dreh-DrückEncoder in das Menü zum Auswählen der Betriebsart (Mode). Durch Drehen des linken Encoders (SELECT) wählen Sie nun Play Loop aus (Auswahlpfeil links beachten) und bestätigen durch Drücken auf den linken Encoder (ENTER).
ENGLISH DEUTSCH Geben Sie jetzt der Farbsequenz einen individuellen, bis zu 12-stelligen Namen, indem Sie durch Drehen des linken Encoders einen Buchstaben, den Unterstrich oder eine Zahl für die erste Stelle des Namens auswählen und durch Drücken auf den linken Encoder bestätigen. Nun folgt die Eingabe für die zweite Stelle usw.. Ist der Name komplettiert, drücken Sie auf den mittleren Encoder (Save&Next), um zum nächsten Bearbeitungsschritt zu gelangen.
ESPAÑOL FRANCAIS DEUTSCH ENGLISH EZ REMOTE STEUERUNG PER CAMEO UNICON (optional erhältlich) Ausgehend von der Hauptanzeige gelangen Sie durch Drücken auf den linken Dreh-DrückEncoder in das Menü zum Auswählen der Betriebsart (Mode). Durch Drehen des linken Encoders (SELECT) wählen Sie nun EZ Remote aus (Auswahlpfeil links beachten) und bestätigen durch Drücken auf den linken Encoder (ENTER).
ENGLISH DEUTSCH SYSTEMEINSTELLUNGEN (Settings) Ausgehend von der Hauptanzeige gelangen Sie durch Drücken auf den rechten Dreh-Drück-Encoder in das Menü zum Auswählen der Betriebsart (Menu). Durch Drehen des linken Encoders (SELECT) wählen Sie nun Settings aus (Auswahlpfeil links beachten) und bestätigen durch Drücken auf den linken Encoder (ENTER).
ENGLISH 10s Fade zu Blackout Full On Alle LEDs auf Maximalhelligkeit Linear Die Lichtintensität steigt linear mit dem DMXWert an Exponential Die Lichtintensität lässt sich im unteren DMX-Wertbereich fein und im oberen DMXWertbereich grob einstellen Logarithmic Die Lichtintensität lässt sich im unteren DMX-Wertbereich grob und im oberen DMXWertbereich fein einstellen S-Curve Die Lichtintensität lässt sich im unteren und oberen DMX-Wertbereich fein und im mittleren DMX-Wertbereich grob einstellen
Red-Shift ENGLISH = Imitiert die Farbdrift beim Dimmen eines Halogenscheinwerfers. Beim Herunterdimmen des Scheinwerfers verändert sich die Farbtemperatur automatisch zunehmend zu wärmeren Weißtönen und Amber (und umgekehrt). PWM= LED PWM Frequency Frequenz DEUTSCH FRANCAIS ESPAÑOL Off Farbdrift deaktiviert Dim to Warm Farbdrift aktiviert 650Hz, 1530Hz, 3600Hz, 12kHz, 18.
= Zurücksetzen der Einstellungen UC_Loops = User-Colours Reset und Loops zurücksetzen Off Deaktivierter Lüfter bei stark reduzierter Helligkeit Constant Low Konstant niedrige Lüftergeschwindigkeit bei reduzierter Helligkeit, falls notwendig Constant Medium Konstant mittlere Lüftergeschwindigkeit bei reduzierter Helligkeit, falls notwendig Constant High Konstant hohe Lüftergeschwindigkeit FRANCAIS Automatische Regelung der Lüfterleistung ESPAÑOL = Lüftersteuerung Auto ENGLISH Automatische Sper
ENGLISH User Buttons DEUTSCH FRANCAIS Service ESPAÑOL POLSKI ITALIANO DMX 70 = Belegen Sie User Button User Button 1 1 und 2 mit je einer der Stand Alone Betriebsarten (plus EZ Remote und Mode Selection) EZ Remote Mode Selection HSI Direct Colour Coordinates GEL User Colour Play Loop Light Simulation User Button 2 = Nur für Service-Zwecke " EZ Remote = Steuerung per CAMEO UNICON (optional erhältlich) Mode Selection = Stand Alone Betriebsarten nacheinander durch wiederholtes Drücken des User Buttons
LED / Halogen Off / Dim to Warm 650Hz / 1530Hz / 3600Hz / 12kHz / 18.
TV-ZAPFEN AM U-BÜGEL MONTIEREN ENGLISH Links und rechts neben dem M10 Schraubgewinde im TV-Zapfen befindet sich je ein Bolzen. Führen Sie die beiden Bolzen in die Löcher links und rechts neben dem Schraubloch im U-Bügel ein und schrauben den TV-Zapfen mit Hilfe der M10 Schraube, der Tellerfeder und der Unterlegscheibe am U-Bügel fest (siehe Abbildung).
ENGLISH STATIVMONTAGE DEUTSCH GEFAHR: Überkopfmontage erfordert umfassende Erfahrung, einschließlich der Berechnung der Grenzwerte für die Arbeitslast, des verwendeten Installationsmaterials und der regelmäßigen Sicherheitsüberprüfung aller Installationsmaterialien und Scheinwerfer. Wenn Sie diese Qualifikationen nicht haben, versuchen Sie nicht, eine Installation selbst durchzuführen, sondern nutzen Sie die Hilfe von professionellen Unternehmen.
TV-ZAPFEN FÜR TRAVERSENMONTAGE NUTZEN ENGLISH DEUTSCH GEFAHR: Überkopfmontage erfordert umfassende Erfahrung, einschließlich der Berechnung der Grenzwerte für die Arbeitslast, des verwendeten Installationsmaterials und der regelmäßigen Sicherheitsüberprüfung aller Installationsmaterialien und Scheinwerfer. Wenn Sie diese Qualifikationen nicht haben, versuchen Sie nicht, eine Installation selbst durchzuführen, sondern nutzen Sie die Hilfe von professionellen Unternehmen.