
Use and Care Manual


MAINTENANCE /
REPAIR
TROUBLESHOOTINGOPERATION
ASSEMBLY /
INSTALLATION
SAFETY /
SPECIFICATIONS
GETTING STARTED
5
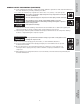
ASSEMBLY INSTRUCTIONS
Handle Assembly (Figure 1)
1. Place ends of handle around tank and into the
mounting pipe. Align holes in handle to holes in
mounting pipe.
2. Assemble two (2) screws (from parts package)
through holes in mounting pipe and handle.
Tighten screws.
Never use the handle to lift the unit
completely off the ground. Only
use the handle to lift one end so the wheels may be used to
move the unit.
Wheel Assembly (Figure 2)
Wheel assembly kit includes:
- 2 wheels *
- 2 axle bolts *
- 2 washers *
- 2 nuts *
The items marked with an asterisk (*) were shipped
loose with the unit.
1. Wheel has an offset hub. Place wheel insert into
center of hub. With offset hub facing axle iron,
assemble axle bolt through washer and then holes
in wheel and axle iron.
2. Place lock washer on axle bolt. Then tighten nut
securely to threaded part of axle bolt.
3. Repeat procedure with other side.
Handle
Bolt
Figure 1 - Handle Assembly
Figure 2 - Wheel Assembly
Nut
Wheel
Axle
Spring Washer